What is Retesting?
|
|
“Simple things are always the most difficult” – Carl Jung.
What applies to the philosophy of life is true for software testing as well? We think – Yes.
Retesting in software testing — seems pretty simple, doesn’t it? You go and retest a bug fix or some other code. Yet sometimes, simply retesting doesn’t work because it wasn’t done right. While the name of this process might seem straightforward, it can be quite nuanced. Here’s a guide to help you understand more about retesting and how it is unique from other types of testing.
What is Retesting?
Retesting in software testing is the process of testing a specific part of a software application again after a defect (bug) has been fixed. The goal of retesting is simple: to make sure that the issue has been properly resolved and that the software is working as expected after the fix.
Here’s how it works…
- Problem Found: Let’s say a tester finds a bug in the software, like a button that doesn’t work.
- Bug Fixed: The developers fix that bug and update the code.
- Retesting: After the fix, the tester goes back to that specific button and tests it again to make sure it now works as it should.
Retesting focuses only on the specific part or feature that had the bug, unlike other types of testing, which might look at the whole application.
Key Characteristics of Retesting in Software Testing
Let’s look at those characteristics that differentiate the act of retesting from other types of testing.
- Testing the Same Issue, Same Way: When you retest, you are testing the exact same issue you tested before, using the same test steps. Retesting ensures that the bug fix works. If you change the way you test it or test a different part of the application, you may not catch whether the fix actually worked. For example, if the “Submit” button on a form was broken, you wouldn’t test any other buttons or parts of the form, just the “Submit” button, using the exact same steps you took before.
- Focusing Only on the Fixed Bug: Retesting focuses only on the area that was fixed, not the entire software. You don’t want to waste time retesting things that didn’t change. For example, if the “Submit” button is fixed, you don’t need to retest the entire form.
- No New Changes Involved: Retesting is only for issues that were fixed. You don’t test new features or changes that were added to the system. It’s all about checking that the fix worked. If new changes were made to the system, they would be handled through other types of testing, such as regression testing.
- Using the Same Test Case: In most cases, you’ll reuse the same test case that found the original bug to check if it still exists after the fix. This is because the test case you used before helps ensure consistency. If the bug is still there after the fix, running the same test case will help you spot it again.
Retesting vs. Regression Testing
Testers often confuse these two. While both are used to make sure that the functionality is working as expected, they focus on different things and are done under different circumstances.
Let’s first look at regression testing.
After a bug is fixed or a new feature is added, testers run regression tests to verify that everything in the software still works as expected, especially in areas that were indirectly affected by the change. The focus is broad – everything that might have been impacted by the change is tested.
Read more about regression testing:
- What is Regression Testing?
- Why is Automating Regression Testing so Important?
- Automated Regression Testing
Now, look at retesting.
After a developer fixes a bug (like a button not working), a tester will go back and test that same bug to make sure it’s fixed. The focus is narrow – just the bug that was fixed.
Here’s an easier comparison of the two.
| Aspect | Retesting | Regression Testing |
|---|---|---|
| Focus | Tests only the fixed issue/bug. | Tests the adjacent functionalities, if not the entire system, to ensure nothing else is broken due to the fix or feature. |
| Purpose | Ensures the bug fix works and the issue is resolved. | Ensures that nothing else was broken due to changes. |
| Scope | Narrow – only the specific bug that was fixed. | Broad – tests the whole system or significant parts affected. |
| Test Cases | The same test case as before is used to verify the fix. | New or updated test cases to check all impacted areas. |
| When It Happens | After a bug fix, before the fix is considered done. | After any change, bug fix, or new feature is added. |
While both are important, they serve different purposes. Retesting verifies the fix itself, whereas regression testing ensures nothing else was broken by the fix.
For example, imagine you found that the “Login” button in an app didn’t work. The developer fixes it, and then you (the tester) go back and test only that button to make sure it’s working as expected. You’re not testing anything else in the app at this point, just that specific button. Now if you do regression testing, you would not only check the button but also other parts of the application like the login flow, password recovery, and any other areas that could have been affected by the fix, even indirectly. This ensures that the fix hasn’t broken other features or parts of the app.
Read more about how these two differ over here – The Difference Between Regression Testing and Retesting.
Manual vs. Automated Retesting
You have the option of retesting manually or through automation.
-
Manual Retesting: It involves a human tester going through the same steps that were used to identify the original bug without the aid of any automation testing tool. The tester manually checks whether the issue has been fixed.Manual retesting is best suited for:
- Complex scenarios: Some bugs are tricky, and the tester needs to use their judgment or understand the broader context of the application. Manual testing allows flexibility and human insight.
- New or infrequent issues: If a bug only happens occasionally, it might be hard to automate. Manual testing can be better for these one-off or less common situations.
- Small teams or budget constraints: In some cases, automating every test might not be feasible due to limited resources.
-
Automated Retesting: It involves using test automation to automatically run the test cases that were used to find the original bug. Automated tests tend to save your time and reduce human error, especially when there are many tests to run.Automated retesting is best suited for:
- Large test suites: When there are many tests that need to be repeated frequently, automation becomes essential.
- Repetitive tasks: If you need to test the same features after every code change (like the same button or form), automation saves time.
- Time sensitivity: When you need to run tests quickly, automation is much faster than doing it manually, especially for large applications (e.g., after every build or code change).
Automated Retesting with testRigor
Automated Retesting can help you ensure bugs remain fixed even after a few cycles of development. With an intelligent tool like testRigor, you can do this easily. testRigor is a generative AI-based test automation tool that allows you to automate a variety of test scenarios, including retesting. Here’s how testRigor can make retesting super easy for you.
Write test cases in simple language without code
First things first. You need the test cases that can be used for retesting. Through simple English statements, anyone in your team can automate retesting easily. Simply mention which UI element you want testRigor to automate, and testRigor will do it for you. For example, if you want to click on the login button, just write click “login”. So even if the implementation details like XPath or CSS values of the login button change, you need not worry. testRigor will still be able to find the button. Apart from having to write test cases, you can use testRigor’s generative AI feature to create the test cases for you.
Reliable and stable retests as many times as you want
testRigor uses generative AI to stabilize test execution and maintenance as well. A major help is testRigor’s approach to dealing with UI elements. You can easily integrate your testRigor test cases into CI/CD pipelines for continuous testing. So, if you want to run a select few test cases frequently, you can simply trigger the run after a fresh build that includes the new fix.
Test everything with a single tool
testRigor can help you retest functional, regression, visual, API, end-to-end, acceptance, and more. You can retest across the web, mobile, desktop, and browsers with this single tool. Scenarios like 2FA, CAPTCHA resolution, QR codes, SMS, phone calls, emails, and working with table data can all be easily done using testRigor.
Here’s a comprehensive list of testRigor’s features.
Retesting Example: testRigor
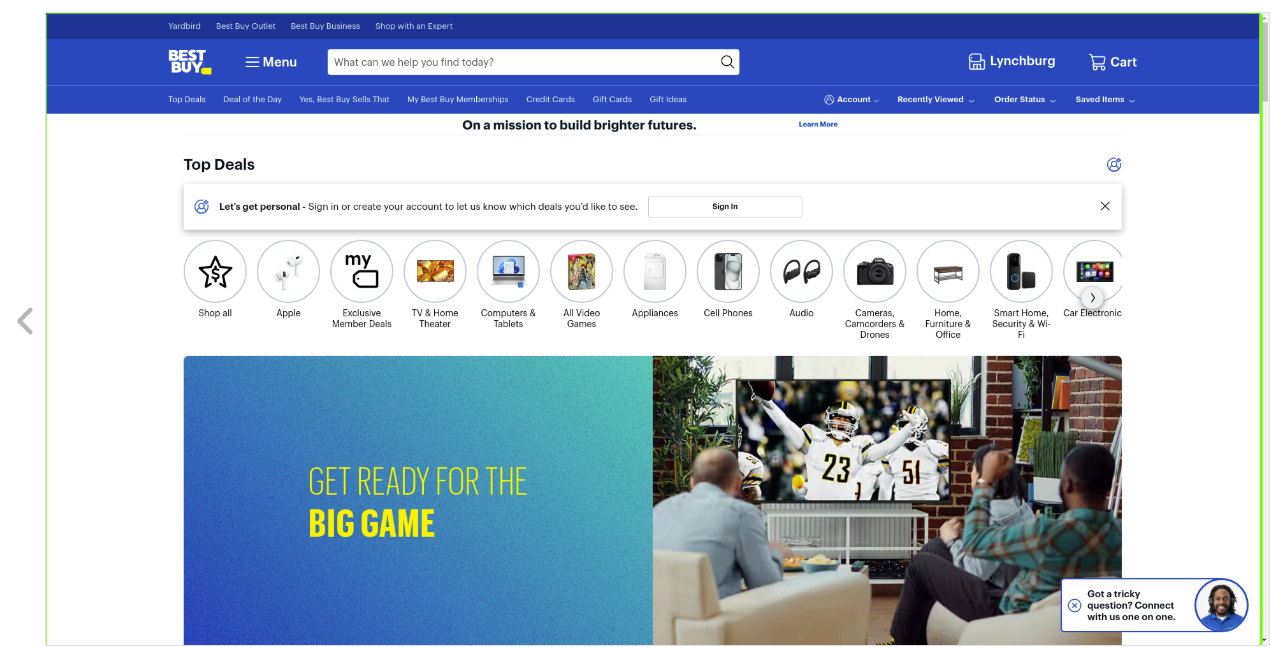
Click “To Deals”
Check page "contains a player" using AI.
Let’s run this test case now, click “Add and Run”. Read to know how to run an E2E test case using testRigor.
testRigor has identified the image of a player, and hence, the test case is passed.
Now, the UI has some changes, and the player’s image is replaced by an image of some ‘friends gathering’. Let us click the “Re-test” button and see how testRigor behaves with these changes.
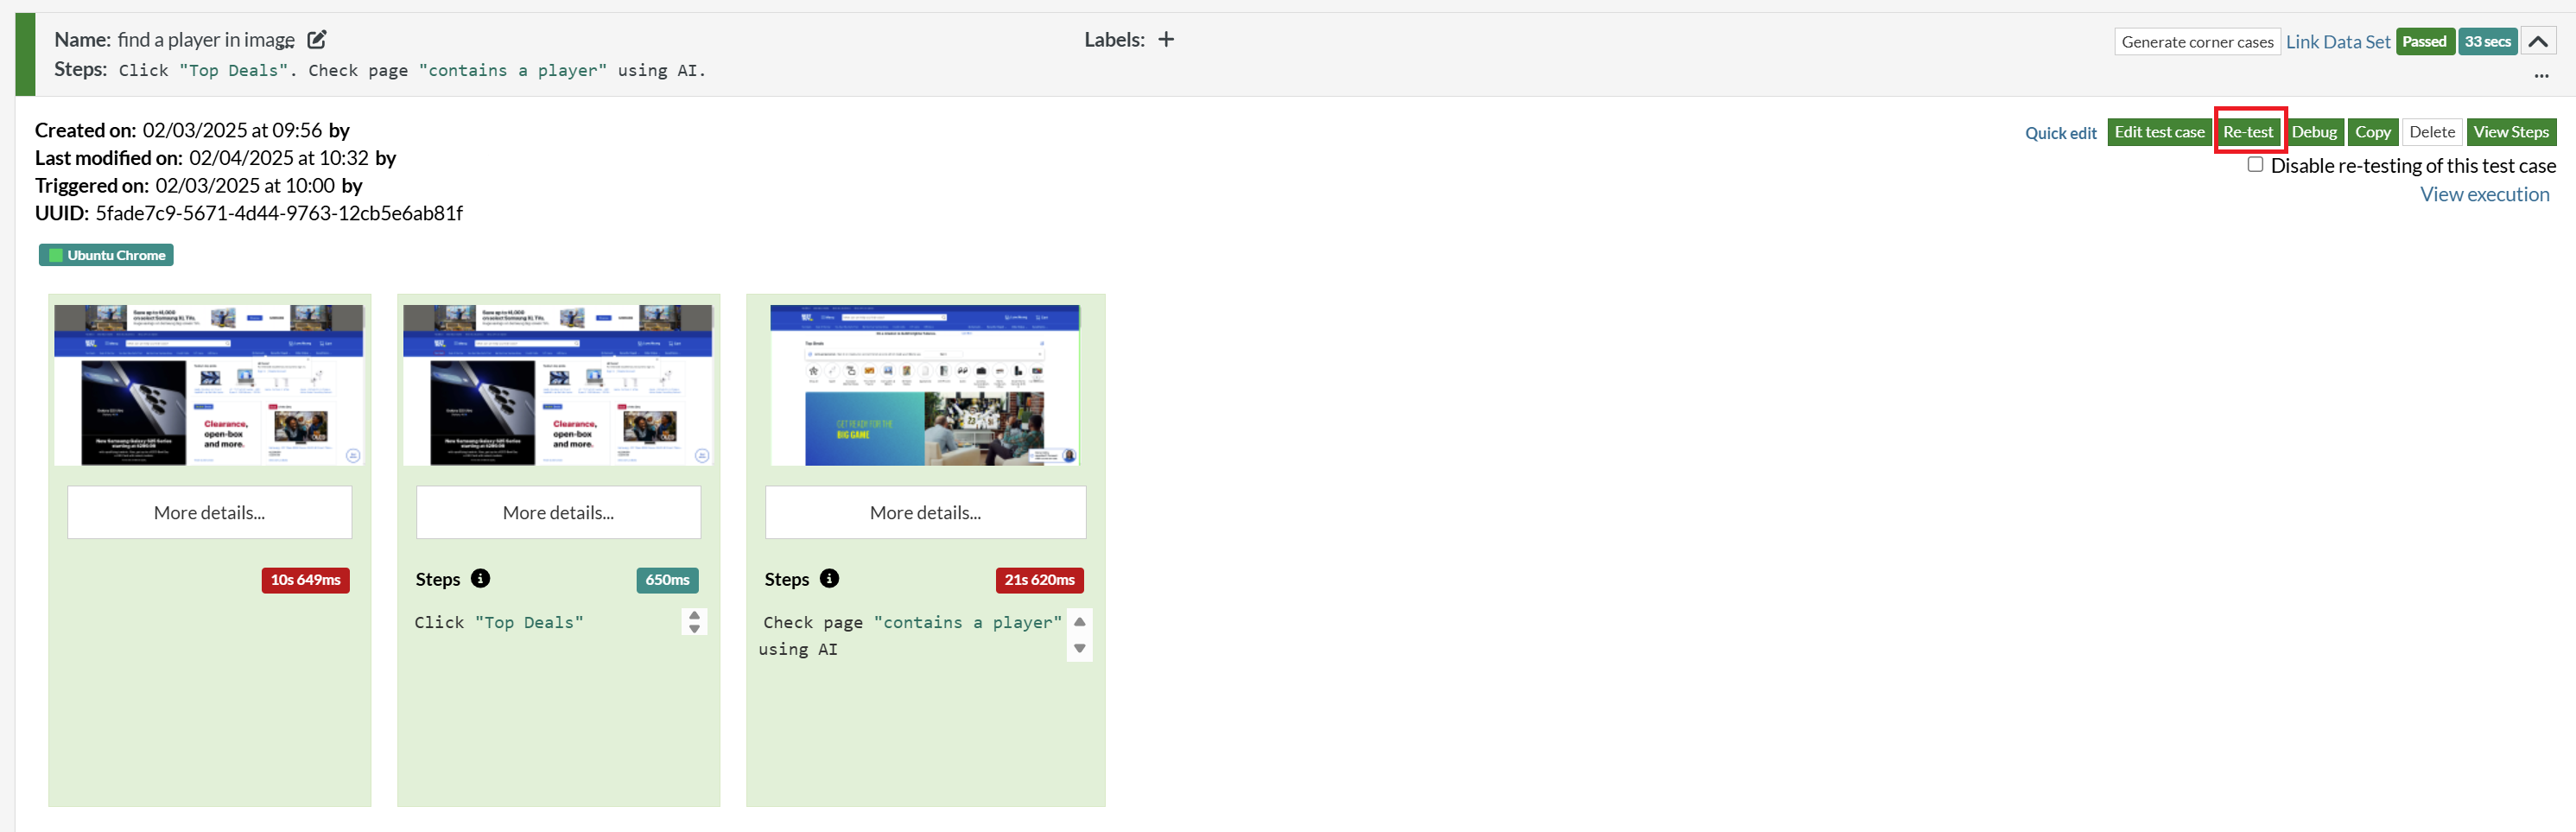
The test case is Failed because now the screen does not have any ‘player’ in the image. testRigor shows the ‘old screenshot’ and ‘new screenshot’ for validation as shown in the image below.
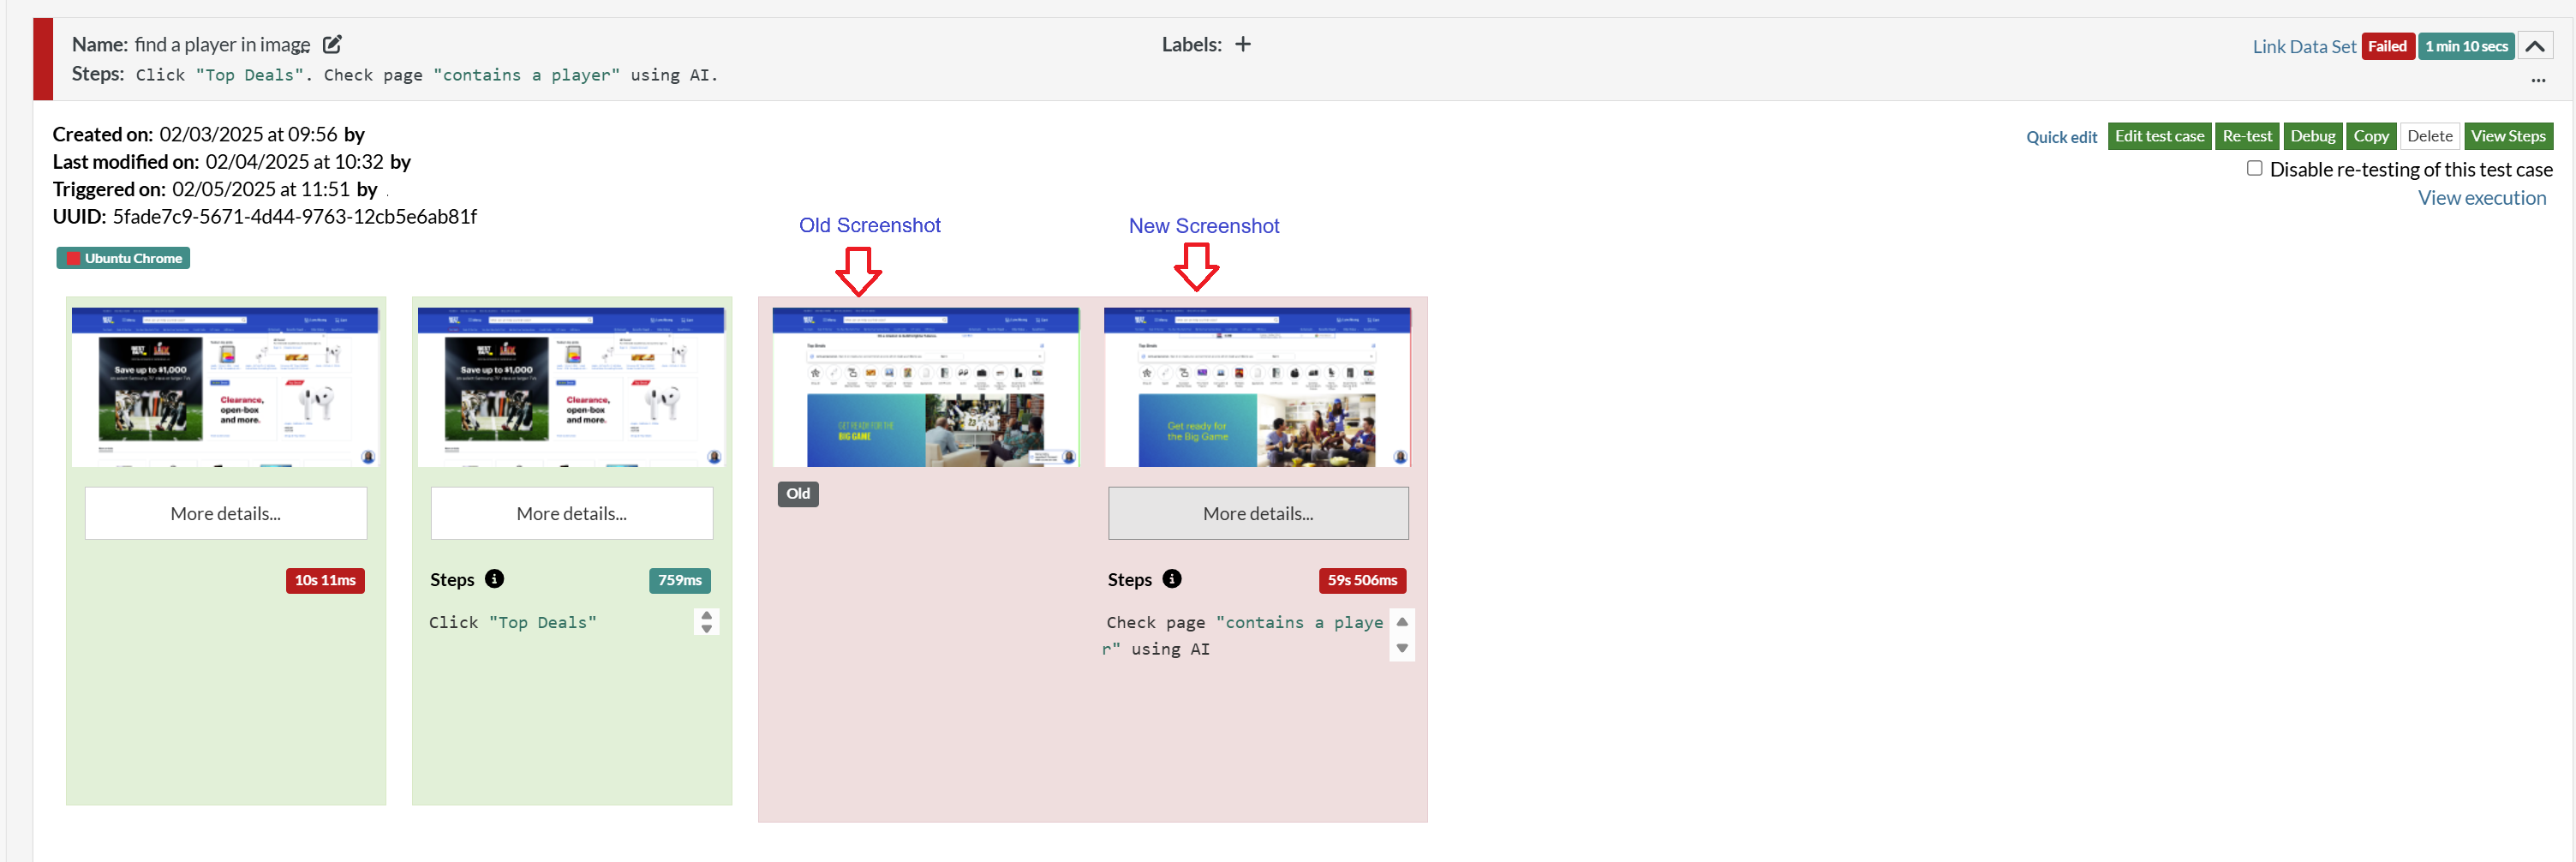
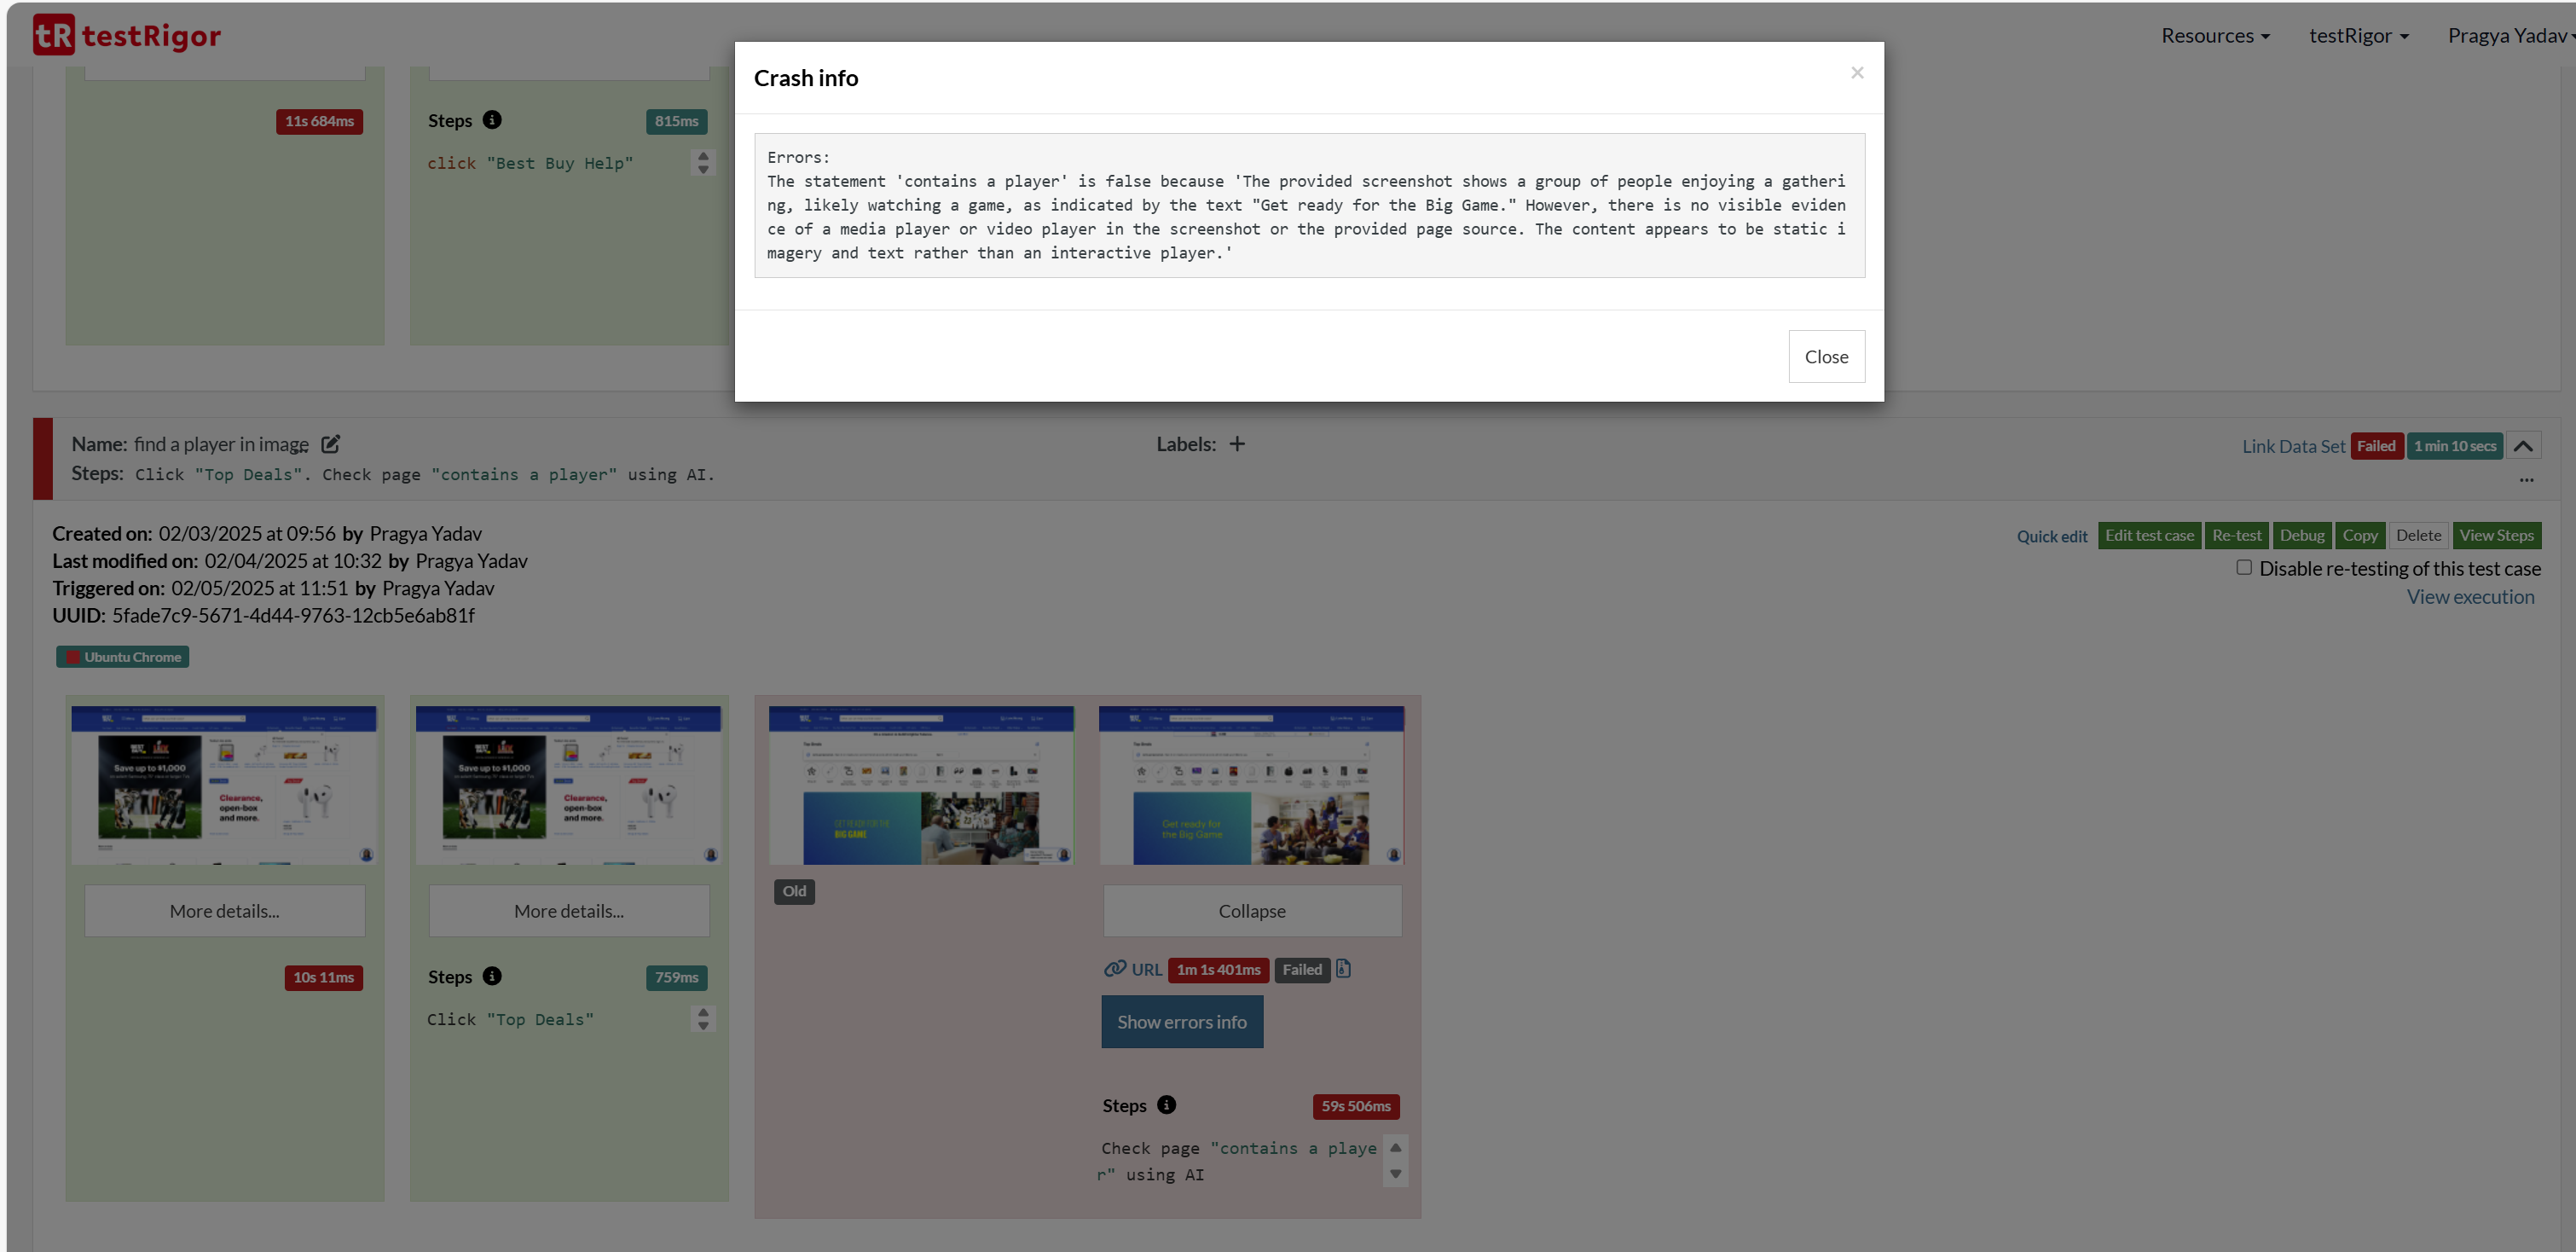
Click on “More details” and then on “Show errors info” to know the identified reason in plain English. You do not need to decode any logs or code for that. Here is the reason as per testRigor’s AI:
The statement ‘contains a player’ is false because ‘The provided screenshot shows a group of people enjoying a gathering, likely watching a game, as indicated by the text “Get ready for the Big Game.” However, there is no visible evidence of a media player or video player in the screenshot or the provided page source. The content appears to be static imagery and text rather than an interactive player.’
This is the power of AI. First, it is able to identify the content in images, true/false statements, positive/negative intentions, and while retesting it clearly shows the old/new screens and a well defined reason why the test case failed.
Read how to test AI features and LLMs(chatbots) in plain English.
Best Practices for Retesting
To make retesting effective, you can use these pointers.
- Always Use the Same Test Case: Though we’ve been over this many times, remember that retesting is about confirming that the original bug has been fixed. To do this, you should use the same test case you used when you first found the bug.
- All Fixes are not Equal: Time constraints are bound to squeeze you, and retesting in such an environment can be challenging. But remember, not all bugs are equally important. Consider a risk assessment and then retest fixes accordingly. This will ensure that you pay rightful attention to the deserving candidates first. Focus on retesting high-priority issues (like bugs that affect core features or user experience) before moving on to lower-priority ones.
- Understand the Fix: Retesting is a focused and concentrated activity. Hence, before retesting, make sure you understand the code changes made to address the bug. This will help you anticipate potential side effects and focus your testing. Review the developer’s notes or discuss the fix with them as well for more clarity.
- Make Sure the Fix is Verified in the Right Environment: Sometimes, bugs are environment-specific (e.g., they only happen on certain browsers or devices). If the fix was done in one environment, make sure it’s retested in the same environment.
- Test Case Review: Review the original test cases that failed. These are your starting point. You may need to modify them slightly if the bug fix has changed the behavior of the application. Consider adding new test cases to cover edge cases or related functionality while keeping concerned stakeholders in the loop.
- Check for Any Side Effects: A fix for one bug can sometimes have unexpected consequences or side effects on other parts of the software. Although retesting is focused on the fix, it’s important to ensure the bug doesn’t impact other features. After testing the fixed issue, quickly check other areas that might be related to the fix to ensure nothing else is broken – like a quick regression for the retested fix.
- Automate Retests When Possible: Manual retesting can be time-consuming, especially if the same issue needs to be tested multiple times. Automating repetitive tests can save time and reduce human error.
- Document and Track the Results: Always document the results of your retests, including whether the bug is fixed or if the issue persists. Use a bug-tracking tool to log these results.
- Retest Only After the Fix is Done: Make sure the fix is fully implemented before starting the retesting process. This saves time and ensures you’re not testing a partially fixed bug.
Conclusion
Retesting isn’t simply re-running some test cases to verify a fix. You need to think strategically to make sure that the fix that you’re testing works and does not affect any other areas. When automating retesting, make sure to use smart test automation tools that will allow you to perform retesting and focused regression testing in an efficient manner.
| Achieve More Than 90% Test Automation | |
| Step by Step Walkthroughs and Help | |
| 14 Day Free Trial, Cancel Anytime |


