Plane Testing
|
|
Plane is a modern, open-source application designed to help teams plan, track and manage their work in one unified space. Whether you’re running Agile, Scrum, or a hybrid workflow, Plane provides a flexible structure that adapts to your process.
This tool supports both cloud-hosted and self-hosted deployments, giving you control over your data and infrastructure when needed.
Plane End-to-End Testing
End-to-end testing is a comprehensive approach that evaluates an entire system or application from the user’s perspective to ensure that it functions as expected. In the context of Plane. End-to-end testing involves testing the complete functionality of the website.
The primary goal of end-to-end testing is to simulate real-world user scenarios and validate that the system behaves correctly under various conditions. This testing type can help uncover issues that might not be detected during unit or integration testing.
testRigor
The primary advantages of testRigor include its simplicity, ease of maintenance, and scalability. Often the end user’s perspective on interacting with a system, which is crucial for creating end-to-end test cases, comes from non-technical individuals such as product owners, experienced manual testers, business analysts, or client-facing teams.
However, if test cases must be coded, this perspective may not be accurately translated due to limited engagement from a diverse audience. testRigor addresses this issue by enabling test cases to be written in plain English, facilitating easy collaboration, review, and editing of test scenarios. Additionally, testRigor supports Behavior-Driven Development (BDD) right out of the box. You can explore more benefits of using testRigor here.
Selenium
Selenium is a well-known open-source framework that enables you to automate many different testing scenarios from start to finish.
It also gives ways to confirm and check different elements and attributes on websites, helping users make sure the expected actions and information are correct. It supports various programming languages like Java, Python, C#, Ruby, many others.
However, Selenium has limitations, such as the need for a lot of work to maintain tests, challenges with testing across different platforms, and some instability from using locators based on elements like CSS and XPaths.
Playwright
Playwright is a node.js-based framework maintained by Microsoft that was created to meet end-to-end testing needs. It supports modern rendering engines, including Chromium, WebKit, and Firefox, and testing on Windows, Linux, and macOS, locally or on CI, headless or headed, with native mobile emulation of Google Chrome for Android and Mobile Safari. As with Selenium, Playwright also shares some of its shortcomings.
How to perform End-to-end Testing with testRigor
Let’s assume we have a Plane website set up, in the following steps we’ll be showing how to create a test suite to start performing end to end test cases.
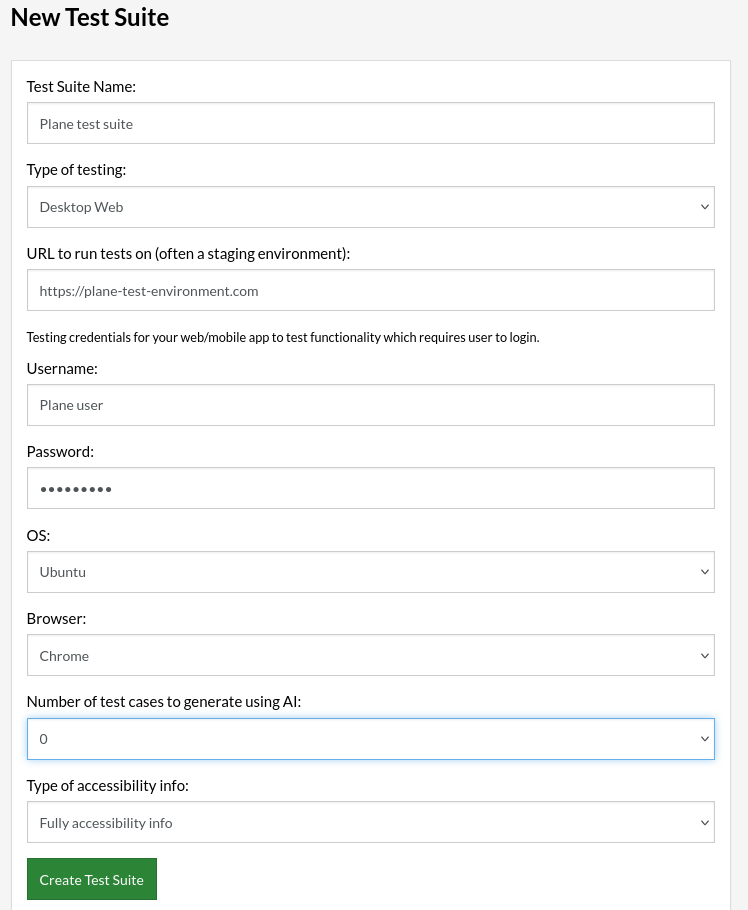
Step 1: Log in to your testRigor app with your credentials.
- Test Suite Name: Provide a relevant and self-explanatory name.
- Type of testing: Select from the following options: Desktop Web Testing, Mobile Web Testing, Native and Hybrid Mobile.
- URL to run test on: Input the application URL that you want to test.
- Testing credentials for your web/mobile app to test functionality which requires user to login: You can provide the app’s user login credentials here and need not write them separately in the test steps then. The login functionality will be taken care of automatically using the keyword
login. - OS and Browser: Choose the OS Browser combination on which you want to run the test cases.
- Number of test cases to generate using AI: If you wish, you can choose to generate test cases based on the App Description text, which works on generative AI.
Step 3: Click Create Test Suite.
On the next screen, you can let AI generate the test case based on the App Description you provided during the Test Suite creation. However, for now, select do not generate any test, since we will write the test steps ourselves.
Step 4: To create a new custom test case yourself, click Add Test Case.

Step 5: Provide the test case Description and start adding the test steps, once finished, click “Add and Run”
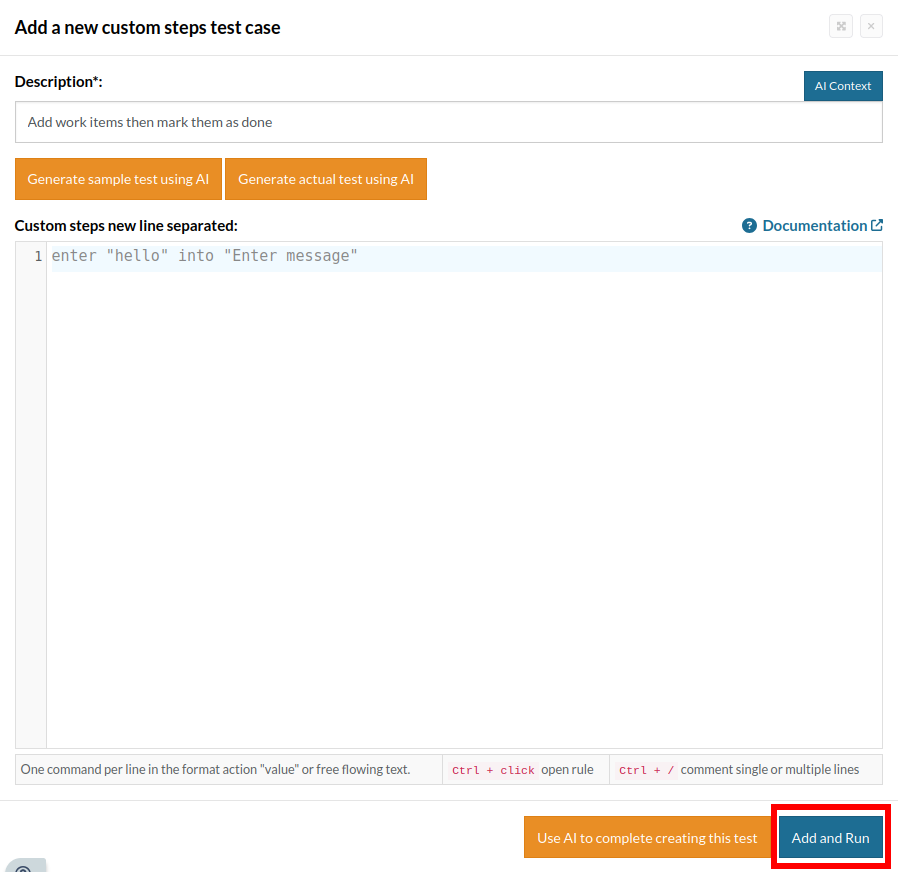
- Log into the Plane instance
- Add work items to a project
- Verify that the work items are being added to that project
Setting up the testing environment
//Registering
click button "Get started"
enter "Plane" into "First name"
enter "Testing" into "Last name"
enter "[email protected]" into "Email"
enter "Plane" into "Company name"
enter "safePassword14*" into "Set a password"
enter "safePassword14*" into "Confirm password"
click button roughly below "See more"
enter "[email protected]" into "Email"
enter "safePassword14*" into "Password"
click button roughly below input "Password"

//Creating workspace
Click button "Create workspace"
enter stored value "projectName" into "Name your workspace"
click "Select a range"
click "2-10"
click "Create a new workspace on this instance"
click "Create workspace"
click button on the right of "Prevent anyone else from creating a workspace"
click stored value "projectName"

//Setting up workspace then adding project
Log stored value "adminUser" to website
click "Continue"
click "Skip"
click "Skip"
click "Let's get started"
click "Add project"
enter stored value "projectName" into "Project name"
click "Create project"
click 1st button "switch"
click 2nd button "switch"
click "Close"
click stored value "projectName"
click "Settings"
click "Projects"
click "Features"
click "Disabled"
click "switch"
click "Back to workspace"

//Adding extra users to workplace
invite user stored value "projectUser"
invite user stored value "invitedUser"
log out
create user stored value "projectUser" then join workplace
log out
create user stored value "invitedUser" then join workplace
log out
Log stored value "adminUser" to website
add user stored value "projectUser" to project stored value "projectName"
Global variables
- projectUser = project_user
- adminUser = test
- invitedUser = invited_user
- projectName = E2E Testing playground
Test Case: Log into the website, create work items and validate they’re visible
Step 1: We will add test steps on the test case editor screen one by one.
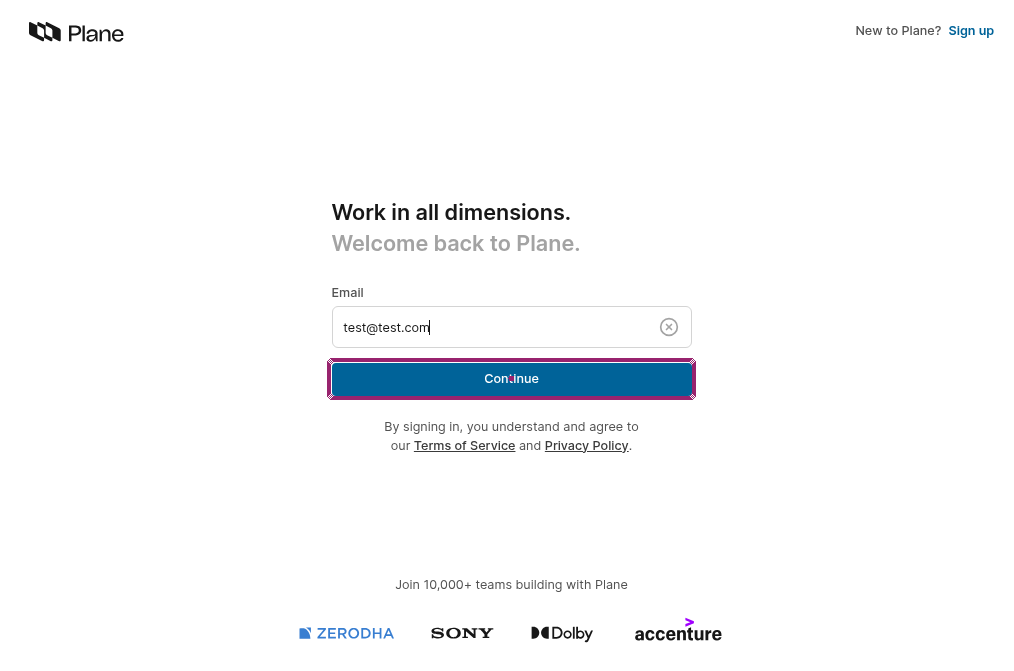
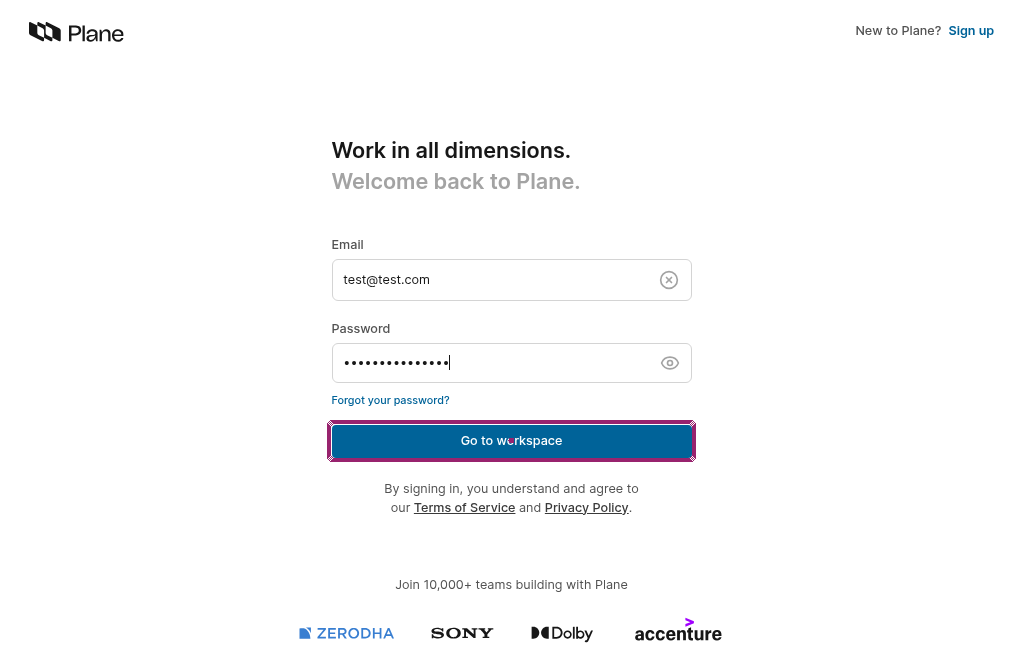
enter stored value "username" into "Email"
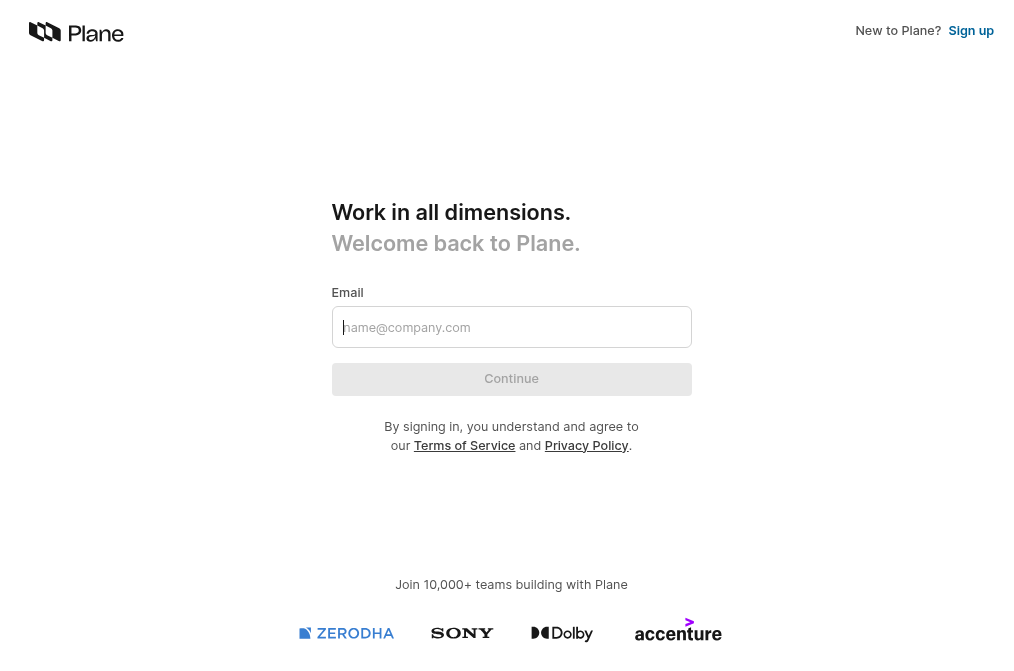
click "Continue"
enter stored value "password" into "Password"
click "Go to workspace"
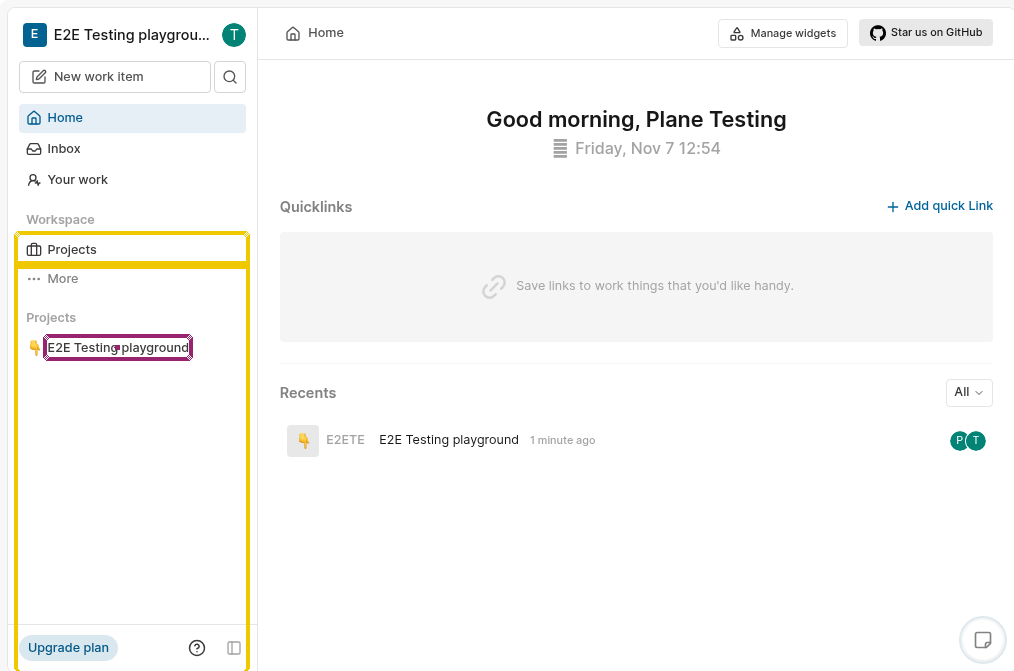
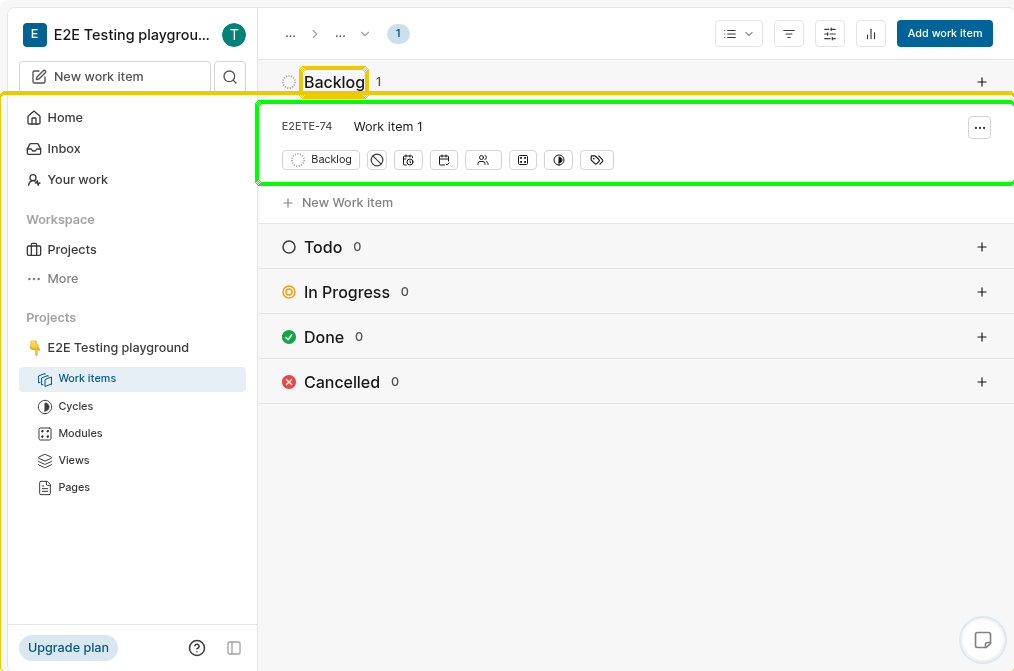
click "E2E Testing playground" below "Projects"
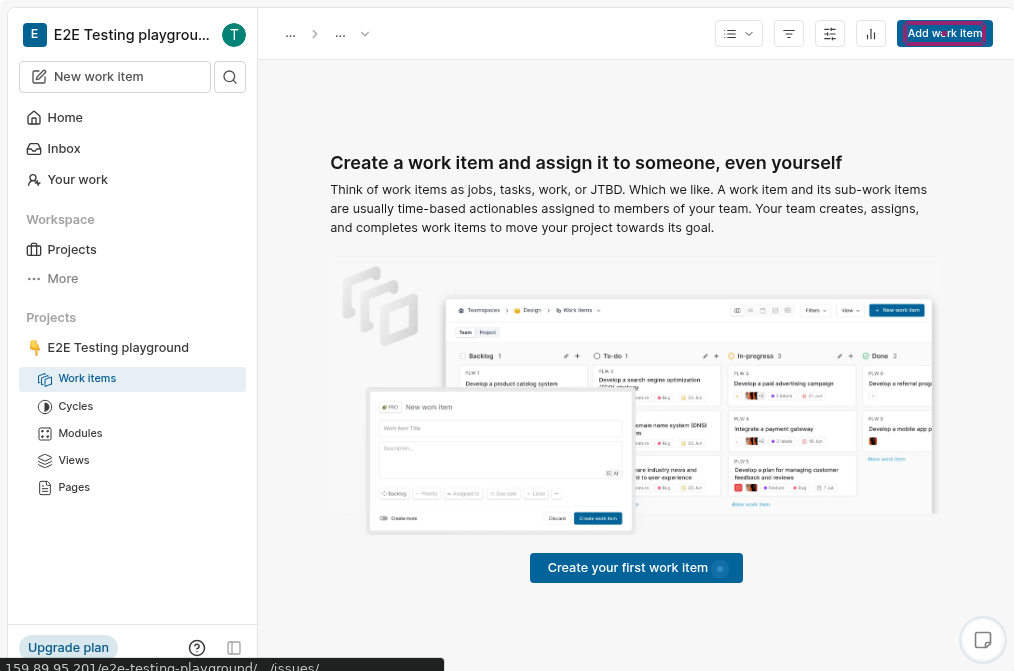
Step 5: on this step we need to start adding work items, to do so we must click on the “Add work item”
click "Add work item"
enter "Work item 1" into "Title"
click "Save"
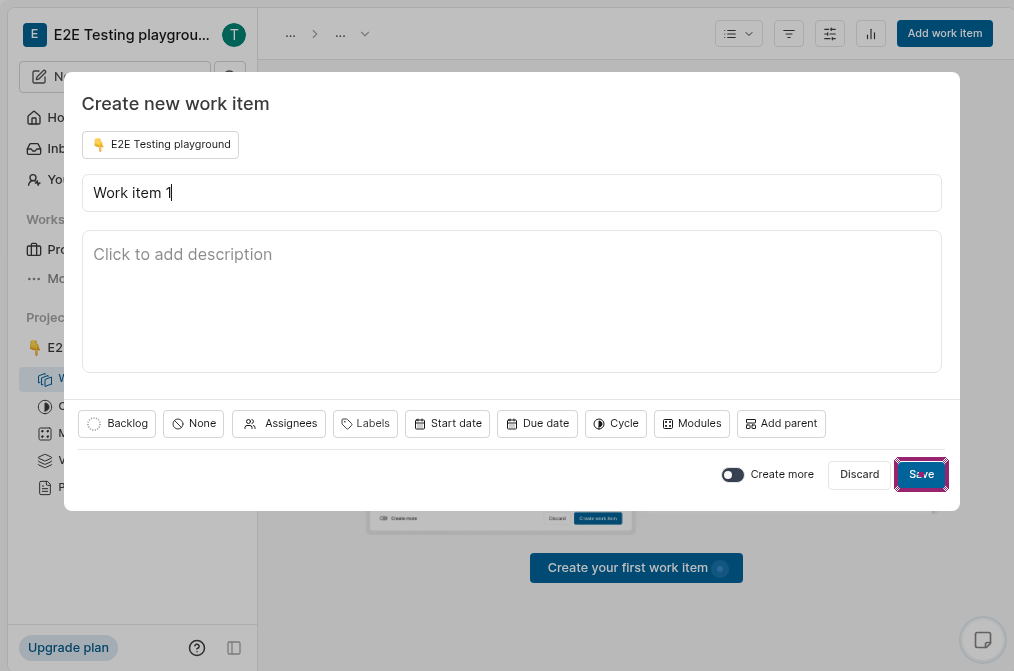
check that page contains "Work item 1" roughly below "Backlog"
Complete Test Case
enter stored value "username" into "Email"
click "Continue"
enter stored value "password" into "Password"
click "Go to workspace"
click "E2E Testing playground" below "Projects"
click "Work items"
click "Add work item"
enter "Work item 1" into "Title"
click "Save"
check that page contains "Work item 1" roughly below "Backlog"
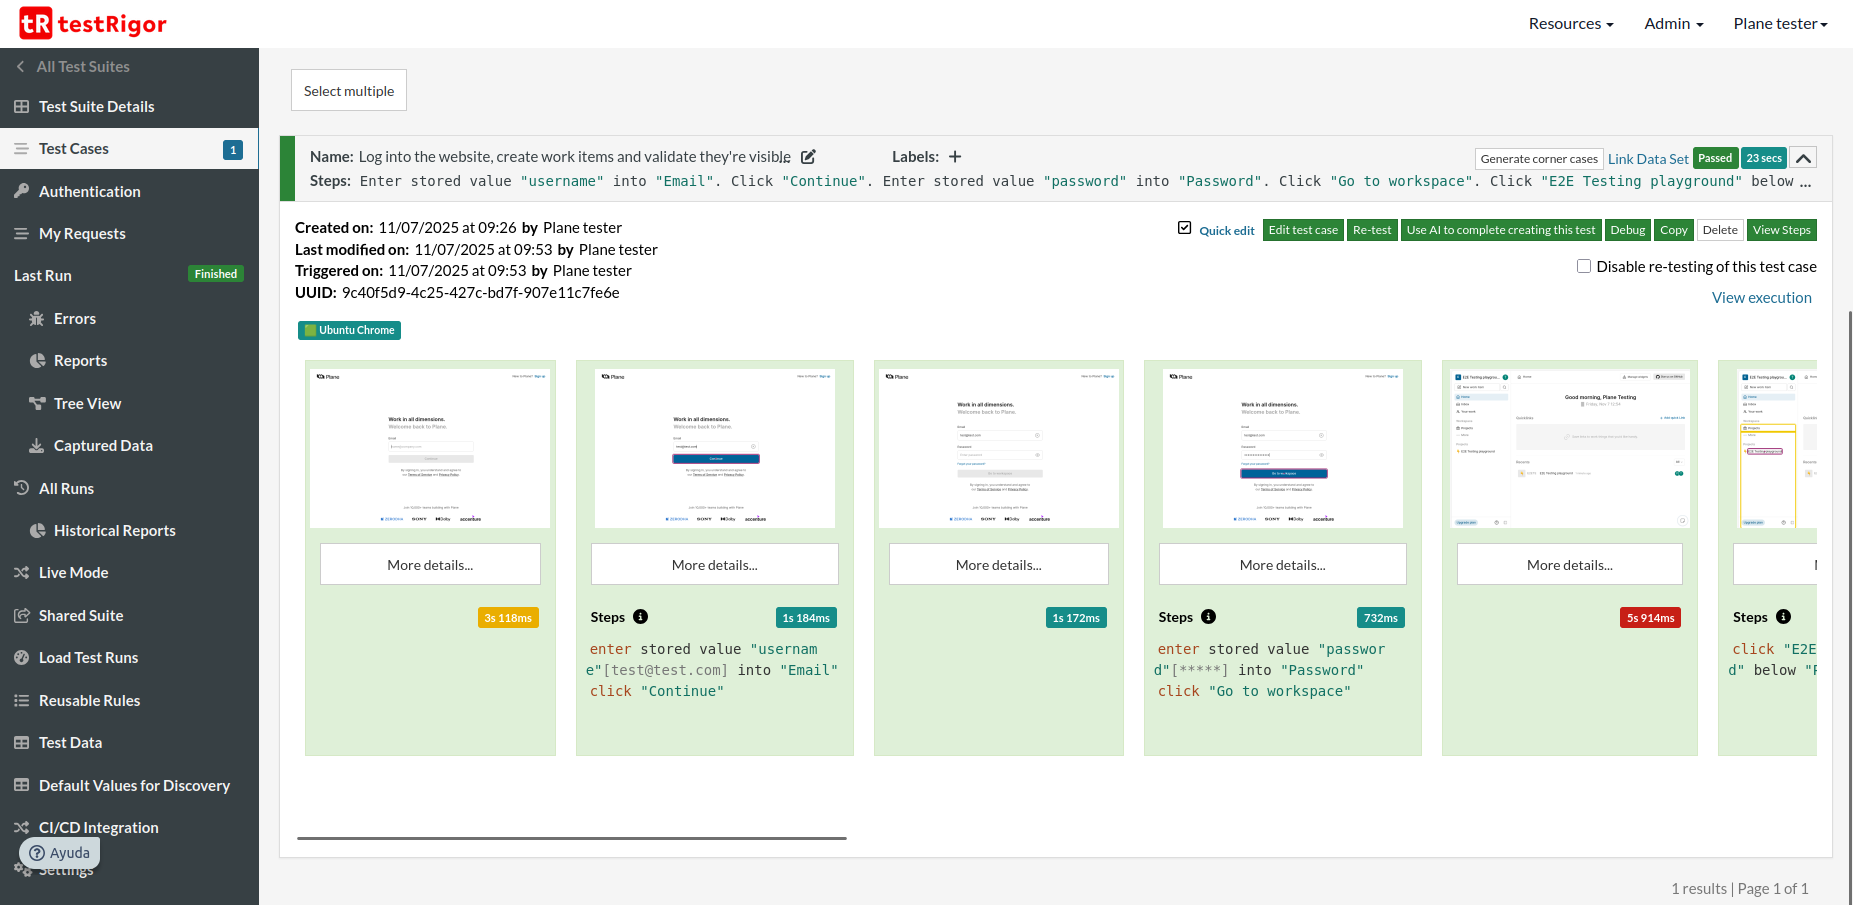
Execution Results
Once the test is executed, you can view its results, such as execution status, time spent in execution, screenshots, error messages, logs, etc. In case of any failure, there are logs and error text that are available easily in a few clicks.
You can also download the complete execution with steps and screenshots in PDF or Word format through the View Execution option.
testRigor’s Capabilities
- Reusable Rules (Subroutines): You can easily create functions for the test steps that you use repeatedly. You can use the Reusable Rules to create such functions and call them in test cases. See the example of Reusable Rules.
- Global Variables and Data Sets: You can import data from external files or create your own global variables and data sets in testRigor to use them in data-driven testing.
- 2FA, QR Code, and Captcha Resolution: testRigor easily manages the 2FA, QR Code, and Captcha resolution through its simple English commands.
- Email, Phone Call, and SMS Testing: Use simple English commands to test the email, phone calls, and SMS. These commands are useful for validating 2FA scenarios, with OTPs and authentication codes being sent to email, phone calls, or via phone text.
- File Upload/ Download Testing: Execute the test steps involving file download or file upload without the requirement of any third-party software. You can also validate the contents of the files using testRigor’s simple English commands.
- Database Testing: Execute database queries and validate the results fetched.
testRigor enables you to test web, mobile (hybrid, native), API, and desktop apps with minimum effort and maintenance.
Additional Resources
- Access testRigor documentation to know about more useful capabilities
- Top testRigor’s features
- How to perform end-to-end testing
Test cases to get you started with end-to-end testing
We’ve created a set of prebuilt test cases that you can run immediately. These tests cover a wide range of functionalities. Below there’s a brief description of what feature each test case is testing and a link to its execution:
-
Change Project ID, verify that work items get updated accordingly: this test case verifies that the work item identifier (determined by project ID), is properly being updated when the project ID is changed. Test case execution.
Log stored value "adminUser" to website
create work item "workItem" on project stored value "projectName"
check that page contains "E2ETE" on the left of "workItem"
click stored value "projectName"
click "Settings"
click "Projects"
enter "TEST" into "Project ID"
click "Update project"
click "Back to workspace"
click stored value "projectName" below "Project"
click "Work items"
check that page contains "TEST" on the left of "workItem"
click stored value "projectName" below "Project"
delete work item "workItem" from project stored value "projectName"
click stored value "projectName"
click "Settings"
click "Projects"
enter "E2ETE" into "Project ID"
click "Update project"
-
Change view to board, verify that dragging items to other columns updates their status: This test case verifies that the board view supports dragging items with the mouse.Test case execution.
Log stored value "adminUser" to website
create work item "workItem" on project stored value "projectName"
click "Kanban"
drag "workItem" to "New Work Item" below "In Progress"
click "workItem"
check that page contains "In Progress" on the right of "State"
click "Backlog"
click "list"
delete work item "workItem" from project stored value "projectName"
-
Comment on a work item, validate that other users receive notifications on their inbox: this test case verifies that users receive notification when updates are made on their work items. Test case execution.
save value "Comment work item" as "commentItem" Log stored value "adminUser" to website create work item saved value "commentItem" on project stored value "projectName" click stored value "projectName" below "Projects" within the context of "sidebar" click "Work items" click stored value "commentItem" click "Add comment" type string with parameters "@${projectUser}" click stored value "projectUser" click "Comment" log out Log stored value "projectUser" to website click "Inbox" check that page contains "1" on the right of "Mentions" log out Log stored value "adminUser" to website delete work item saved value "commentItem" from project stored value "projectName" -
Create a page, validate that other users can modify it: here we test if all users that have access to a page can make edits and the page updates accordingly. Test case execution.
save "Test edition page" as "pageName"
Log stored value "adminUser" to website
create page saved value "pageName" on project stored value "projectName"
log out
Log stored value "projectUser" to website
click stored value "projectName" below "Projects" within the context of "sidebar"
click "Pages"
reload
click stored value "pageName"
enter "Text added by project_user" into "Press '/' for commands..."
log out
Log stored value "adminUser" to website
click stored value "projectName" below "Projects" within the context of "sidebar"
click "Pages"
reload
click stored value "pageName"
check that page contains "Text added by project_user"
click stored value "projectName" below "Projects" within the context of "sidebar"
delete page stored value "pageName" from stored value "projectName"
-
Create a view, add work items then drag them: similar to the second test case, we test that mouse dragging works on work items that are being displayed on a view. Test case execution.
Log stored value "adminUser" to website
save "Test view for item dragging" as "viewName"
add view saved value "viewName" to project stored value "projectName"
quick add work item "first item" with status "Backlog"
quick add work item "second item" with status "Backlog"
quick add work item "third item" with status "Backlog"
drag "third item" to "first item"
check that page contains "third item" above "first item"
delete view saved value "viewName" from project stored value "projectName"
delete work item "first item" from project stored value "projectName"
delete work item "second item" from project stored value "projectName"
delete work item "third item" from project stored value "projectName"
-
Create a work cycle, add work items, validate that progress is being tracked after work items are tagged as completed: in here, we test if a work cycle’s progress gauge advances whenever a work item is tagged as “Done”. Test case execution.
Log stored value "adminUser" to website
save "Test Cycle" as "cycleName"
add a cycle saved value "cycleName" to project stored value "projectName"
click stored value "cycleName"
quick add work item "workItem1" with status "Done"
quick add work item "workItem2" with status "Backlog"
click "Cycles"
check that page contains "1/2 work item closed"
click saved value "cycleName"
click "workItem2"
click "Backlog"
click "Done"
click "Cycles"
check that page contains "2/2 work items closed"
remove cycle saved value "cycleName" from project stored value "projectName"
delete work item "workItem1" from project stored value "projectName"
delete work item "workItem2" from project stored value "projectName"
-
Create an active cycle, check that you cant have more than one active cycle: checks that it’s not possible to have multiple active cycles on the same date. Test case execution.
Log stored value "adminUser" to website
add a cycle "Cycle 1" to project stored value "projectName"
click stored value "projectName" below "Project" within the context of "sidebar"
click "Cycles" below stored value "projectName"
click button "Add Cycle"
enter "Cycle 2" into "Title"
click "Start date"
click stored value "todayDayOfMonth"
click button "Create cycle"
check that page contains "You already have a cycle on the given dates"
click "Cancel"
check that page does not contain "Cycle 2"
click "Completed cycle"
click stored value "projectName" below "Project" within the context of "sidebar"
remove cycle "Cycle 1" from project stored value "projectName"
-
Validate that quicklinks redirect to the specified page: in order to test this feature, a quicklink gets created then checks if it’s working correctly. Test case execution.
Log stored value "adminUser" to website
save "https://en.wikipedia.org/wiki/Main_Page" as "customUrl"
click "Home" within the context of "sidebar"
click "Add quick Link"
enter saved value "customUrl" into "Type or paste a URL"
enter "Quick link test" into "Display title"
click "Add Quicklink"
click "Quick link test"
check that url is saved value "customUrl"
switch to tab 1
hover over "Quick link test"
click "ellipsis" roughly on the right of "Quick link test"
click "Delete"
check that page contains "Save links to work things that you'd like handy."
-
Validate that search work items by labels is filtering correctly: two work items get created, one of them gets tagged by a label then validates that the filtered search by labels is working as intended. Test case execution.
Log stored value "adminUser" to website
save "Work item to label" as "workItem"
click stored value "projectName"
click "Settings"
click "Projects"
click "Labels"
click "Add label"
enter "concepts" into "Label title"
click "Add"
click "Back to workspace"
create work item saved value "workItem" on project stored value "projectName"
quick add work item "Unlabeled item" with status "Backlog"
click saved value "workItem"
click "Select label"
click "concepts"
click "move-right"
click "list-filter"
click "Label"
click "concepts" below "Search"
double click stored value "projectName"
check that page contains "Work item to label"
check that page does not contain "Unlabeled item"
click "Clear All"
check that page contains "Unlabeled item"
delete work item saved value "workItem" from project stored value "projectName"
delete work item "Unlabeled item" from project stored value "projectName"
-
Add team member to project,assign a work item to them then validate they see the work item: this test case verifies that users can be added to project then said users get access to the work items inside of that project. Test case execution.
save "Work item assign test" as "workItem"
Log stored value "adminUser" to website
add user stored value "invitedUser" to project stored value "projectName"
create work item saved value "workItem" on project stored value "projectName"
click saved value "workItem"
click "Add assignees"
click stored value "invitedUser"
click "E2E Testing playground" below "Projects" within the context of "sidebar"
log out
Log stored value "invitedUser" to website
click stored value "projectName" below "Projects" within the context of "sidebar"
click "Work items"
check that page contains saved value "workItem"
click saved value "workItem"
check that page contains saved value "invitedUser" to the right of "Assignees"
log out
//cleanup
Log stored value "adminUser" to website
delete work item stored value "workItem" from project stored value "projectName"
remove user stored value "invitedUser" from project stored value "projectName"
Reusable rules
-
invite user “userName”
click button on the left of "Open user menu" click "Invite members" click "Add member" enter string with parameters "${userName}@test.com" into "[email protected]" click "Send Invitations" click "Back to workspace" -
Log “user” to website
enter string with parameters "${user}@test.com" into "Email" check that button "Continue" is enabled click "Continue" enter "safePassword14*" into "Password" check that button "Go to workspace" is enabled click "Go to workspace" -
create user “user” then join workplace
enter string with parameters "${user}@test.com" into "Email" click button below input "Email" enter "safePassword14*" into "Set a password" enter "safePassword14*" into "Confirm password" click button below input "Confirm password" enter saved value "user" into "Enter your full name" click button below input "Enter your full name" click "Skip" click "Skip" click button above "Continue" click "Continue" click "get started" check that page contains "New work item" -
log out
click "Open user menu"
click "Sign out"
-
add user “userName” to project “projectName”
hover over stored value "projectName" below "Project" within the context of "sidebar"
click "Toggle quick actions menu"
click "Settings"
click "Members"
click "Add member"
click "Select co-worker"
click stored value "userName"
click "Add member"
check that page contains stored value "userName"
click "Back to workspace"
-
remove user “userName” from project “projectName”
hover over stored value "projectName" below "Project" within the context of "sidebar"
click "Toggle quick actions menu"
click "Settings"
click "Members"
hover over text within context of table at row containing stored value "userName" and 1st column
click button on the right of stored value "userName"
click "Remove"
click "Remove"
check that page does not contain stored value "userName"
click "Back to workspace"
-
create work item “workItem” on project “projectName”
click stored value "projectName" below "Project" within the context of "sidebar"
click "Work items" below stored value "projectName"
click button "Add work item"
enter stored value "workItem" into "Title"
click button "Save"
check that page contains stored value "workItem"
click stored value "projectName" below "Project" within the context of "sidebar"
-
delete work item “workItem” from project “projectName”
click stored value "projectName" below "Project" within the context of "sidebar"
click "Work items" below stored value "projectName"
click "ellipsis" on the right of stored value "workItem"
click "Delete"
click "Delete"
check that page does not contain stored value "workItem"
click stored value "projectName" below "Project" within the context of "sidebar"
-
add a cycle “cycleName” to project “projectName”
click stored value "projectName" below "Project" within the context of "sidebar"
click "Cycles" below stored value "projectName"
click button "Add Cycle"
enter stored value "cycleName" into "Title"
click "Start date"
click stored value "todayDayOfMonth"
click button "Create cycle"
check that page contains stored value "cycleName"
click stored value "projectName" below "Project" within the context of "sidebar"
-
remove cycle “cycleName” from project “projectName”
click stored value "projectName" below "Project" within the context of "sidebar"
click "Cycles" below stored value "projectName"
click button "ellipsis" on the right of stored value "cycleName"
click "Delete"
click "Delete"
check that page does not contain stored value "cycleName"
click stored value "projectName" below "Project" within the context of "sidebar"
-
quick add work item “workItem” with status “status”
click "Add work item"
enter stored value "workItem" into "Title"
click "Backlog"
click stored value "status"
click "save"
-
create page “pageName” on project “projectName”
click stored value "projectName" below "Project" within the context of "sidebar"
click "Pages" below stored value "projectName"
click button "Add page"
enter stored value "pageName" into "Untitled" roughly below button "Icon"
click stored value "projectName" below "Project" within the context of "sidebar"
-
delete page “pageName” from “projectName”
click stored value "projectName" below "Project" within the context of "sidebar"
click "Pages" below stored value "projectName"
click button "ellipsis" on the right of stored value "pageName"
click "Archive"
click "Archived"
click button "ellipsis" on the right of stored value "pageName"
click "Delete"
click "Delete"
check that page does not contain stored value "pageName"
click stored value "projectName" below "Project" within the context of "sidebar"
-
add view “viewName” to project “projectName”
click stored value "projectName" below "Project" within the context of "sidebar"
click "Views" below stored value "projectName"
click button "Add View"
enter stored value "viewName" into "Title"
click button "Create View"
check that page contains stored value "viewName"
click stored value "projectName" below "Project" within the context of "sidebar"
-
delete view “viewName” from project “projectName”
click stored value "projectName" below "Project" within the context of "sidebar"
click "Views" below stored value "projectName"
click "ellipsis" on the right of stored value "viewName"
click "Delete"
click "Delete"
check that page does not contain stored value "viewName"
click stored value "projectName" below "Project" within the context of "sidebar"
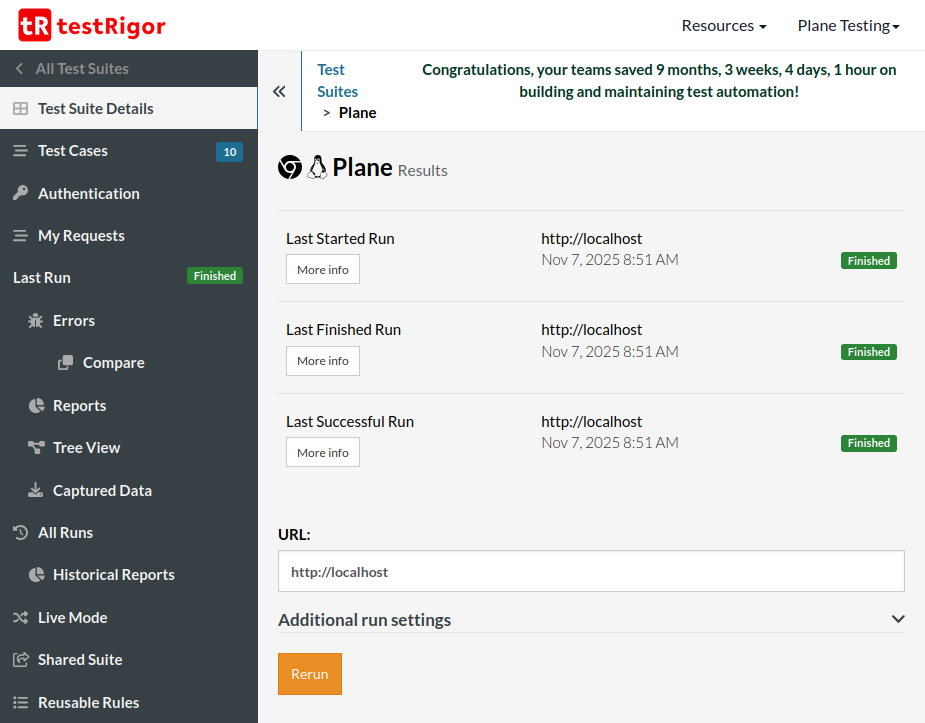
Running Plane Tests with testRigor
To trigger test suite runs we can simply navigate to the “Test Suite Details” page located inside our test suite, then click the button “Rerun”.
If you set up your testing environment locally, then you will have to use testRigor’s CLI tool in order to run the test suite.
Setting up GitHub CI/CD integration
For automated testing in your GitHub repository, you’ll need to configure your testRigor credentials as GitHub secrets. This approach differs from local testing by using GitHub’s secure environment variables.
Step 1: Add GitHub Secrets
- Go to your GitHub repository
- Click on “Settings” → “Secrets and variables” → “Actions”
- Add the following:
- As a secret:
PLANE_AUTH_TOKEN: Your testRigor auth token (keep this private)
- As variables:
PLANE_TEST_SUITE_ID: Your testRigor Test Suite IDPLANE_BASE_URL: Your Plane website URL
- As a secret:
For further information on creating secrets and variables in GitHub Actions, you can check the official GitHub documentation on secrets and variables.
Step 2: Use in GitHub Actions
- name: Run testRigor Tests
  run: testrigor test-suite run PLANE_TEST_SUITE_ID --token PLANE_AUTH_TOKEN --localhost --url PLANE_BASE_URL
  env:
    PLANE_AUTH_TOKEN: ${{ secrets.PLANE_AUTH_TOKEN }}
    PLANE_TEST_SUITE_ID: ${{ vars.PLANE_TEST_SUITE_ID }}
    PLANE_BASE_URL: ${{ vars.PLANE_BASE_URL }}
| Achieve More Than 90% Test Automation | |
| Step by Step Walkthroughs and Help | |
| 14 Day Free Trial, Cancel Anytime |


