Azure DevOps Integration

How to Enable the Integration
Settings -> Integrations
First, you need to complete the Azure DevOps integration by navigating to Settings > Integrations.
Make sure the integration is enabled, and fill in the required fields.
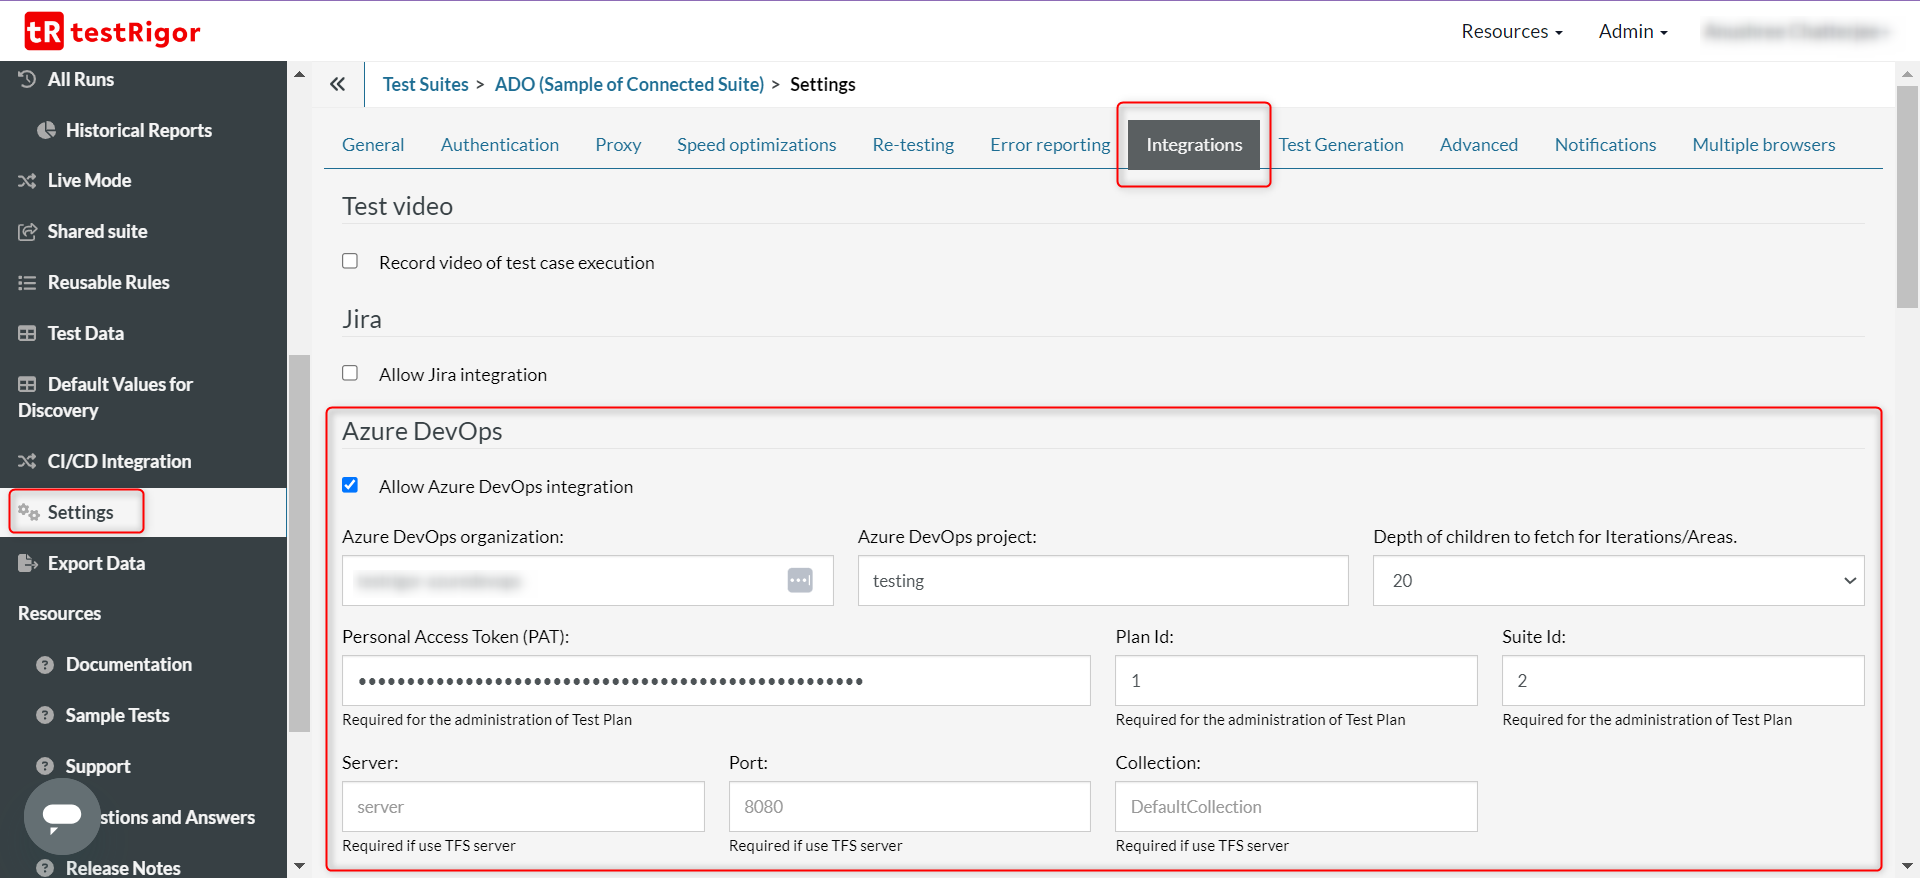
Fields to fill:
- Azure DevOps organization: In most cases, your organization name will be displayed directly in the top right or left corner of the Azure DevOps dashboard. If the name isn’t readily visible at the top, you can find it within the organization settings.
- Azure DevOps project: Enter the name of the project that contains the test cases.
-
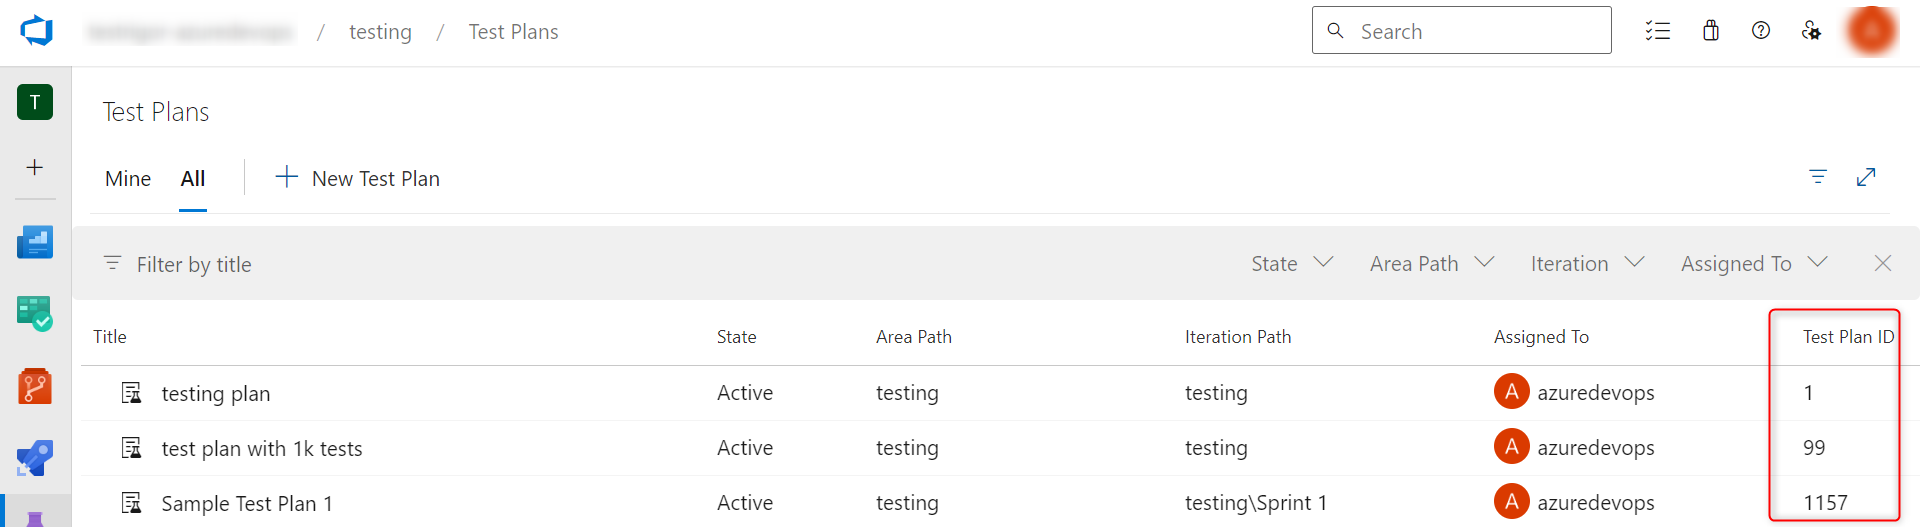
Plan Id: Open the project, and then click on ‘Test Plan‘ in the left panel. You will see all test plans within the project listed. One of the columns will also contain the plan id.
-
Suite Id: Navigate to the project-> relevant test plan -> relevant test suite. Once you open the test suite, you will see the id displayed on top, about the test cases.Alternatively, you can find Plan Id and Suite Id from the URL once you are within the test suite you wish to work with.

Don’t forget to click the Save button at the bottom of the page after filling in the fields!
How to Obtain a Personal Access Token in Azure DevOps
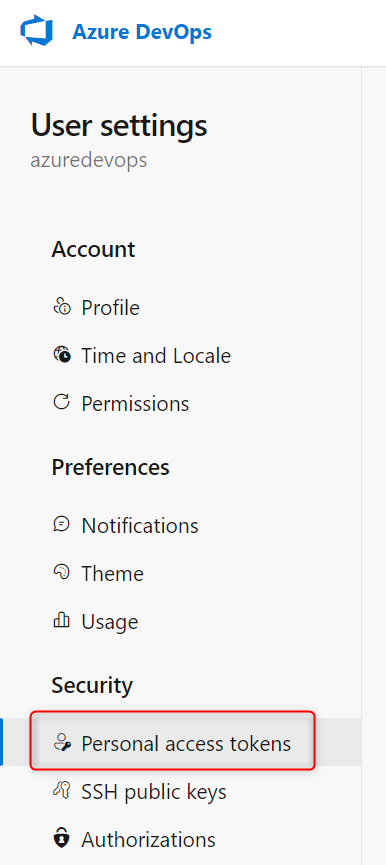
You need a Personal Access Token (PAT) to connect testRigor and Azure DevOps. Here’s how you can get it:
-
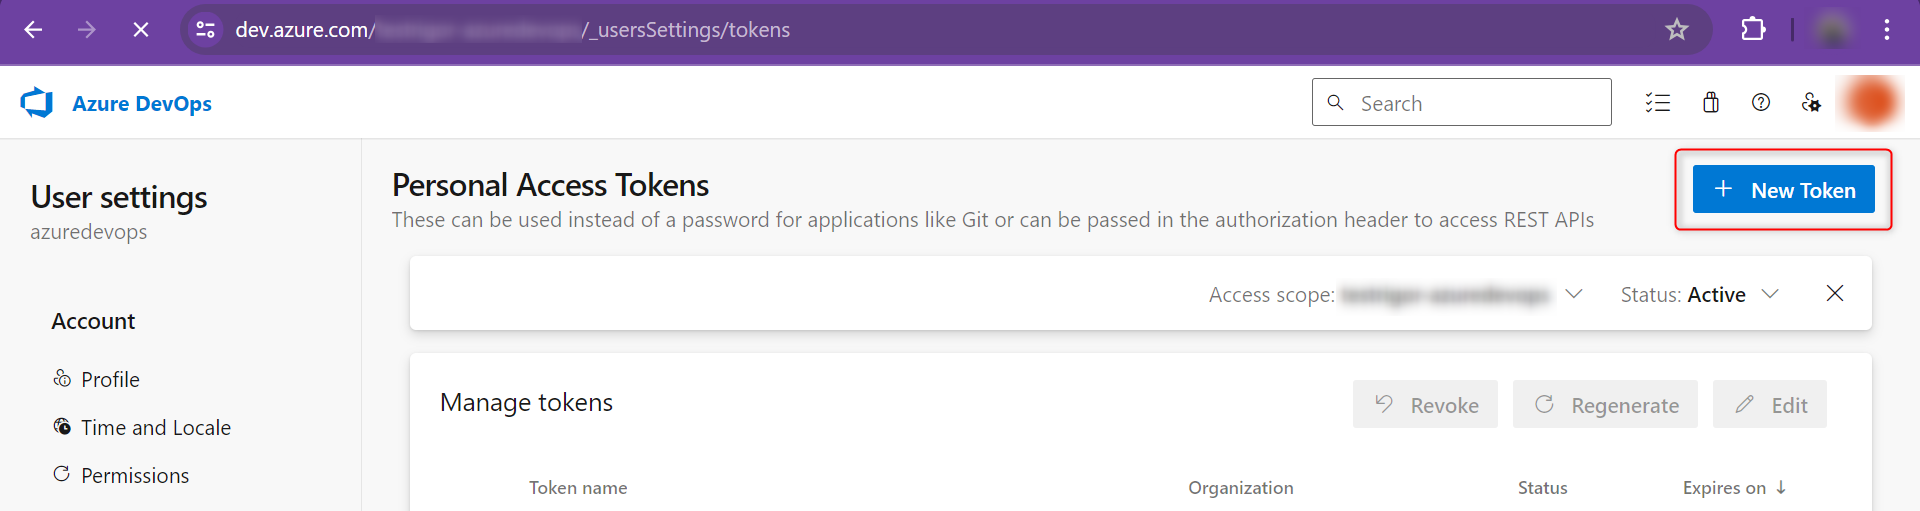
Click on Profile -> User settings -> Personal access tokens.
-
Create a New Token.
-
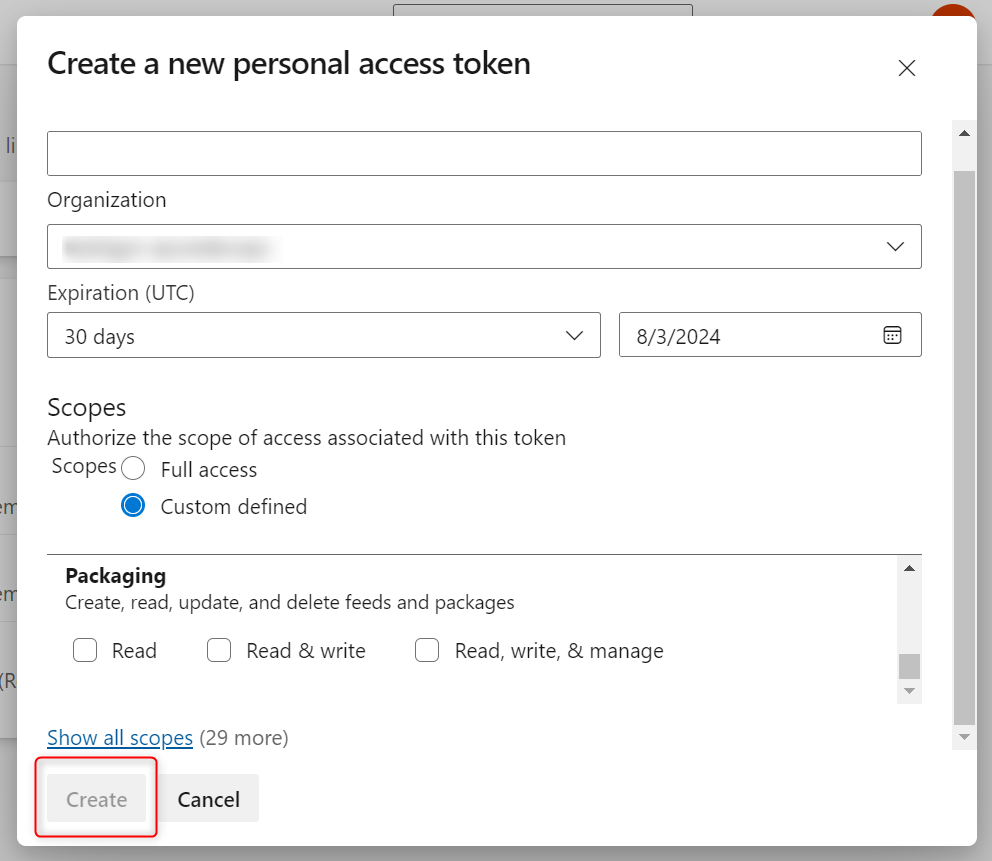
Fill in requested preferences like access controls and validity date in the popup window and click Create.
-
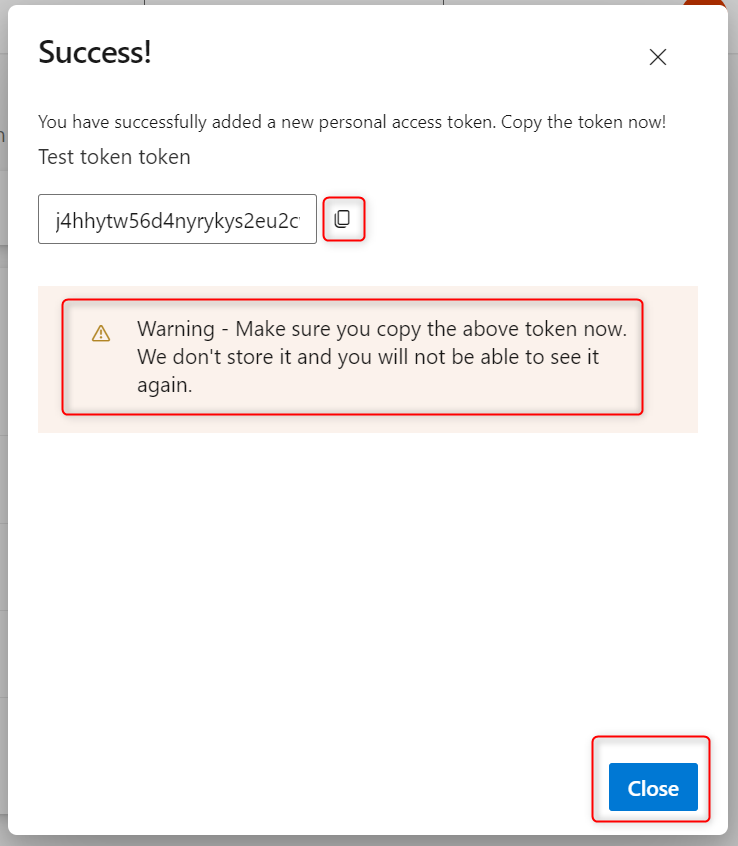
Another popup window will appear with the token id which needs to be copied right then since the id will not be available after you close the popup. Close the window.
-
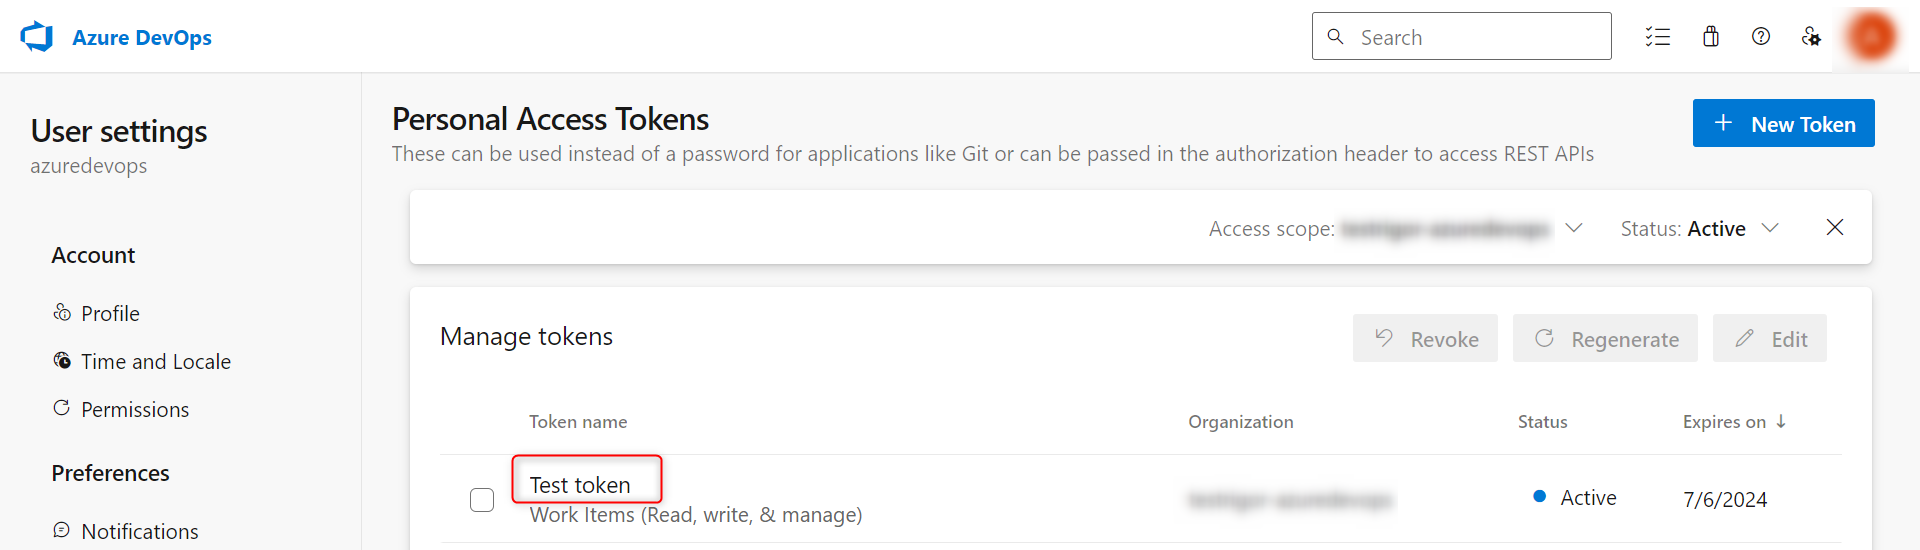
Once you close the popup window, you’ll see the new token under Manage tokens section from where you can revoke, edit, or regenerate it.
Test Run Results
Sync test cases across both platforms. You can do this in two ways:
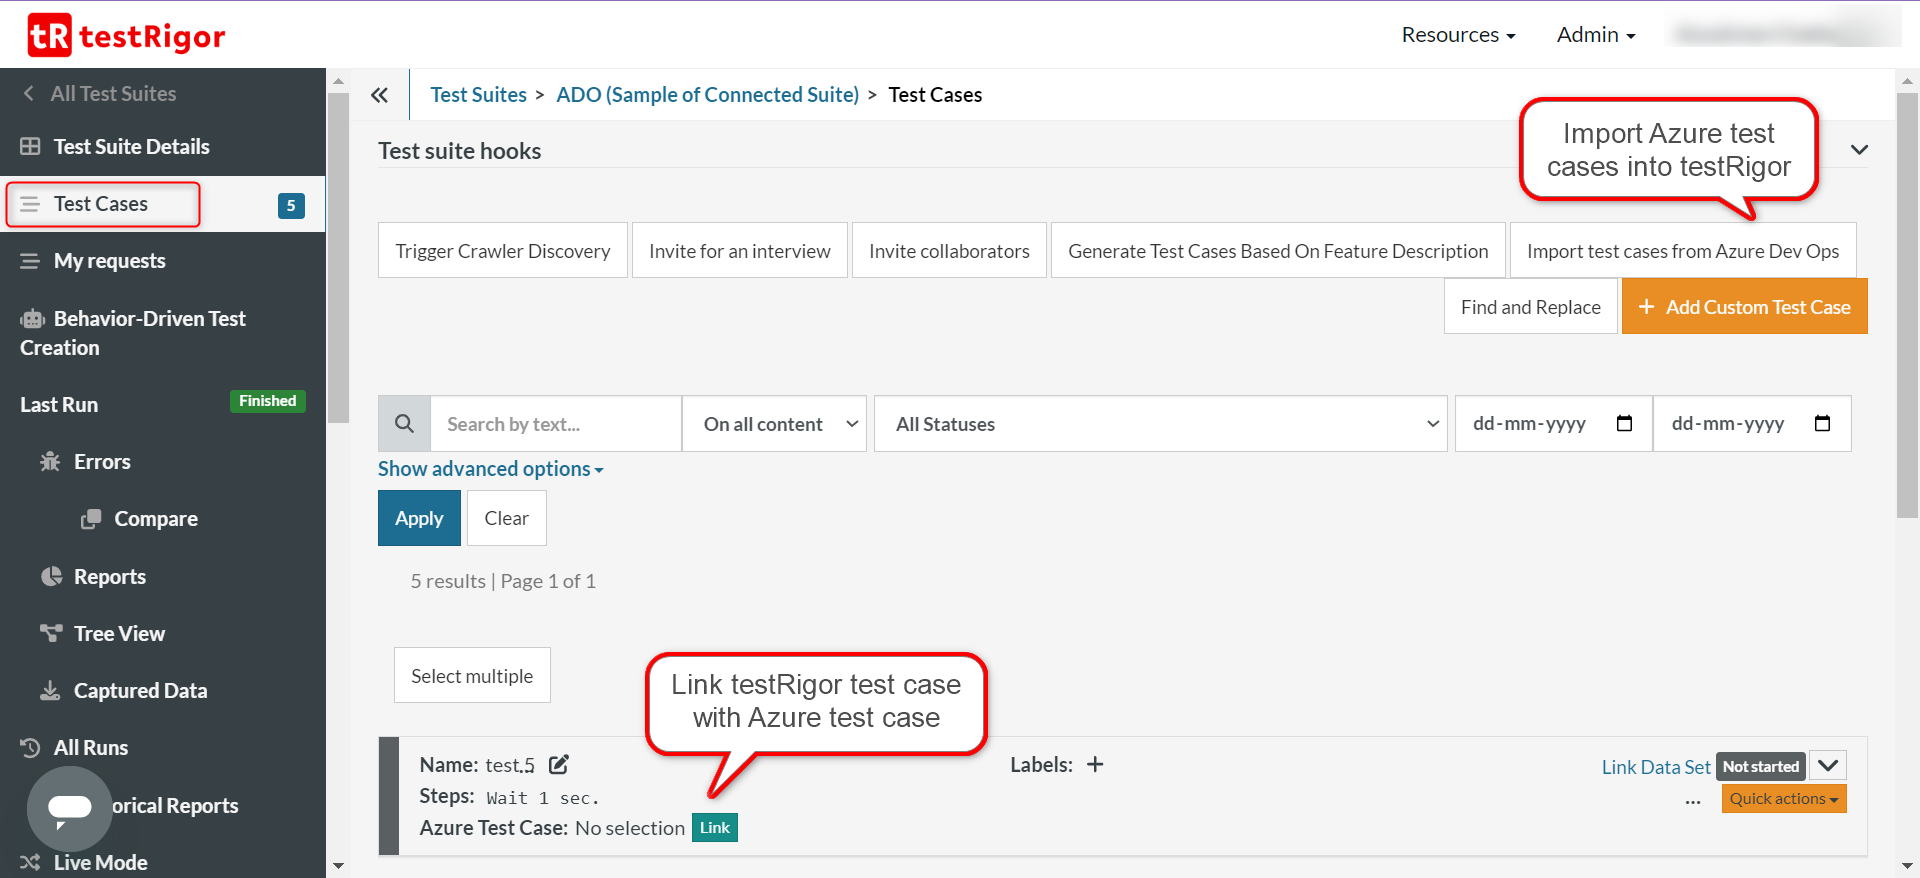
- Import manual test cases into testRigor: You can do this by using the import option with testRigor. Go to the testRigor test suite which is linked with Azure, and click on the import option in the Test Cases section.
- Link testRigor test cases to Azure test cases: You can selectively link test cases from testRigor to Azure test cases, thus letting testRigor manage test automation for you. You can do this by going to the testRigor test suite that is linked with Azure, clicking on the Link option below the testRigor test case, and selecting the test cases you want to link.
Now, every time you do a full Rerun of your testRigor tests, we will automatically create a Test Run in Azure DevOps, and you will have an execution history record with execution details for each linked test case.
Additionally, you can run a test suite without updating Azure DevOps by checking the Do not update AzureDevOps checkbox on the Test Suite Details page before rerunning the test suite.
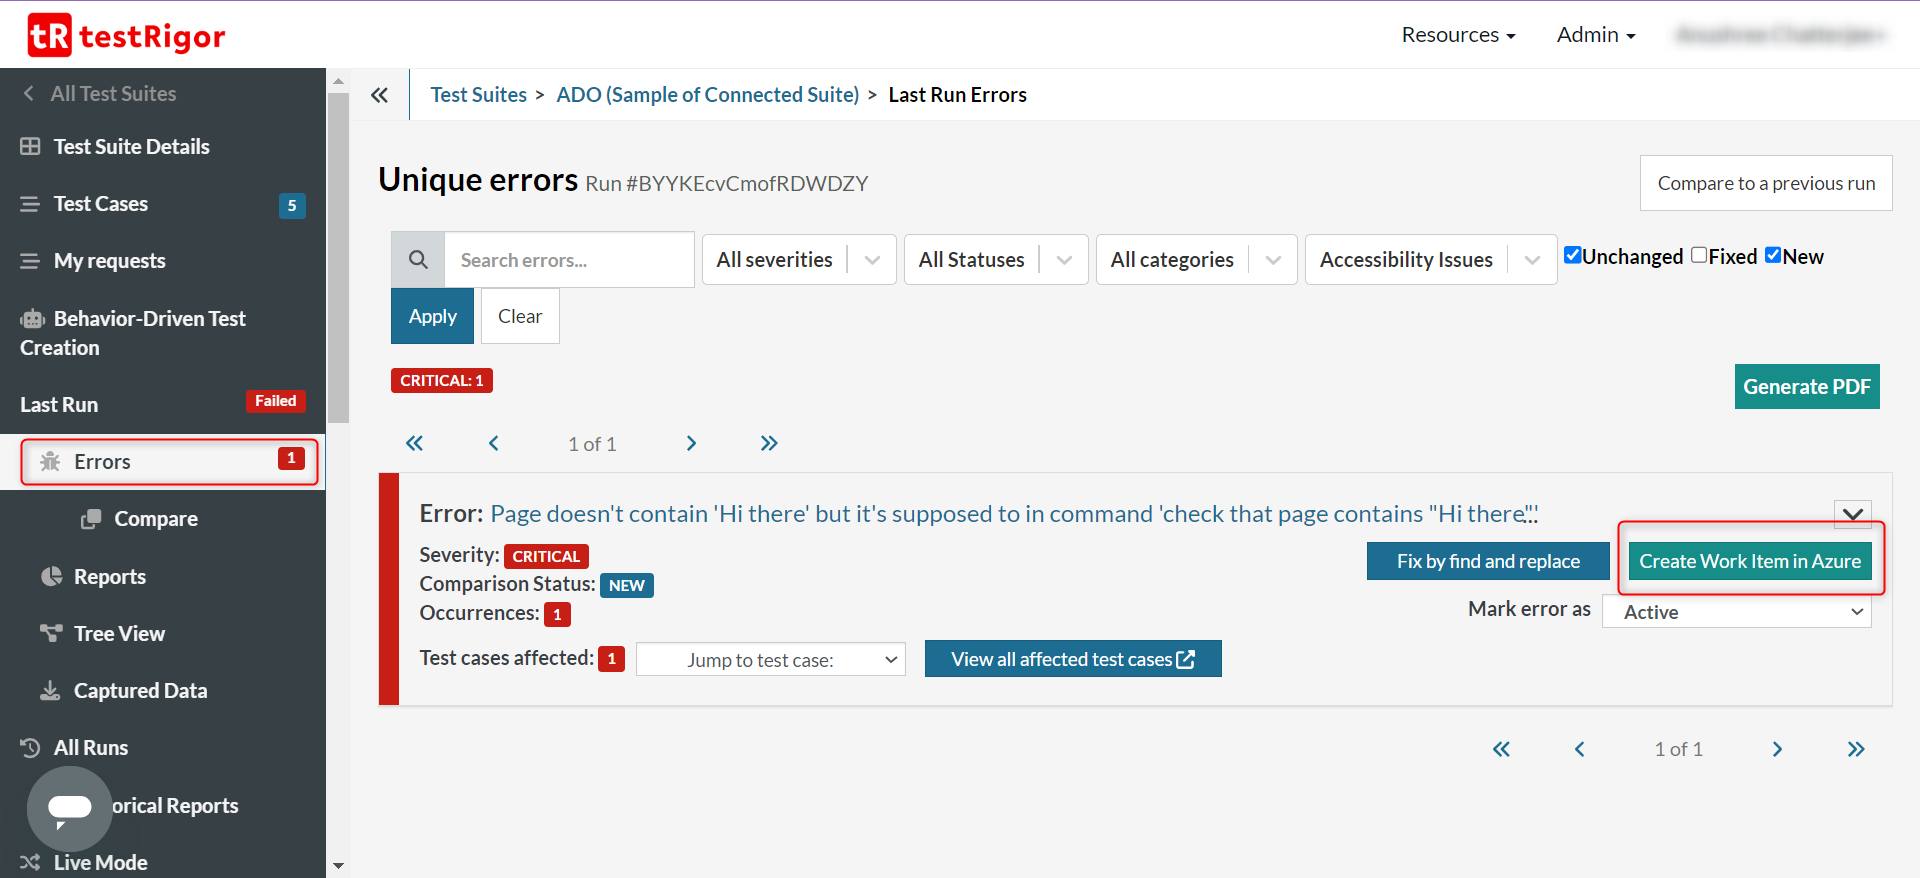
Errors brought up in testRigor during test runs can easily be added as work items in Azure. Simply click the Create Work Items in Azure button and fill out the form.