Jira Integration


Enable The Integration
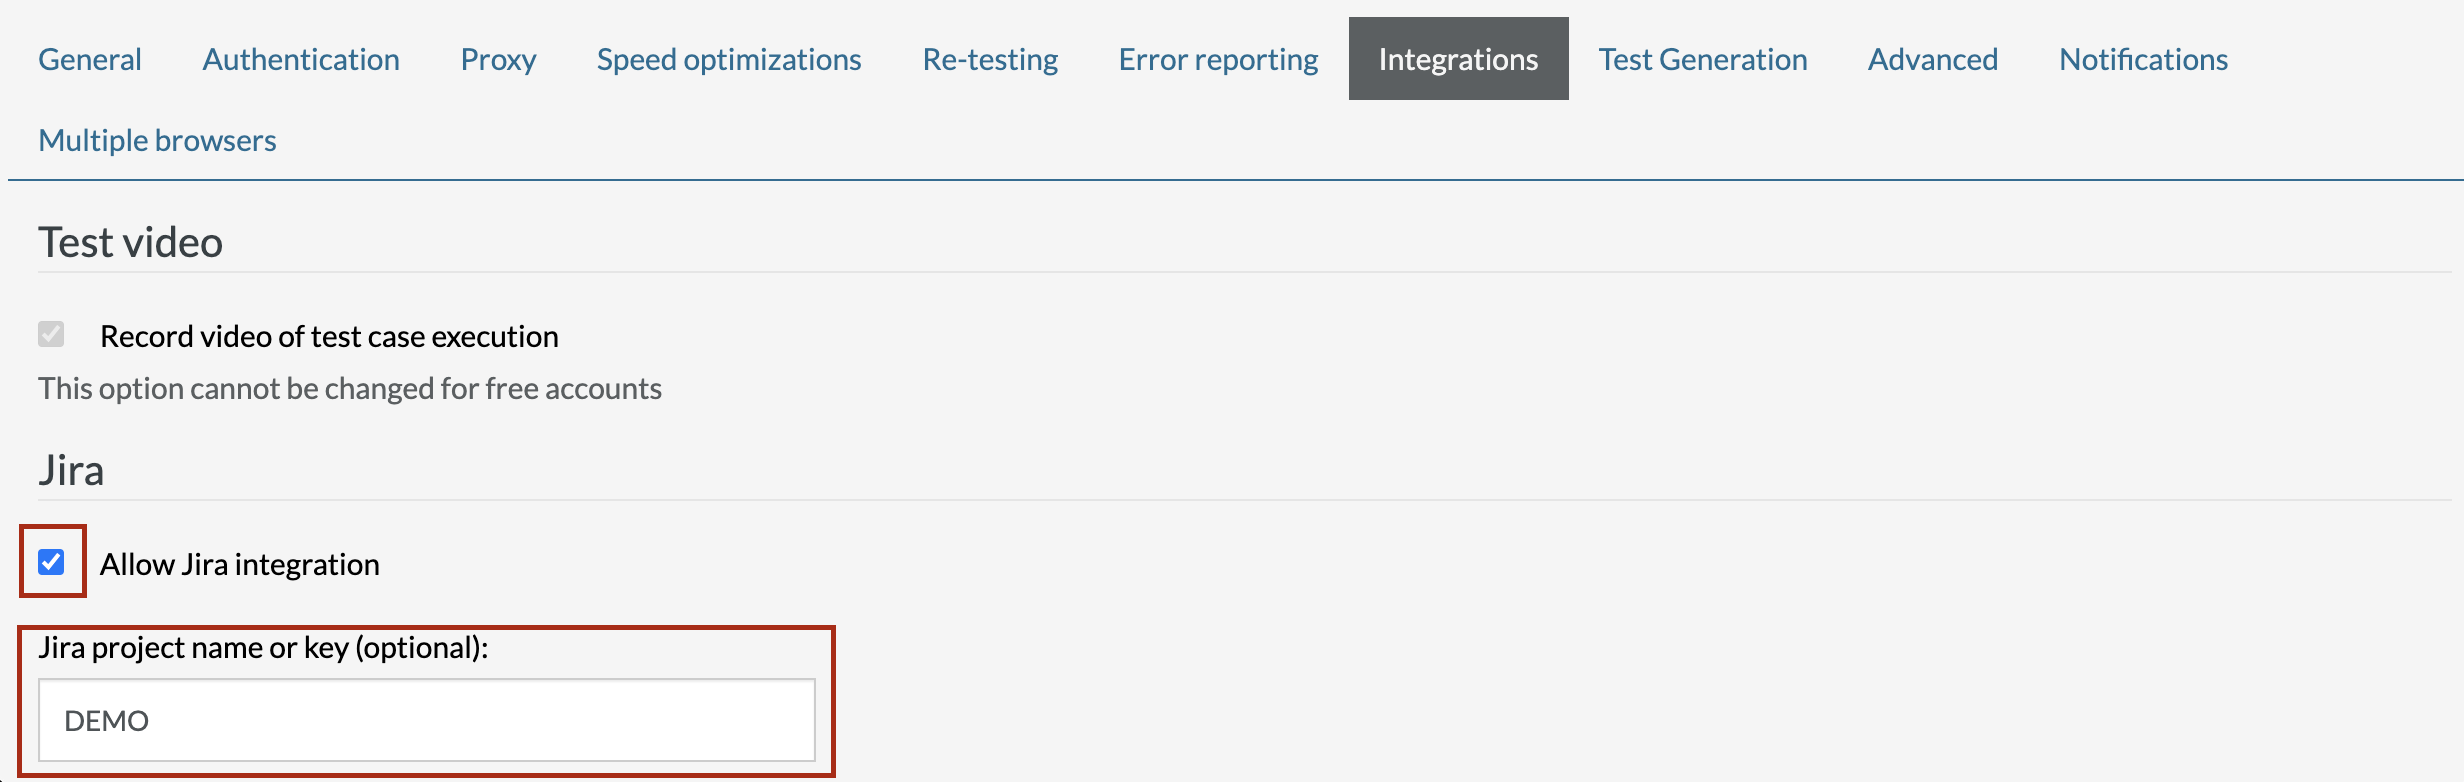
Settings -> Integrations
First, you need to allow Jira integration by navigating to Settings > Integrations. Make sure the integration is enabled, and add the Jira project key where you want your future tickets to be created. (Note: only company-managed Jira projects are supported at this time).
Next we’ll walk you through an example of how it works with your test cases.
Here’s how it’s used
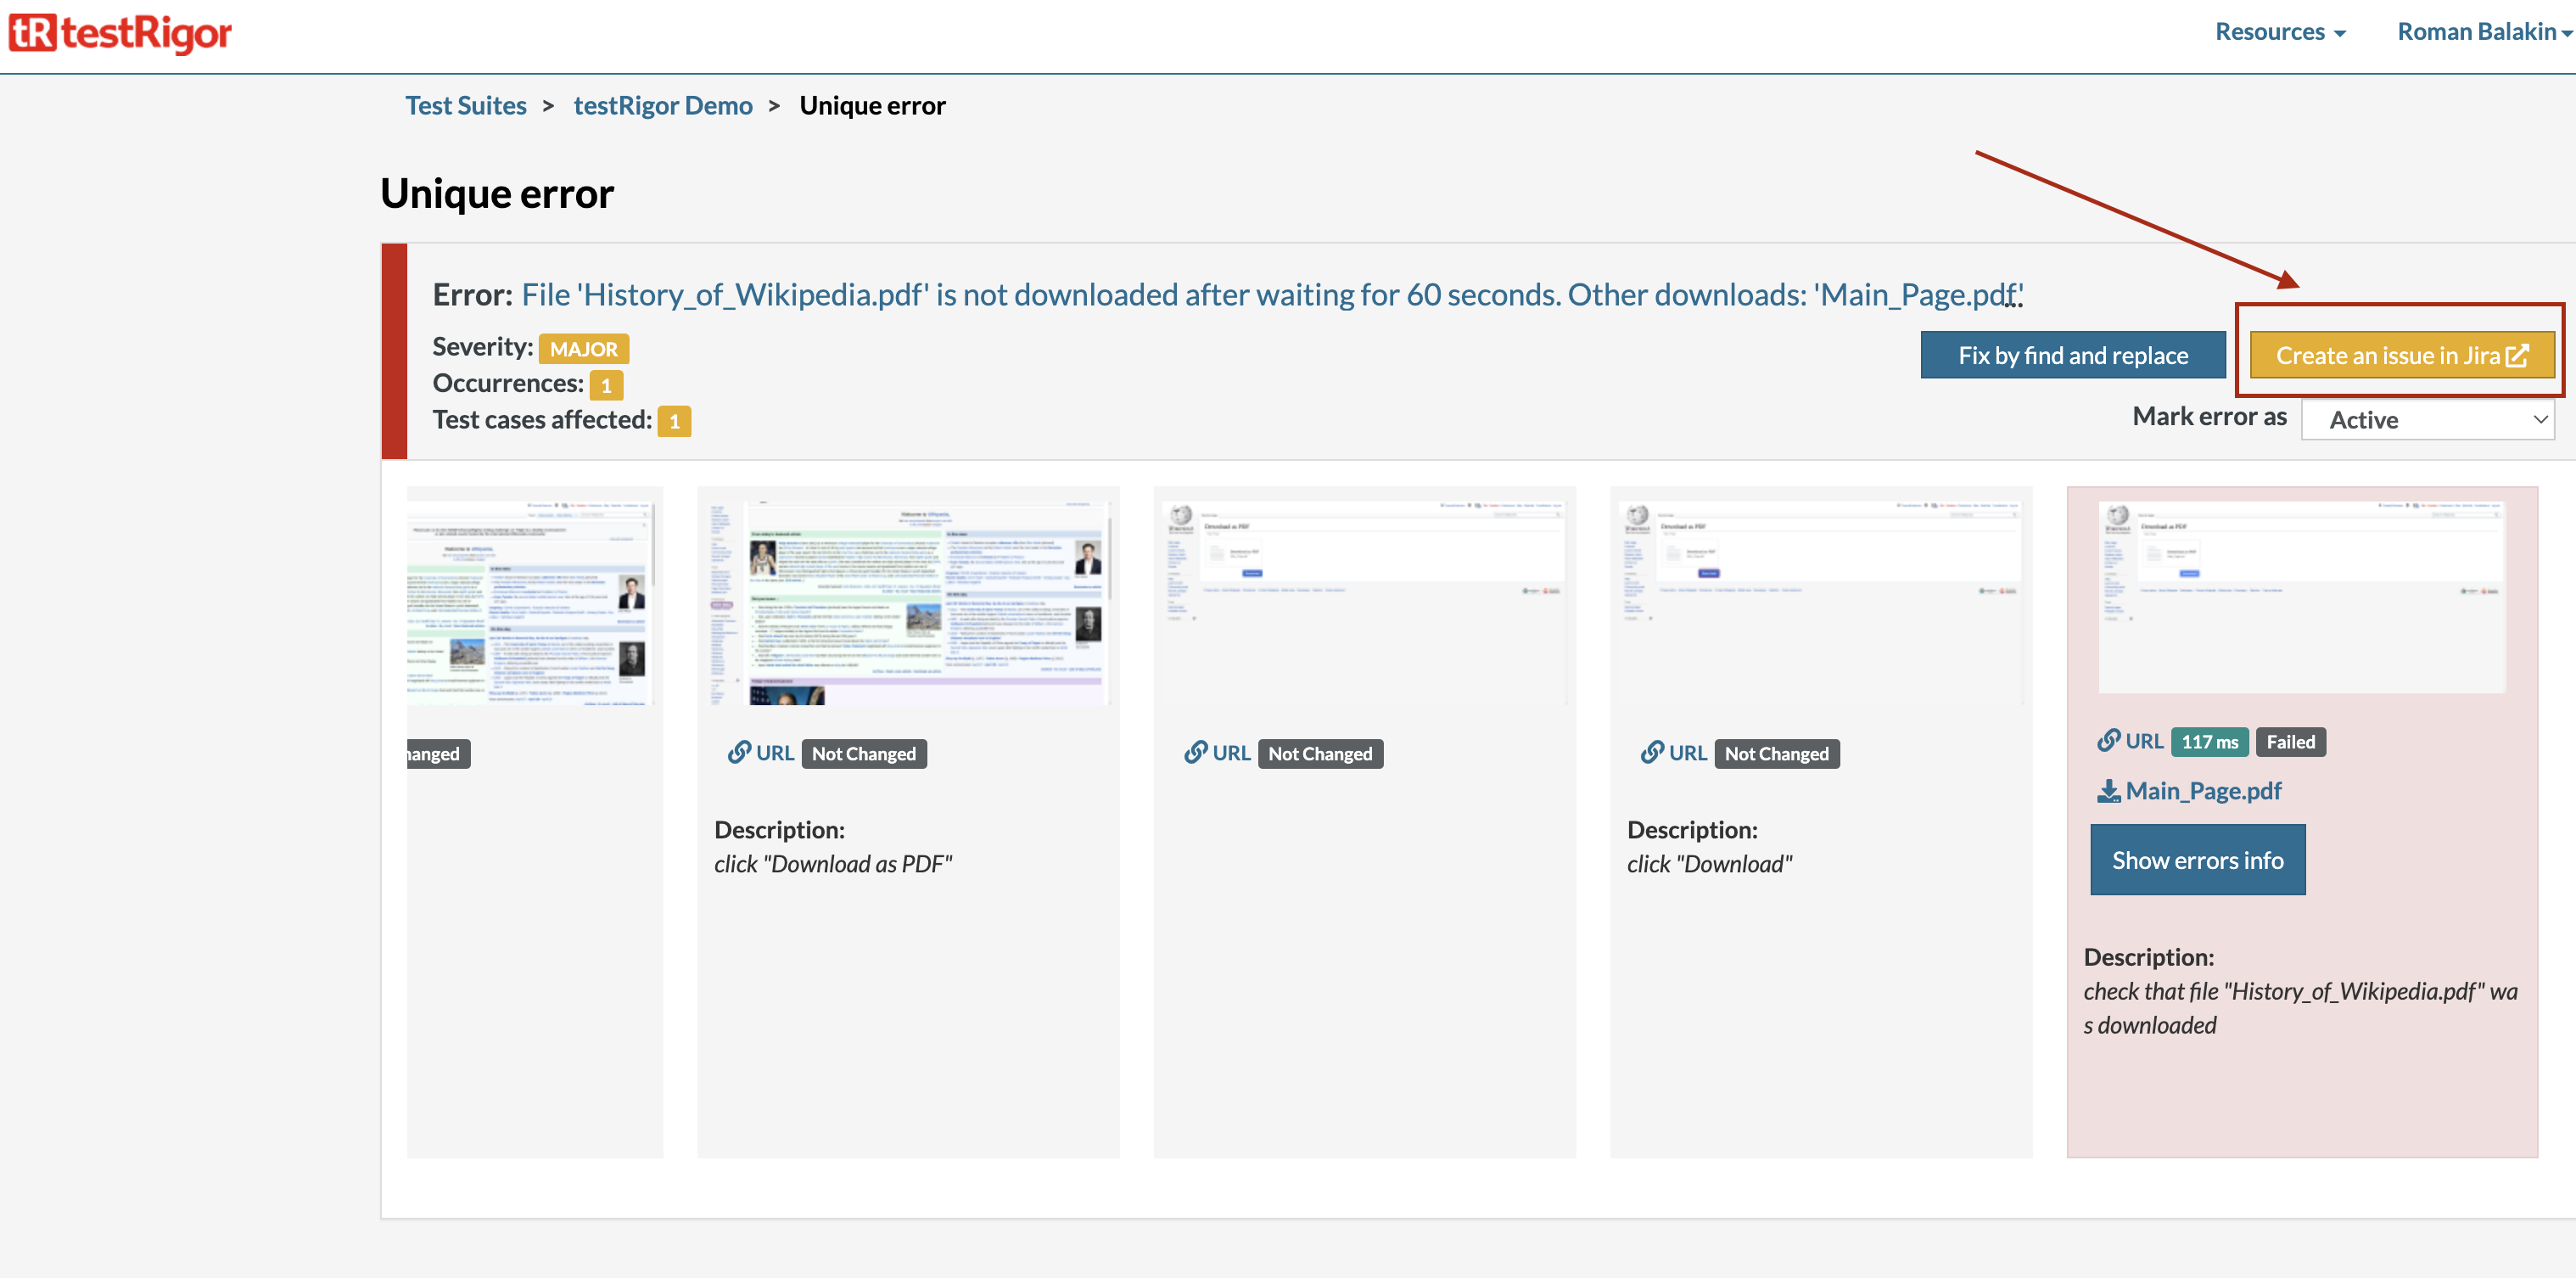
Locate Your Test
Next, locate a failed test which you want to create a Jira ticket for. Press “Create an issue in Jira” button.
A new screen prompting you to enable the integration will appear (you’ll only need to do this once).
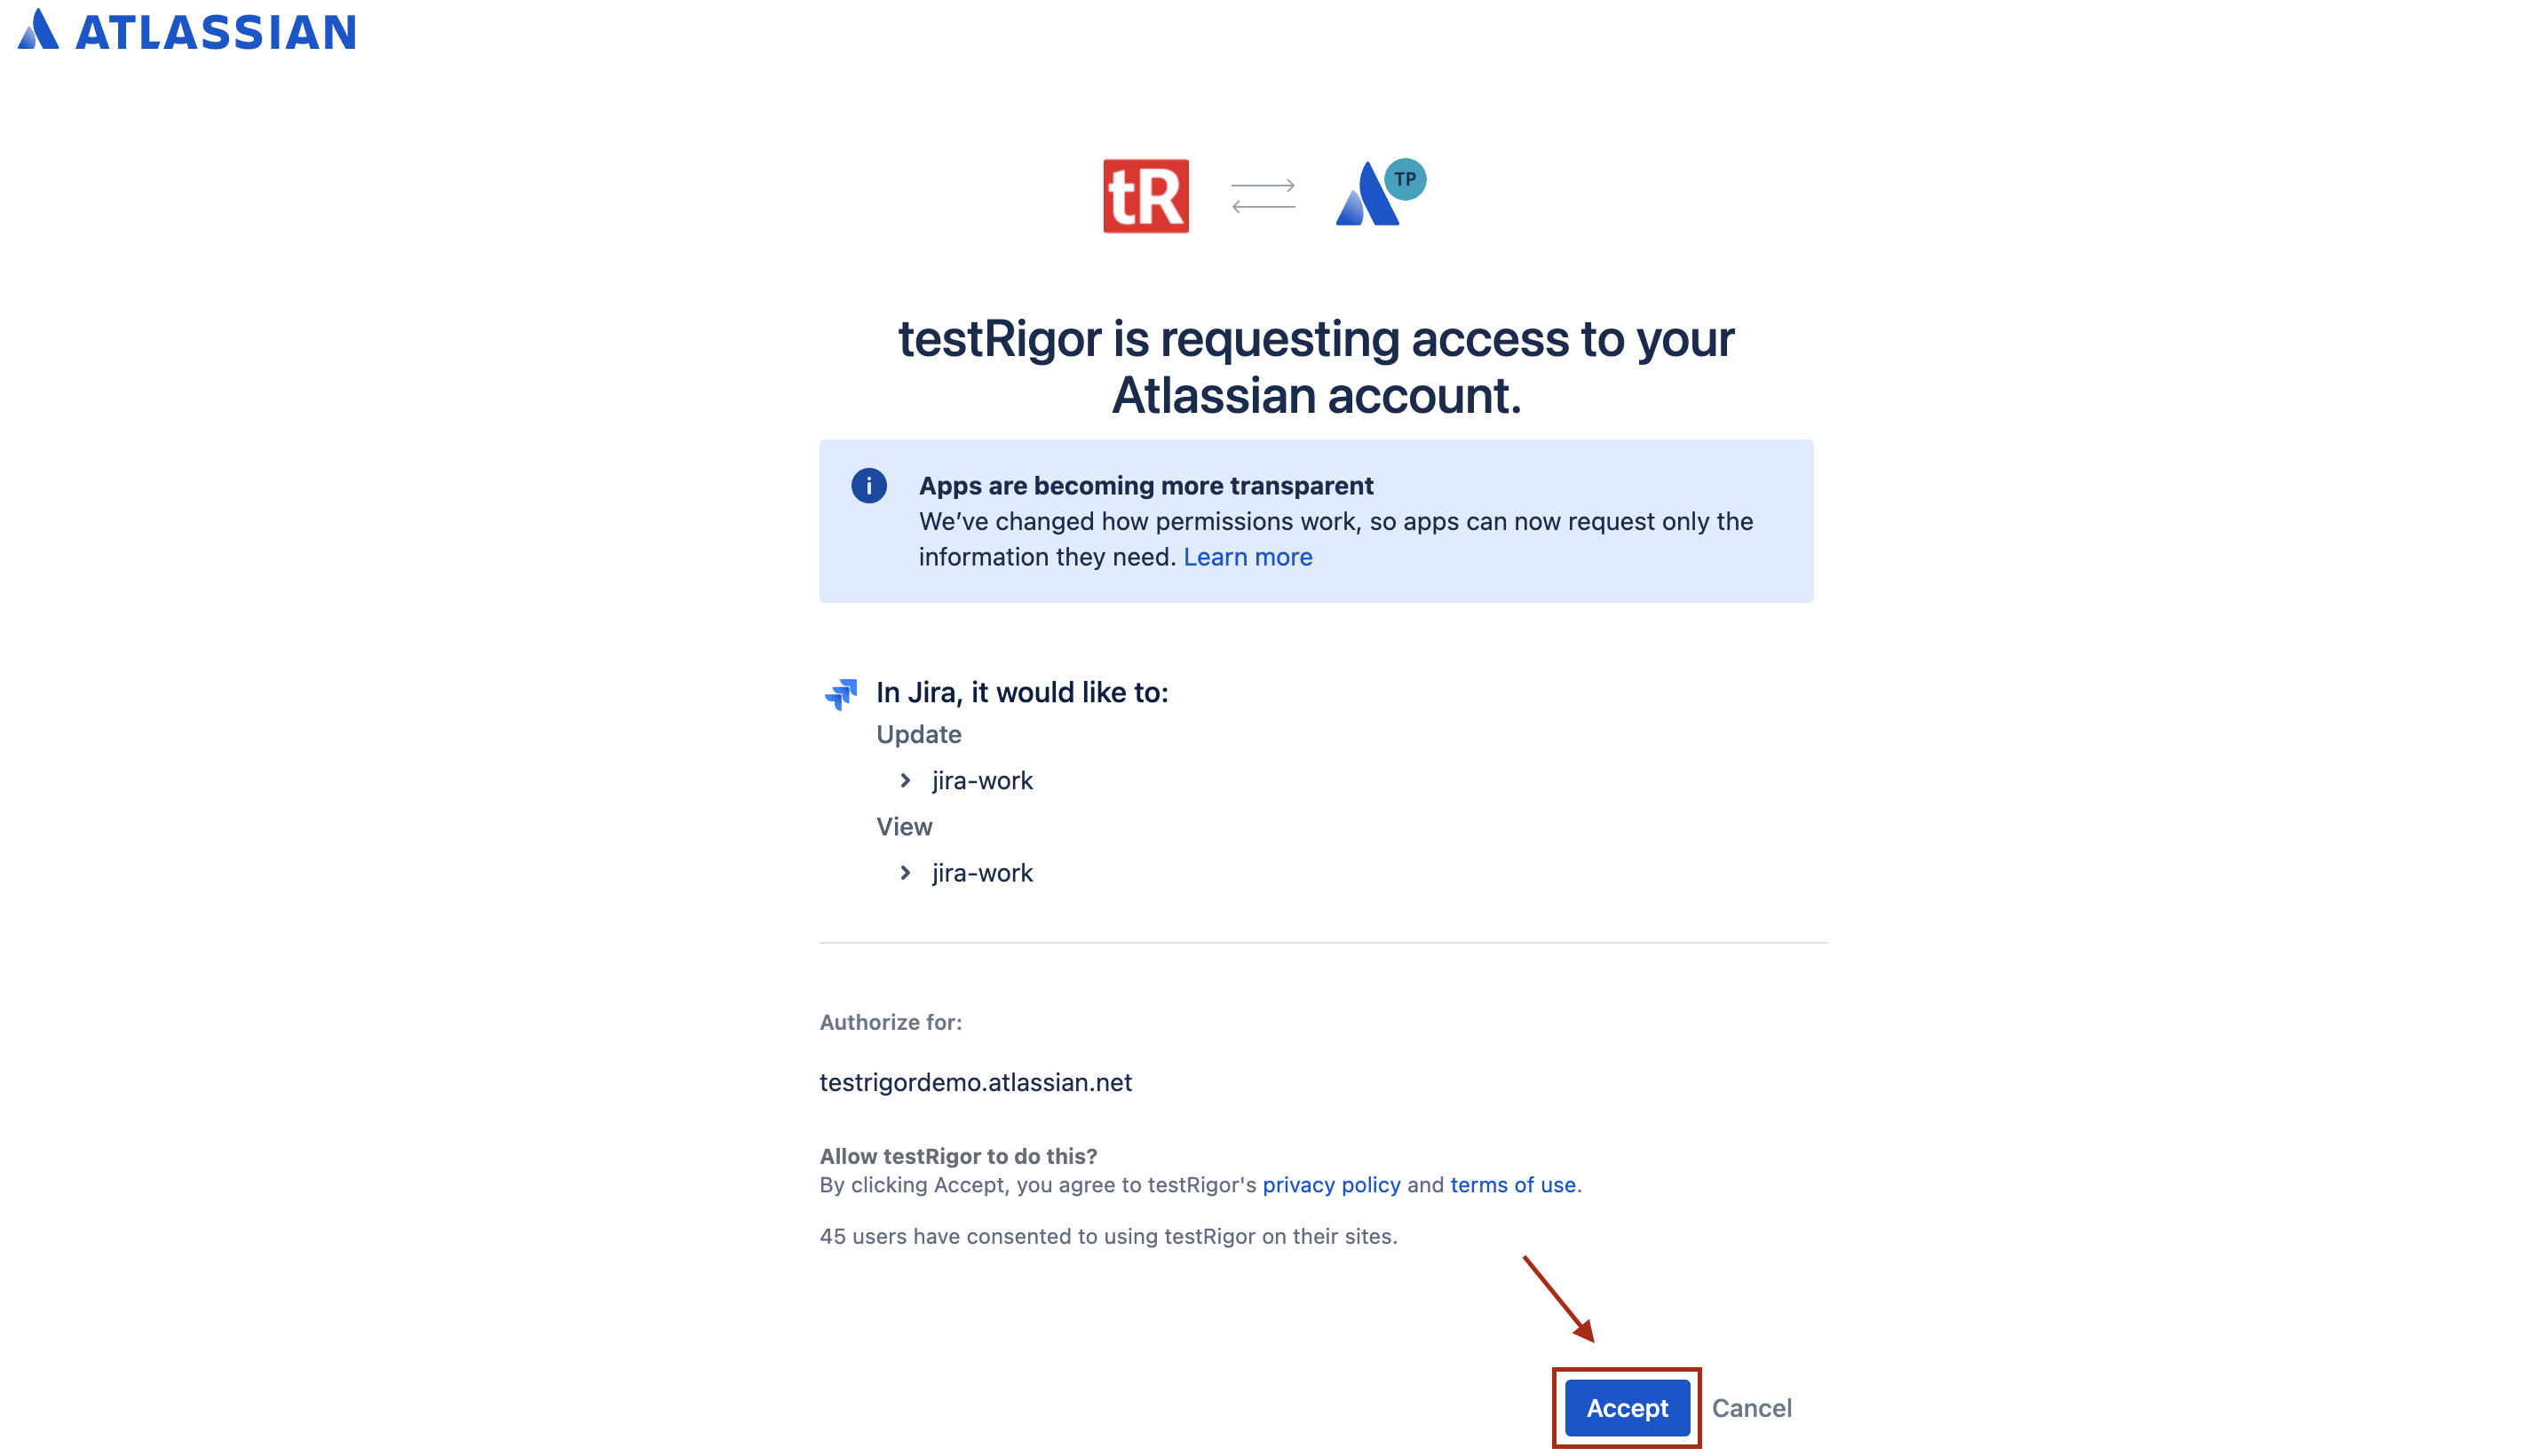
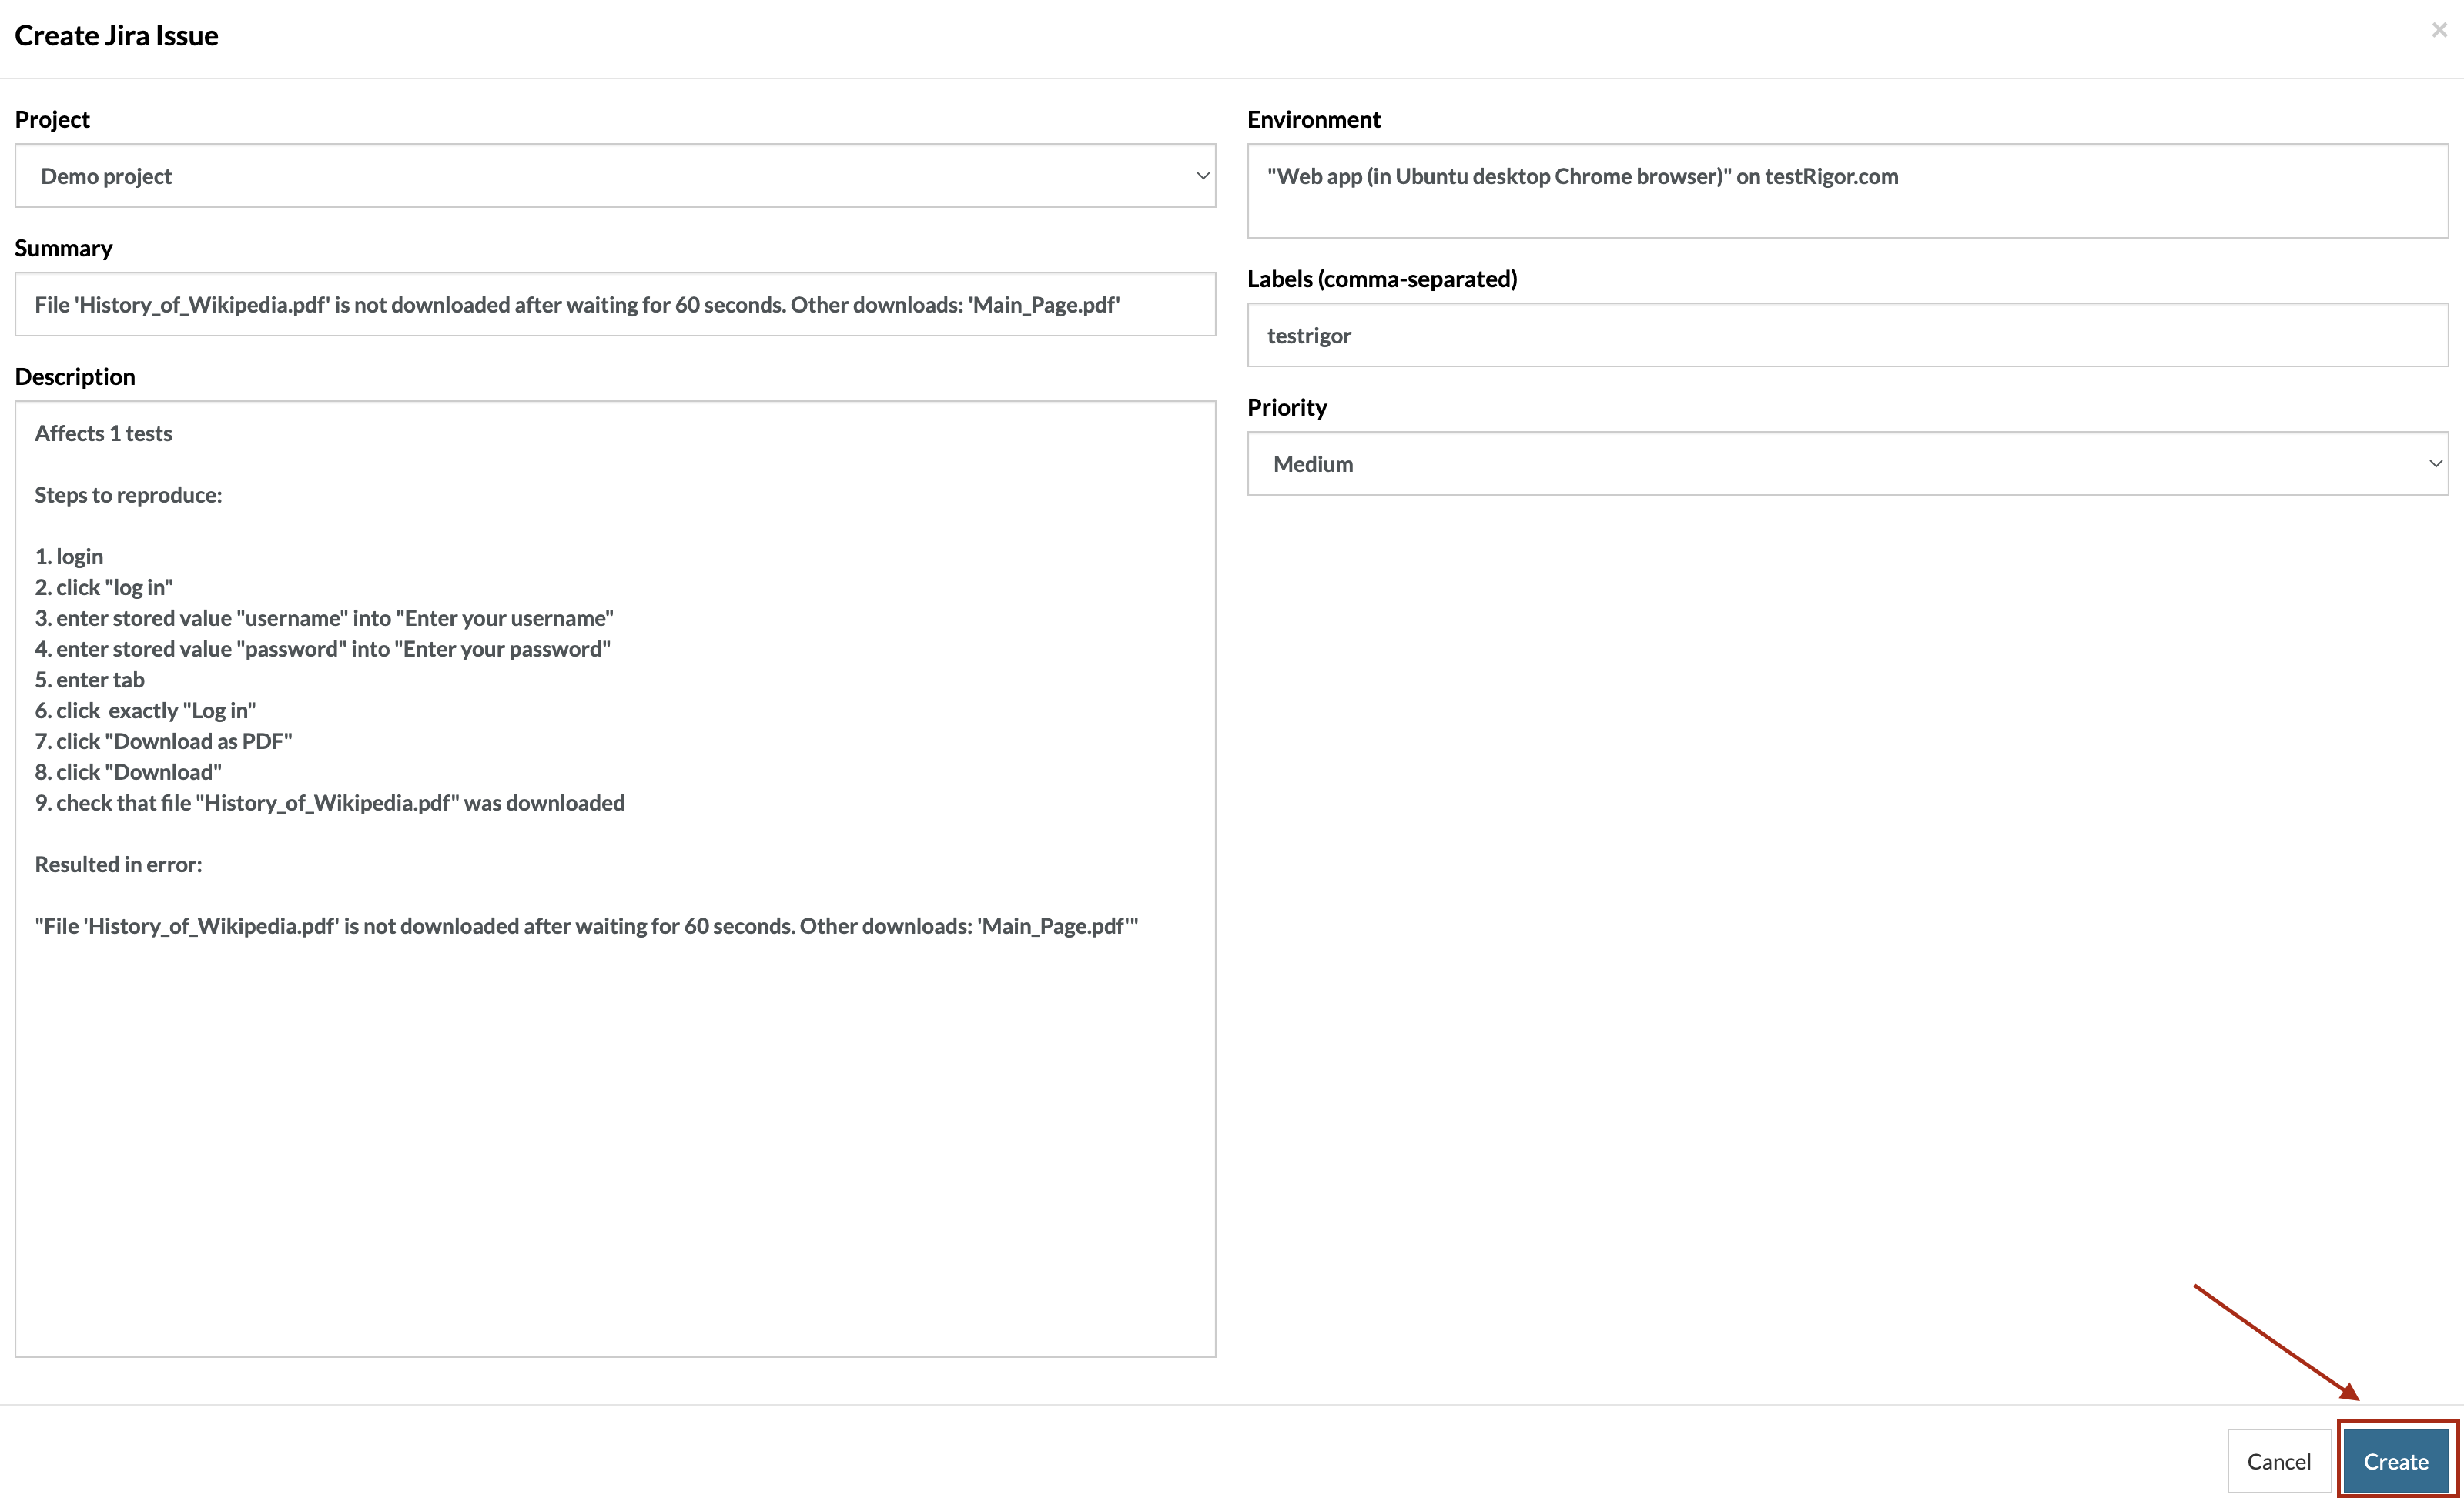
Once accepted, you’re all good to go! Now, upon clicking the “Create an issue in Jira” button, you’ll be presented with a screen to confirm any details you’d like to be included in the Jira ticket.
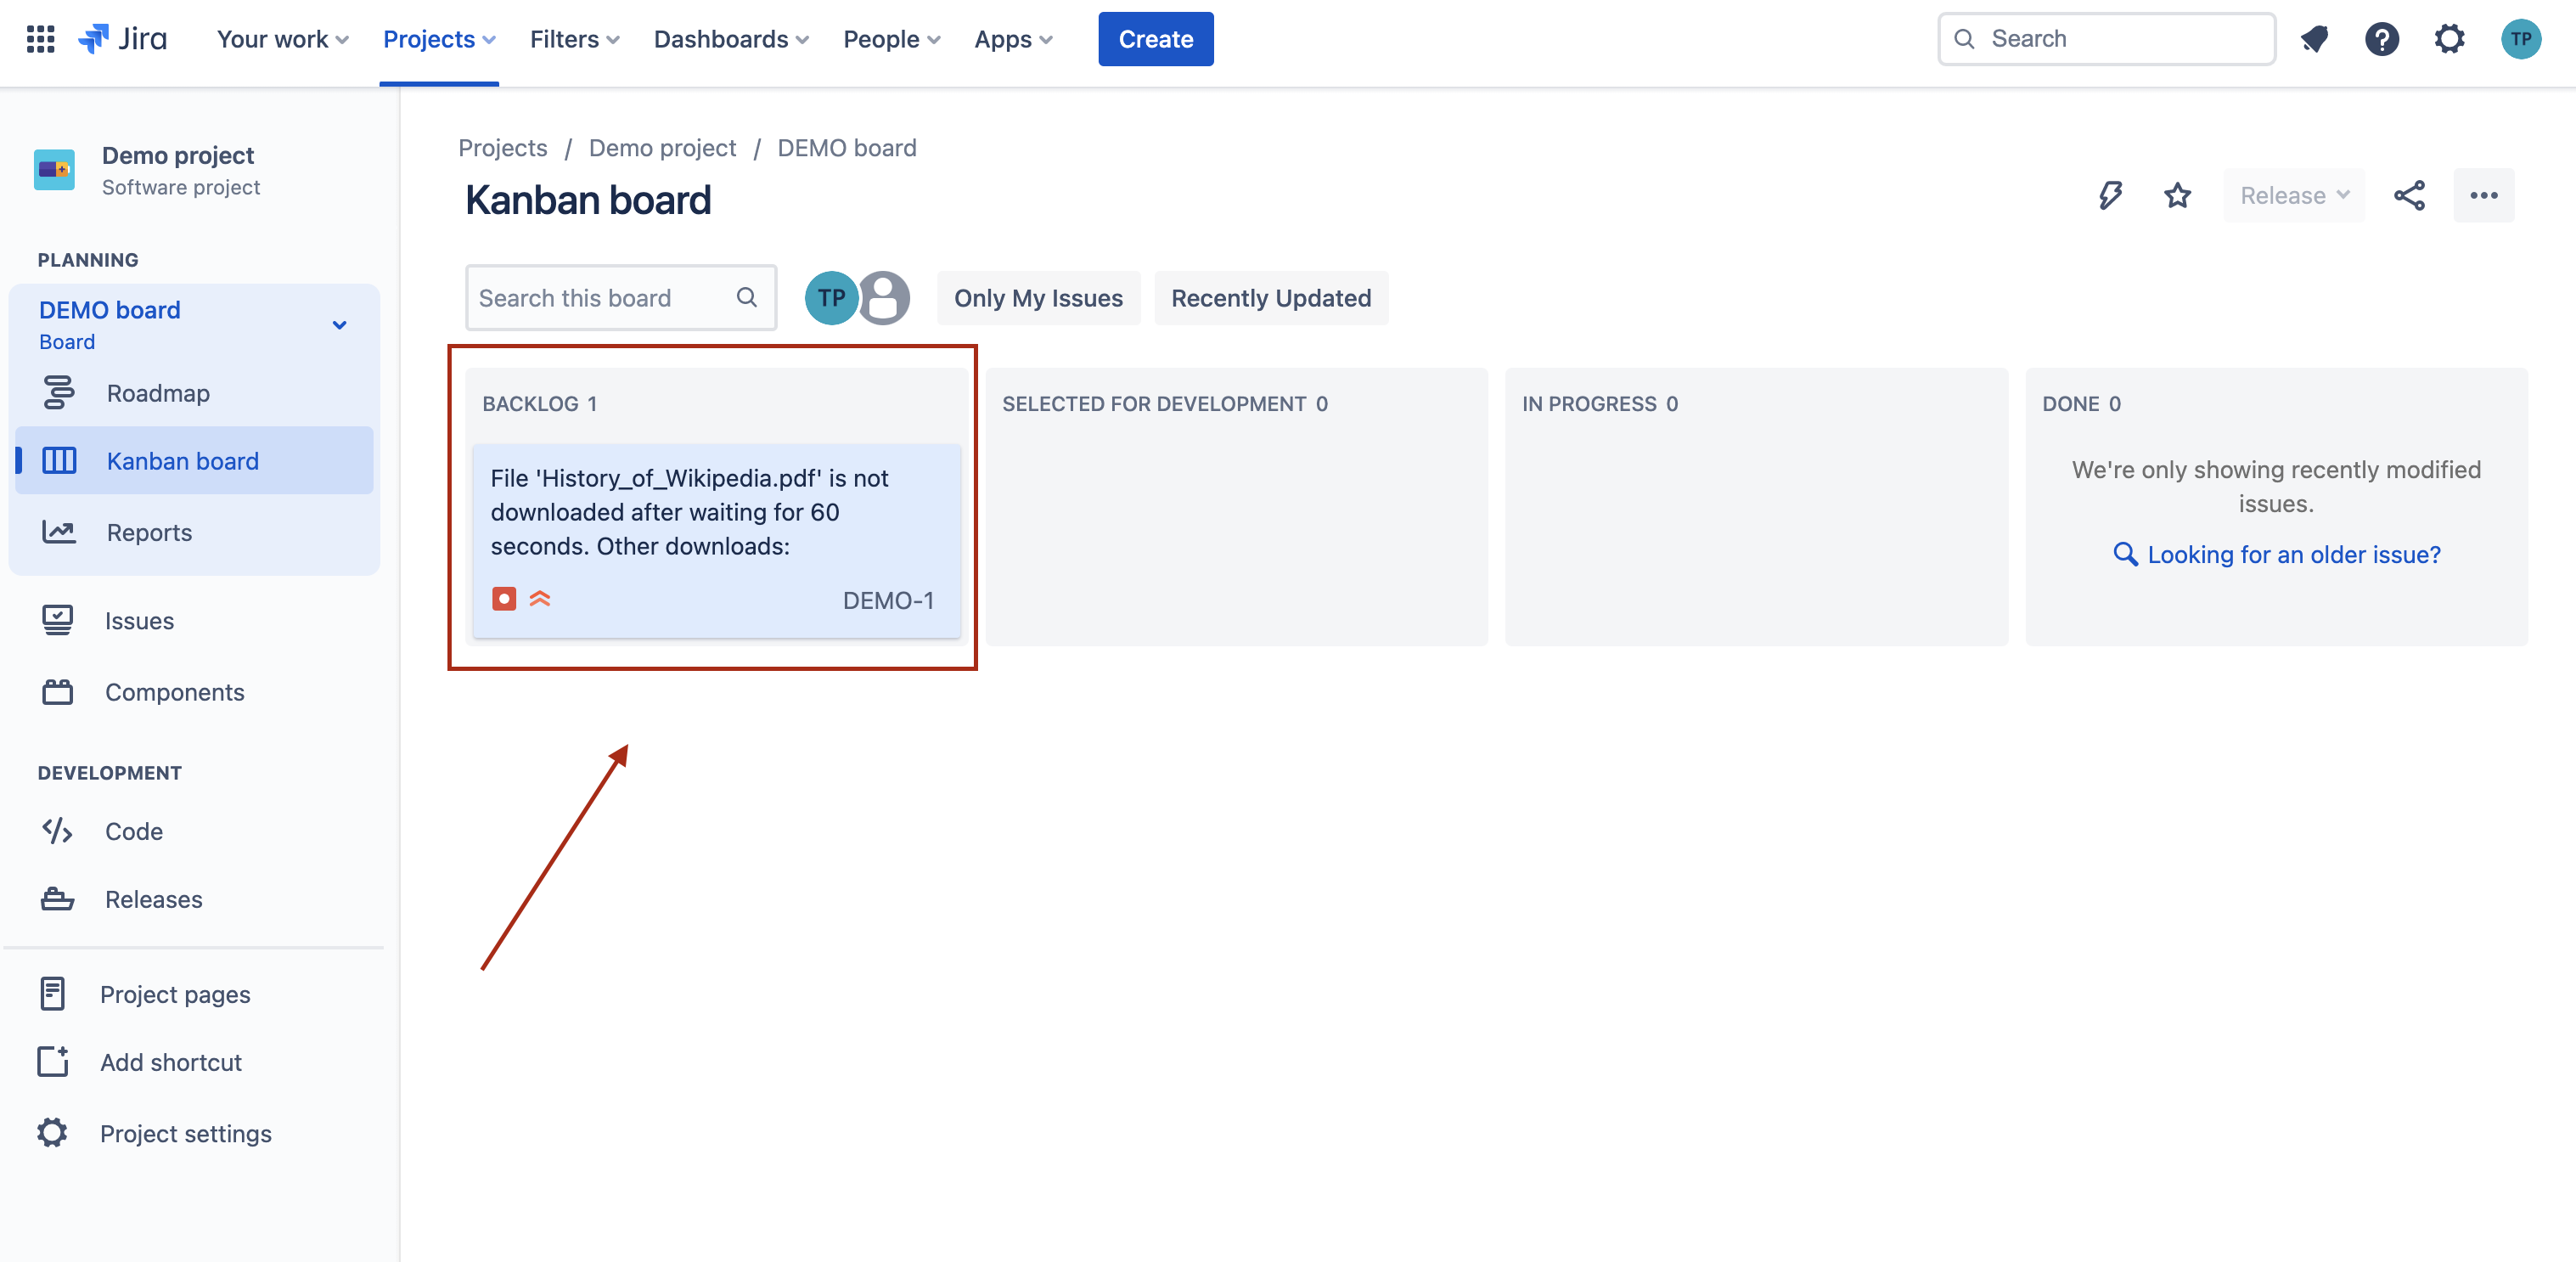
Once you click “Create”, a new bug ticket will be created and added to the backlog: