Okta Integration Guide
- Single Sign-On (OpenID Connect or SAML) initiated via Okta.
- Automatically creates user accounts in testRigor when Single-Sign-On is initiated by your Okta users.
In order to proceed with configuring login with SSO through Okta, you must:
- Have access to an Okta tenant.
- Be an Okta administrator to that tenant.
- Have a testRigor account, if you still don’t have one you can get yours now.
- Be an administrator in testRigor and owner of a project.
- Complete the steps below according to protocol to set everything up.
Today testRigor support the integration with Okta through OIDC and SAML. The following documents the configurations for setting up integration between testRigor and Okta separated by protocol (OIDC or SAML). Okta is the Identity Provider (IDP) and depending on the use case, the user will be redirected to Okta for authentication if no session has been established. To configure your provisioning settings for testRigor in Okta, there are two main steps to follow:
- Login to your organization’s Okta tenant and select the Classic UI.
- Navigate to Applications > Applications > Add Application, search for testRigor, and then click Add.
- Enter an Application Label in General Settings. This is the name under which the testRigor app will appear in your Okta dashboard.
- Click Done.
-
Then under the Sign On tab of the testRigor application, copy the Client ID and the Client Secret. You must copy the Okta Domain (or Issuer URL), which is the URL you are accessing your Okta tenant (https://example.okta.com). You will need this values to enter in the testRigor configuration form.
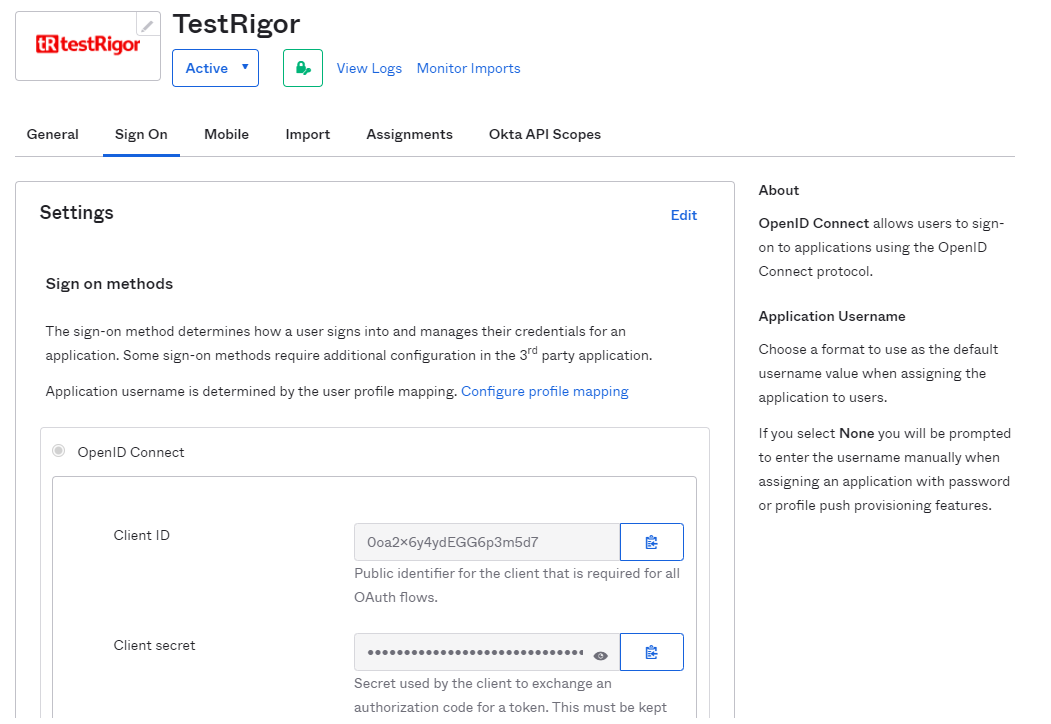 Note: These values allow testRigor to communicate with Okta. The Client ID is a public identifier for the client that is required for all OAuth/OIDC flows. The Client Secret is a private identifier which you should not share or broadly distribute.
 - Before leaving Okta, ensure you have given yourself and any other target users access to the testRigor application. You can do this by going to Applications > testRigor > Assignments tab and then assigning to either the target people or group.
-
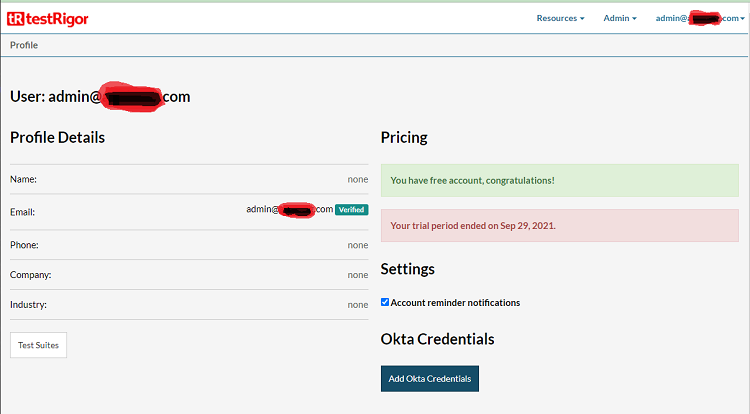
Login to your testRigor account and navigate to the profile’s page.

-
Click the “Add Okta Credentials” button in the profile’s page. If this button is not displayed, please contact us through our support channels on Slack or through our support page.
-
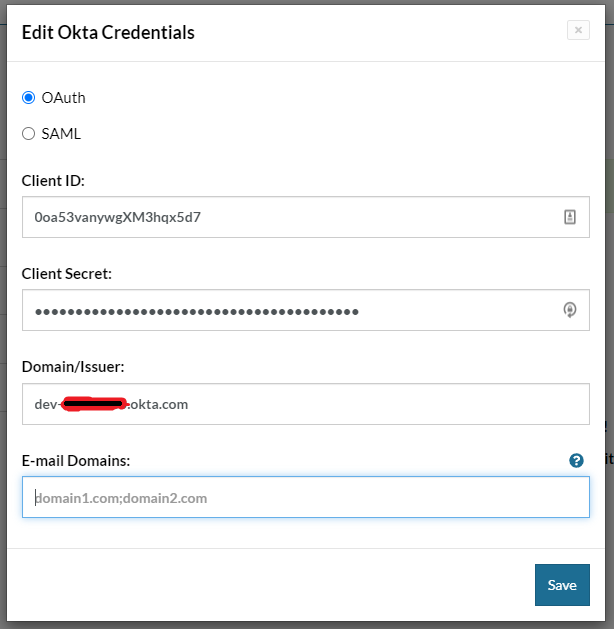
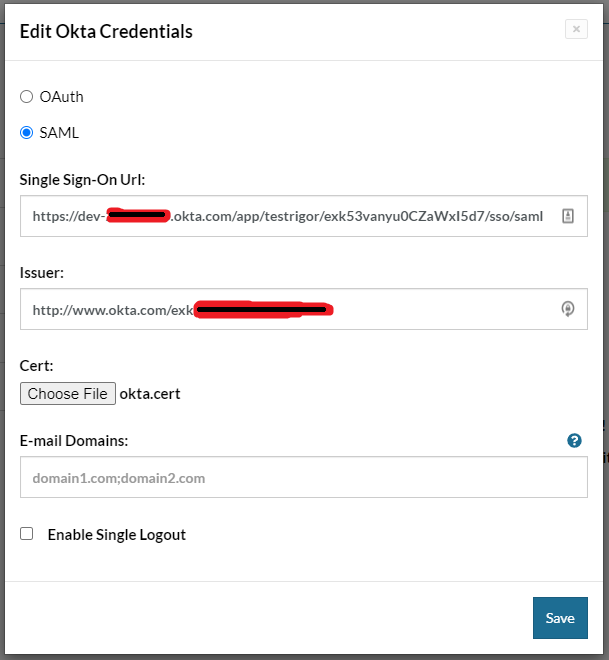
In the form which will appear, select OAuth, enter the Client ID, Client Secret and Domain/Issuer.
- Click save.
- If the values provided in step 2.3, above, are correct, you will see a success message telling you that the Okta credentials was saved successfully.
-
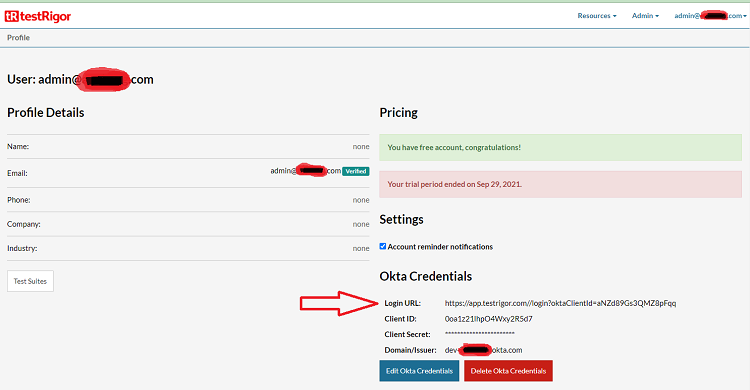
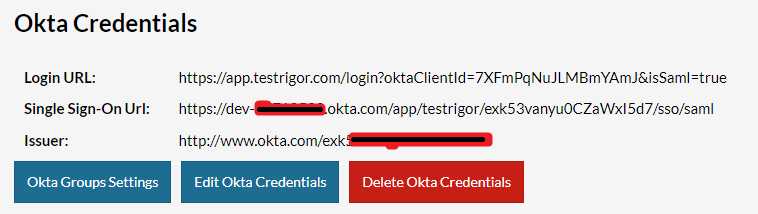
Now, in the profile’s page you will see the Okta credentials configured to your company. You can copy and share with your collaborators the Login URL. This is a way for users to be able to login using their okta account. Another way to log in will be presented in the session Configure Company Domain.
-
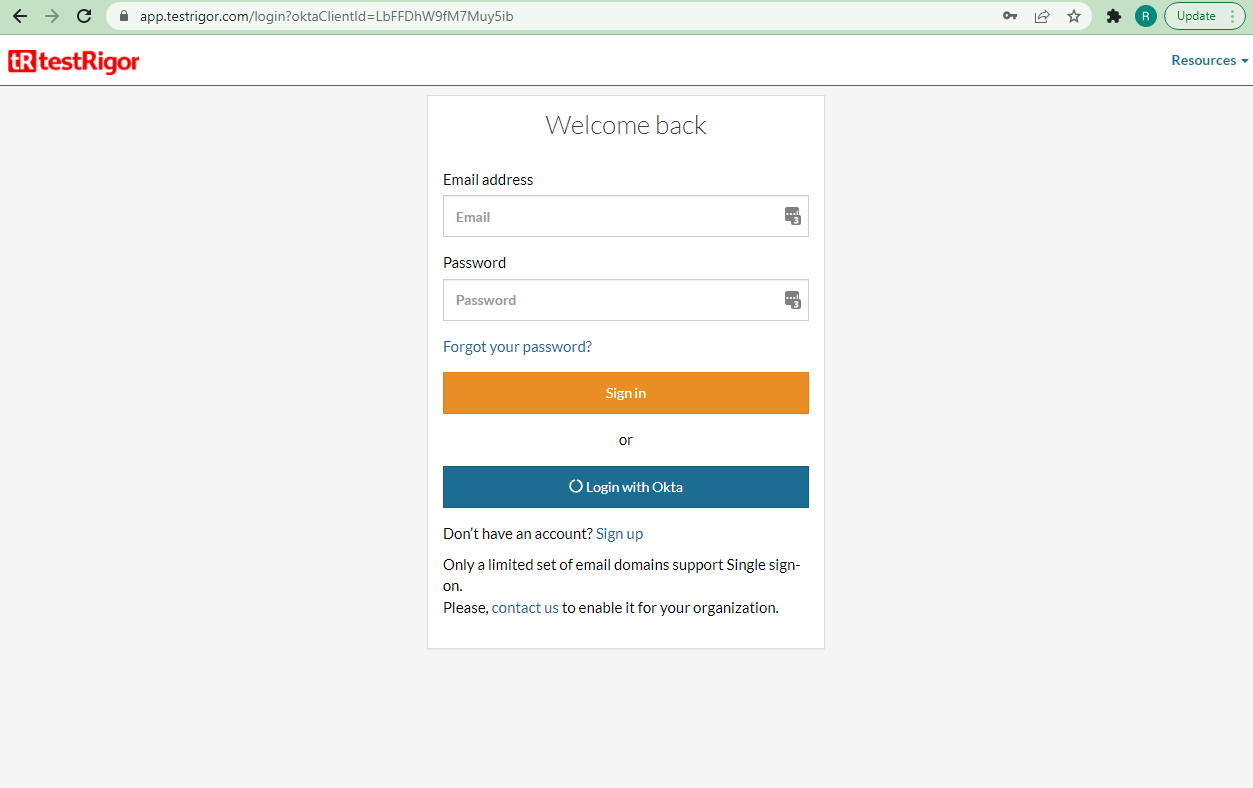
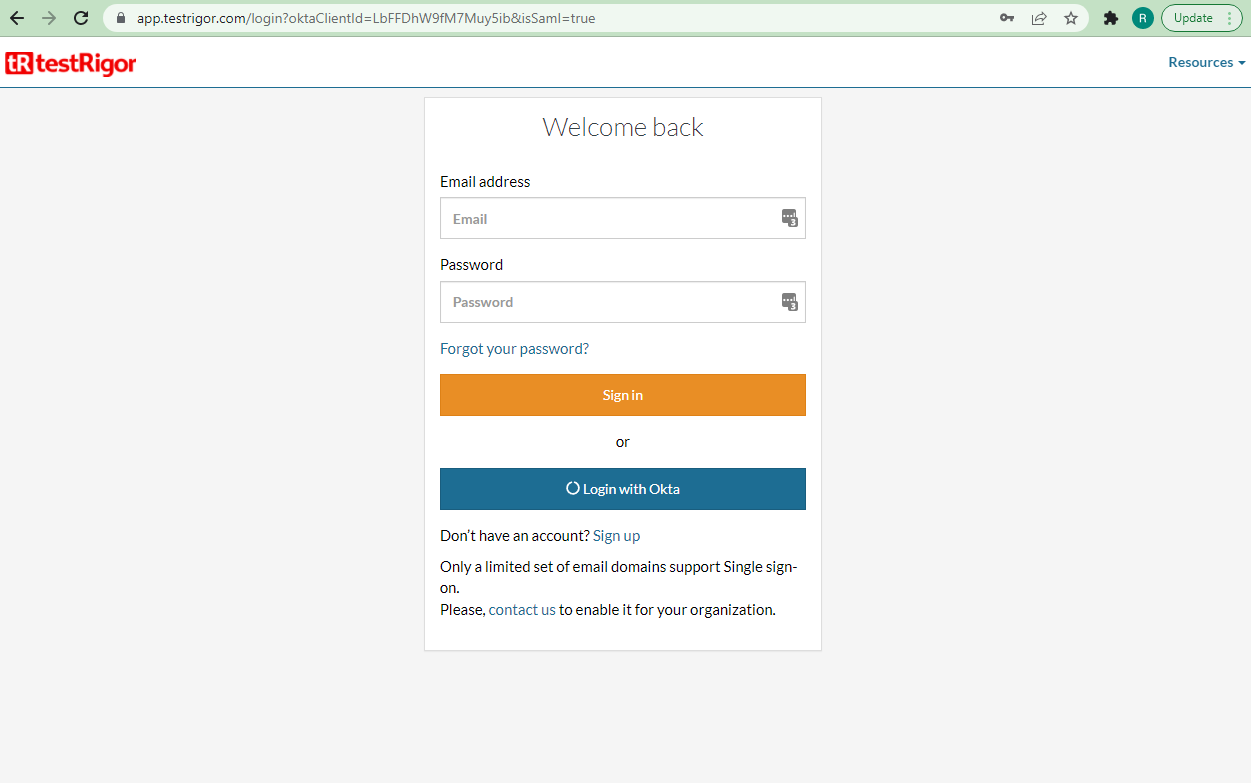
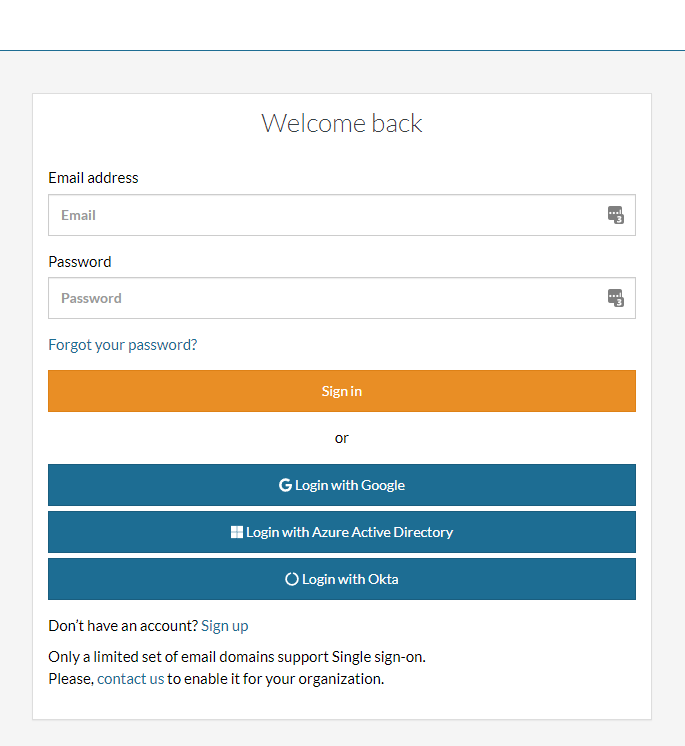
Accessing the login URL the users should see the “Login with Okta” button.
- Login to your organization’s Okta tenant and select the Classic UI.
- Navigate to Applications > Applications > Add Application, search for testRigor, and then click Add.
- Enter an Application Label in General Settings. This is the name under which the testRigor app will appear in your Okta dashboard.
- Click Done.
-
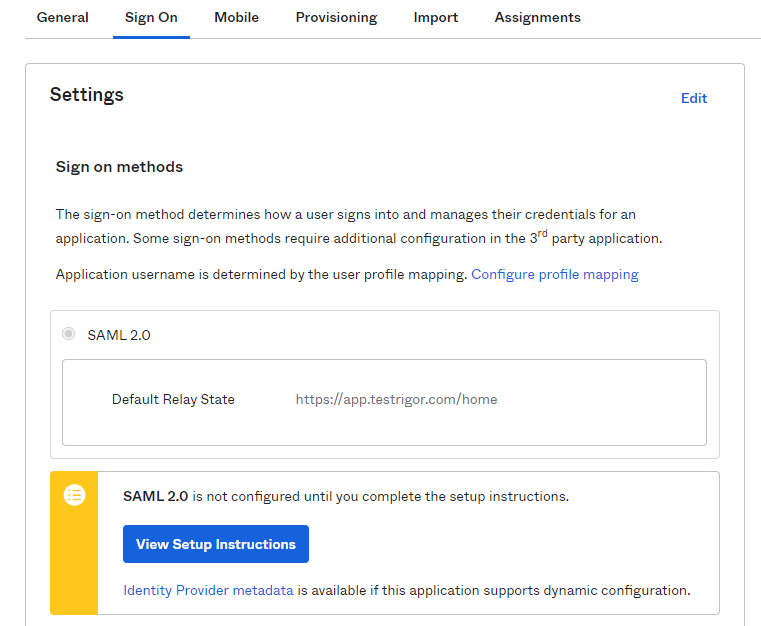
Then under the Sign On tab select “SAML 2.0”, click on View Setup Instructions. In the new page, you will need to copy the Issuer and create a file with the Cert value. These values are necessary to enter in the testRigor configuration form.
- Before leaving Okta, ensure you have given yourself and any other target users access to the testRigor application. You can do this by going to Applications > testRigor > Assignments tab and then assigning to either the target people or group.
-
Login to your testRigor account and navigate to the profile’s page.
-
Click the “Add Okta Credentials” button in the profile’s page. If this button is not displayed, please contact us through our support channels on Slack or through our support page.
-
In the form which will appear, select SAML and enter the values provided in Okta.
- Click save.
- If the values provided in step 2.3, above, are correct, you will see a success message telling you that the Okta credentials was saved successfully.
-
Now, in the profile’s page you will see the Okta credentials configured to your company. You can copy and share with your collaborators the Login URL. This is a way for users to be able to login using their okta account. Another way to log in will be presented in the session Configure Company Domain.
-
Accessing the login URL the users should see the “Login with Okta” button.
Regardless of the configured protocol, you can configure a domain in the testRigor application to login via Okta. To achieve this, just follow the steps below:
-
Login to your testRigor account and navigate to the profile’s page.
-
Click the “Edit Okta Credentials” button in the profile’s page.
-
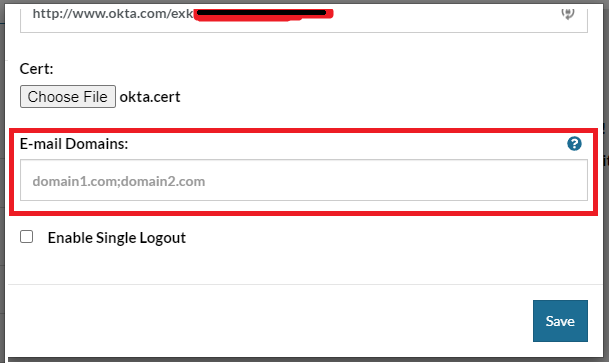
In the E-mail Domains field enter the domains of your company separated by “;” like “yourcompany.com;yourcompany2.com”.
-
After that, in the testRigor login’s page, you can click on “Login with Okta”.
-
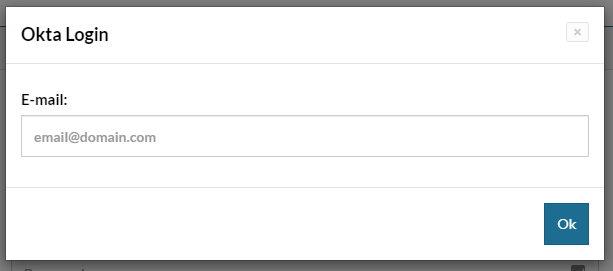
In the dialog that appears, enter an email with one of the domains configured in step 3 and you will be redirected to login through Okta.
To give people or groups access to the testRigor application, click the Assignments tab under the configured testRigor app, then click Assign. Leveraging Groups is recommended to assign access. If assigning access to People, ensure the User Name is a valid email.
Users assigned directly or via group will now be able to log into testRigor via SSO through the testRigor app on their Okta dashboards. Keep in mind, accounts won’t be created in testRigor until the initial SSO login.
TestRigor’s integration with Okta leverages Okta only for authentication. To assign permissions for testRigor, users must do so directly within testRigor.


