PrestaShop Testing
|
|
PrestaShop is a free, open-source e-commerce platform that enables businesses to create and manage their online stores. Launched in 2007, it has become one of the most popular e-commerce solutions globally due to its user-friendly interface, extensive customization options, and a wide range of features.
It is built on the PHP programming language and uses MySQL for database management. It offers a variety of built-in features, such as product and inventory management, payment gateway integrations, multi-language and multi-currency support, marketing tools, and order management. Additionally, its modular architecture allows users to extend its functionality with plugins and themes available from the PrestaShop marketplace.
In this framework, you have the capability to customize the following:
A default set of themes and modules are made available to you as a part of the original project. However, you can apply further customizations to make sure that your website grows and behaves the way you want it to. Prestashop also allows you to host your website easily.
According to the testing pyramid, you can test your PrestaShop application through
Unit Testing
As a project grows, it becomes difficult to keep track of every single method and class written. Through unit testing, you can ensure that your methods and classes, that is, various units of code, are working as expected.
PrestaShop supports the PHPUnit framework. It is essential to have a clean folder structure. In Prestashop, the unit test case should be located in the tests/Unit folder and have the same path as the tested class. For example, if the class to be tested is in src/Core/Foo/Baz, then the unit test should be in the tests/Unit/Core/Foo/Baz folder.
<?php
  namespace Tests\Unit\Foo;

  use PHPUnit\Framework\TestCase;

  class BarTest extends TestCase
  {
    /* ... */
  }
<?php
use PHPUnit\Framework\TestCase;

class EqualsTest extends TestCase
{
  public function testFailure()
  {
    $this->assertEquals(1, 0);
  }

  public function testFailure2()
  {
    $this->assertEquals('bar', 'baz');
  }
}
?>
<?php
use PHPUnit\Framework\TestCase;
class DependTest extends TestCase
{
  public function testEmpty()
  {
    $value = [];
    $this->assertEmpty($value);
    return $value;
  }

  /**
   * @depends testEmpty
  */

  public function testPush(array $value)
  {
    array_push($value, 'first');
    $this->assertEquals('first', $value[count($value) - 1]);
    $this->assertNotEmpty($value);
    return $value;
  }
}
?>
Integration Testing
The next step after testing different units in your code in isolation is to see if they also work together well. This is where integration testing comes into the picture. You can plan your test cases such that the integrations at crucial junctions are tested.
For example, if your e-commerce website is to call a third-party payment gateway, then you can have positive and negative integration tests revolving around this scenario. Other areas that you can target for integration testing could be places where there are integrations with databases, file management systems, and any third-party applications.
<?php
namespace Tests\Integration;
use Tests\TestCase;

class MathTest extends TestCase
{
  public function setUp()
  {
    parent::setUp();
    $this->math = $this->app->make('App\Math');
  }

  public function test_getArea_WhenCalledWithLength2_Return4()
  {
    $response = $this->math->getArea(2);
    $this->assertTrue(is_int($response));
    $this->assertEquals(4, $response);
  }
}
<?php
 function testSavingUser()
 {
  $user = new User();
  $user->setName(Erica);
  $user->setSurname(Jones);
  $user->save();
  $this->assertEquals(Erica Jones, $user->getFullName());
  $this->tester->seeInDatabase('users', ['name' => Erica, 'surname' => Jones]);
 }
End-to-End Testing
End-to-end or system testing verifies the behavior and performance of an application from start to finish, covering the entire system flow or business process. This type of testing is also known as “black-box testing,” as it focuses on the functionality of the application without requiring knowledge of the internal workings of the system.
The goal of end-to-end testing is to simulate real-world scenarios and identify any issues or defects that may arise when actual users use the application. It typically involves testing the application as a whole, including its interfaces with external systems, databases, and other dependencies.
You can do that using the following ways.
- UI testing with supported tools
- Selenium-based tools
- testRigor
UI testing with supported tools: Playwright, Mocha, Chai, Faker
Prestashop offers support to automate UI scenarios with the help of the following tools. It uses
- Playwright as the automation tool
- Mocha as the testing framework
- Chai as the assertion library
- Faker as the mock data generator
const playwright = require('playwright')
const chai = require('chai')
const expect = chai.expect
const BASE_URL = 'http://todomvc.com/examples/react/#/'

// playwright variables
let page, browser, context

describe('TO DO APP TESTS - PLAYWRIGHT', () => {
  beforeEach(async () => {
    browser = await playwright['chromium'].launch({ headless: false })
    context = await browser.newContext()
    page = await context.newPage(BASE_URL)
  })

  afterEach(async function() {
    await page.screenshot({ path: `${this.currentTest.title.replace(/\s+/g, '_')}.png` })
    await browser.close()
  })

  it('List is loaded empty', async() => {
    const sel = 'ul.todo-list li'
    const list = await page.$$(sel)
    expect(list.length).to.equal(0)
  })

  it('Adds a new todo in empty list', async() => {
    await page.waitForSelector('input')
    const element = await page.$('input')
    await element.type('Practice microsoft playwright')
    await element.press('Enter')

    // check list of ToDo
    const sel = 'ul.todo-list li'
    await page.waitForSelector(sel)
    const list = await page.$$(sel)
    expect(list.length).to.equal(1)
    expect(await page.$eval(sel, node => node.innerText)).to.be.equal('Practice microsoft playwright')
  })
})
testRigor for end-to-end testing
testRigor is one of the easiest ways to cover your entire application with robust end-to-end tests. Why? Because it’s a no-code AI-driven tool and solves a lot of the tricky aspects associated with writing and maintaining complex end-to-end UI tests.
Initial setup takes only a few minutes, and even less technical people can start writing tests, add assertions, and easily modify existing tests when needed. This results in being able to write tests up to 15x faster than with Selenium-based tools, and spending up to 95% less time on test maintenance – thanks to testRigor being packed with self-healing features.
Moreover, you can do cross-platform and cross-browser testing without major configuration steps. testRigor also allows 2FA, email testing, and SMS testing – included at no extra cost.
Let us consider the example from the UI testing using the supported tools section above. There is an application in React for creating a to-do list. The code has 2 test cases within the describe() block. When considering the test case in testRigor, things become much easier. Firstly, you need to create a test suite. During this suite creation, you can give the URL so that every time a new test case from this suite runs, a fresh instance of the application is opened in the browser. You can also specify the browser of your choice from the suggested options. This covers your beforeEach() block from the above code. As you can tell, it is much simpler than creation explicit conditions.
check that page does not contain checkboxes below "what needs to be done?"
enter "Buy groceries for Friday dinner" into "What needs to be done?"
enter enter into "testrigor.com test"
check that page contains "Buy groceries for Friday dinner" below "What needs to be done?"
In the afterEach() block, testRigor automatically takes screenshots of every step. Each test case run captures detailed screenshots along with a video recording of the whole test execution.
How to do End-to-end Testing with testRigor
Let us take the example of a PrestaShop e-commerce website. We will create end-to-end test cases in testRigor using plain English test steps.
Step 1: Log in to your testRigor app with your credentials.
Step 2: Set up the test suite for the website testing by providing the information below:
- Test Suite Name: Provide a relevant and self-explanatory name.
- Type of testing: Select from the following options: Desktop Web Testing, Mobile Web Testing, Native and Hybrid Mobile, based on your test requirements.
- URL to run test on: Provide the application URL that you want to test.
- Testing credentials for your web/mobile app to test functionality which requires user to login: You can provide the app’s user login credentials here and need not write them separately in the test steps then. The login functionality will be taken care of automatically using the keyword
login. - OS and Browser: Choose the OS Browser combination on which you want to run the test cases.
- Number of test cases to generate using AI: If you wish, you can choose to generate test cases based on the App Description text, which works on generative AI.

Step 3: Click Create Test Suite.
On the next screen, you can let AI generate the test case based on the App Description you provided during the Test Suite creation. However, for now, select do not generate any test, since we will write the test steps ourselves.
Step 4: To create a new custom test case yourself, click Add Test Case.
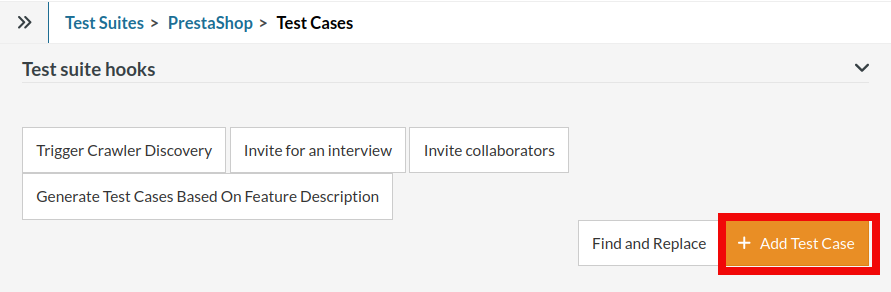
Step 5: Provide the test case Description and start adding the test steps.
For the PrestaShop application under test, we will perform the test steps below:
- Search for a product (e.g., t-shirt or clothing item)
- Add it to the cart
- Verify that the product is present in the cart
Test Case: Search and Add to Cart
Step 1: We will add test steps on the test case editor screen one by one.
testRigor automatically navigates to the PrestaShop website URL you provided during the Test Suite creation. There is no need to use any separate function for it. Here is the PrestaShop homepage, which we intend to test.
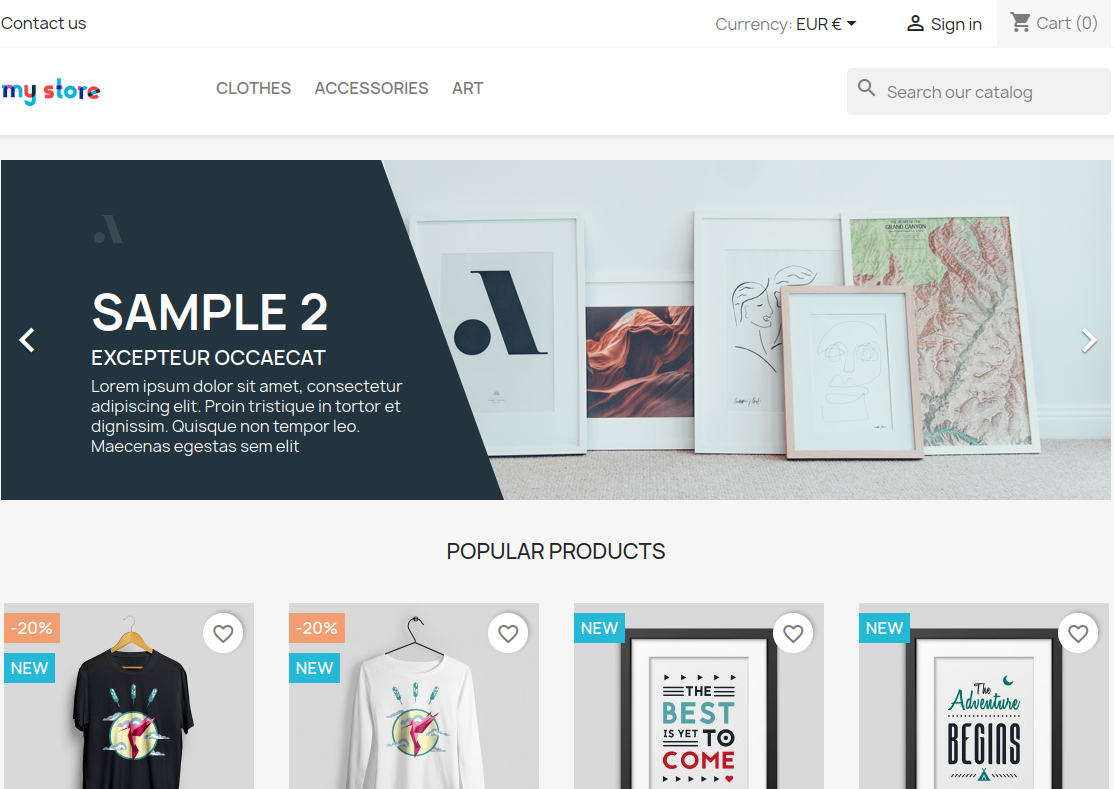
First, we want to search for a product. Unlike traditional testing tools, you can use simple English commands that automatically handle the UI interactions. You don’t need to use any CSS/XPath identifiers.
search for "t-shirt"
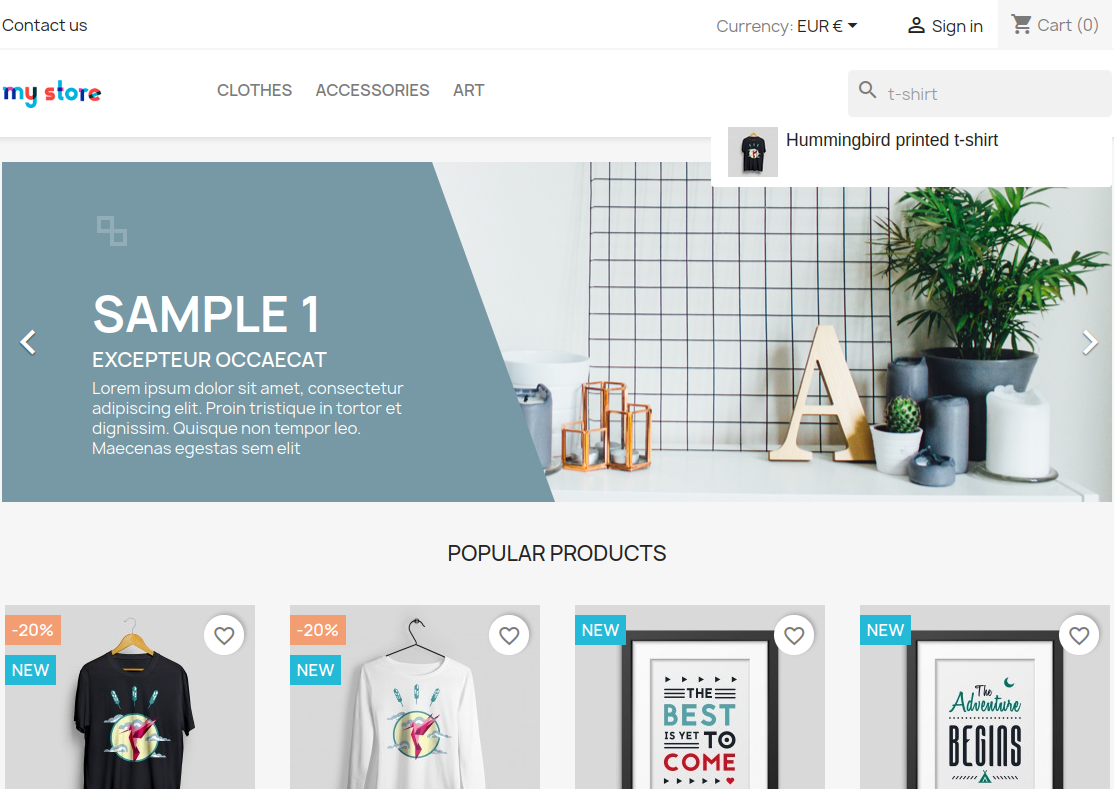
Search lists all products with the “t-shirt” keyword on the webpage.
Step 2: The t-shirt we are searching for needs the screen to be scrolled; for that testRigor provides a command. Scroll down until the product is present on the screen:
scroll down until page contains "Hummingbird printed t-shirt"

When the product is found on the screen, testRigor stops scrolling.
Step 3: Click on the product name to view the details:
click "Hummingbird printed t-shirt"
After the click, the t-shirt product details are displayed on the screen as below, with the default Quantity as 1.
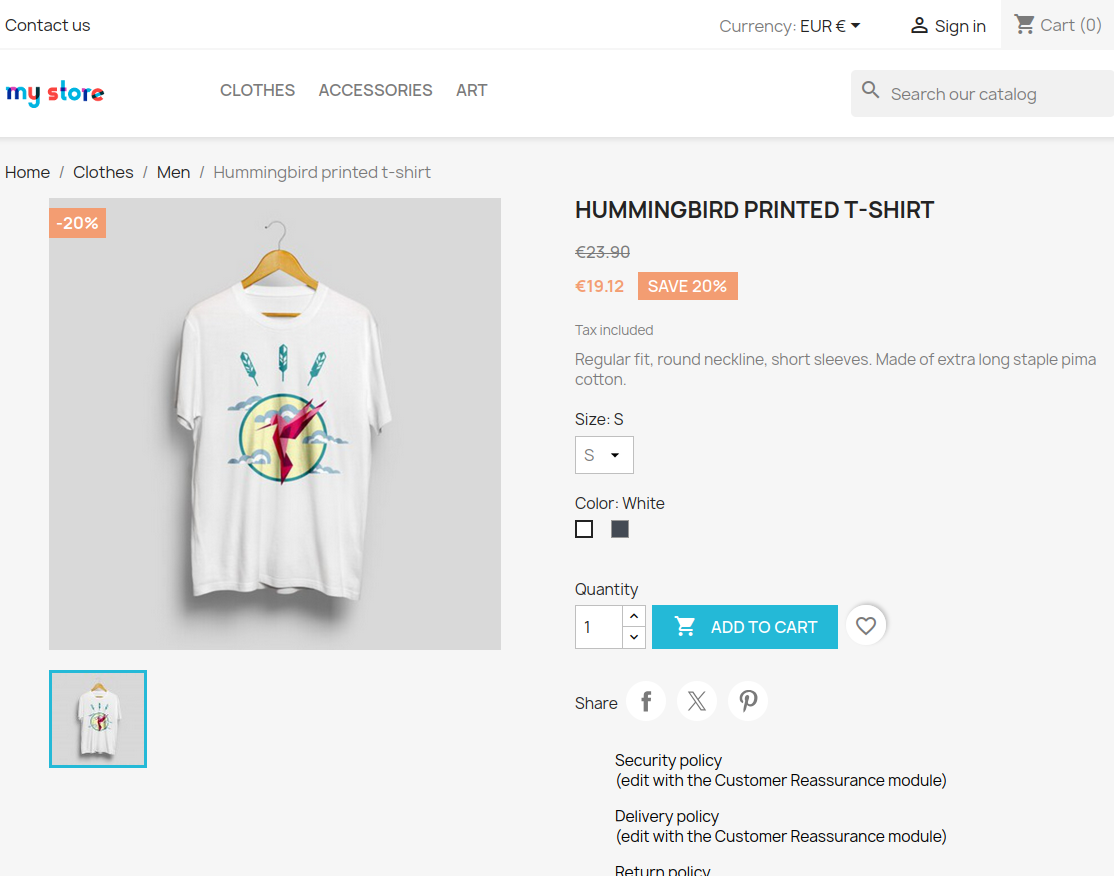
Step 4: Let’s say, we want to change the Quantity to 2, so here we use the testRigor command to select from a dropdown or modify the quantity field.
enter "2" into "Quantity"
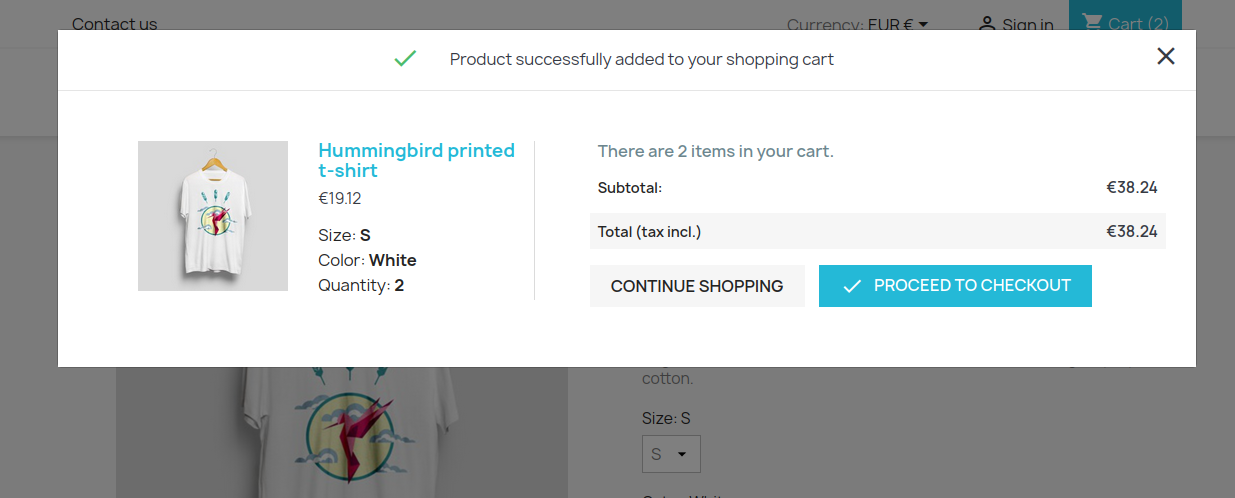
click "Add to cart"
The t-shirt is successfully added to the cart, and a confirmation message is displayed on the webpage. PrestaShop shows a message “Product successfully added to your shopping cart”.
Step 5: To assert that the message is successfully displayed, use a simple assertion command as below:
check that page contains "Product successfully added to your shopping cart"
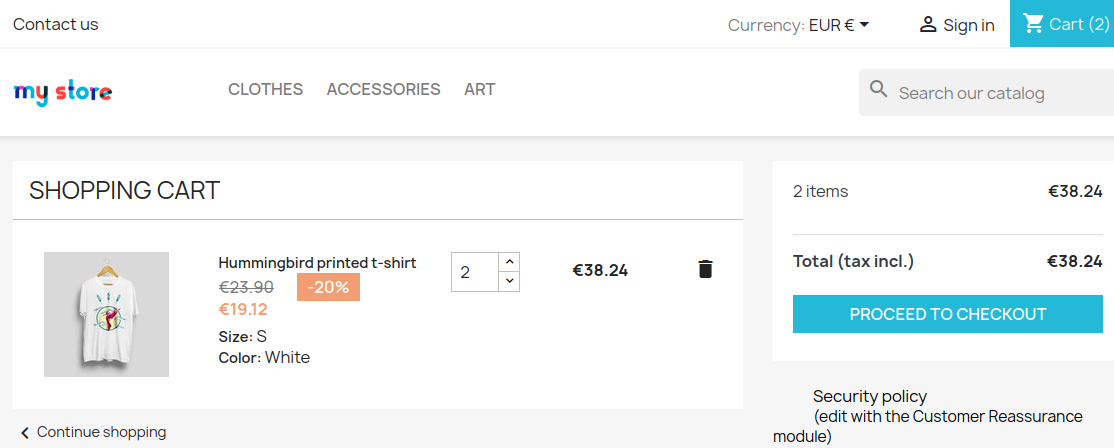
Step 6: After this check, we will view the contents of the cart by clicking the “Proceed to checkout” button as below:
click "Proceed to checkout"
Step 7: Now we will check that the product is present in the cart, under the shopping cart section using the below assertion. With testRigor, it is really easy to specify the location of an element on the screen.
check that page contains "Hummingbird printed t-shirt" roughly below "Shopping Cart"
Complete Test Case
Here is how the complete test case will look in the testRigor app for testing the PrestaShop e-commerce website. The test steps are simple in plain English, enabling everyone in your team to write and execute them.

Click Add and Run.
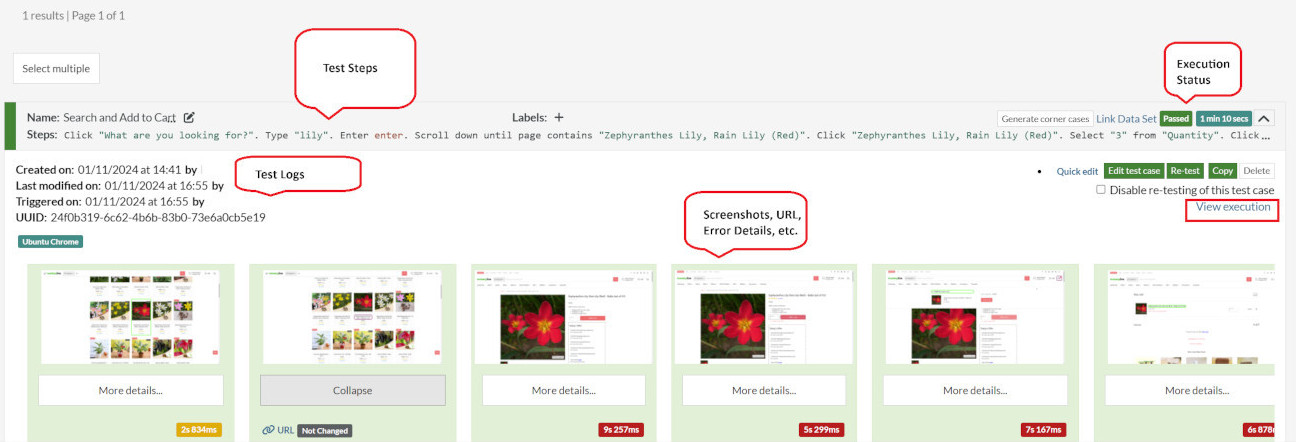
Execution Results
Once the PrestaShop test is executed, you can view the execution details, such as execution status, time spent in execution, screenshots, error messages, logs, video recordings of the test execution, etc. In case of any failure, there are logs and error text that are available easily in a few clicks.
You can also download the complete execution with steps and screenshots in PDF or Word format through the View Execution option.
testRigor’s Capabilities
Apart from the simplistic test case design and execution, there are some advanced features that help you test your application using simple English commands.
- Reusable Rules (Subroutines): You can easily create functions for the test steps that you use repeatedly. You can use the Reusable Rules to create such functions and call them in test cases by simply writing their names. See the example of Reusable Rules.
- Global Variables and Data Sets: You can import data from external files or create your own global variables and data sets in testRigor to use them in data-driven testing.
- 2FA, QR Code, and Captcha Resolution: testRigor easily manages the 2FA, QR Code, and Captcha resolution through its simple English commands.
- Email, Phone Call, and SMS Testing: Use simple English commands to test the email, phone calls, and SMS. These commands are useful for validating 2FA scenarios, with OTPs and authentication codes being sent to email, phone calls, or via phone text.
- File Upload/ Download Testing: Execute the test steps involving file download or file upload without the requirement of any third-party software. You can also validate the contents of the files using testRigor’s simple English commands.
- Database Testing: Execute database queries and validate the results fetched.
testRigor enables you to test PrestaShop e-commerce websites, mobile apps (hybrid, native), APIs, and desktop applications with minimum effort and maintenance.
Additional Resources
- Access testRigor documentation to know about more useful capabilities
- Top testRigor’s features
- How to perform end-to-end testing
Conclusion
With e-commerce website building, it becomes imperative to have reliable, well-tested building blocks. If the framework offers various modules and themes, they should be user-friendly. For instance, Prestashop provides many options for building your website, including the ability to use provided blocks or customize them to suit your needs. Once your website is operational, the good testing strategies described in this article can help you build a strong testing strategy.
| Achieve More Than 90% Test Automation | |
| Step by Step Walkthroughs and Help | |
| 14 Day Free Trial, Cancel Anytime |


