Release Notes: Dataset filters, Oracle and proxy DB support
|
|
Dataset Page with Test Case Count and Direct Navigation
We have upgraded the Dataset Page by introducing a dynamic count that displays the number of test cases linked to each dataset. These counts are now interactive, functioning as clickable hyperlinks that take users directly to the Test Cases Page. The links automatically apply relevant filters via URL parameters, enabling efficient access to associated test cases.
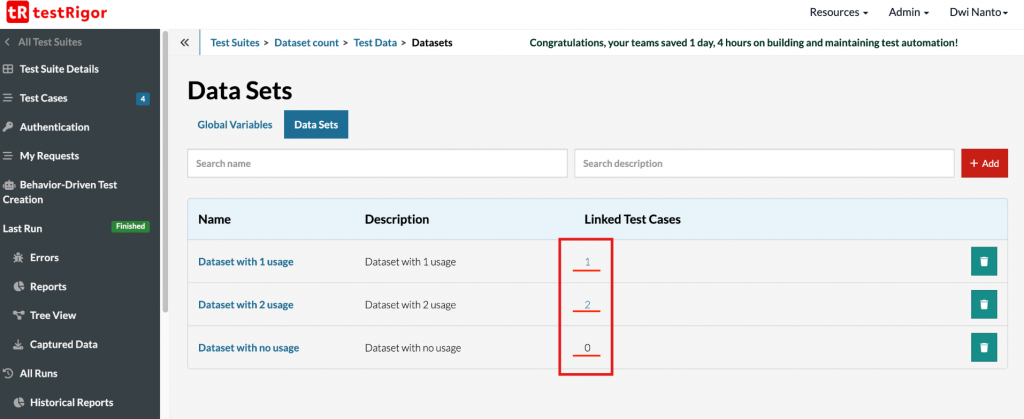
Caption: Number of test cases linked to each dataset.
Dataset-Based Filtering with Inheritance and Shared Suite Support
We have introduced a powerful new filter on the Test Cases Page that allows users to view test cases by their associated datasets. This feature provides a user-friendly dropdown menu to select dataset values, enabling quick and precise filtering.
Key capabilities include support for inheritance and shared suite test cases and datasets, ensuring comprehensive visibility across related test suites. This enhancement streamlines test case management and improves navigation efficiency, helping users quickly locate relevant test cases based on dataset associations.
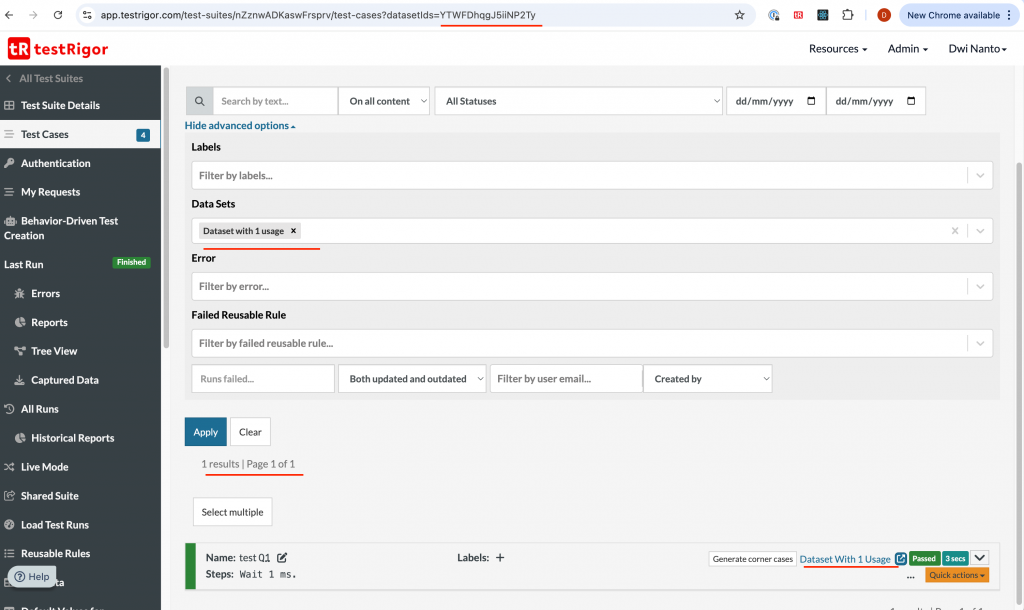
Caption: Dataset filter usage.
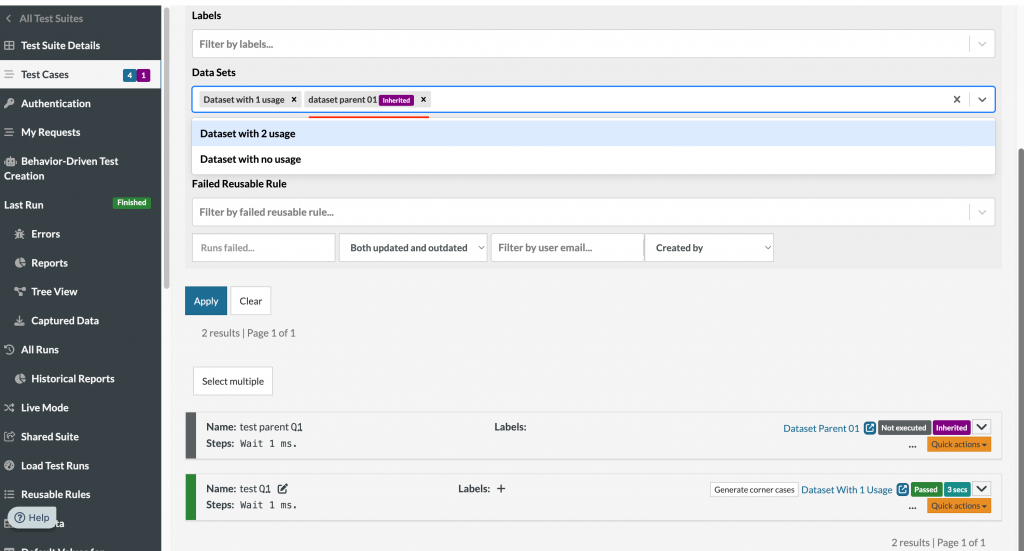
Caption: Dataset filter with inheritance.
Oracle Database Connection Support & Generic JDBC Integration
Now, we introduce a long waited feature: testRigor now offers enhanced database integration capabilities, allowing you to seamlessly connect your test suites to Oracle databases via our secure database proxy.
testRigor’s database proxy now supports generic JDBC connections. This means you can easily integrate with a wide range of relational databases, leveraging the flexibility of JDBC for comprehensive test coverage across diverse environments (Note: Oracle connection has to be performed from the database proxy, as mentioned before).
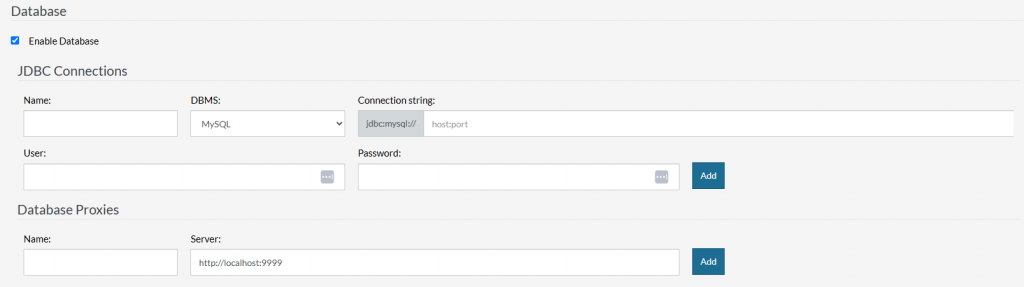
Caption: Database Proxy connection.
Here’s a quick example to know how to Set up an Environment to Use Our Database Proxy: :
-
Download our database proxy JAR FILE.
-
Download the corresponding database JDBC driver.
-
Download the last version of Java and install it.
-
For each supported provider, there are different environment variables that need to be set in order to configure their respective connections:
Microsoft SQL Server (“mssql”):
DATABASE_PROVIDER="mssql"
DATABASE_MSSQL_USER=<string>
DATABASE_MSSQL_PASSWORD=<string>
DATABASE_MSSQL_DATABASE_NAME=<string>
DATABASE_MSSQL_SERVER_NAME=<string>
DATABASE_MSSQL_PORT_NUMBER=<number>
DATABASE_MSSQL_INTEGRATED_SECURITY=<boolean>
DATABASE_MSSQL_AUTHENTICATION_SCHEME=<string>
DATABASE_MSSQL_DOMAIN=<string>
DATABASE_MSSQL_SERVER_SPN=<string>
MySQL (“mysql”):
DATABASE_PROVIDER="mysql"
DATABASE_MYSQL_USER=<string>
DATABASE_MYSQL_PASSWORD=<string>
DATABASE_MYSQL_DATABASE_NAME=<string>
DATABASE_MYSQL_SSL=<boolean>
DATABASE_MYSQL_SERVER_NAME=<string>
DATABASE_MYSQL_PORT_NUMBER=<number>
PostgreSQL (“postgresql”):
DATABASE_PROVIDER="postgresql"
DATABASE_POSTGRESQL_USER=<string>
DATABASE_POSTGRESQL_PASSWORD=<string>
DATABASE_POSTGRESQL_DATABASE_NAME=<string>
DATABASE_POSTGRESQL_SSL=<boolean>
DATABASE_POSTGRESQL_SERVER_NAME=<string>
DATABASE_POSTGRESQL_PORT_NUMBER=<number>
Oracle (“oracle”)
DATABASE_PROVIDER="oracle"
DATABASE_ORACLE_USER=<string>
DATABASE_ORACLE_PASSWORD=<string>

# Either define this one (if this URL is defined, the other following variables are ignored)
DATABASE_ORACLE_URL="jdbc:oracle:thin:@//<hostname>:<port>/<service_name>"

# Or the following ones separately
DATABASE_ORACLE_SERVER_NAME=<string>
DATABASE_ORACLE_PORT_NUMBER=<number>
DATABASE_ORACLE_SERVICE_NAME=<string>
Generic (“generic”)
DATABASE_PROVIDER="generic"
DATABASE_GENERIC_USER=<string>
DATABASE_GENERIC_PASSWORD=<string>
DATABASE_GENERIC_URL=<string>
-
Recommended directory structure is:
proxy-runtime/
|- database-proxy.jar
|- launch-proxy.sh
\- lib/
   |- corresponding-dbms-driver.jar
-
If using the directory structure above, you may execute the proxy with:
java -cp "lib/*:database-proxy.jar" -Dloader.main=com.testrigor.database.proxy.DatabaseProxyApplication org.springframework.boot.loader.PropertiesLauncher
-
The application should be running without errors.
-
Go to testRigor web and add a proxy in the database integration section, inside the test suite settings.
-
There, put the URL with the private IP of the computer, for example http://192.168.68.55:9999 (the port is 9999 by default)
And that’s it in order to enable your database proxy connection!


