Spark Testing
|
|
Spark, an open-source framework, offers developers a powerful tool for creating web applications in Kotlin and Java 8 with minimal boilerplate code. Unlike other Java frameworks like Spring and Play, Spark provides a highly expressive and less verbose alternative, heavily influenced by the Sinatra framework.
By forgoing traditional model-view-controller patterns, Spark allows rapid web development. It excels in creating microservices, allowing developers to produce a REST API ready to serve JSON in just a few lines of code.
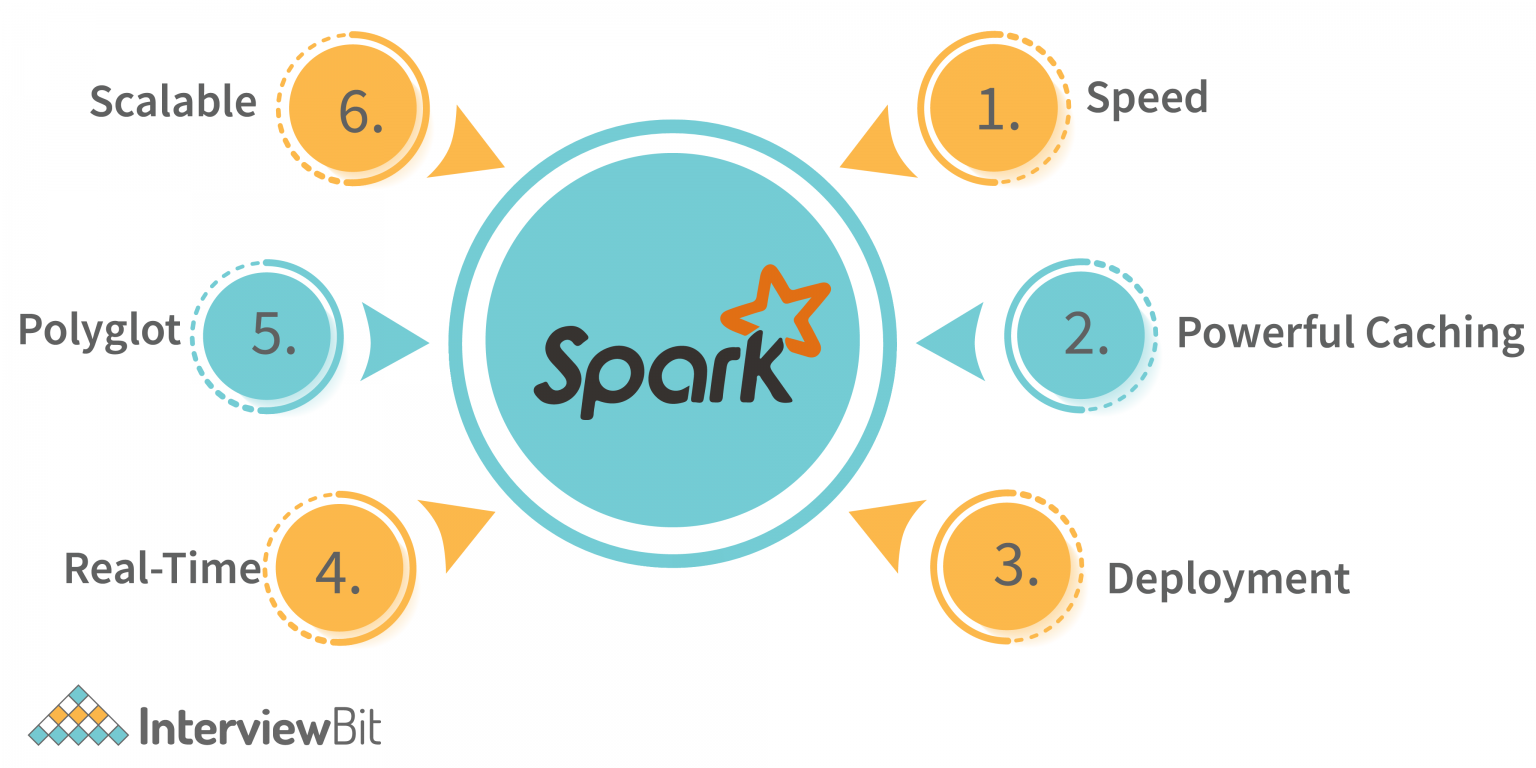
Spark is designed to handle various data processing tasks, including batch processing, real-time workloads, iterative algorithms (e.g., machine learning), and interactive queries. Its speed, performance, rich ecosystem of libraries, cost-effectiveness, ease of use, distributed platform, and strong community are a few reasons for the popularity it has garnered.
In the Spark framework, the code can be roughly divided into two parts - the logic and the plumbing. Logic is specific to the application and domain, while plumbing deals with the technological aspects. Unit tests are performed for the logic part, and functional testing will be done in the plumbing part.
Testing Types and Tools for Spark Testing
Let us discuss different testing types and associated tools for testing Spark applications.
Spark Local Testing
It requires testing the Spark applications in local mode on a single machine or developer's workstation. Spark local testing is done without a full Spark cluster setup, making it quick and easy to perform.
Use it during the initial development, debugging, and testing phase. Spark local testing validates the Spark code before deploying it to a distributed Spark cluster. Local testing allows you to work with smaller test datasets locally. You can create and manipulate specific testing datasets without the involvement of clusters and nodes.
Set the Spark's master configuration to local in the development environment or application code to start local testing.
Spark Testing Base
Testing distributed computing programs in local mode or with smaller datasets is challenging. Spark Testing Base library provides base classes to make Spark unit testing easier. It provides a simple way to write unit tests for Spark code by allowing you to create SparkContexts and SparkSession objects that can be used in your tests.
package de.jofre.spark.tests;
import static org.assertj.core.api.Assertions.assertThat;
import org.apache.spark.SparkConf;
import org.apache.spark.ml.Pipeline;
import org.apache.spark.ml.feature.SQLTransformer;
import org.apache.spark.sql.Dataset;
import org.apache.spark.sql.SparkSession;
import org.junit.AfterClass;
import org.junit.BeforeClass;
import org.junit.Test;
import org.slf4j.Logger;
import de.jofre.test.categories.UnitTest;

@Category(UnitTest.class)
public class SparkSessionAndFileReadTest {
  private static Dataset<Row> df;
  private static SparkSession spark;
  private static final Logger logger = LoggerFactory.getLogger(SparkSessionAndFileReadTest.class);
  @BeforeClass
  public static void beforeClass() {
    spark = SparkSession.builder().master("local[*]").config(new SparkConf().set("fs.defaultFS", "file:///"))
          .appName(SparkSessionAndFileReadTest.class.getName()).getOrCreate();
    df = spark.read().parquet("src/test/resources/tests/part-r-00001-myfile.snappy.parquet");
    logger.info("Created spark context and dataset with {} rows.", df.count());
  }
  @Test
  public void buildClippingTransformerTest() {
    logger.info("Testing the spark sorting function.");
    Dataset<Row> sorted = df.sort("id");
    assertThat(sorted.count()).isEqualTo(df.count());
  }
  @AfterClass
  public static void afterClass() {
    if (spark != null) {
      spark.stop();
ScalaTest
ScalaTest offers multiple testing styles, and you must choose the one that best fits your preferences and testing needs. Some popular styles are FunSpec, FlatSpec, WordSpec, FeatureSpec, etc.
ScalaTest can integrate with popular testing libraries like JUnit, TestNG, Maven, Selenium, etc., allowing you to run ScalaTest unit tests with your existing ones.
Cucumber with Ruby
In Spark applications, integration testing involves testing the interaction between the Spark code and other components, such as databases, messaging systems, and external APIs.
Spark prefers Cucumber to have more declarative and easy-to-read tests. Cucumber is a BDD(Behavior-Driven Development) that allows developers to write and execute human-readable acceptance tests, called features in Gherkin language.
Feature: Post management
I can create posts
I can edit posts
I can delete posts

Scenario: Add a post
  Given I insert a post with title "Foo" and content "bar"
  Then I have 1 posts
  Then the post has title "Foo"
  Then the post has content "bar"
For the above feature file, Gherkin steps start with any of the below keywords:
- Given - represents the preconditions or initial setting
- When - operation to be performed
- Then - the state is to be verified after the operation
require 'rest-client'
require 'json'
require "rspec"
include RSpec::Matchers
Given(/^I insert a post with title "([^"]*)" and content "([^"]*)"$/) do |title, content|
  payload = """
  {
    \"title\" : \"#{title}\",
    \"content\" : \"#{content}\",
    \"categories\" : []
  }
  """
  response = RestClient.post 'http://localhost:4567/posts', payload, :content_type => :json, :accept => :json
  expect(response.code).to eq(201)
end


Then(/^I have (\d+) posts?$/) do |n_posts|
  begin
    response = RestClient.get 'http://localhost:4567/posts'
    expect(response.code).to eq(200)
    data = JSON.parse(response.body)
    expect(data.count).to eq(n_posts.to_i)
end


Then(/^the post has title "([^"]*)"$/) do |title|
  begin
    response = RestClient.get 'http://localhost:4567/posts'
    expect(response.code).to eq(200)
    data = JSON.parse(response.body)
    expect(data[0]["title"]).to eq(title)
  end


Then(/^the post has content "([^"]*)"$/) do |content|
  begin
    response = RestClient.get 'http://localhost:4567/posts'
    expect(response.code).to eq(200)
    data = JSON.parse(response.body)
    expect(data[0]["content"]).to eq(content)
  end
You can integrate Cucumber reports into the framework to generate reports. Read more about integration tests using Cucumber and Ruby here.
Cluster Testing
It is a process of testing Spark applications in a real distributed cluster environment by deploying and executing Spark applications on a cluster with multiple nodes. Cluster testing is essential to assess the Spark application's behavior, performance, and scalability in a distributed, concurrent, and multi-node environment.
Below are the steps associated with cluster testing:
Step 1: Set up a test cluster; you need access to a test cluster or cloud-based Spark cluster.
Step 2: Package and prepare your Spark application by packaging it into a JAR or other distributable format with all dependencies correctly bundled.
Step 3: Deploy and execute your Spark application on the test cluster using Spark submit command.
Step 4: Monitor and analyze progress, logs, errors, resource utilization, performance metrics, memory usage, and overall job execution time of the application on the cluster.
End-to-End Testing
It is a comprehensive testing approach that ensures the system works as expected in a production-like environment. In an E2E testing scenario, the system is tested as a whole rather than individual components. This approach simulates real-world user scenarios, from the user interface to the backend database and everything in between.
You can perform Spark E2E testing with automation tools such as Selenium to automate the Spark web applications. You need knowledge of Selenium and programming languages such as Java or Python to achieve this successfully. That is why Selenium is not a preferred choice today.
There are many other major drawbacks, such as complex scripting, tedious maintenance, dependency on third-party integrations, CSS, XPath locators, steep learning curve, slow ROI, etc., for a decline in interest towards Selenium.
How is testRigor Different?
testRigor is a next-generation no-code automation tool with integrated AI that helps create automated test cases faster and to spend nearly no time on maintenance. Use testRigor's generative AI-based test script generation, where you only need to provide the test case title and the steps will be automatically generated within seconds.
Below are some advantages of testRigor over other tools:
Versatile test creation: Select from the three convenient ways to create tests - write tests yourself in plain English, use our test recorder, or employ generative AI for test creation.
Ultra-stable: testRigor employs no-code test scripts, eliminating dependencies on any specific programming language. Elements are referenced as they appear on the screen, thereby reducing reliance on implementation details. This capability dramatically simplifies the process of test creation and debugging.
Cloud-hosted: Save time, effort, and resources on infrastructure setup. With testRigor, you are ready to start writing test scripts right after signing up, boasting a speed up to 15 times faster compared to other automation tools.
Comprehensive testing coverage: testRigor supports all main types of testing and accommodates cross-browser and cross-platform tests.
Seamless integrations: Its built-in integrations with CI/CD, ERP, and test management tools ensure a seamless and efficient testing process.
Get a glimpse of testRigor's incredible features.
// Buy from a cloth retail website
login
check that page contains "Striped Black Shirt"
click "Striped Black Shirt"
click "Add to cart"
click "Cart"
click "Place Order"
check that page contains "Shipping Address"
click "Home"
check that page contains "Payment Options"
click "Cash on Delivery"
click "Place Order"
check that page contains "Order placed successfully."
The simplicity of the test script is what catches the eye: no CSS or XPath locators, just plain text as visible on the UI. The auto-healing capabilities automatically handle the changes in the element attributes, minimizing the maintenance efforts.
How to do End-to-end Testing with testRigor
Let us take the example of an e-commerce website that sells plants and other gardening needs. We will create end-to-end test cases in testRigor using plain English test steps.
Step 1: Log in to your testRigor app with your credentials.
Step 2: Set up the test suite for the website testing by providing the information below:
- Test Suite Name: Provide a relevant and self-explanatory name.
- Type of testing: Select from the following options: Desktop Web Testing, Mobile Web Testing, Native and Hybrid Mobile, based on your test requirements.
- URL to run test on: Provide the application URL that you want to test.
- Testing credentials for your web/mobile app to test functionality which requires user to login: You can provide the app’s user login credentials here and need not write them separately in the test steps then. The login functionality will be taken care of automatically using the keyword
login. - OS and Browser: Choose the OS Browser combination on which you want to run the test cases.
- Number of test cases to generate using AI: If you wish, you can choose to generate test cases based on the App Description text, which works on generative AI.

Step 3: Click Create Test Suite.
On the next screen, you can let AI generate the test case based on the App Description you provided during the Test Suite creation. However, for now, select do not generate any test, since we will write the test steps ourselves.
Step 4: To create a new custom test case yourself, click Add Custom Test Case.

Step 5: Provide the test case Description and start adding the test steps.
For the application under test, i.e., e-commerce website, we will perform below test steps:
- Search for a product
- Add it to the cart
- Verify that the product is present in the cart
Test Case: Search and Add to Cart
Step 1: We will add test steps on the test case editor screen one by one.
testRigor automatically navigates to the website URL you provided during the Test Suite creation. There is no need to use any separate function for it. Here is the website homepage, which we intend to test.

First, we want to search for a product in the search box. Unlike traditional testing tools, you can identify the UI element using the text you see on the screen. You need not use any CSS/XPath identifiers.
click "What are you looking for?"
Step 2: Once the cursor is in the search box, we will type the product name (lily), and press enter to start the search.
type "lily"
enter enter

Search lists all products with the “lily” keyword on the webpage.
Step 3: The lily plant we are searching for needs the screen to be scrolled; for that testRigor provides a command. Scroll down until the product is present on the screen:
scroll down until page contains "Zephyranthes Lily, Rain Lily (Red)"

When the product is found on the screen, testRigor stops scrolling.
Step 4: Click on the product name to view the details:
click "Zephyranthes Lily, Rain Lily (Red)"
After the click, the product details are displayed on the screen as below, with the default Quantity as 1.

Step 5: Lets say, we want to change the Quantity to 3, so here we use the testRigor command to select from a list.
select "3" from "Quantity"
click "Add to cart"
The product is successfully added to the cart, and the “Added to your cart:” message is displayed on webpage.
Step 6: To assert that the message is successfully displayed, use a simple assertion command as below:
check that page contains "Added to your cart:"
Step 7: After this check, we will view the contents of the cart by clicking View cart as below:
click "View cart"

Step 8: Now we will again check that the product is present in the cart, under heading “Your cart” using the below assertion. With testRigor, it is really easy to specify the location of an element on the screen.
check that page contains "Zephyranthes Lily, Rain Lily (Red)" under "Your cart"

Complete Test Case
Here is how the complete test case will look in the testRigor app. The test steps are simple in plain English, enabling everyone in your team to write and execute them.

Click Add and Run.
Execution Results
Once the test is executed, you can view the execution details, such as execution status, time spent in execution, screenshots, error messages, logs, video recordings of the test execution, etc. In case of any failure, there are logs and error text that are available easily in a few clicks.
You can also download the complete execution with steps and screenshots in PDF or Word format through the View Execution option.

testRigor’s Capabilities
Apart from the simplistic test case design and execution, there are some advanced features that help you test your application using simple English commands.
- Reusable Rules (Subroutines): You can easily create functions for the test steps that you use repeatedly. You can use the Reusable Rules to create such functions and call them in test cases by simply writing their names. See the example of Reusable Rules.
- Global Variables and Data Sets: You can import data from external files or create your own global variables and data sets in testRigor to use them in data-driven testing.
- 2FA, QR Code, and Captcha Resolution: testRigor easily manages the 2FA, QR Code, and Captcha resolution through its simple English commands.
- Email, Phone Call, and SMS Testing: Use simple English commands to test the email, phone calls, and SMS. These commands are useful for validating 2FA scenarios, with OTPs and authentication codes being sent to email, phone calls, or via phone text.
- File Upload/ Download Testing: Execute the test steps involving file download or file upload without the requirement of any third-party software. You can also validate the contents of the files using testRigor’s simple English commands.
- Database Testing: Execute database queries and validate the results fetched.
testRigor enables you to test web, mobile (hybrid, native), API, and desktop apps with minimum effort and maintenance.
Additional Resources
- Access testRigor documentation to know about more useful capabilities
- Top testRigor’s features
- How to perform end-to-end testing
Conclusion
As E2E testing serves as a stepping stone for user acceptance testing, the quality and efficiency of the system testing process are incredibly crucial. You must focus on early product releases to stay relevant and ahead in the market. This reason marks the requirement for a robust testing tool that can effectively cover multiple types of testing and optimize testing time without requiring extensive framework development as paramount.
testRigor's comprehensive suite of testing capabilities and generative AI-based test case generation makes it the ideal automation testing solution for Spark applications.
| Achieve More Than 90% Test Automation | |
| Step by Step Walkthroughs and Help | |
| 14 Day Free Trial, Cancel Anytime |


