How to Manage Blocking and Non-Blocking Issues in Test Case Executions
|
|
When you’re running automated tests, it’s normal to run into errors — some that stop everything in its tracks and others that just slow things down. With our tool, we call these blocking and non-blocking issues.
Understanding how these work (and how to control them) can make your testing process smoother, faster, and far less frustrating. Let’s take a closer look.
What’s the Difference Between Blocking and Non-Blocking?
Think of your automated test like a train moving along its track.
- A blocking issue is like a fallen tree on the rails — the train can’t move forward until it’s cleared.
- A non-blocking issue is more like a signal light glitch — the train keeps going, but you’ll want to note it and fix it later.
Blocking Issues
Blocking issues stop your test completely. They usually happen when a test can’t complete an essential action — for example:
- Trying to click, hover, or drag something that is not present on the page.
- Trying to grab an item from an object that is not present on the page.
When that happens, the test can’t continue. Blocking issues are there to make sure your test doesn’t continue with unreliable or missing steps.
Non-Blocking Issues
Non-blocking issues don’t stop your test. Instead, they let your test continue while keeping track of what went wrong.
These often include:
- Failed validations, like checking that a label says “Success” but finding something else.
- Failed data entry or select actions that aren’t critical to the main flow.
The big advantage? You can collect multiple errors in one execution. That means you spend less time restarting tests because you can fix everything at once.
New Settings: Greater Flexibility, More Control
To make this process even more adaptable, our tool now lets you customize how blocking and non-blocking issues are treated.
You’ll find these options under:
Settings → Error Detection → Failed Step Treatment
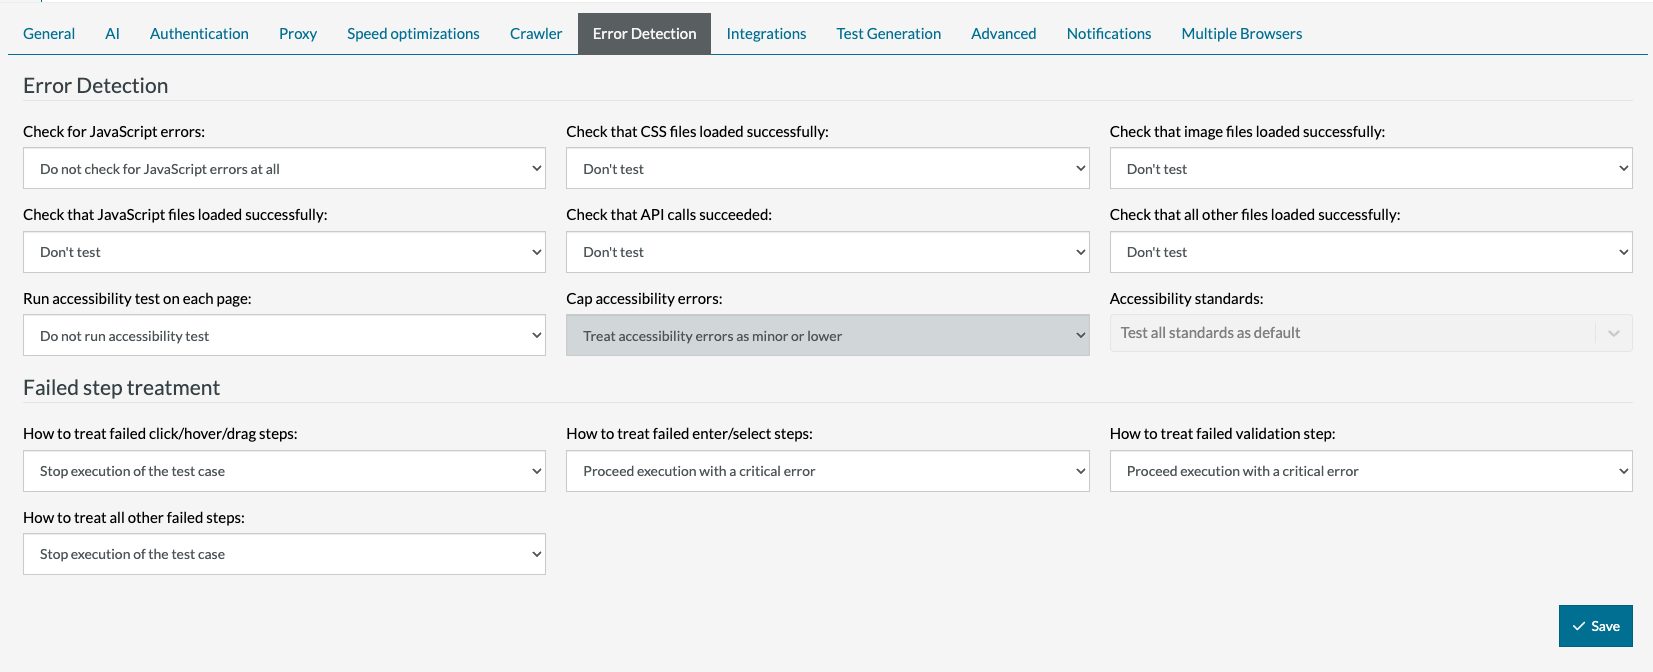
Here’s a quick guide to what you can adjust:
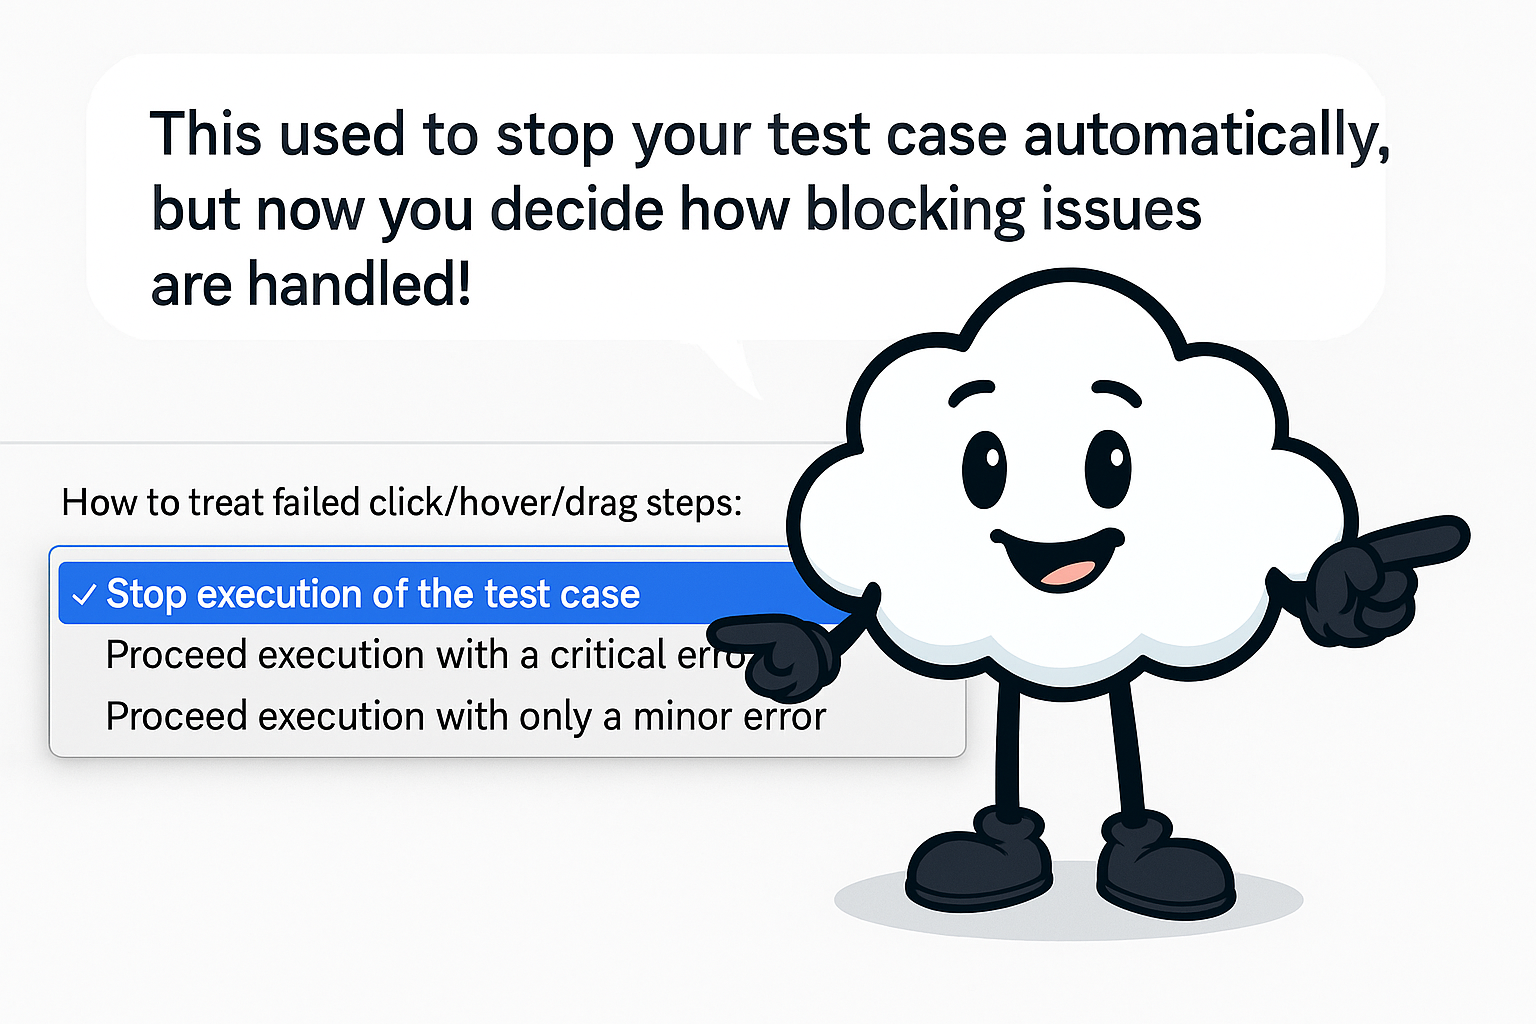
- Click, Hover, and Drag Steps
Decide whether a failed interaction should:- Stop the test completely,
- Continue with a critical error, or
- Continue with a minor error.
- Enter or Select Steps
Configure what happens if your test can’t fill out a field or select an option — do you want it to pause, or keep going? - Validation Steps
Choose whether a failed check should end the test or simply be logged so you can see all results in one run. - Other Failed Steps
You can apply the same logic to other step types, giving you full control over how each part of your test behaves.
Why This Matters
Having control over how tests react to issues means you can…
- …save time by running tests that gather more data in one go.
- …focus on critical failures first.
- …and adapt your testing approach to different workflows.
In short — fewer interruptions, more insights.
A Friendly Word of Caution
You’ll want to be thoughtful before changing these settings. The defaults are there for a reason — they’re balanced for reliability.
If you mark too many steps as “non-blocking,” you might end up with tests that keep running even after something important fails. That could cause…
- …later steps that fail unexpectedly.
- …data to be deleted or overwritten.
- …other tests to behave unpredictably.
Tip:
If you’re unsure, start with small adjustments and observe how your test behaves before rolling out the change across multiple suites.
In Summary
By understanding and configuring blocking and non-blocking issues, you can…
- …keep tests running efficiently.
- …collect more useful data per run.
- …adjust behavior to fit your workflow.
These new settings give you more flexibility — just remember to use them wisely to maintain stable, predictable test results.


