How to create a B2B direct connection with testRigor in Microsoft Teams
|
|
testRigor offers multiple support channels for our customers. One channel that we have recently added is through B2B direct connections in Microsoft Teams.
Setup will require a Teams and Azure administration; but with a few simple steps, you will be able to talk directly to testRigor support specialists just as you communicate back and forth with any member from teams within your organization.
Enable Shared Channels in Microsoft Teams (Needs a Teams Admin)
First, your Teams administrator will have to enable shared channels for your organization if this has not already been done. This is a one-time process. The steps to do so are the following
- Log in to Teams Admin Center: https://admin.teams.microsoft.com/
- Click Teams in the navigation pane on the left side of the screen, which will expand several options.
- Click Teams policies.
- Select the desired policy from the Manage Policies table. (At the very least, you should see the default option “Global (Org-wide default)“)
-
Enable the sliders for Create shared channels, Invite external users to shared channels, and Join external shared channels.
- Click Accept once you have selected all of your settings.
- Click Users in the navigation pane on the left side of the screen, which will expand several options.
- Click External access.
- Select Allow all external domains from the dropdown below Teams and Skype for Business users in external organizations.
- Click Save.
Add testRigor to Your B2B Direct Connections
Once shared channels are enabled, your Azure Active Directory administrator must establish a direct connection with testRigor’s MS Teams instance. Follow these steps to do so:
- Log in to Azure Active Directory admin center: https://portal.azure.com/#home
- Click View below Manage Azure Active Directory.
- Click External identities in the navigation pane on the left side of the screen.
- Click Cross-tenant access settings in the navigation pane on the left side of the screen.
- Click +Add organization.
- Type arttestrigor.onmicrosoft.com into the Tenant ID or domain name field on the right side of the screen. (If the company name and tenant for testRigor doesn’t appear by copying and pasting the domain, try typing it into the field.)
- Click Add.
Once these steps are completed, notify your primary contact at testRigor and we will proceed to create the new private channel and add the members who will need to interact with our team.
Video Reference
Changing Defaults (Only if necessary)
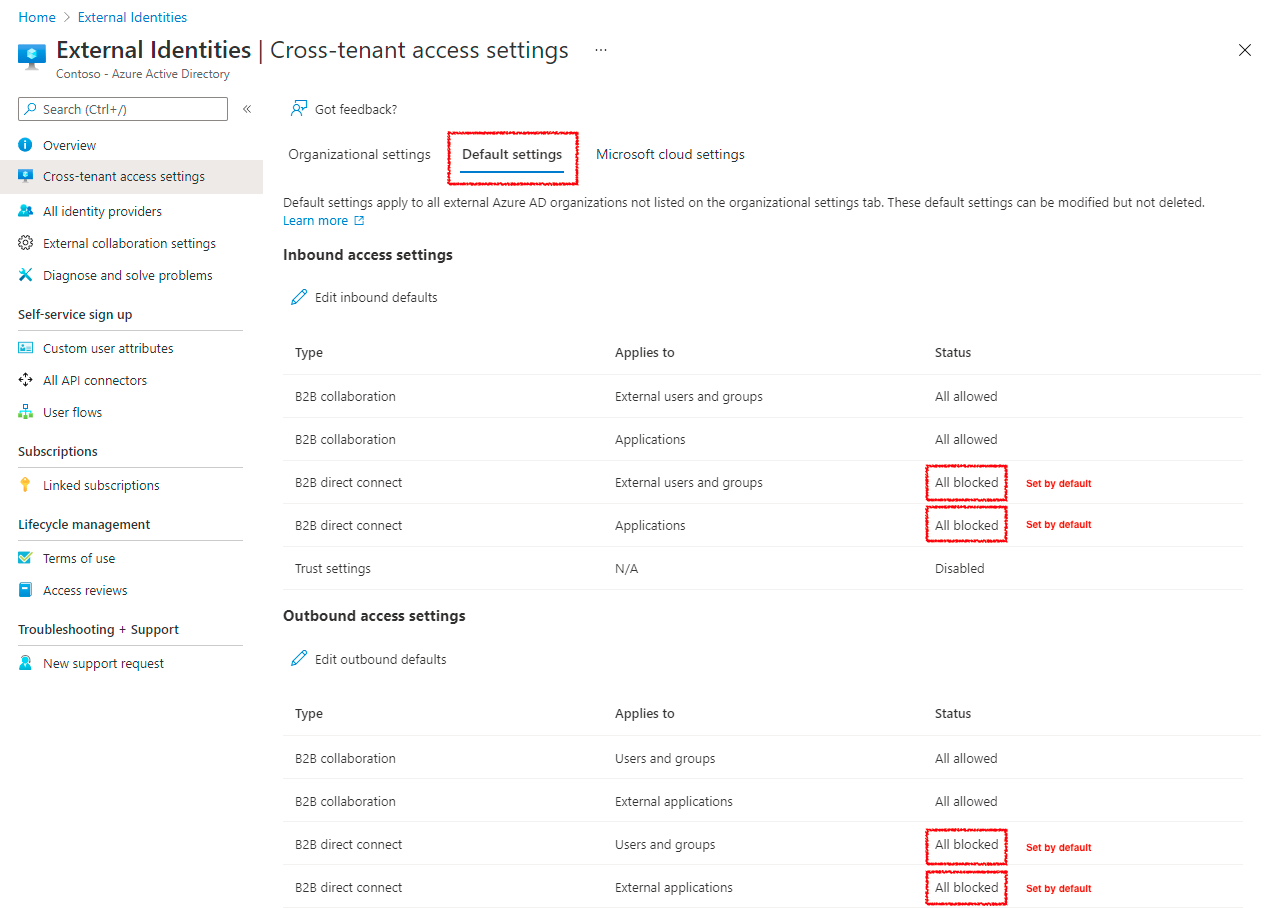
These are usually the only steps needed; however, if your organization has not yet enabled B2B direct connections, there are a two final steps that may be needed to allow us to share the channel with you.
Inbound and Outbound access settings for B2B direct connect collaborations are not allowed by default unless the default option is modified.

The steps to grant both Inbound and Outbound accesses are very similar. See the way to modify Inbound Access Settings below:
- Go to https://entra.microsoft.com/#home
- Click External Identities in the lower part of the left navigation pane.
- Click Cross-tenant access settings in the left pane, below External Identities.
- Click Default settings, the tab in the main page on the right of Organizational settings.
- Click Edit inbound defaults (button below Inbound access settings).
- Click B2B direct connect in the tab on the right of B2B collaboration.
- Click Allow access below External users and groups and save.
For Outbound settings, all the steps are the same with the exception of Step 5, which in this case would be click Edit outbound defaults (button below).


