How to do data-driven testing in testRigor (using testRigor UI)
|
|
Although users may have different use cases, the primary reason data-driven testing is used by testRigor users is by far when the same scenario needs to be tested over and over again with different input values.
A data set must correspond with a test case, that is, the data set is where the test case will get its variables. For that, a test case script must be written with the variables dependent on the data set in mind. In testRigor, we create data sets with the structure of a spreadsheet as the model. The column headers are the variable names (also known as keys) that are used in the test case script. Row cells contain the values for each key. One test case will be executed for each row on the spreadsheet after the row with column headers.
testRigor provides two ways to create data sets:
- Manual input through the testRigor UI (recommended for small amounts of variables)
- Bulk upload via CSV files (recommended for large amounts of variables)
The method detailed in this article is manual input. Here’s a step-by-step guide on how to create a data set.
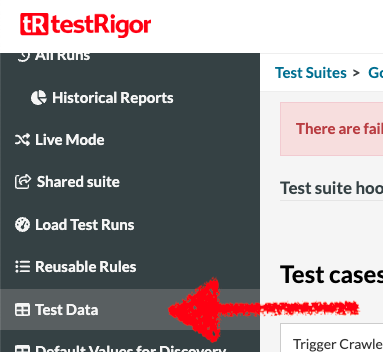
Step 1: Go to Test Data
Inside the test suite where data-driven testing is needed, click on Test Data inside the left side navigation menu.
Step 2: Go to Data Sets Section
Click the Data Sets button. The first time you do this, there will not be any items on the list, but all data sets created thereafter will be located here.

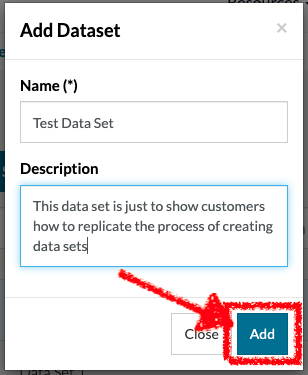
Step 3: Give the data set a name and description
Click +Add on the right side of the page, after which a popup asking for the Name and Description of the data set will appear. After filling out the Name (mandatory field) and Description (optional field), click the Add button inside the popup.

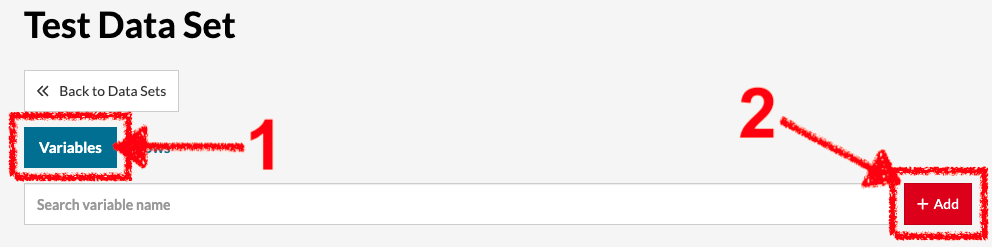
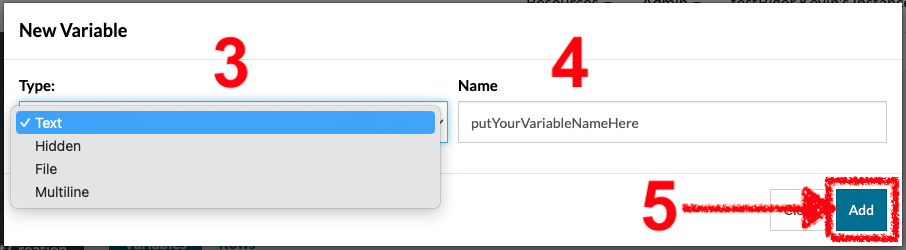
Step 4: Add variable names
Create the variable names by clicking the Variable tab (if not yet selected), then +Add. A popup requiring the variable type (text, hidden, file, multiline) and name. Repeat this step as many times as necessary.
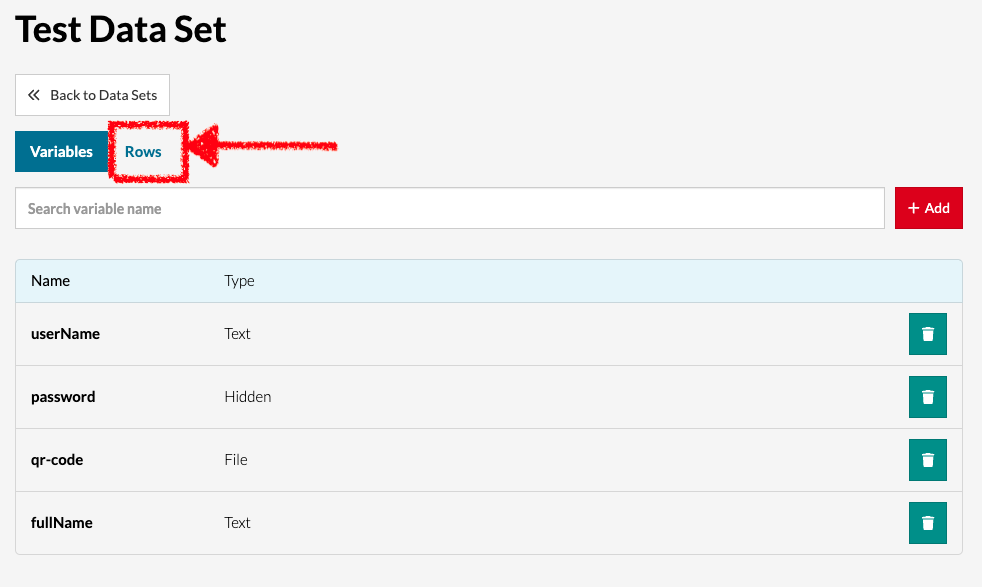
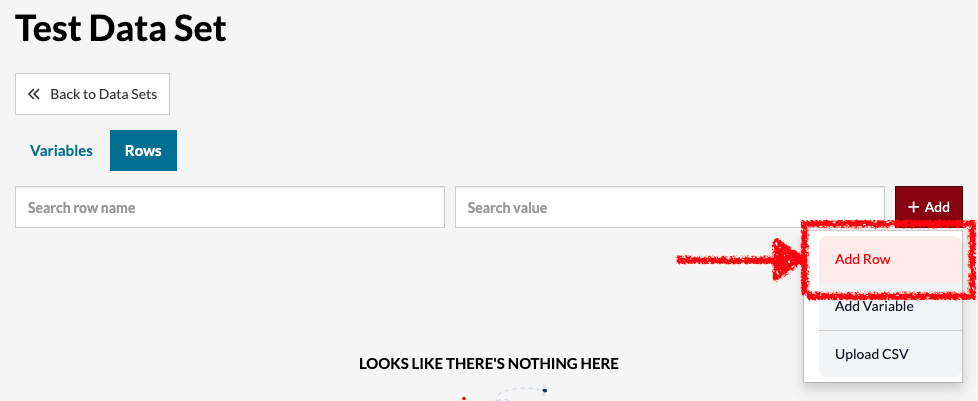
Step 5: Create a row
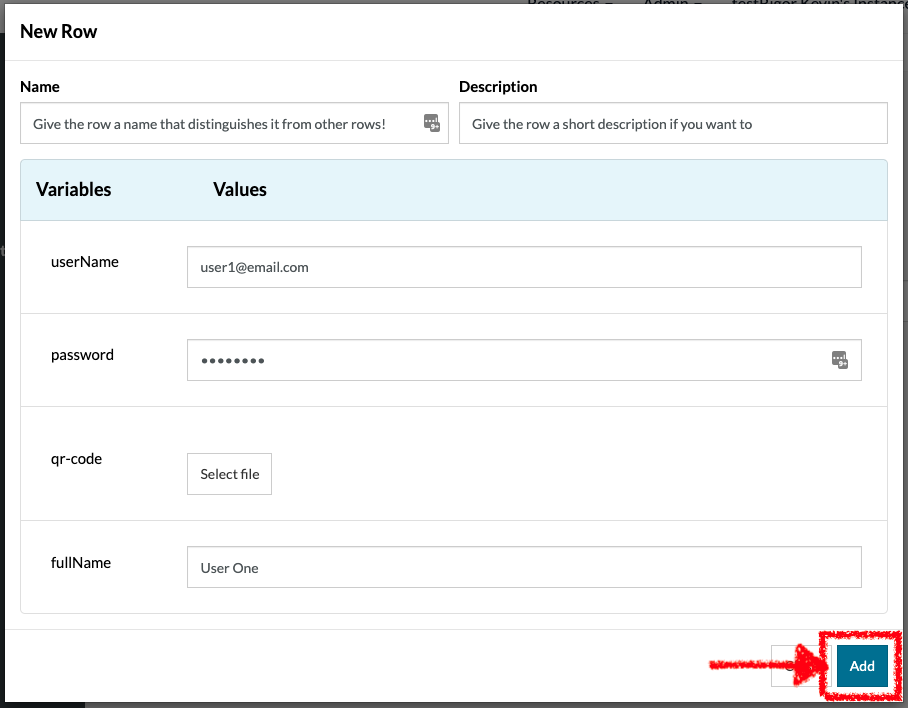
Once the variables are created, rows can be created by clicking the Row tab, the +Add button, and then Add row. A popup will ask for the name to identify the row and the variable values for that row. Once they have been provided, click Add to complete the row.
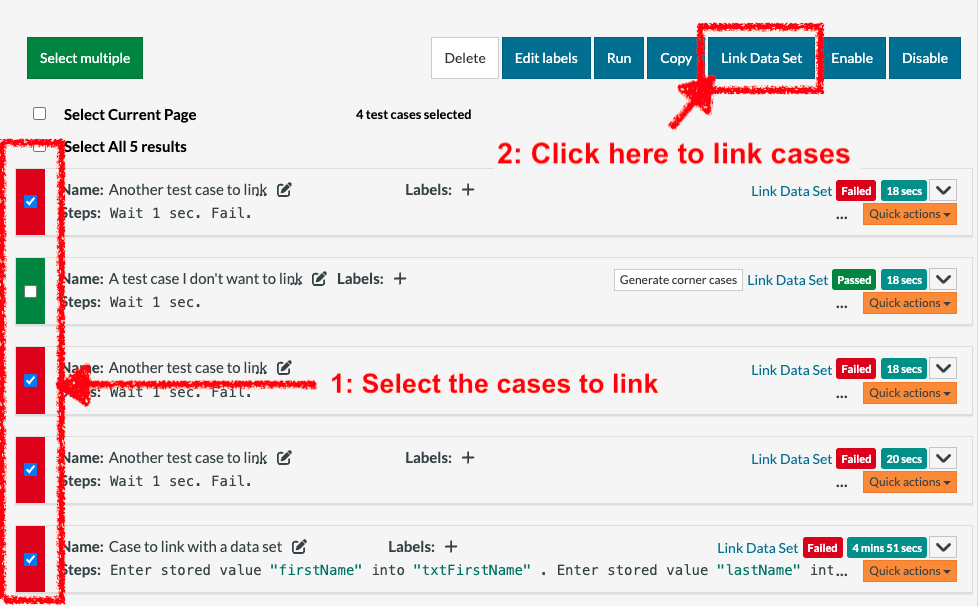
Step 6: Link the data set to the test case
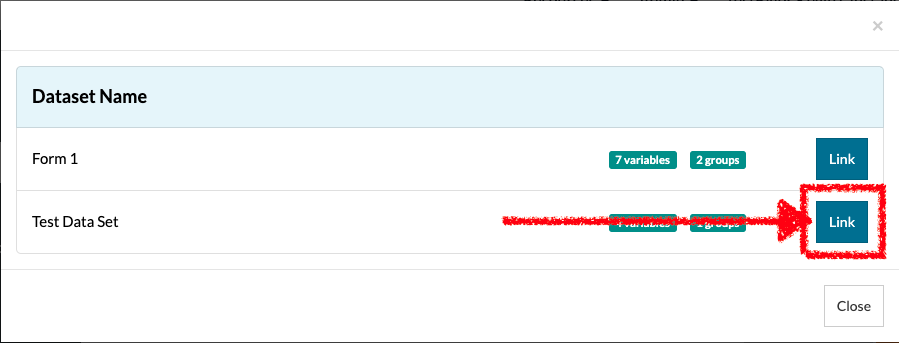
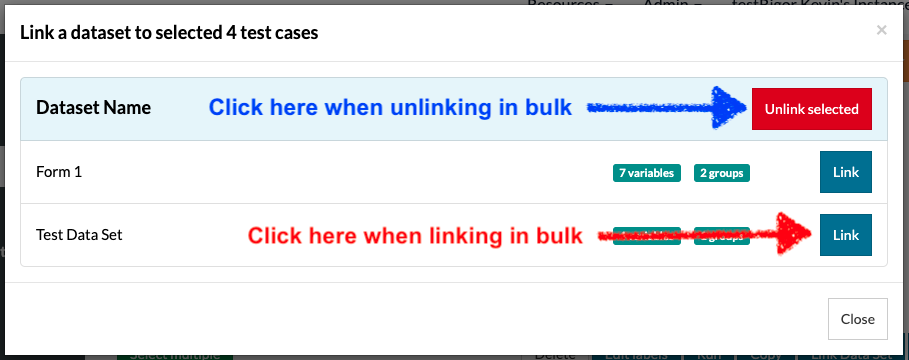
Find the test cases that need to be tested with the data set, and link them individually or in bulk. If it is a single test case, simply click Link data set and select the correct data set from the popup. To link them in bulk, click Select Multiple followed by the Link data set button. Then select the correct data set.
Link individually:


Link in bulk:
For a full tutorial on creating data sets, watch the video below:


