How to do email testing using testRigor?
|
|
Emails are a part of many workflows and might come up frequently when performing end-to-end testing. Here’s a detailed how-to guide for you to test emails using testRigor.
Let us take the example of a sample e-commerce web application. We will use this app and create a test case in testRigor using plain English test steps. Let’s get started.
Pre-requisites to writing the test case
Step 1: Log in to your testRigor app with your credentials.
Step 2: Set up the test suite for testing by providing the information below:
- Test Suite Name: Provide a relevant and self-explanatory name.
- Type of testing: Select from the following options: Desktop Web Testing, Mobile Web Testing, Native and Hybrid Mobile, based on your test requirements. In this case, we will go with Desktop Web Testing.
- URL to run test on: Provide the application URL that you want to test.
- Testing credentials for your web/mobile app to test functionality which requires user to login: You can provide the app’s user login credentials here and need not write them separately in the test steps then. The login functionality will be taken care of automatically using the keyword login. However, this is an optional field and can be skipped if not relevant.
- OS and Browser: Choose the OS Browser combination on which you want to run the test cases.
- Number of test cases to generate using AI: You can simplify your test creation further by opting to generate test cases based on the App Description text. This feature works on generative AI.
This is how the test suite creation screen will look like

Step 3: Click on Create Test Suite.
On the next screen, you can let AI generate the test case based on the App Description you provided during the Test Suite creation. However, for now, select do not generate any test, since we will write the test steps ourselves.
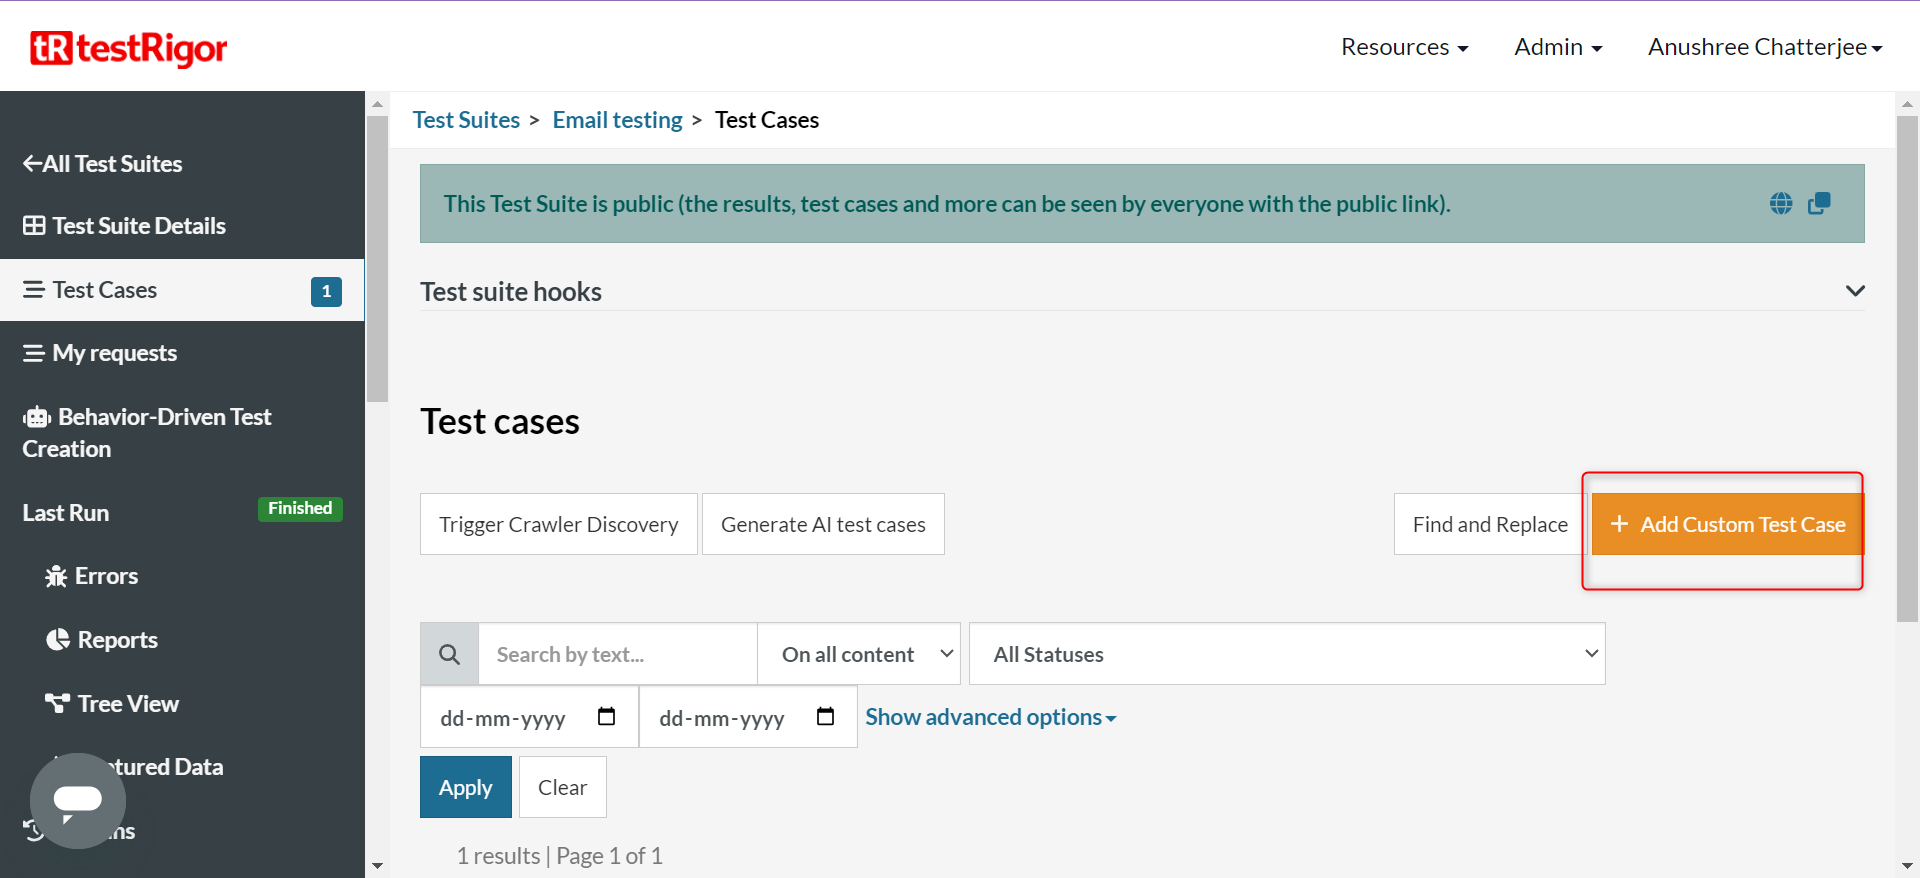
Step 4: To create a new custom test case yourself, click Add Custom Test Case.
Test Case: Register on a website and check the confirmation email
In this test case, we will go to an e-commerce website and create an account, providing the required information. Once this is done, an email will be sent to the email address provided on the website. We will check if the email was received.
Let’s take a look at every step that will be part of the testRigor test case.
Test Steps
Step 1: Come to the Test Cases section, provide the test case Description, and start adding the test steps. We will add test steps in the test case editor screen.
Step 2: Since we provided the website URL during test suite creation, testRigor automatically navigates to this website. There is no need to use a separate function to open the URL.
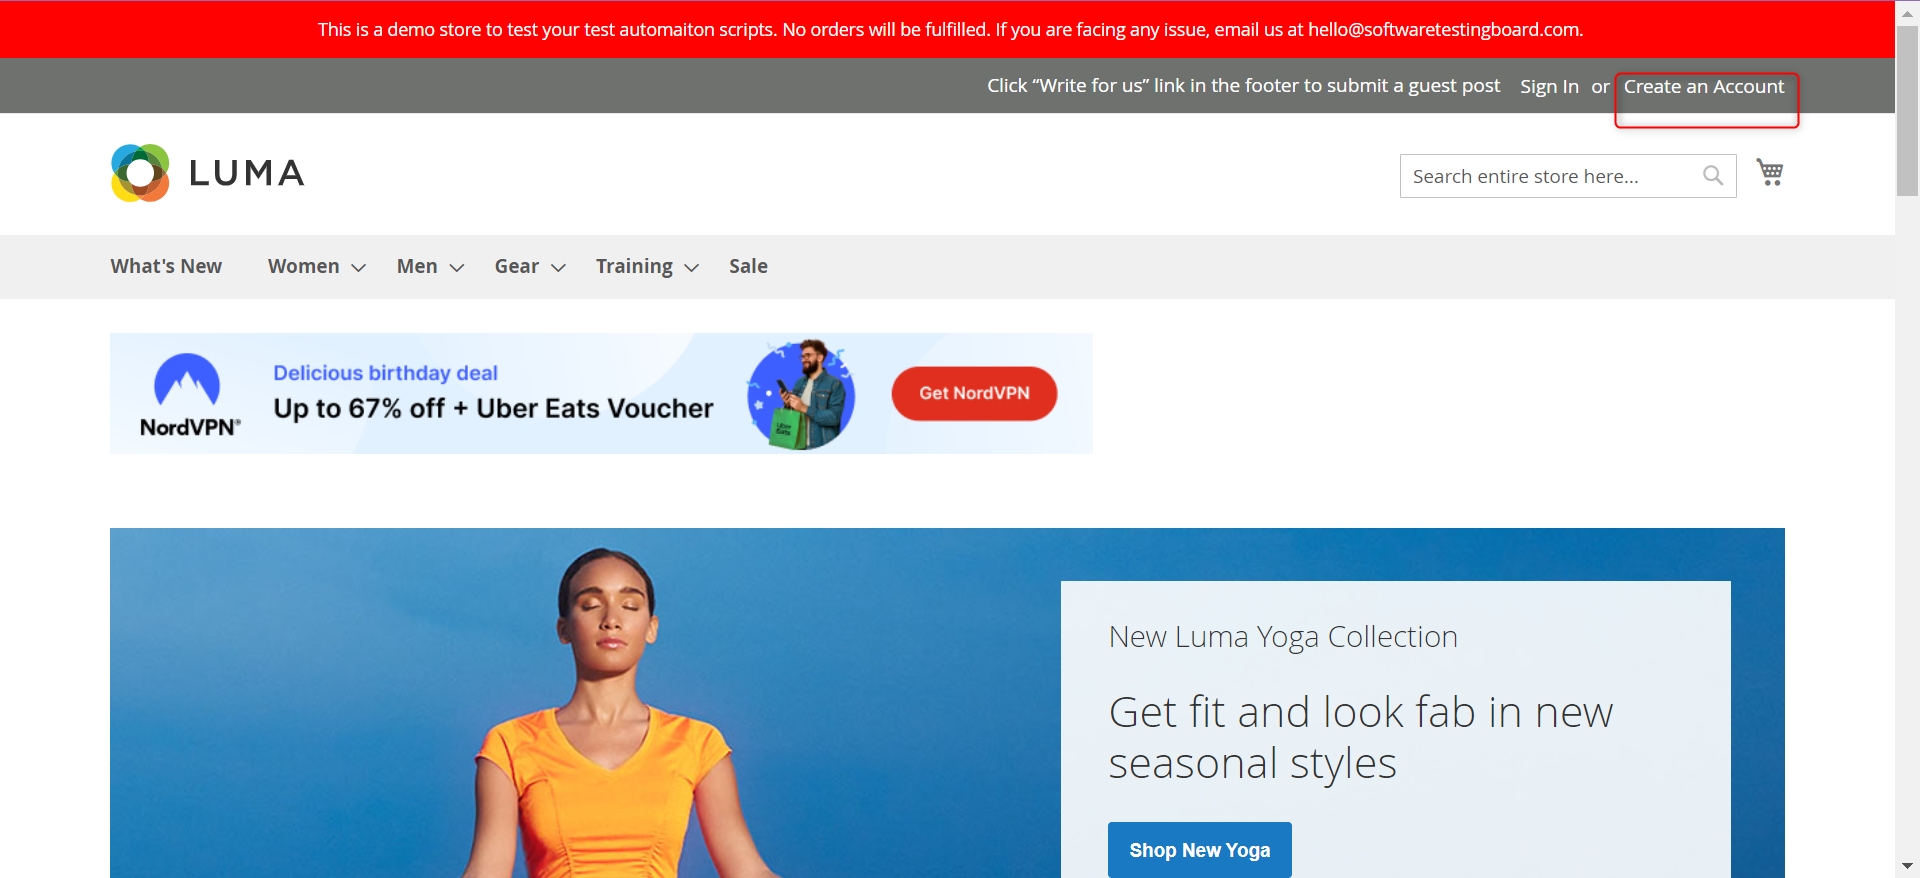
click "Create an Account"
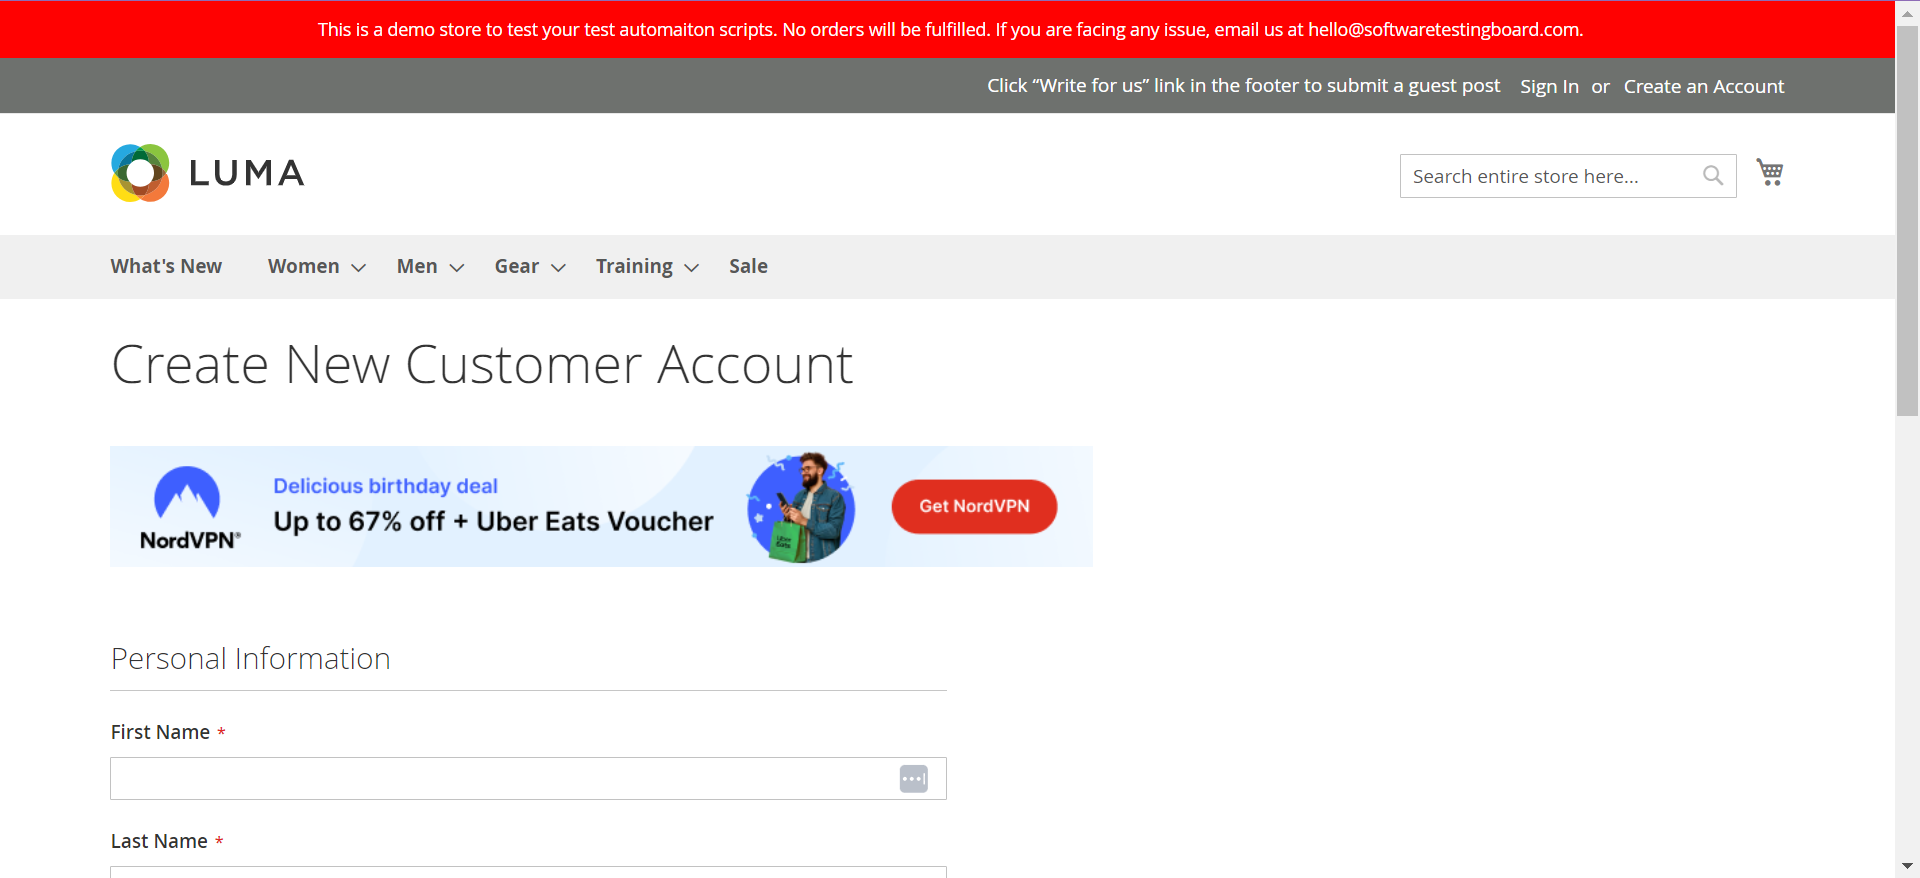
The ‘Create an Account’ page will look like this.
Step 4: On the ‘Create an Account’ page, fill in the required information like first name, last name, email address, and password. testRigor makes creating random test data super easy through plain English commands.
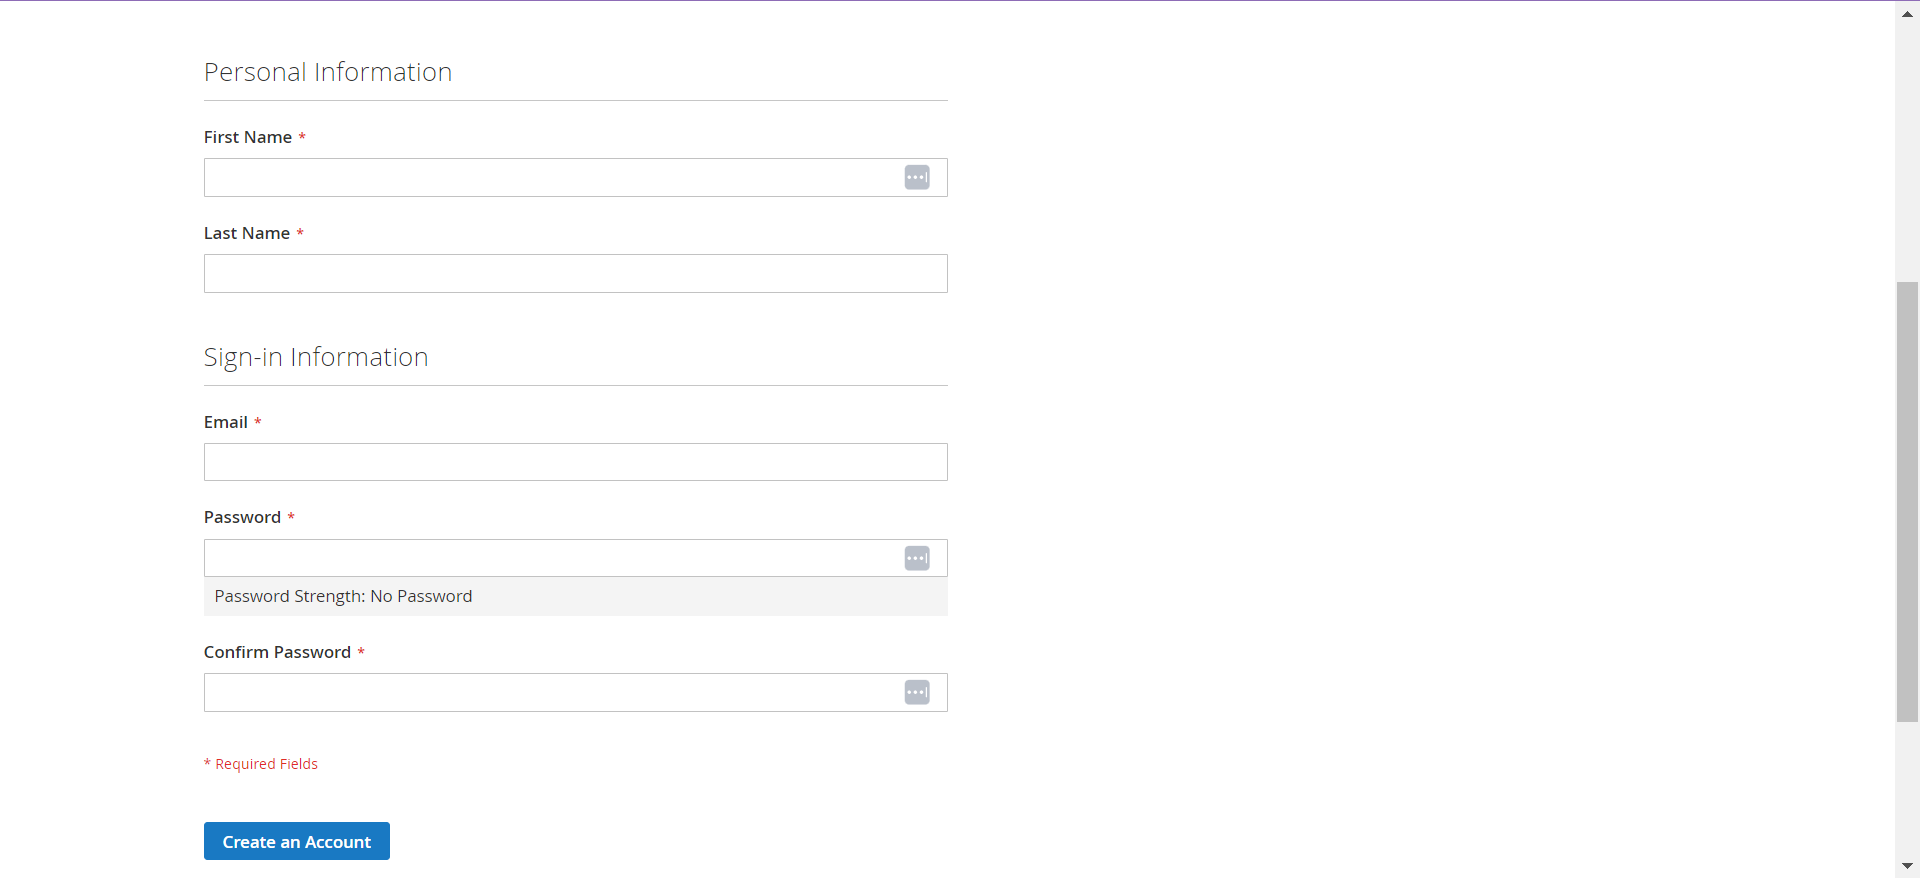
Steps 5 to 7 explain this process in detail.
generate unique email, then enter into "Email" and save as "generatedEmail"
Note: testRigor renders its own virtual mailbox so that the received emails can be seen and interacted with. Hence, the email address you want to use for testing should have the following format: <random-user>@testrigor-mail.com, where <random-user> can be any valid email handle. e.g. [email protected].
For using the ‘send email’ commands, you can use any email address like [email protected]. But if you want to use ‘check email’ commands, the email must be sent to an email address at the domain testrigor-mail.com. This is so that testRigor can access the email to validate and render it.
generate unique name, then enter into "First Name" and save as "generatedFirstName"
generate unique name, then enter into "Last Name" and save as "generatedLastName"
generate unique email and save as "generatedPassowrd"
enter stored value "generatedPassowrd" into "Password"
wait for 2 seconds
enter stored value "generatedPassowrd" into "Confirm Password"
We are using the random email generator (generate unique email) since it includes a special character as well, which works well as a password. Alternatively, you can create a password as a ‘hidden’ variable in the ‘Test Data’ section in the following way.
There’s a 2-second wait to allow the website application’s ‘Password’ field to validate the entered password.
click on button "Create an Account" below "Required Fields"
check that page contains "Thank you for registering with Main Website Store"
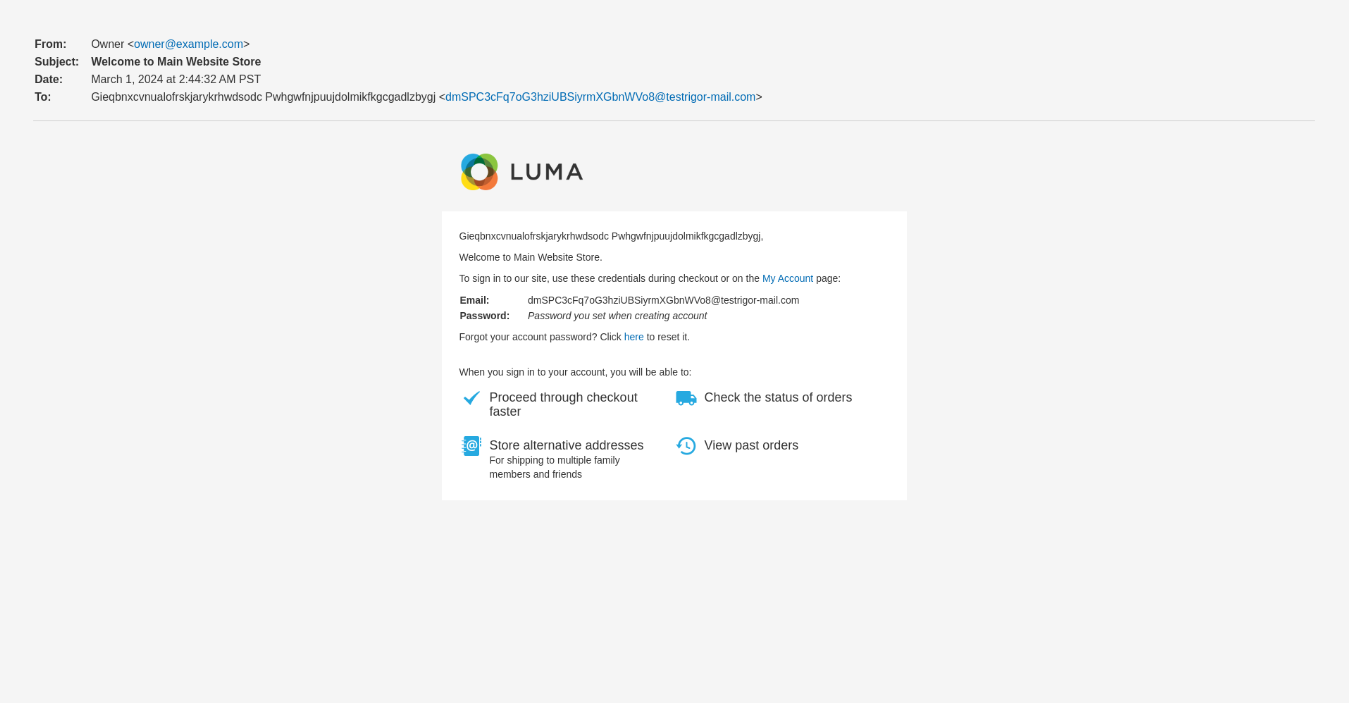
wait for 20 seconds
check that email from "[email protected]" to saved value "generatedEmail" was received
switch to tab 1
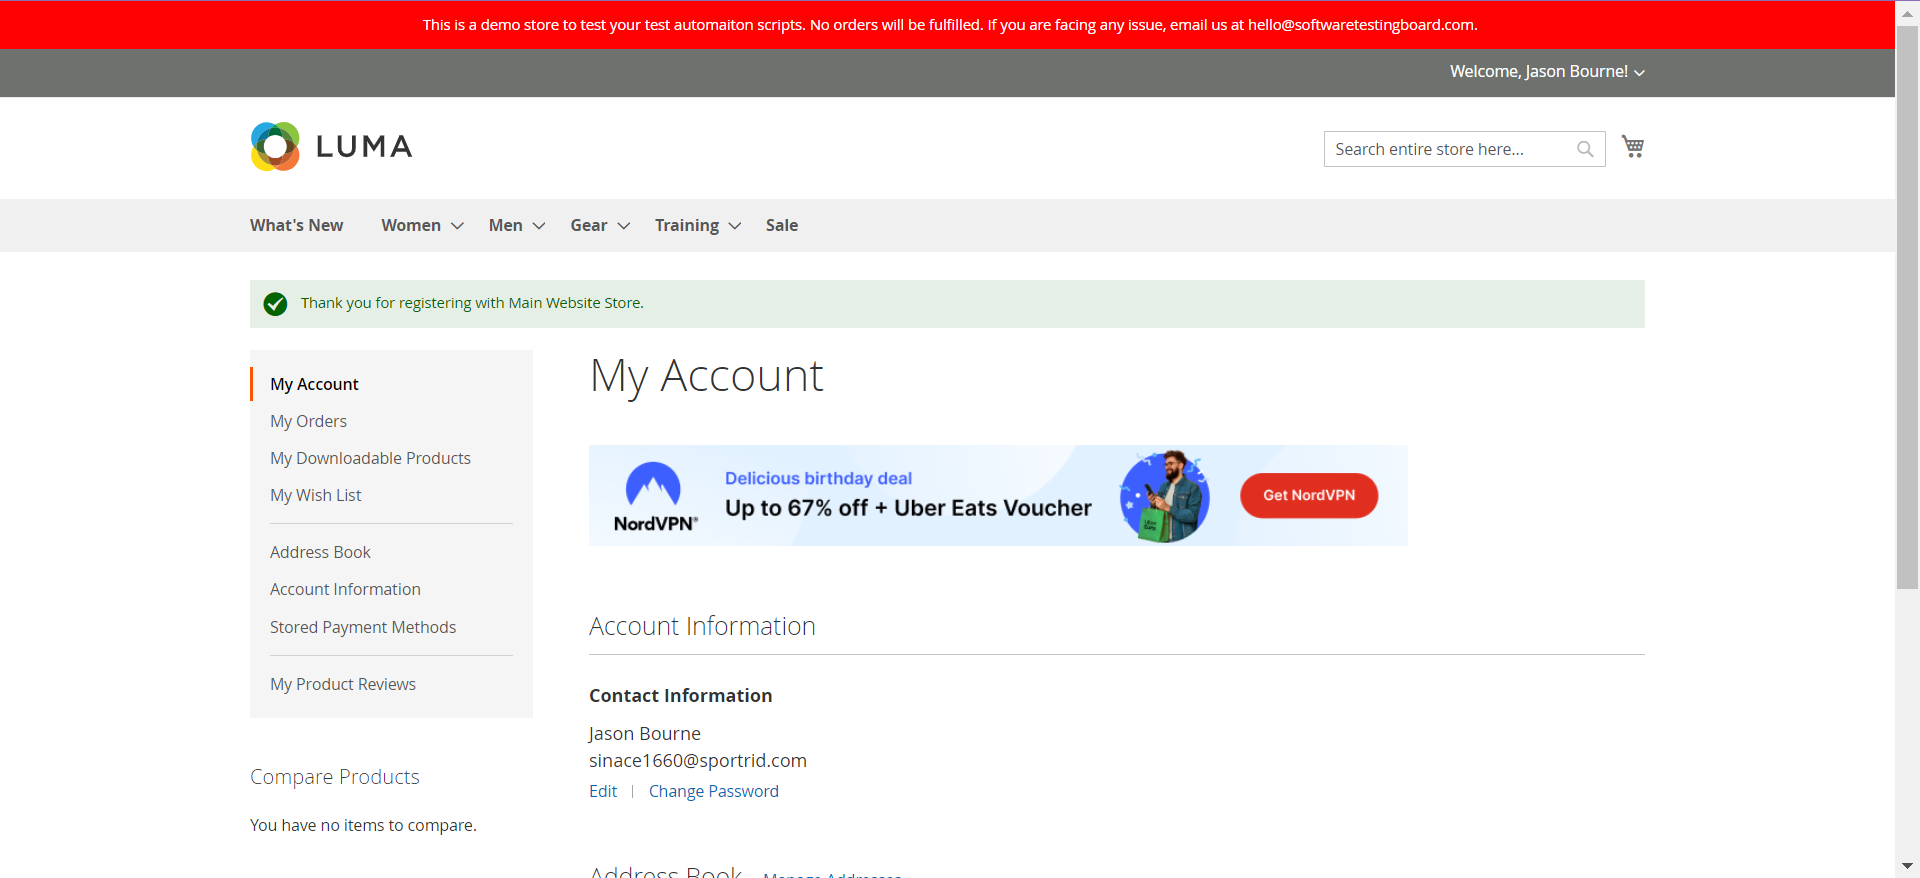
Step 11: To check if we have come to the correct tab, you can verify some UI elements of the website. For now, you can check if the website contains the randomly generated email address saved as ‘generatedEmail’ under the ‘Contact Information’ section.
check that page contains stored values “generatedEmail” roughly below “Contact Information”

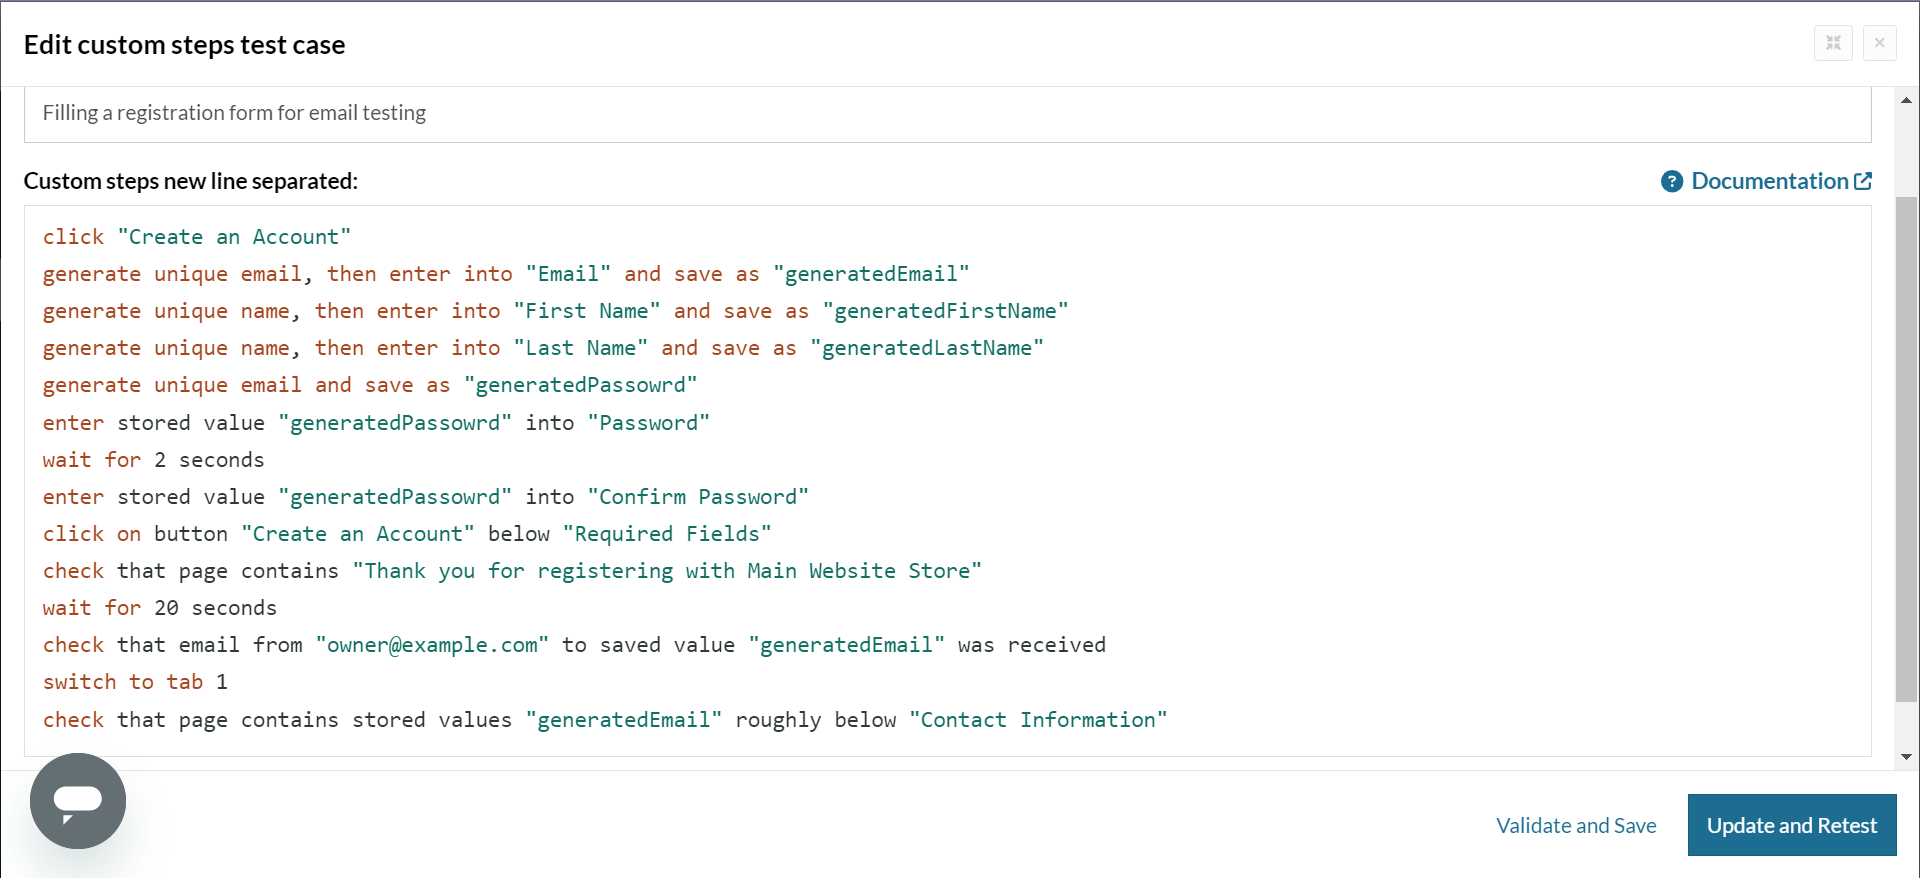
Complete Test Case
click "Create an Account"
generate unique email, then enter into "Email" and save as "generatedEmail"
generate unique name, then enter into "First Name" and save as "generatedFirstName"
generate unique name, then enter into "Last Name" and save as "generatedLastName"
generate unique email and save as "generatedPassowrd"
enter stored value "generatedPassowrd" into "Password"
wait for 2 seconds
enter stored value "generatedPassowrd" into "Confirm Password"
click on button "Create an Account" below "Required Fields"
check that page contains "Thank you for registering with Main Website Store"
wait for 20 seconds
check that email from "[email protected]" to saved value "generatedEmail" was received
switch to tab 1
check that page contains stored values "generatedEmail" roughly below "Contact Information"
Viewing Test Results
Once the test is executed, you can view the execution details, such as execution status, time spent in execution, screenshots, error messages, logs, video recordings of the test execution, etc. Logs and error text are available easily in case of any failure in a few clicks.
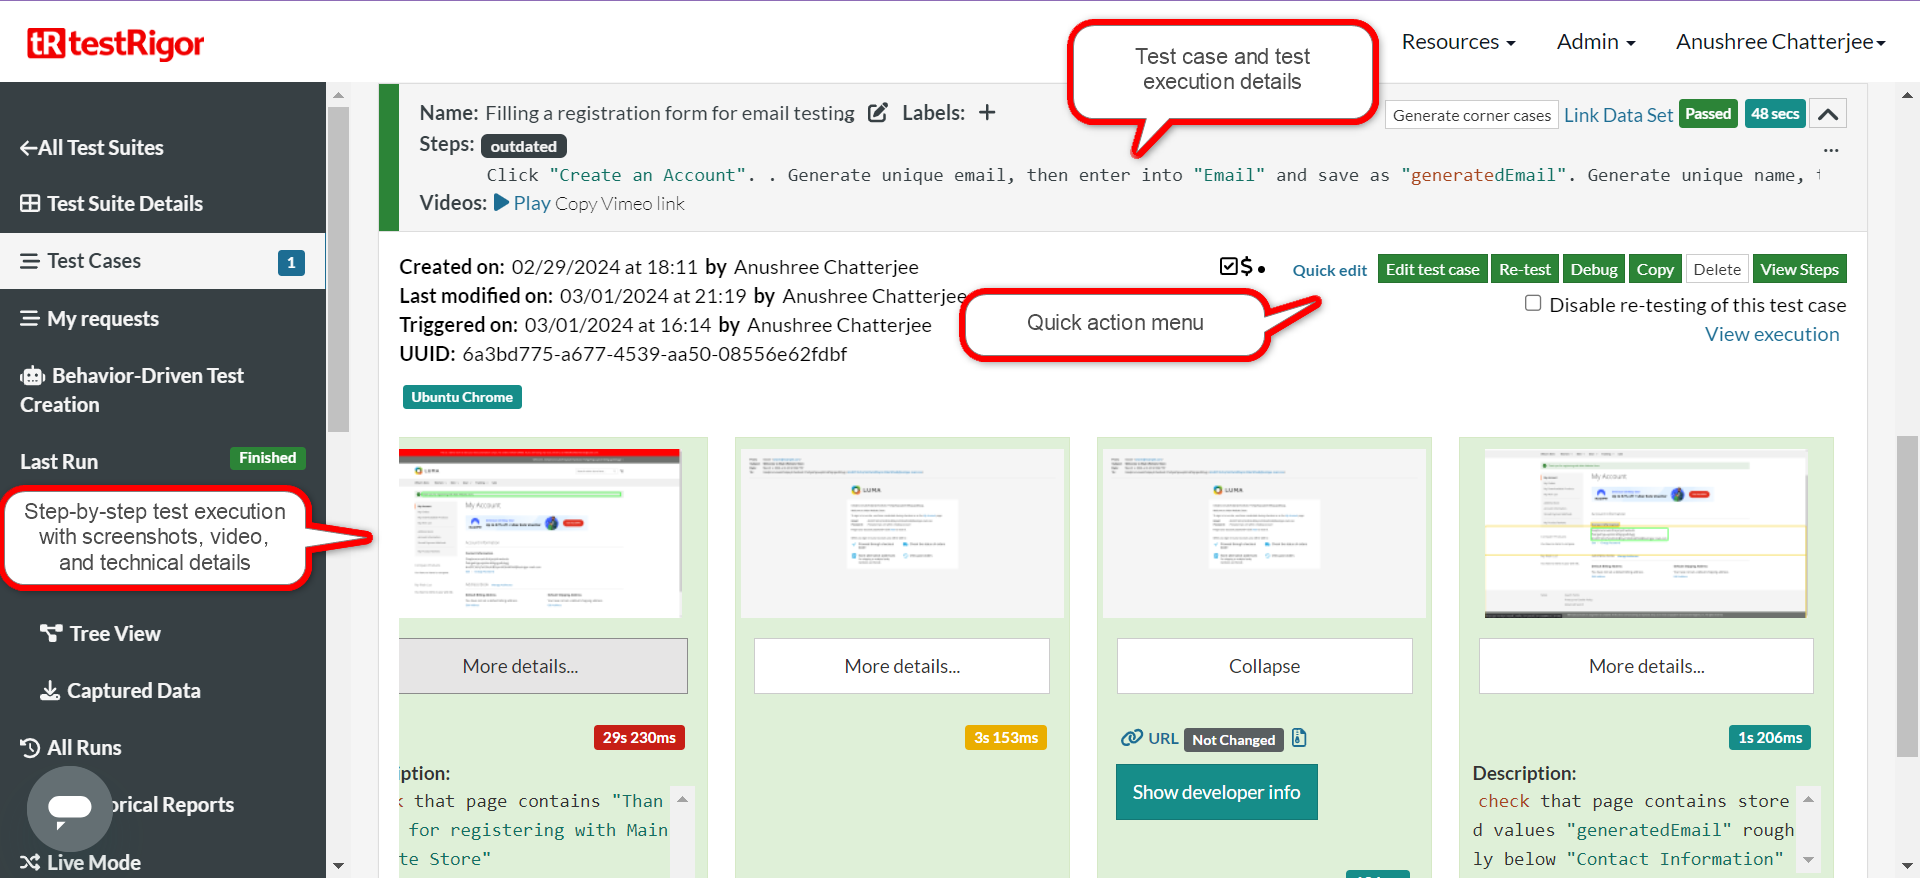
You can also download the complete execution with steps and screenshots in PDF or Word format through the View Execution option.
testRigor’s Capabilities
The test case we saw in the above sections is an end-to-end test case where emails are part of the workflow. Apart from the simplistic test case design and execution, you can do much more with testRigor using simple English commands.
- Email, Phone Call, and SMS Testing: Use simple English commands to test the email, phone calls, and SMS. These commands help validate 2FA scenarios, with OTPs and authentication codes being sent via email, phone calls, or via phone text.
- Reusable Rules (Subroutines): You can easily create functions for the test steps that you use repeatedly. You can use the Reusable Rules to create such functions and call them in test cases by simply writing their names. See the example of Reusable Rules.
- Global Variables and Data Sets: You can import data from external files or create your own global variables and data sets in testRigor to use them in data-driven testing.
- 2FA, QR Code, and Captcha Resolution: testRigor efficiently manages the 2FA, QR Code, and Captcha resolution through its simple English commands.
- File Upload/ Download Testing: Execute the test steps involving file download or file upload without the requirement of any third-party software. You can also validate the contents of the files using testRigor’s simple English commands.
- Database Testing: Execute database queries and validate the results fetched.
testRigor enables you to test web, mobile (hybrid, native), API, and desktop apps with minimum effort and maintenance.
Additional Resources
- Access testRigor documentation to learn about more valuable capabilities
- Top testRigor’s features
- Tips and tricks for email testing
- How to perform end-to-end testing using testRigor
| Achieve More Than 90% Test Automation | |
| Step by Step Walkthroughs and Help | |
| 14 Day Free Trial, Cancel Anytime |


