How to Generate a File for testRigor iOS Simulators
|
|
To test an iOS application on testRigor infrastructure it is important to remember that we use simulators. At the moment, testing on real devices is possible by integrating a 3rd party device farm like LambdaTest with testRigor.
Our simulators are able to test iOS applications compiled for x86 (Intel chips) or arm64 (Apple Silicon chips). The following steps describe the process to correctly generate an iOS application file ready to upload to testRigor.
- Open the application in Xcode.
-
Click the application name at the top of the application.
- Select a simulator device.
-
Setting the correct scheme is a one-time process if it has not been done before:
- Click the application name at the top of the application.
- Select Edit scheme.
- A pop-up will open.
-
Go to Run section.
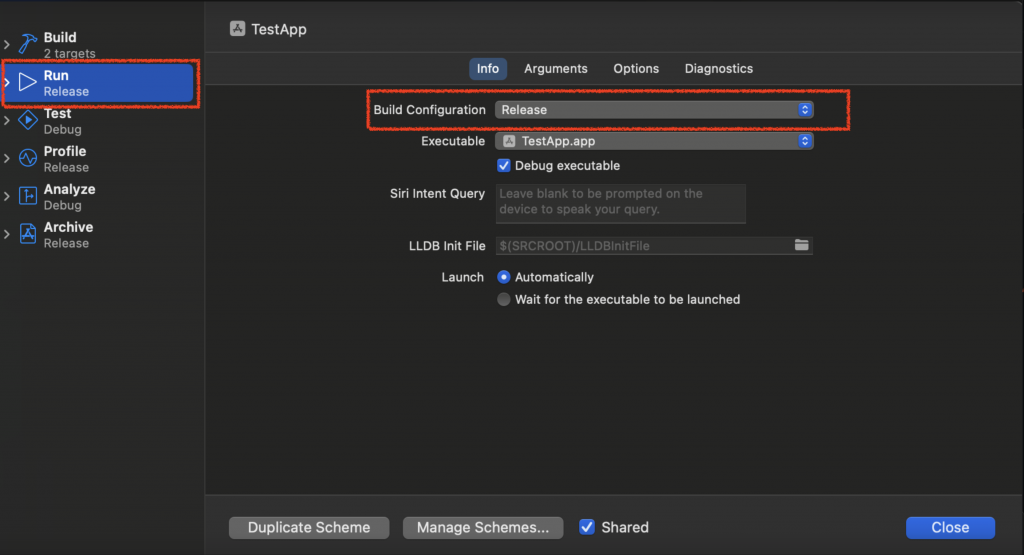
- Select Release from the Build configuration dropdown.
- Click the Close button at the bottom right of the popup.
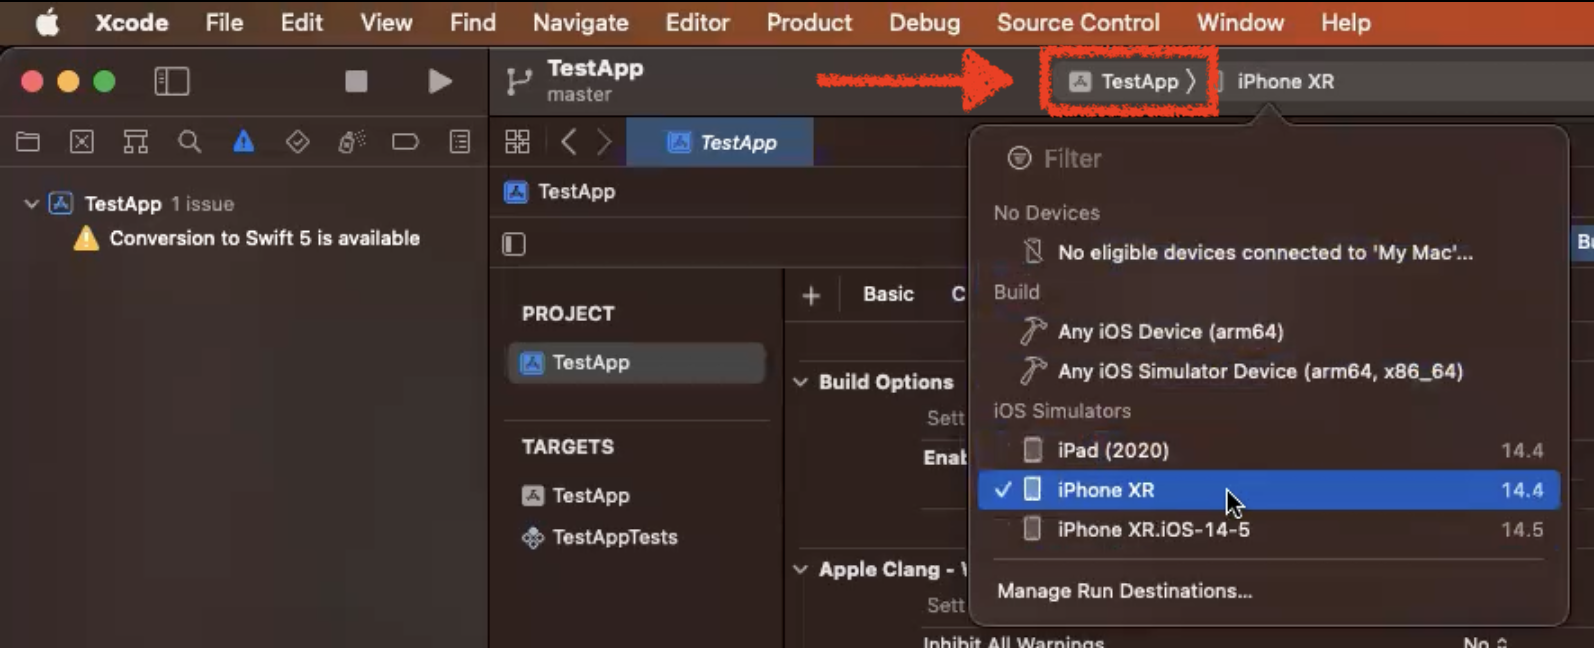
- Select the device from the list at the top menu.
- Click Product in the menu bar at the top of the screen.
- Select Build. This will cause your app to render a new .app file, which may take a few minutes, but you should be able to continue the process up to Step 18.
- Click Xcode on the right of the Apple logo (
or
) at the top of the screen.
- Select Preferences or Settings.
- Select the Locations tab in the popup that opens.
- Click the right arrow (
or
) on the right of the Finder directory below Derived data.
- Open the DerivedData folder.
- Open the folder with the name of the desired app/build (this might have a randomized string of characters added to the name).
- Open the Build folder.
- Open the Products folder.
- Open the Release-iphonesimulator folder.
- The latest build should be in that folder; you can distinguish it from other files of a similar name by the date and time of creation. If it has not finished rendering, allow it to complete the process before moving on to the next step.
- Add the extension .app to the name of the file once it has completed rendering.
- Right click on the file with the application name + the .app extension (e.g., myiosfile.app).
- Select Compress.
- The file should now have the .zip extension.
Now you are ready to begin testing your iOS application on testRigor. If you have already created your iOS suite, simply upload the filename.app.zip file into the file input in Test Suite Details. If you have yet to create your test suite, the filename.app.zip file will need to be ready before attempting to do so.
| Achieve More Than 90% Test Automation | |
| Step by Step Walkthroughs and Help | |
| 14 Day Free Trial, Cancel Anytime |


