CodeIgniter Testing
|
|
[/raw]CodeIgniter is an open-source and rapid-development web framework for developing professional and interactive websites with minimum footprint. EllisLab launched CodeIgniter and is currently a British Columbia Institute of Technology project.
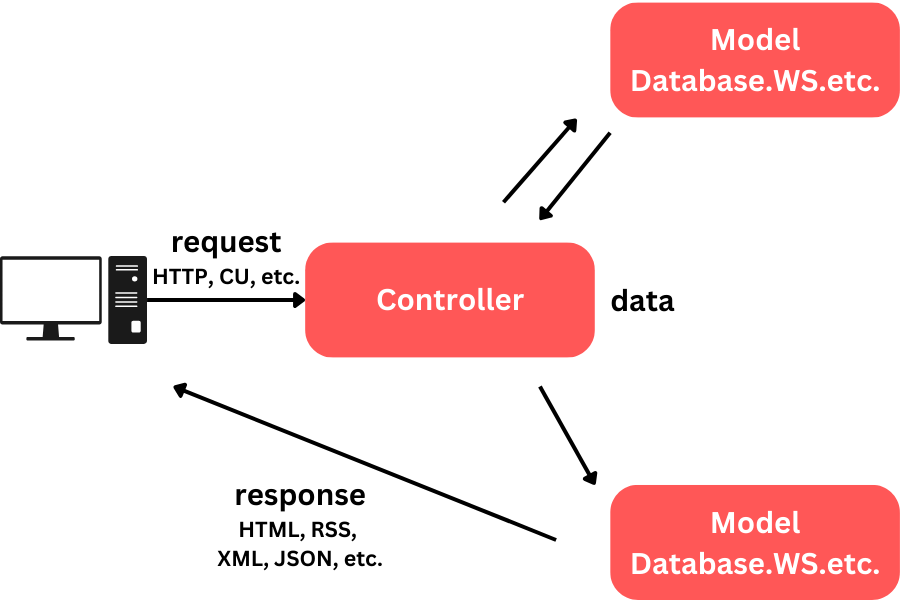
CodeIgniter has rich libraries, simple interfaces, helpers, and logical structures to simplify complex PHP functions. It is loosely based on the MVC (Model-View-Controller) platform, where Controller is necessary, and View is optional.
Unit Testing
In unit testing, the focus will be on individual units or components of the application which are logically isolated. Unit testing is the first level of testing, and developers will usually do it.
For CodeIgniter, you can perform unit testing through the following tools:
- Unit Testing Class
- PHPUnit
Unit Testing Class
CodeIgniter's Unit Test class consists of an evaluation function and two result functions. It's straightforward and not feature-rich like PHPUnit. It helps verify that the code produces the correct data type and results. Below are the steps to use the Unit Test class.
Unit Test class in your controller using the library function.$this->load->library('unit_test');
$test = 1 + 1;
$expected_result = 2;
$test_name = 'Adds one plus one';
$this->unit->run($test, $expected_result, $test_name);
Step 3: Generate the results and view them through any of the following methods:
Echo Command
echo $this->unit->run($test, $expected_result);
Strict Mode
$this->unit->use_strict(TRUE);
Unit Test Display
$this->unit->set_test_items()
Additionally, you can create one template and decide the formatting of test results. Know more about Unit Testing Class here.
PHPUnit
CodeIgniter provides in-built support for PHPUnit for testing. PHPUnit can be installed using any of the two methods:
- Composer: Install PHPUnit into your project using Composer
- Phar: Download the standalone
.pharfile from the PHPUnit website
PHPUnit framework's configurations are saved by default in the phpunit.xml.dist file in the project root. You can override the configuration in your phpunit.xml file.
tests/app/Libraries/CheckUnitTest.php.class Testcase extends CI_Controller {
public function get_testcase() {
$this ->load ->view('view_testcase');
}
public function unit_test_check() {
$output=$this -> request('GET',['Testcase','get_testcase']);
$expected = 'Unit Test';
$this -> assertContains($expected,$output);
}
}
Integration Testing
It focuses on testing different units, modules, or components of the software application as a combined entity. The focus is testing the interfaces and exposing the bugs when the components are integrated and interact.
You can perform integration testing for CodeIgniter applications by testing:
- Database Integrations
- Controllers
- HTTP Features
- Responses
Database Integrations
Use the DatabaseTestTrait class and extend CIUnitTestCase to take advantage of CodeIgniter's built-in database tools. Use the setUp() and tearDown() phases for configuring the pre-condition and cleaning it back to the default state.
DatabaseTestTrait class provides several helper methods to support CodeIgniter database testing.<?php
namespace App\Database;
use CodeIgniter\Test\CIUnitTestCase;
use CodeIgniter\Test\DatabaseTestTrait;
class MyTests extends CIUnitTestCase
{
use DatabaseTestTrait;
protected function setUp(): void
{
parent::setUp();
// Do something here....
}
public function test_basic_example()
{
$response = $this->get('/');
// ...
}
protected function tearDown(): void
{
parent::tearDown();
// Do something here....
}
}
Controllers
CodeIgniter provides valuable helper classes and traits to test the controllers. Enable controller testing by using ControllerTestTrait within the tests. This trait provides many useful helper methods, and you can then set up the environment, including the request and response classes, the request body, URI, etc.
<?php
namespace CodeIgniter;

use CodeIgniter\Test\CIUnitTestCase;
use CodeIgniter\Test\ControllerTestTrait;
use CodeIgniter\Test\DatabaseTestTrait;

class TestControllerA extends CIUnitTestCase
{
  use ControllerTestTrait;
  use DatabaseTestTrait;
  public function testShowCategories()
  {
    $result = $this->withURI('http://example.com/categories')
        ->controller(\App\Controllers\ForumController::class)
        ->execute('showCategories');
    $this->assertTrue($result->isOK());
  }
}
HTTP Features
Feature testing allows viewing the results of a single call to the application, e.g., results of a single web form or an API endpoint. It is helpful since it allows testing the entire life cycle of a single request.
For feature testing, the test class should use CodeIgniter\Test\DatabaseTestTrait and CodeIgniter\Test\FeatureTestTrait traits. Use setUp() and tearDown() phases if implementing custom methods.
<?php
namespace App;

use CodeIgniter\Test\DatabaseTestTrait;
use CodeIgniter\Test\FeatureTestTrait;

class TestFoo extends CIUnitTestCase
{
  use DatabaseTestTrait;
  use FeatureTestTrait;

  protected function setUp(): void
  {
    parent::setUp();
    $this->myClassMethod();
  }

  public function test_basic_example()
  {
    $result = $this->call('get', '/');
    $result = $this->call('post', 'contact', [
      'name'  => 'Fred Flintstone',
      'email' => '[email protected]',
    ]);
  }

  protected function tearDown(): void
  {
    parent::tearDown();
    $this->anotherClassMethod();
  }
}
Responses
CodeIgniter includes a TestResponse class for parsing and testing the application responses. TestResponse class provides the result for Controller and HTTP feature tests. Using ResponseInterface, you can create custom test responses too.
The TestResponse class also has different in-built assertions. If the responses have JSON or XML format, you can handle them using the inbuilt functions provided by the class.
End-to-End Testing
In this testing, the approach is from an end-user perspective and will simulate real user scenarios. The focus will be testing the user scenarios, which integrate the Model, View, and Controller seamlessly.
Perform E2E testing using any of the legacy automation testing tools.
Traditional (Legacy) Automation Testing Tools
Selenium has enjoyed the popularity of being the most used automation tool. It requires a strong background in programming and can be used only for web testing. Dependency on XPath and CSS locators contributes significantly to unstable test scripts and rework. All these factors require massive and unavoidable maintenance efforts to keep the test scripts functional.
Most test automation tools today are based on Selenium and directly inherit its disadvantages. Many other Selenium limitations are causing a shift of interest toward codeless automation tools like testRigor.
New Generation Tools
testRigor is a new era no-code automation tool with integrated AI that helps create automated test cases much faster and spend nearly no time on maintenance. Use testRigor's generative AI-based test script generation, where you only need to provide the test case title and the steps will be automatically generated within seconds.
Below are some advantages of testRigor over other tools:
Versatile test creation: Select from three convenient ways to create tests - write tests yourself in plain English, use the test recorder, or employ generative AI for test creation.
Ultra-stable: testRigor employs no-code test scripts, eliminating dependencies on any specific programming language. Elements are referenced as they appear on the screen, thereby reducing reliance on implementation details. This greatly simplifies the process of test creation , maintenance, and debugging.
Cloud-hosted: Save time, effort, and resources on infrastructure setup. With testRigor, you are ready to start writing test scripts right after signing up, boasting a speed up to 15 times faster compared to other automation tools.
Comprehensive testing coverage: testRigor supports all main types of testing and accommodates cross-browser and cross-platform tests.
Seamless integrations: built-in integrations with CI/CD, ERP, and test management tools ensure a seamless and efficient testing process.
Get a glimpse of testRigor's incredible features.
// Buy from a cloth retail website
login
check that page contains "Striped Black Shirt"
click "Striped Black Shirt"
click "Add to cart"
click "Cart"
click "Place Order"
check that page contains "Order placed successfully."
The simplicity of the test script is what catches the eye. No CSS or XPath locators, just plain text as visible on the UI. The auto-healing capabilities automatically handle the changes in the element attributes. So next time, if the div changes to li, testRigor still identifies the element easily without breaking the test script.
You can cover much more complex scenarios too. Take a look at the documentation to get a better understanding of the supported functionality.
How to do End-to-end Testing with testRigor
Let us take the example of an e-commerce website that sells plants and other gardening needs. We will create end-to-end test cases in testRigor using plain English test steps.
Step 1: Log in to your testRigor app with your credentials.
Step 2: Set up the test suite for the website testing by providing the information below:
- Test Suite Name: Provide a relevant and self-explanatory name.
- Type of testing: Select from the following options: Desktop Web Testing, Mobile Web Testing, Native and Hybrid Mobile, based on your test requirements.
- URL to run test on: Provide the application URL that you want to test.
- Testing credentials for your web/mobile app to test functionality which requires user to login: You can provide the app’s user login credentials here and need not write them separately in the test steps then. The login functionality will be taken care of automatically using the keyword
login. - OS and Browser: Choose the OS Browser combination on which you want to run the test cases.
- Number of test cases to generate using AI: If you wish, you can choose to generate test cases based on the App Description text, which works on generative AI.

Step 3: Click Create Test Suite.
On the next screen, you can let AI generate the test case based on the App Description you provided during the Test Suite creation. However, for now, select do not generate any test, since we will write the test steps ourselves.
Step 4: To create a new custom test case yourself, click Add Custom Test Case.

Step 5: Provide the test case Description and start adding the test steps.
For the application under test, i.e., e-commerce website, we will perform below test steps:
- Search for a product
- Add it to the cart
- Verify that the product is present in the cart
Test Case: Search and Add to Cart
Step 1: We will add test steps on the test case editor screen one by one.
testRigor automatically navigates to the website URL you provided during the Test Suite creation. There is no need to use any separate function for it. Here is the website homepage, which we intend to test.

First, we want to search for a product in the search box. Unlike traditional testing tools, you can identify the UI element using the text you see on the screen. You need not use any CSS/XPath identifiers.
click "What are you looking for?"
Step 2: Once the cursor is in the search box, we will type the product name (lily), and press enter to start the search.
type "lily"
enter enter

Search lists all products with the “lily” keyword on the webpage.
Step 3: The lily plant we are searching for needs the screen to be scrolled; for that testRigor provides a command. Scroll down until the product is present on the screen:
scroll down until page contains "Zephyranthes Lily, Rain Lily (Red)"

When the product is found on the screen, testRigor stops scrolling.
Step 4: Click on the product name to view the details:
click "Zephyranthes Lily, Rain Lily (Red)"
After the click, the product details are displayed on the screen as below, with the default Quantity as 1.

Step 5: Lets say, we want to change the Quantity to 3, so here we use the testRigor command to select from a list.
select "3" from "Quantity"
click "Add to cart"
The product is successfully added to the cart, and the “Added to your cart:” message is displayed on webpage.
Step 6: To assert that the message is successfully displayed, use a simple assertion command as below:
check that page contains "Added to your cart:"
Step 7: After this check, we will view the contents of the cart by clicking View cart as below:
click "View cart"

Step 8: Now we will again check that the product is present in the cart, under heading “Your cart” using the below assertion. With testRigor, it is really easy to specify the location of an element on the screen.
check that page contains "Zephyranthes Lily, Rain Lily (Red)" under "Your cart"

Complete Test Case
Here is how the complete test case will look in the testRigor app. The test steps are simple in plain English, enabling everyone in your team to write and execute them.

Click Add and Run.
Execution Results
Once the test is executed, you can view the execution details, such as execution status, time spent in execution, screenshots, error messages, logs, video recordings of the test execution, etc. In case of any failure, there are logs and error text that are available easily in a few clicks.
You can also download the complete execution with steps and screenshots in PDF or Word format through the View Execution option.

testRigor’s Capabilities
Apart from the simplistic test case design and execution, there are some advanced features that help you test your application using simple English commands.
- Reusable Rules (Subroutines): You can easily create functions for the test steps that you use repeatedly. You can use the Reusable Rules to create such functions and call them in test cases by simply writing their names. See the example of Reusable Rules.
- Global Variables and Data Sets: You can import data from external files or create your own global variables and data sets in testRigor to use them in data-driven testing.
- 2FA, QR Code, and Captcha Resolution: testRigor easily manages the 2FA, QR Code, and Captcha resolution through its simple English commands.
- Email, Phone Call, and SMS Testing: Use simple English commands to test the email, phone calls, and SMS. These commands are useful for validating 2FA scenarios, with OTPs and authentication codes being sent to email, phone calls, or via phone text.
- File Upload/ Download Testing: Execute the test steps involving file download or file upload without the requirement of any third-party software. You can also validate the contents of the files using testRigor’s simple English commands.
- Database Testing: Execute database queries and validate the results fetched.
testRigor enables you to test web, mobile (hybrid, native), API, and desktop apps with minimum effort and maintenance.
Additional Resources
- Access testRigor documentation to know about more useful capabilities
- Top testRigor’s features
- How to perform end-to-end testing
Conclusion
The quote above emphasizes good test design. To think and devote more time to test design, a tester needs to shift focus from programming automation test scripts. Codeless AI-enabled tools like testRigor provide an advantage to focus more on test case design since testRigor takes care of the test scripting, environment handling, maintenance, reporting, and everything else!
Its incredible features aid in catching more relevant bugs early in the software development cycle and subsequently reduce the application's overall cost-to-market.
| Achieve More Than 90% Test Automation | |
| Step by Step Walkthroughs and Help | |
| 14 Day Free Trial, Cancel Anytime |


