Flutter Testing
|
|
What is Flutter?
Flutter is a free and open-source mobile application development framework created by Google. It was released in 2017 and has gained popularity among developers due to its ability to build high-performance, visually appealing, and native-like apps for multiple platforms, including iOS, Android, web, and desktop, using a single codebase.
Flutter uses the Dart programming language, which was also developed by Google, and provides a rich set of pre-built widgets and tools that make it easy for developers to create beautiful and functional apps. The framework uses a reactive programming model.
One of the key advantages of Flutter is its hot reload feature, which allows developers to make changes to their code and see the results instantly in the app without needing to rebuild it from scratch. This helps to speed up the development process and enables developers to iterate quickly.
Flutter also comes with a powerful set of tools for debugging and testing, including support for unit tests, integration tests, and UI tests. This helps developers to ensure that their apps are bug-free and perform well on all platforms.
Flutter Testing
The following are the primary types of testing that can be performed using the testing framework:
- E2E Testing
- Integration testing
- Unit Testing
Pre-requisites for Code-based Testing
Before conducting any level of testing on the code, there are a few pre-requisites that need to be followed for testing Flutter:
-
The flutter_test package is an essential package provided by the Flutter SDK for writing unit tests, widget tests, and integration tests.
-
Add this dependency in
pubspec.yamlfile in thedev_dependenciessection:dev_dependencies: flutter_test: sdk: flutter
-
Create a test file with a file name ending with
_test.For example, to test a class validatecreds.dart, we need to name the test filevalidatecreds_test.dart. The test file should be placed in the test folder located at the root of your Flutter application or package. -
Create a class to test.For example, to test class
validatecreds.dart, we need to create and place the class file in lib folder located at the root of your Flutter application or package.The folder structure should be as shown below:login_screen/ lib/ validatecreds.dart test/ validatecreds_test.dart -
Write a test for the class.Example:
test/ validatecreds_test.dart
Flutter End-to-end testing
E2E testing checks the functionality of the entire system or application, testing it from start to finish. The goal is to make sure that all components of the system are working together as intended and that the application performs as expected under various real-world scenarios.
This type of testing is usually performed after unit testing and integration testing have been completed. Essentially, we are testing the apps that are developed using Flutter, not just the code. Quite often, these tests are UI-based. That is, they interact with the application like a real user would.
However, writing automated tests for Flutter apps can be challenging.
Challenges with Automating Flutter Application Testing
As versatile as Flutter apps are, testing them can pose a challenge. Especially if you’re performing UI-based testing like end-to-end testing. Traditional test automation tools are not equipped to deal with:
- Custom Rendering: Flutter uses its own rendering engine, Skia, to draw UI elements directly onto the screen. This approach allows for high customization and performance but means that Flutter doesn’t rely on the native UI components of Android or iOS. This means that traditional UI automation tools that rely on native UI element locators (like Android’s View IDs or iOS’s accessibility IDs) often struggle to identify and interact with Flutter elements.
- Timing Issues: Flutter apps often involve complex animations and dynamic content updates. Automation tools might struggle to synchronize with these dynamic changes, which can lead to flaky tests.
- Finding Dynamic Elements: Finding elements that change frequently can be difficult.
- Tooling Maturity: While tools like Appium and Flutter Driver exist, the ecosystem for Flutter automation is still evolving. Some automation tools might have limited support for Flutter-specific features or might require workarounds.
While you can use traditional solutions like Selenium, Appium, or Flutter’s testing framework, they tend to fall short of keeping up with the demands of these modern applications. For example:
Flutter Framework (Flutter Driver)
Flutter Driver is the official end-to-end testing framework provided by Flutter. While it’s excellent for Flutter apps, it has its own limitations when compared to more mature, cross-platform tools:
- Requires App Modification: To use Flutter Driver, the app needs to be built in a specific “drive” mode, which can add a slight overhead to the build process.
- Limited Third-Party Integration: Integrating Flutter Driver seamlessly with other test management or reporting tools might require custom development.
- Platform-Specific Quirks: While Flutter aims for cross-platform consistency, there can still be platform-specific behaviors that Flutter Driver might not always handle perfectly without specific platform-aware code.
- Learning Curve: While powerful, learning and effectively utilizing Flutter Driver requires understanding its specific APIs and concepts. This limits who can participate in E2E testing.
Appium
This tool is a popular choice for mobile testing and has many good features, too, yet it isn’t the best choice for Flutter app testing because:
- Native Element Identification: Appium primarily interacts with native mobile UI elements using platform-specific APIs (UI Automator for Android, XCUITest for iOS). Flutter’s custom rendering bypasses these native UI structures.
- Accessibility Dependence: Appium often relies on accessibility labels and identifiers to locate elements. If a Flutter app doesn’t have well-defined and consistent accessibility attributes, Appium’s ability to find elements is severely hampered.
Selenium
While Selenium is well-known for web testing, it struggles with automating Flutter apps mainly because:
- Web-Centric Architecture: Selenium is primarily designed to test web applications in browsers using HTML, CSS, and JavaScript. Flutter uses custom rendering that doesn’t directly map to standard web elements.
- Element Locators: Selenium relies on HTML element locators (IDs, classes, XPath, CSS selectors). Flutter widgets don’t have these standard web-based attributes. This makes it difficult to identify and interact with them reliably.
- Rendering Differences: The way Flutter renders UI is fundamentally different from how web browsers render HTML. Selenium’s interactions are built around browser events and DOM manipulation, which don’t translate well to Flutter’s rendering.
- Limited Mobile Capabilities: While Selenium has bindings for mobile (using Appium as a backend), its core strengths lie in web testing. Its mobile capabilities are often less mature and efficient for complex mobile-specific interactions. If you’re using Flutter, then the chances of your app being a mobile app are high. In such a situation, you’re better off looking for test automation tools that actually focus on mobile testing.
Flutter Applications Testing Using AI
So if traditional test automation tools cannot be relied on, then how should you automate Flutter testing? The answer is – using an AI-based test automation tool.
Why Use AI for Flutter Testing?
The above-mentioned options can be challenging to use, especially if you have to test across platforms and devices like Android or iOS systems or complex scenarios like CAPTCHA-based logins. In such situations where traditional test automation tools might struggle, having tools that use the power of AI can be very helpful. Here’s why:
- Visual Recognition: AI-powered tools can use visual recognition to identify UI elements to overcome the limitations of traditional locators that struggle with Flutter’s custom rendering. AI can “see” the app like a human user and identify elements based on their appearance, regardless of the underlying code structure.
- Adaptive Locators: AI can learn and adapt to changes in the UI, even when element IDs or other locators change. This reduces test flakiness and maintenance overhead.
- Self-Healing Tests: AI can analyze test failures and automatically adjust locators or test steps to adapt to UI changes. This significantly reduces test maintenance and makes tests more resilient.
- Context-Aware Testing: AI can understand the context of the app and user interactions, which leads to more robust and reliable tests. This is especially useful for complex animations and dynamic content.
- No-Code/Low-Code Automation: AI-powered tools often provide intuitive interfaces that allow testers to create tests without extensive coding knowledge. This accelerates test creation and reduces the learning curve.
- Automated Test Generation: AI can analyze the app and automatically generate test cases and cover a wider range of scenarios. This can greatly increase test coverage.
- Reduced Maintenance: Due to the self-healing and adaptive nature of AI-powered tools, the maintenance of test scripts is greatly reduced.
- Exploratory Testing: AI can perform exploratory testing, discovering edge cases, and potential bugs that might be missed by manual testing or traditional automation.
- Visual Testing: AI can perform visual testing, compare screenshots, and detect visual regressions. This is very important for Flutter due to its graphic rendering nature.
- Visual Consistency Checks: AI can easily compare UI elements and layouts across different platforms (Android and iOS), ensuring visual consistency in Flutter apps. This helps to find platform-specific UI issues.
testRigor
testRigor is a generative AI-powered test automation tool that can easily test Flutter web and mobile applications. There’s no programming language dependency since testRigor is an actual codeless tool – which means that even manual QA testers can comfortably own the process of creating, editing, and maintaining any test cases. Thus, the speed of test creation is way faster compared to Selenium or Appium, and test maintenance issues are basically nil.
Here are some of testRigor’s notable AI features that significantly simplify test automation:
- Test Creation in Natural Language: This tool lets you use plain English language to write test cases. Just write what you see on the screen, and testRigor will take care of the rest. Along with manually writing test cases in English, you can use the generative AI feature to help you create test cases in bulk based on a comprehensive description or prompt. Read: All-Inclusive Guide to Test Case Creation in testRigor.
- AI Vision: testRigor utilizes AI vision capabilities to “see” and interpret the visual elements on the screen, like buttons, images, and more. This allows it to go beyond basic pixel comparisons. Read: Vision AI and how testRigor uses it.
- Self-healing of Tests: testRigor constantly tries to make sure that your test runs are not flakey and that you’re only bothered if there’s a real issue. The tool uses AI to heal tests in the event of basic UI changes, such as if the UI element’s label or position changes. Using testRigor’s Vision AI and self-healing capabilities, your test cases can “look on the screen” for the alternative way of doing what was intended as opposed to failing. This is a huge relief from a test maintenance standpoint. Read: AI-Based Self-Healing for Test Automation.
- Visual Regression Testing: You can use testRigor to perform visual regression testing by comparing the application with a baseline. Read: How to do visual testing using testRigor?
- OCR Capability: testRigor also offers OCR capabilities to read and validate text within images or non-textual elements on the screen.
- Contextual Understanding: testRigor has another interesting capability – to allow testers to provide context at each step. Just by appending the
using aisuffix to the command, you can easily test the otherwise difficult scenarios. This is immensely helpful in graph testing as the AI is designed to understand the context of the graph within the application. - Exploratory UI Testing: testRigor can also assist you with exploratory testing, unlike most other test automation tools. One of the great ways it helps with this is by detecting UI issues using Vision AI on every page. This works when you enable the relevant setting. Read: Exploratory Testing with AI in testRigor.
Apart from the above features, testRigor uses AI to reduce test maintenance time by up to 99.5% and give you smooth test execution. testRigor behaves like a human emulator. What this implies is that rather than utilizing element locators (like XPaths or CSS), you can just name the elements as you see them on the screen. Due to testRigor’s independence from minute implementation details such as changes in HTML or XML structure or anything similar, the stability of the test is unaffected by these changes.
Unlike other tools and frameworks where you need to set up the environment by importing packages or performing a string of activities, testRigor gets to work with just a few clicks.
Flutter App Testing with testRigor
click "Let's start" using ai click "both" using ai click "Next" using ai click "far apart" using ai click "Next" using ai click "below" using ai click "Next" using ai click "too much" using ai click "Next" using ai check page contains "Add to cart" using ai
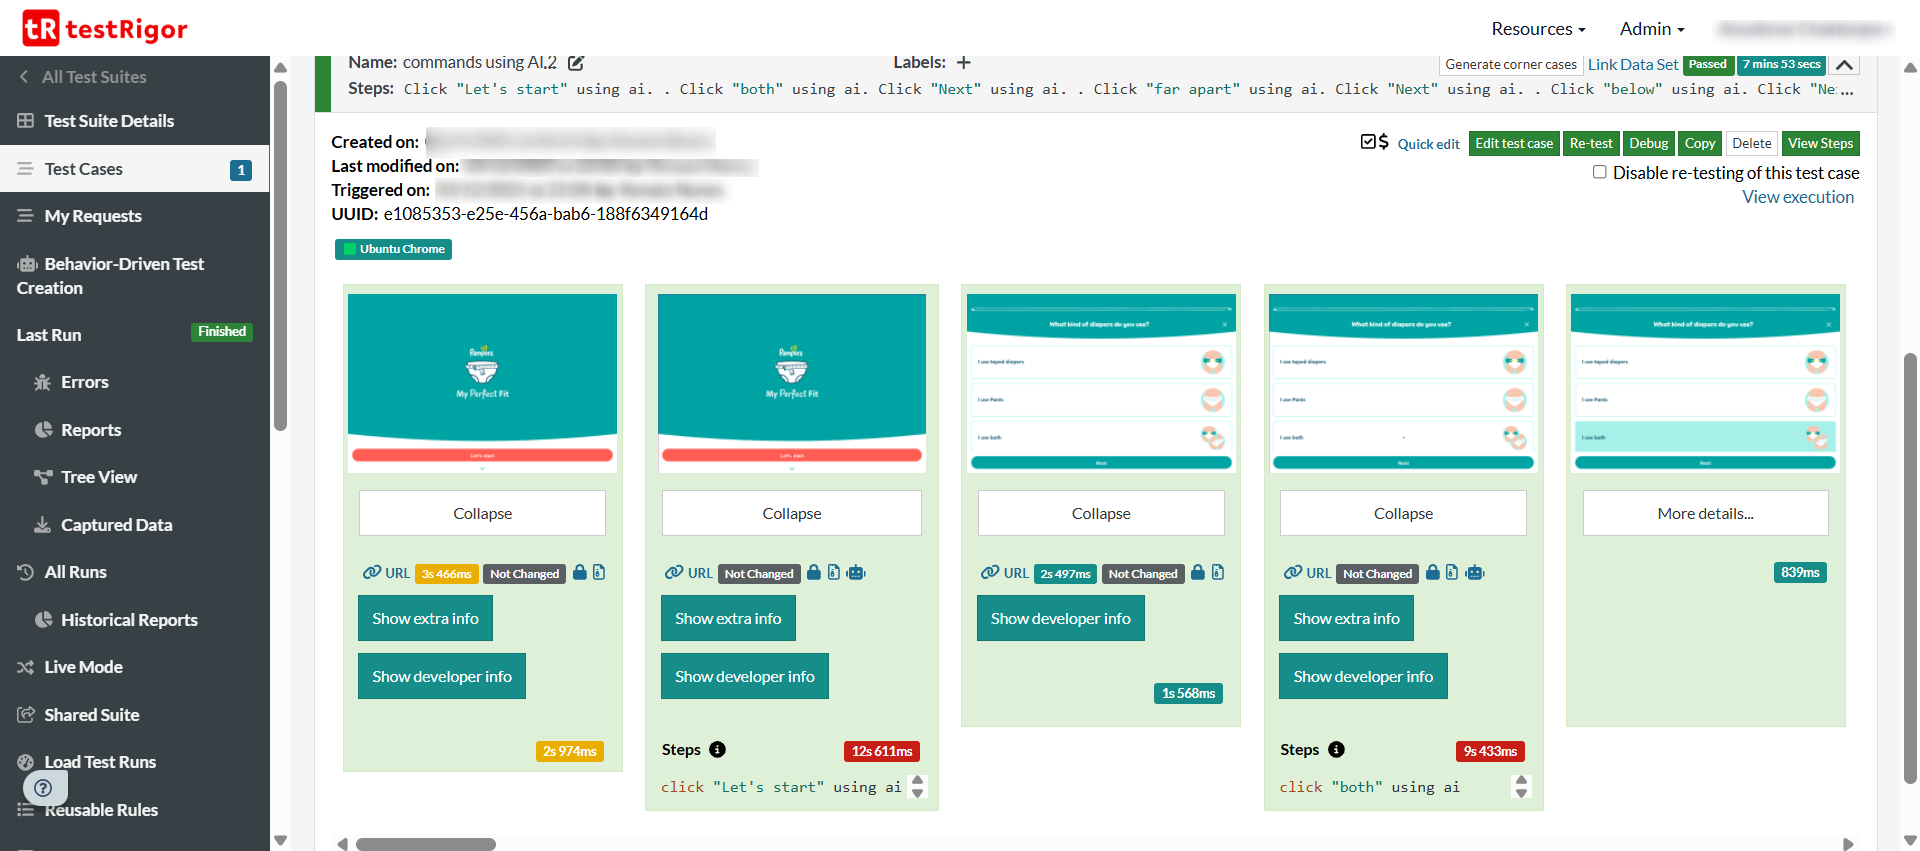
You can see that even without providing the exact details to testRigor, the tool comprehends what’s on the screen and tries its best to identify the right option.
While AI-based testing will give you much better results, remember that it can take some back and forth to get it right. As it is with AI, you need to try out different prompts before the right one clicks. In that case, make use of the other AI-based testing features to achieve the best results. You can use a mix of testRigor features like the OCR capability, reusable rules, and generative AI-based test creation to ease the process of automation testing.
This is truly a one-stop solution for all your testing needs, be it web testing, mobile testing, or desktop testing. And if you still need to extend testRigor’s capabilities, you can simply integrate it with other tools like those for CI/CD or databases. The integrations are smooth and hassle-free.
Flutter Integration Testing
Integration testing is a software testing technique that tests the interactions and interfaces between different modules or components of a software system. The purpose of integration testing is to make sure that the individual modules of the system work together as expected and to catch any defects or issues that may arise due to the interaction between different parts of the system.
In the case of Flutter apps, integration testing can be done in the following ways:
- Using HTTP tests to perform integration testing at the API layer
- Integration testing can be performed at the user interface level (which can also be part of E2E testing)
- Also, integration testing can be performed at the database layer
Pre-requisites for Integration Testing
-
We need to add two packages in the dev dependencies section in the pubspec.yaml file.
dev_dependencies: integration_test: sdk: flutter flutter_test: sdk: flutter -
We need to group flow using ‘group’ keyword.
-
We cannot create integration tests in the ‘test’ folder. We need to create a folder with the name ‘integration_test‘ where our integration scripts will be placed.
-
For API, we need to:
-
Add http client package in the dependencies section in pubspec.yml.
dependencies: flutter: sdk: flutter http: 0.13.4 -
Add mockito and build_runner dependency in pubspec.yaml.
dev_dependencies: flutter_test: sdk: flutter mockito: ^5.1.0 build_runner: ^2.1.10
-
Example of an Integration Test on the API Level
Suppose we want to validate a response for an API that should return a list of books. This means we need to create an API test class called fetch_books_test.dart.
Sample code test class fetch_books_test.dart:
@GenerateMocks([http.Client])
void main() {
  MockClient mockClient;

  setUp(() {
    mockClient = MockClient();
  });

  tearDown(() {
    mockClient.close();
  });

  group('Fetch books API call test', () {
    test('Should return list of books for http successful call', () async {
      final mockClient = MockClient();
      when(mockClient.get(Uri.parse(fetchBooksURL))).thenAnswer(
        (realInvocation) async => http.Response(
            '[{"name": "The 5 Second Rule","auther": "Mel Robbins"}]',
            200));

      // ACT && ASSERT
      expect(await fetchBooks(mockClient), isA<List<BooksListModel>>());
    });
  });
}
Using @GenerateMocks([http.Client]), mockito understands the HTTP client needs to be mocked for the test class.
After creating a Mock Client, we must inject the mockClient into the fetchBooks(mockClient) method. We can then initialize Mock Client using the setUp() method, which will be used in test cases repeatedly. Anything we would like to do before the test can be specified in setUp().
We can use tearDown() method to close the mockClient once all test cases are executed. Anything we decide to do after the test, can be specified in the tearDown() method.
For more details on API integration testing, refer here.
Example of an Integration Test on the UI Level
Suppose we want to test the interaction between Login and Home screen for the HRMS app for testing the scenario if username and password are correct, the user is navigated to Home Screen then the code looks like below:
Sample integration_test:
void main() {
  group("Login Flow Test", () {
    IntegrationTestWidgetsFlutterBinding.ensureInitialized();
    testWidgets("User navigated to Home Screen on successful login",
        (WidgetTester tester) async {
      // ARRANGE
      await tester.pumpWidget(const MaterialApp(
        home: LoginScreen(),
      ));

      // ACT
      Finder userName = find.byKey(const ValueKey("username"));
      Finder password = find.byKey(const ValueKey("password"));
      await tester.enterText(userName, "[email protected]");
      await tester.enterText(password, "password");

      Finder loginButton = find.byType(ElevatedButton);
      await tester.tap(loginButton);
      Finder welcomeText = find.byType(Text);

      // ASSERT
      expect(welcomeText, findsOneWidget);
    });
  });
}
We use 'IntegrationTestWidgetsFlutterBinding,' which ensures the integration flow among all the components in the group in the test class.
Example of an Integration Test on the Database Level
Flutter has two necessary packages to work with databases:
- sqflite - to access and manipulate SQLite database
- firebase_database - to access and manipulate NoSQL databases from Google
Here's a sample database test:
void main() {
  Database db;
  // Setup sqflite_common_ffi for flutter test
  setUpAll(() {
    // Initialize FFI
    sqfliteFfiInit();
    // Change the default factory for unit testing calls for SQFlite
    databaseFactory = databaseFactoryFfi;
    db = Database();
  });

  tearDownAll(() {
    // Maybe delete the database here
  });

  // Tests here
  test('Example test', () {
    // Do your database calls here, query, delete, etc
  });
}
Flutter Unit Testing
Unit testing is a technique where individual units or components of a software application are tested in isolation from the rest of the system. The purpose of unit testing is to validate that each component of the application is functioning as intended and to catch any defects or bugs early in the development cycle. Following the TDD approach for writing unit tests is a great practice in Flutter.
In Flutter, app unit testing can be performed at:
- Code level
- Widget Level
Below is an Example of Unit Testing at the Code Level:
// Import the test package and Counter class
import 'package:counter_app/counter.dart';
import 'package:test/test.dart';

void main() {
  test('Counter value should be incremented', () {
    final counter = Counter();
    counter.increment();
    expect(counter.value, 1);
  });
}
We write the unit test in the counter_test.dart file. In this example, we increment the counter by 1 and expect the result to be 1 as the starting value is 0.
Below is an Example of Unit Testing at the Widget Level:
import 'package:flutter/material.dart';
import 'package:flutter_test/flutter_test.dart';

void main() {
  testWidgets('displays greeting message', (WidgetTester tester) async {
    await tester.pumpWidget(GreetingWidget(name: 'John'));
    final greetingFinder = find.text('Hello, John!');
    expect(greetingFinder, findsOneWidget);
  });
}

class GreetingWidget extends StatelessWidget {
  final String name;

  GreetingWidget({required this.name});

  @override
  Widget build(BuildContext context) {
    return Text('Hello, $name!');
  }
}
In this example, we define a GreetingWidget class that takes a name argument and displays a greeting message with the name in a Text widget. We then define a test case using the testWidgets function provided by the flutter_test package. The test case uses the pumpWidget method to render the GreetingWidget with a specified name and then checks that the expected greeting message is displayed by searching for a Text widget with the expected text using the find.text function. The expect function then verifies that the Text widget is found exactly once using the findsOneWidget matcher.
Conclusion
Flutter is a great option for developing applications across different platforms with a single codebase. Make sure to test your Flutter apps across these varied platforms to ensure that your customers have a satisfying experience. If the advanced AI capabilities can help you reach your goals faster and efficiently, why not use them? Tools like testRigor are specifically designed to ease the testing burdens and bring in scalability, efficiency, collaboration, while minimizing the test maintenance costs.
| Achieve More Than 90% Test Automation | |
| Step by Step Walkthroughs and Help | |
| 14 Day Free Trial, Cancel Anytime |


