Import test cases from Zephyr for execution with testRigor
|
|
Test management alone isn’t enough to ensure good software testing. You need to be able to integrate with other testing tools to make the process efficient. Luckily, Zephyr integrates with many test automation tools, one of which is testRigor.
Integrating Zypher with testRigor
testRigor is one of the best options there is for effortless automated testing. This tool uses AI to make test case creation, execution, and maintenance easy on its intuitive cloud platform. It allows you to create various types of tests for different types of apps and platforms in plain English without requiring any kind of coding.
Of the many integrations that testRigor supports, one is for Zephyr. Here’s how you can do it.
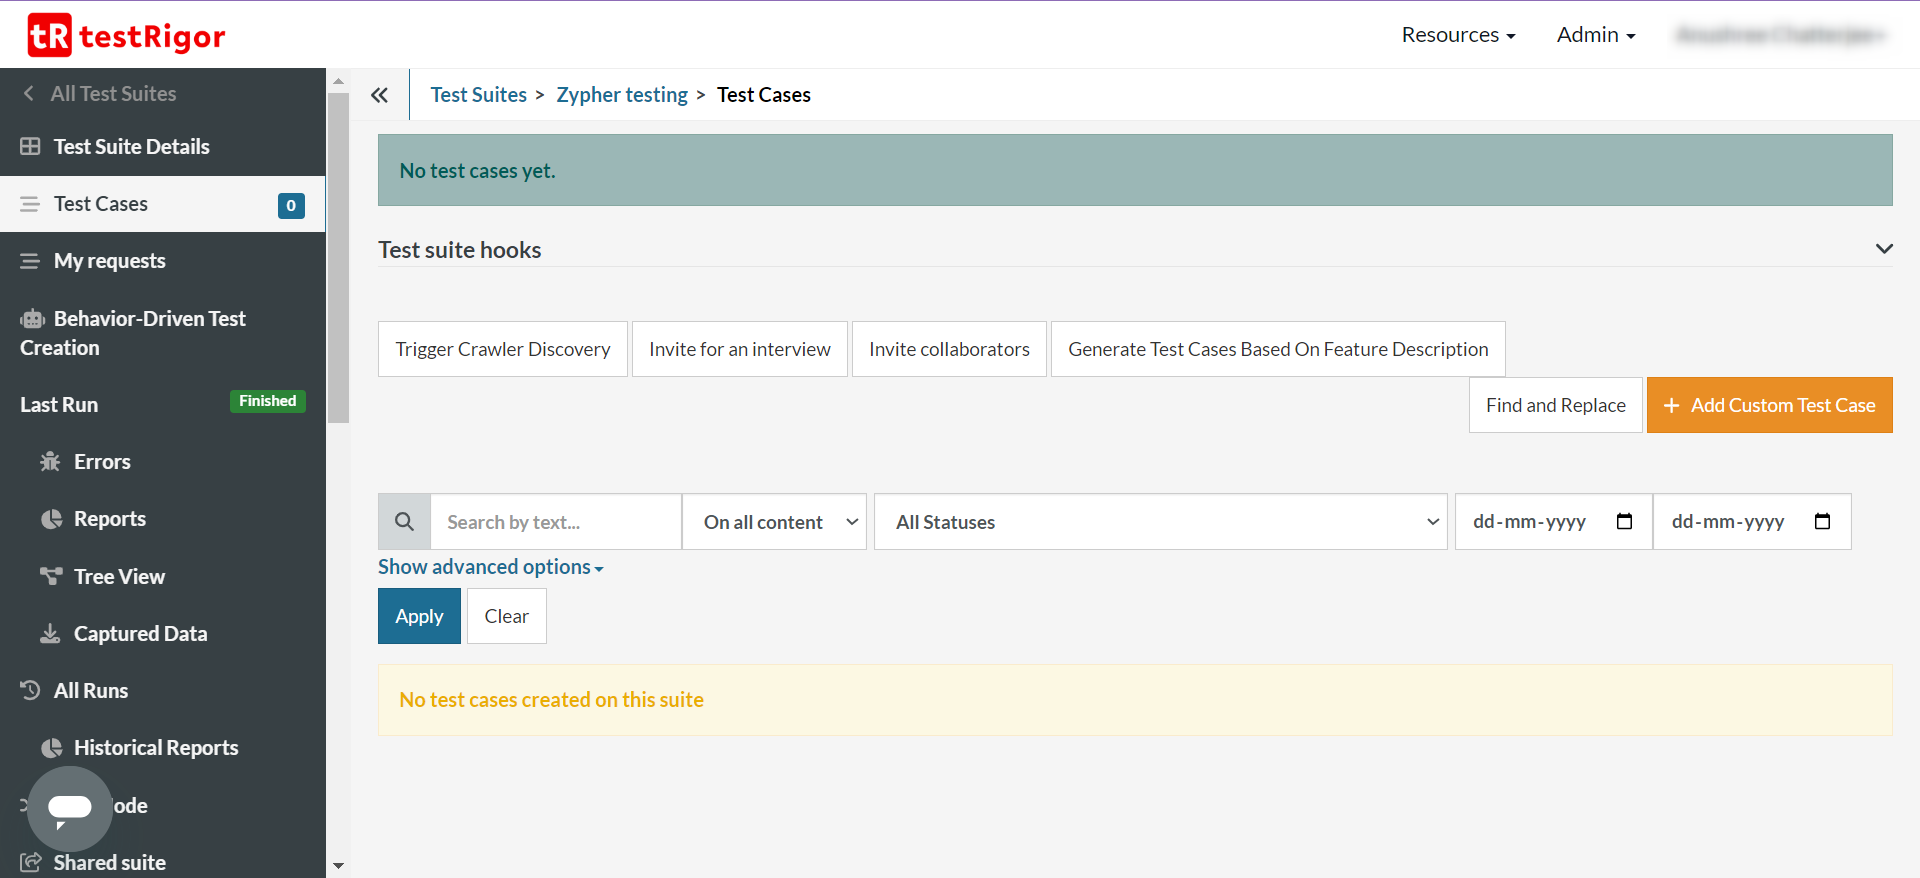
Step 1: Log into your testRigor account and create a test suite where you want to import your Zephyr test cases.
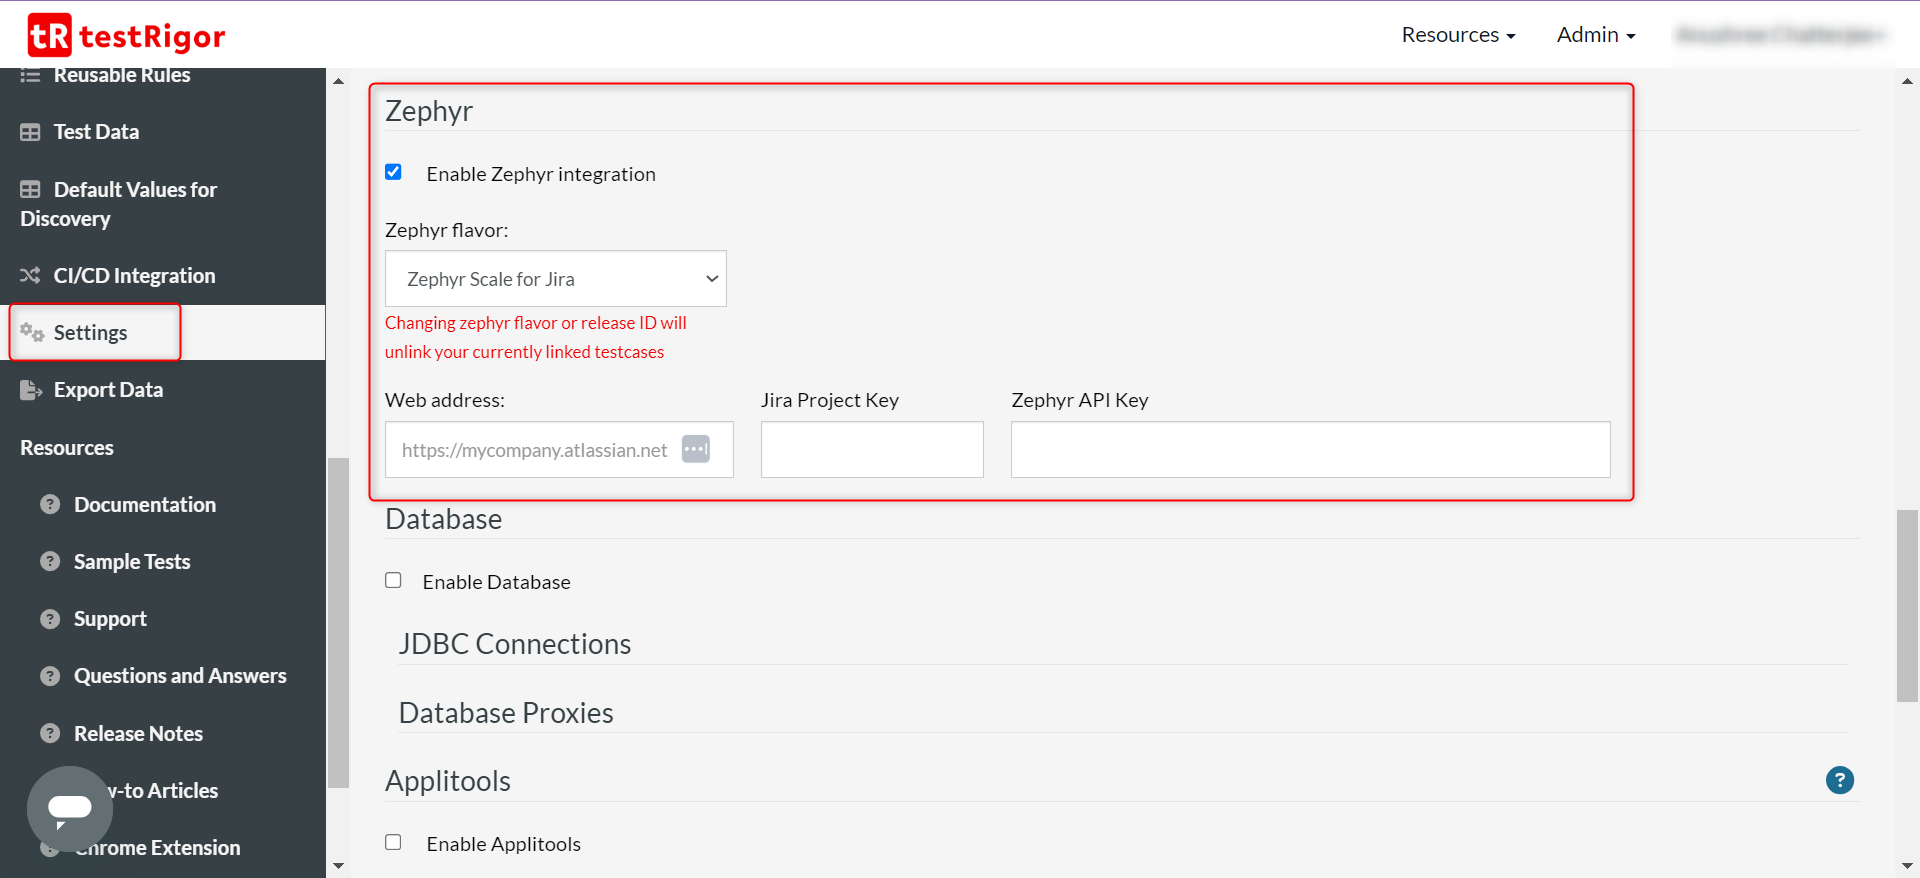
Step 2: Within the test suite, navigate to the Settings -> Integrations -> Zephyr section.
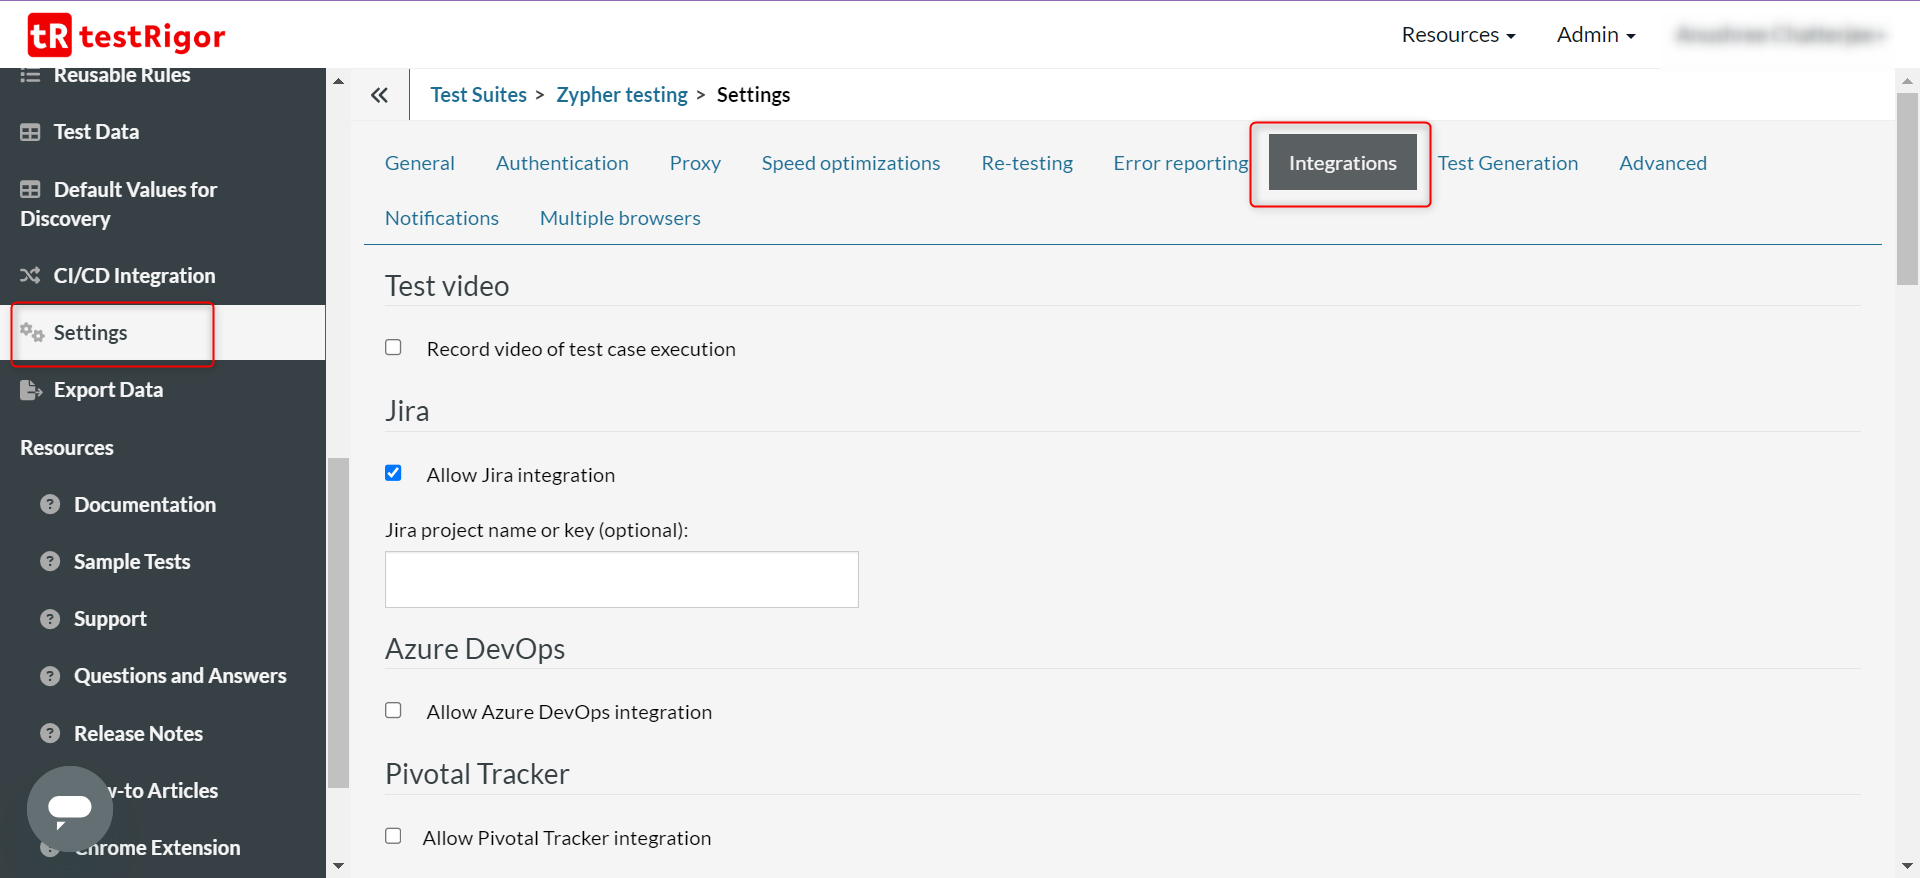
Refer to this detailed documentation on how to fill up the details in this section.
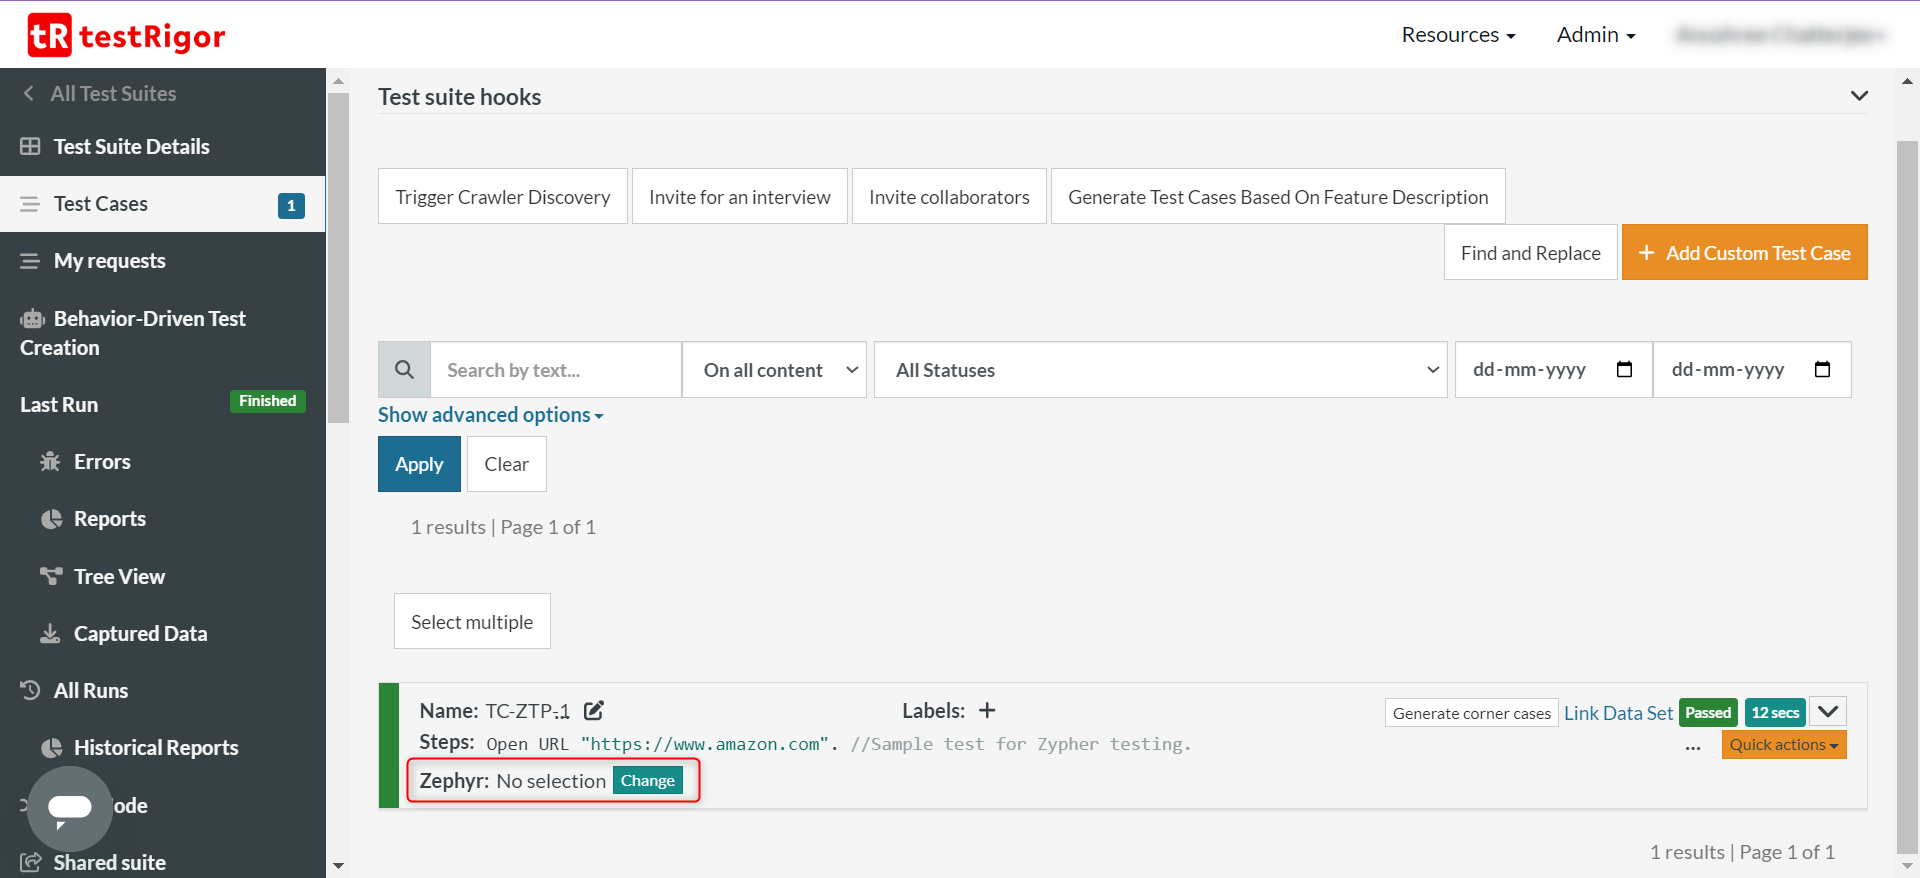
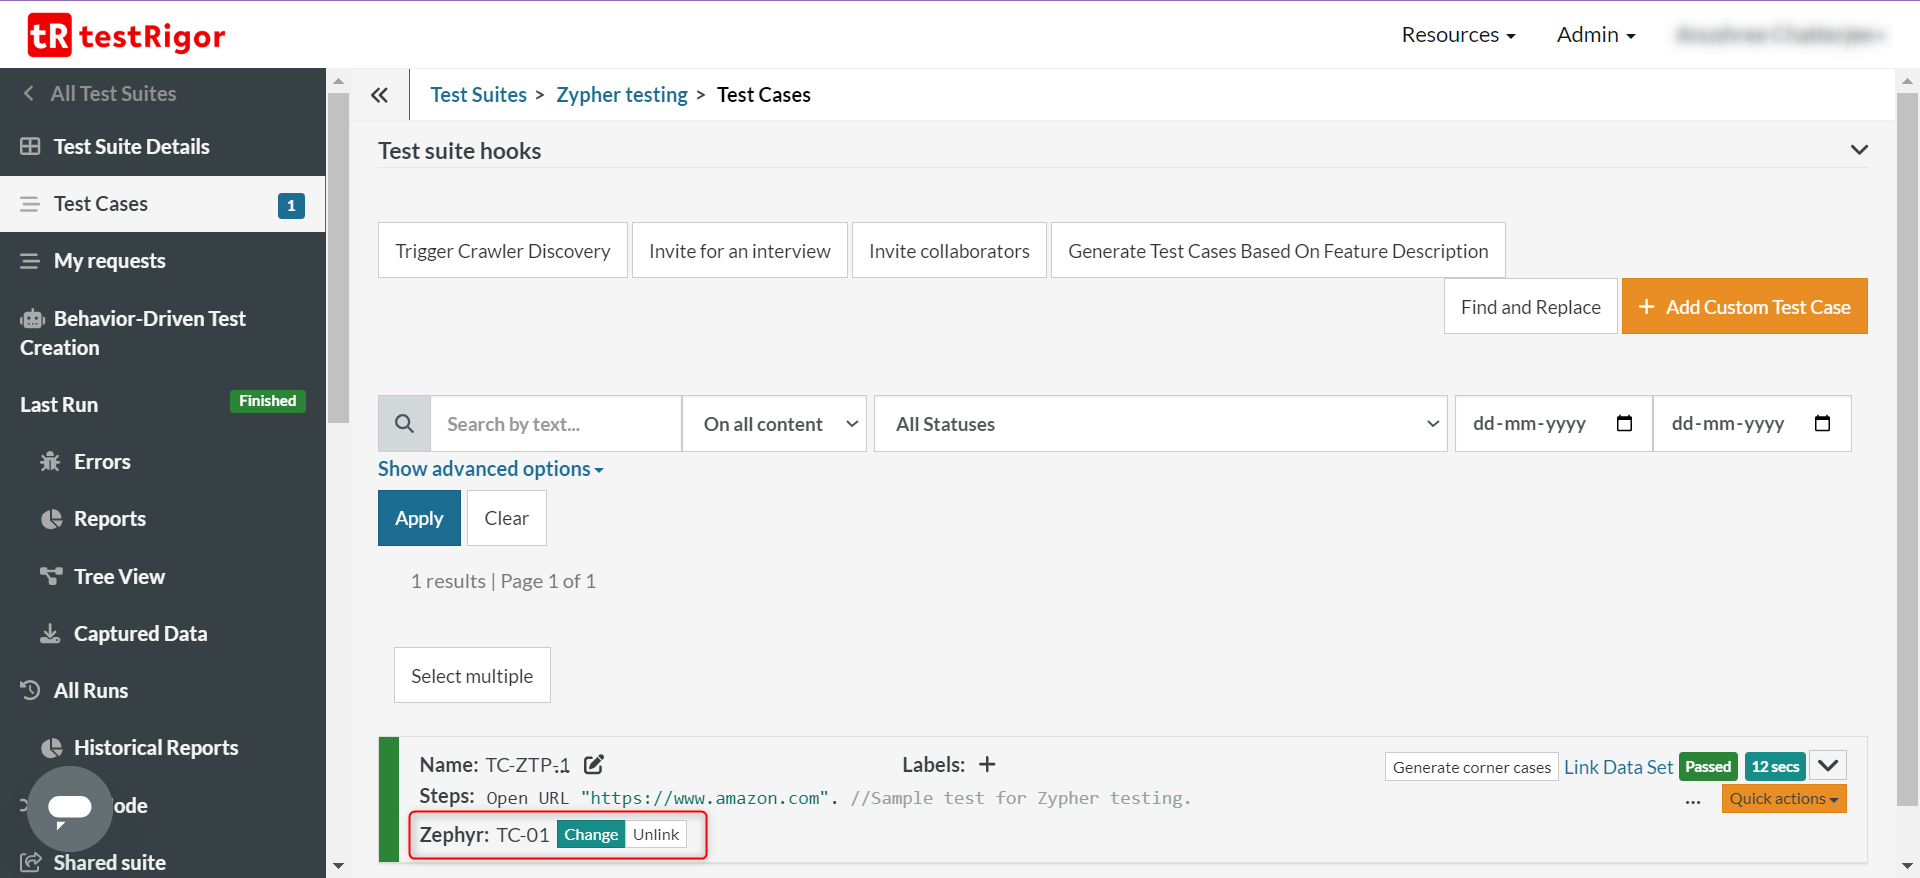
Step 3: Once you save these changes, come back to the Test Cases section. You can now start adding test cases in testRigor and then link them to the ones you’ve created in JIRA using Zephyr. Here’s how to do it.
Step 3.1: You will see a new section associated with each testRigor test case, as shown below, called Zephyr. To link a testRigor test case to one of the Zephyr test cases, click Change.
Step 3.2: Select the Zephyr test case from the list.

Step 3.3: Save changes.

Step 3.4: You’ll see that the link is updated for that test case. Now the execution details will be updated not just in testRigor, but even in Zephyr (within JIRA).
Step 4: If you want to run the entire test suite, do it from the Test Suite Details section within testRigor. Here, you’ll get additional configurations like not updating Zephyr with test execution results and the choice of choosing a test cycle.

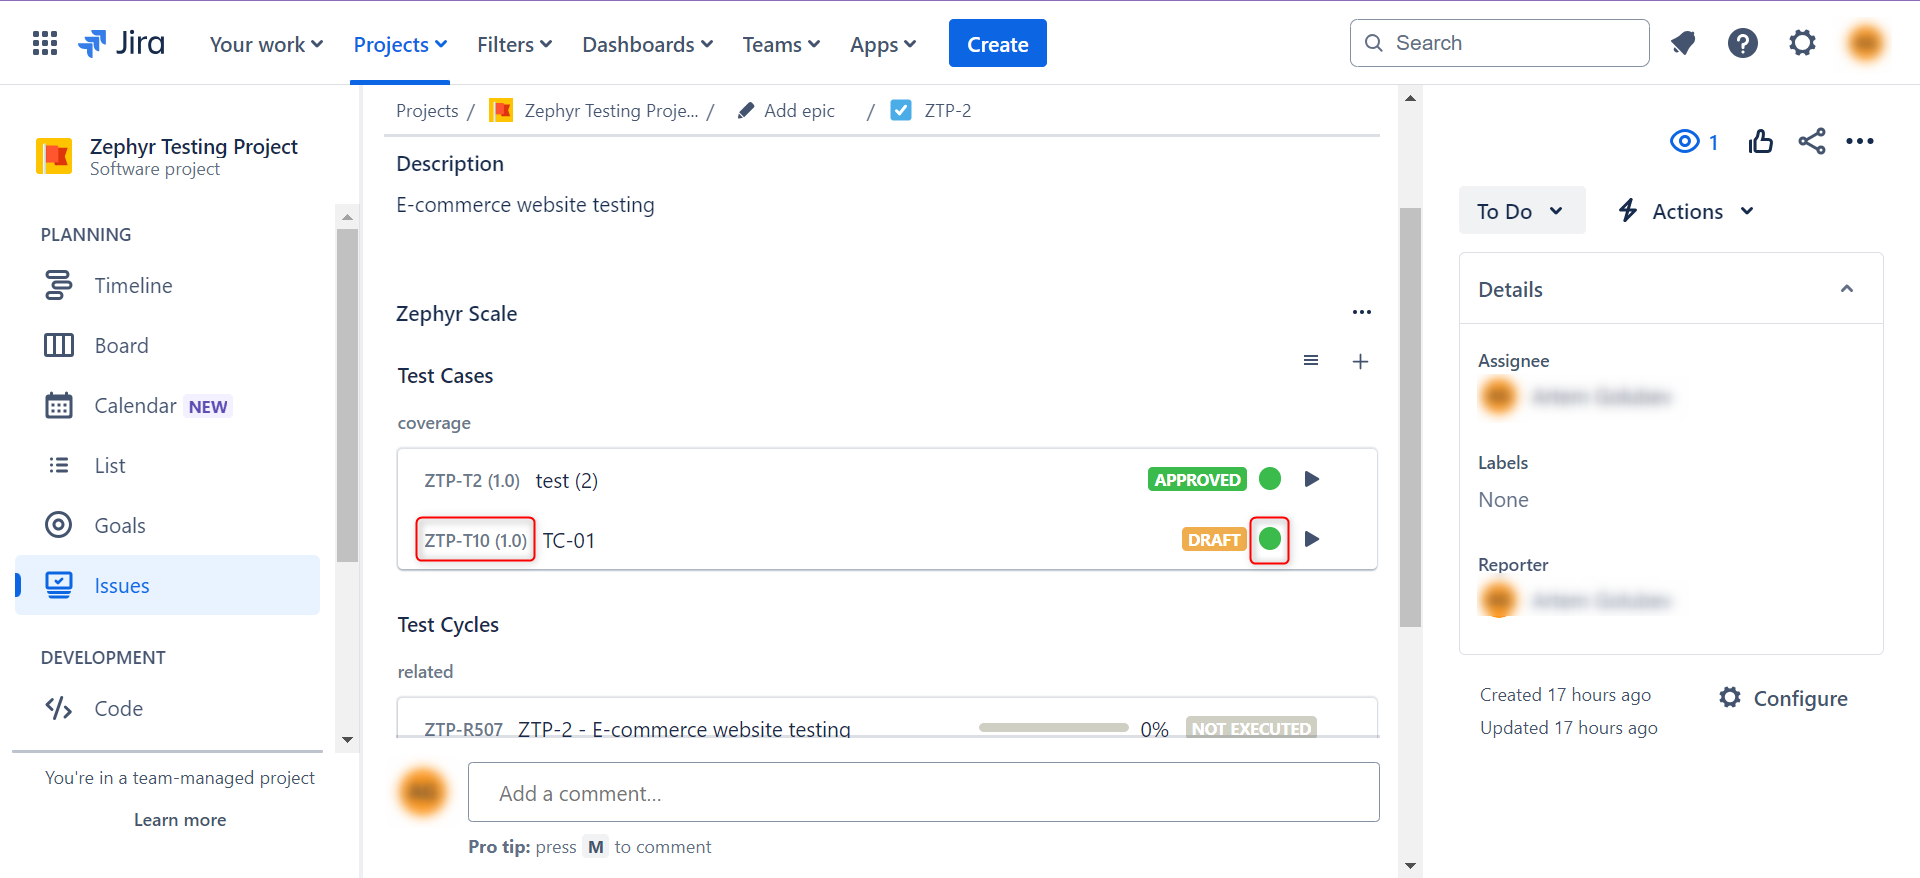
Step 5: Once the test cases in testRigor have run, you can view the execution updates within Zephyr.
Step 5.1: Click on the test case id to open it. Alternatively, you can click on the green dot on the test case to see a quick view of the execution history.
Step 5.2: Going ahead with clicking the test case id option, navigate to the Execution section by clicking on it in the sub-header tab.
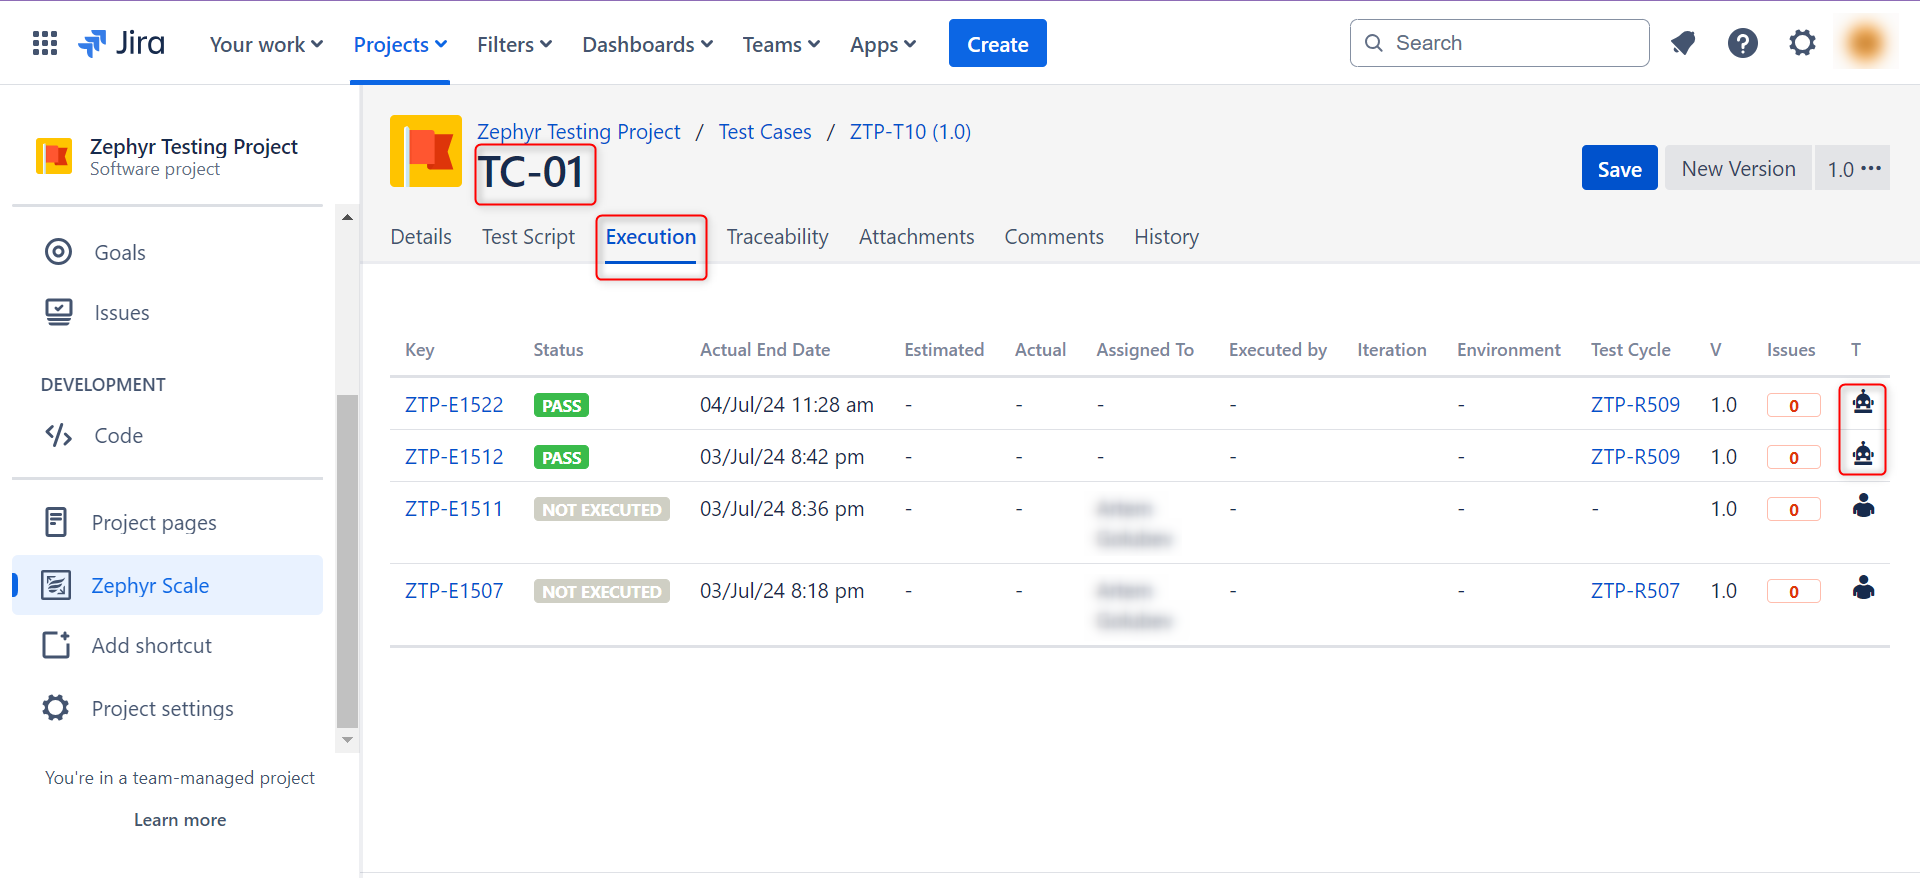
Over here, the rows that show a robot icon in the T column are the ones that were run via automation, i.e., (testRigor).
Thus, you can easily extend Zephyr’s capabilities and involve automated testing to improve the efficiency of your QA endeavors. testRigor also offers test reporting, to have a summary of your test cases’ performance.
That’s not all. You can do a lot more with this tool. Here’s a full list of testRigor’s capabilities.
| Achieve More Than 90% Test Automation | |
| Step by Step Walkthroughs and Help | |
| 14 Day Free Trial, Cancel Anytime |


