XRay Overview
|
|
As software testing gains momentum in a project, the volume of testing artifacts like test cases also increases. This happens so that test coverage can be increased and thorough documentation of the entire system is available. To achieve this, legacy tools like sheets are not suitable; instead, test case management tools are. Along with test case creation, they let you manage and do much more with them.
XRay is one such test management tool that we’ll look at in this post.
What is XRay?
XRay is a test management tool that also provides features for test planning, design, execution, and reporting. It can be used to manage both manual and automated tests. Because Xray integrates directly with Jira, it’s particularly useful for teams already using Jira.
Features of XRay
Here’s a list of Xray features for test management within Jira:
- Jira Integration: Unlike other test management tools that integrate with JIRA, XRay allows you to create test cases, test sets, and test plans as native JIRA issues. This means that you can add custom fields to your tickets, configure workflows, and work in the same integrated interface.
- Centralized Repository: This is a single location where all test cases are stored and managed.
- Test Set Management: You can organize test cases into logical groups based on functionality, feature, or risk.
- Test Plan Creation: You can use test plans to define the testing strategy and outline the scope of testing for a release.
- Requirement Mapping: Link test cases to specific Jira requirements for traceability.
- Test Estimation: Estimate the effort required to execute test cases.
- Test Case Creation: Create detailed test cases with steps, expected results, pre-conditions, and post-conditions. You can even log the type of test case like manual, automated, etc.
- Data-Driven Testing: Use external data sources to parameterize test cases for efficient execution.
- Test Case Versioning: Track changes made to test cases over time.
- Reusable Test Components: Create reusable steps and functions for modular test case design.
- Manual Test Execution: Tests are executed manually, and results are recorded within XRay.
- Automation Integration: You can integrate with automation frameworks for automated test execution.
- Defect Tracking: XRay lets you log defects identified during testing and link them to corresponding test cases.
- Test Cycle Management: You can group test executions for a specific iteration or release.
- Real-time Reporting: Get instant insights into test execution progress and results.
- Test Coverage Reports: You can analyze the percentage of requirements covered by tests.
- Defect Reports: Get reports on identified defects, including trends and severity.
- Customizable Dashboards: Create dashboards to visualize key testing metrics.
- Permissions & Sharing: Control access to test plans, test cases, and execution results.
- Search & Filter: Easily find specific test cases based on various criteria.
- Reporting Templates: Utilize pre-built report templates for common testing scenarios.
- API Access: Integrate Xray with other tools through its API for further automation.
Benefits of using XRay
Using XRay for test case management has many benefits like:
- Integrated and Centralized Platform: All testing information is stored in one place, eliminating the need to manage data across multiple tools.
- Structured and Effective Testing: Through XRay’s test plans, test sets, and test executions, you can not only plan out testing activities but also track their progress. Each ticket promotes detailed logging, which helps you gain real-time updates.
- Increased Collaboration: Since XRay integrates so well with JIRA, your developers and testers can work on a single platform. Everyone involved has access to up-to-date testing progress and results, providing a common ground for planning, execution, and reporting.
- Better Test Coverage and Traceability: Features like requirement mapping ensure a comprehensive testing strategy that covers all aspects of the software.
- Data-Driven Testing: The use of external data sources allows for more robust and reliable test cases.
- Comprehensive Reporting: XRay generates detailed reports on test coverage, execution status, and defect rates.
- Scalable Solution: XRay is suitable for projects of all sizes, from small teams to large enterprises. It can handle large volumes of test cases and executions without performance degradation.
- Customizable: You can define custom workflows for test cases and executions to match your process and even add custom fields and screens to capture additional information specific to your testing needs.
Overview of XRay
Let’s take a look at how XRay allows you to create and organize test cases in JIRA.
Creating test cases
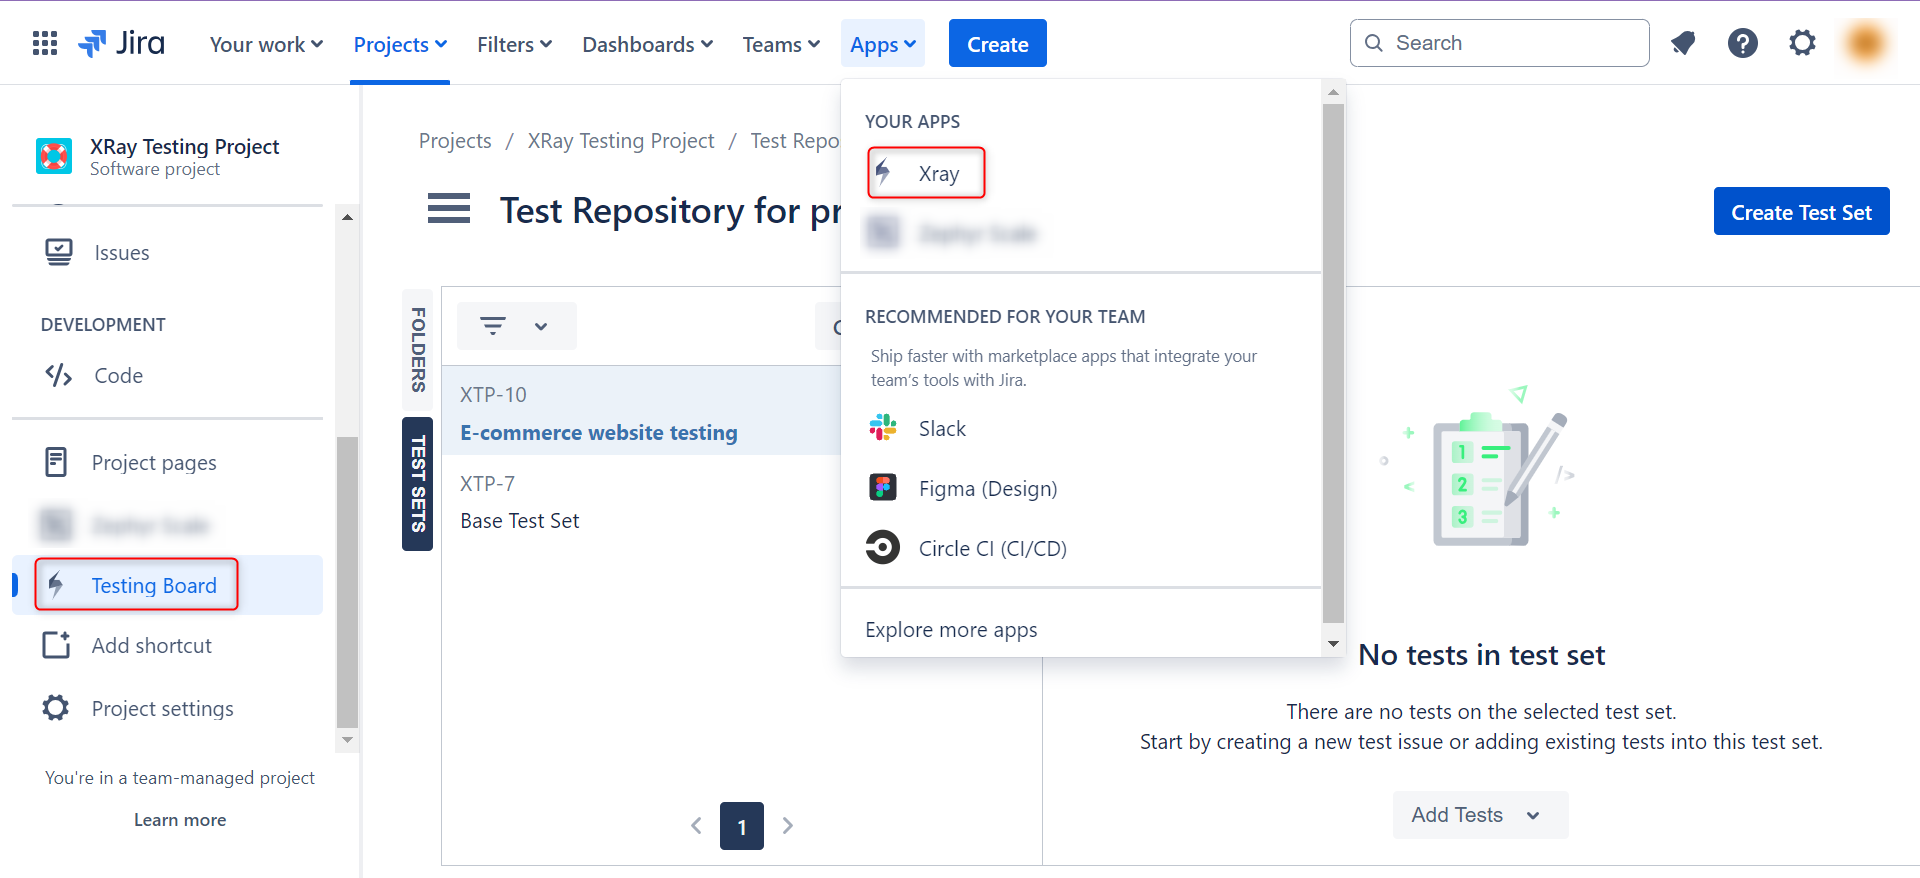
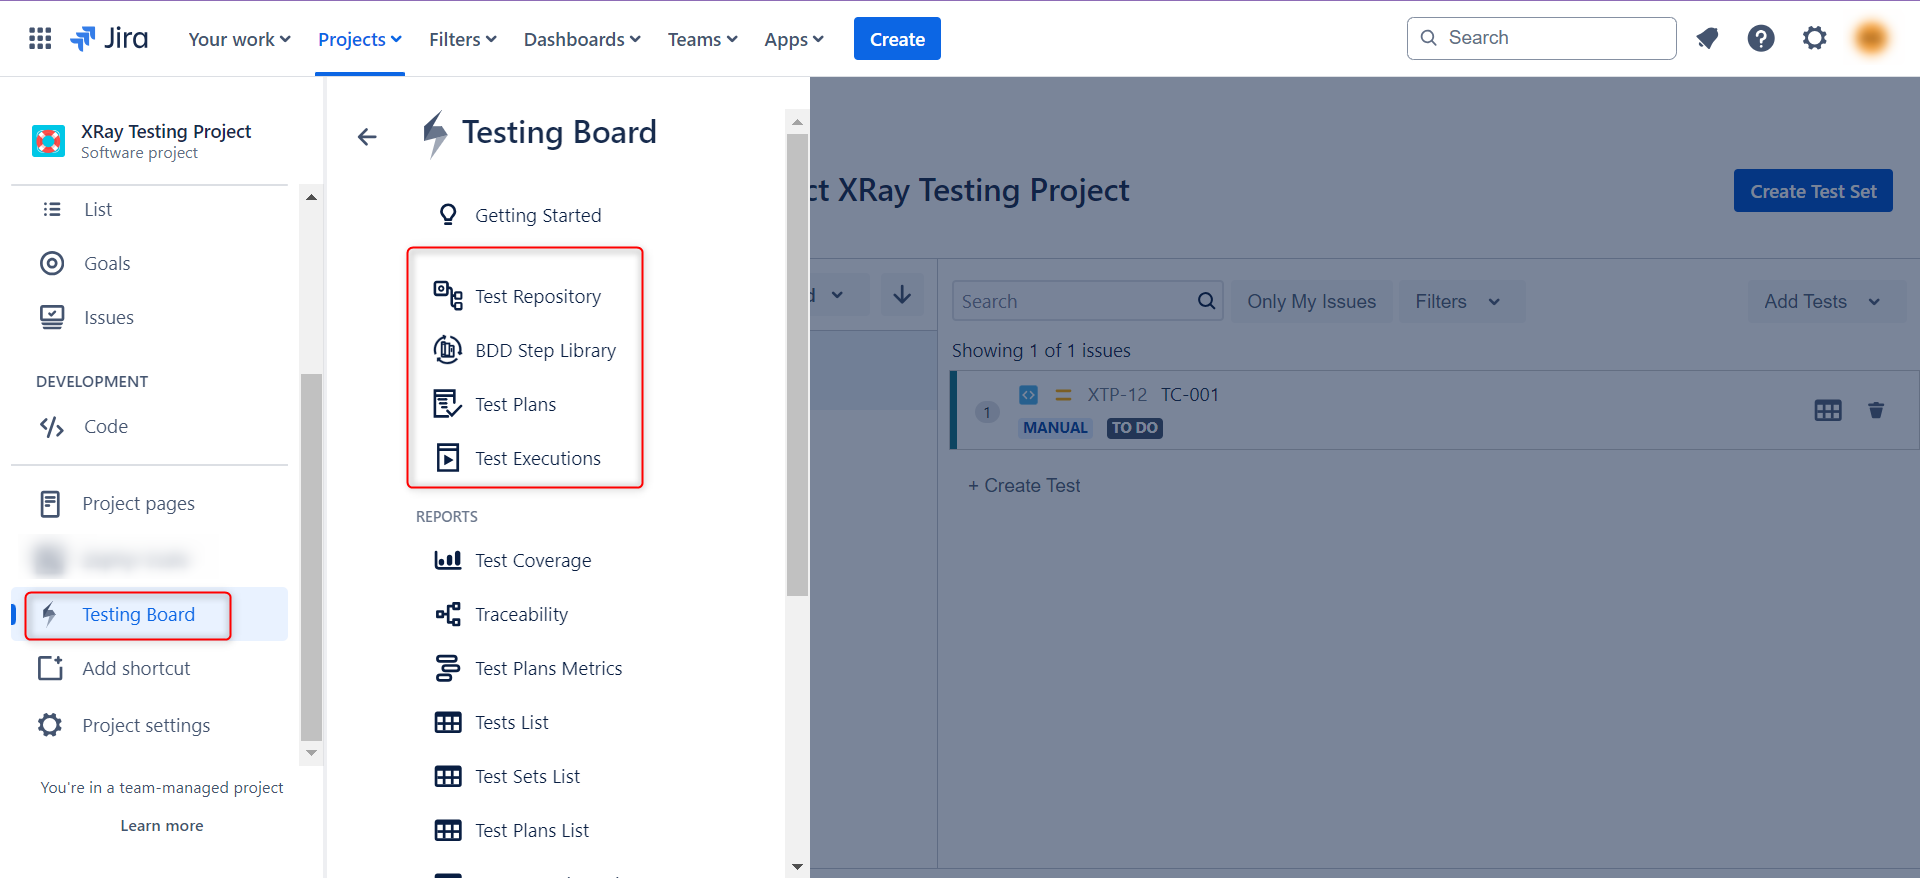
Step 1: Log into JIRA. Once you download XRay from the Marketplace, it will be visible to you under the apps section. Click on it, and you will see the Testing Board option in the left panel menu. The Testing Board shows a list of all the XRay test cases.
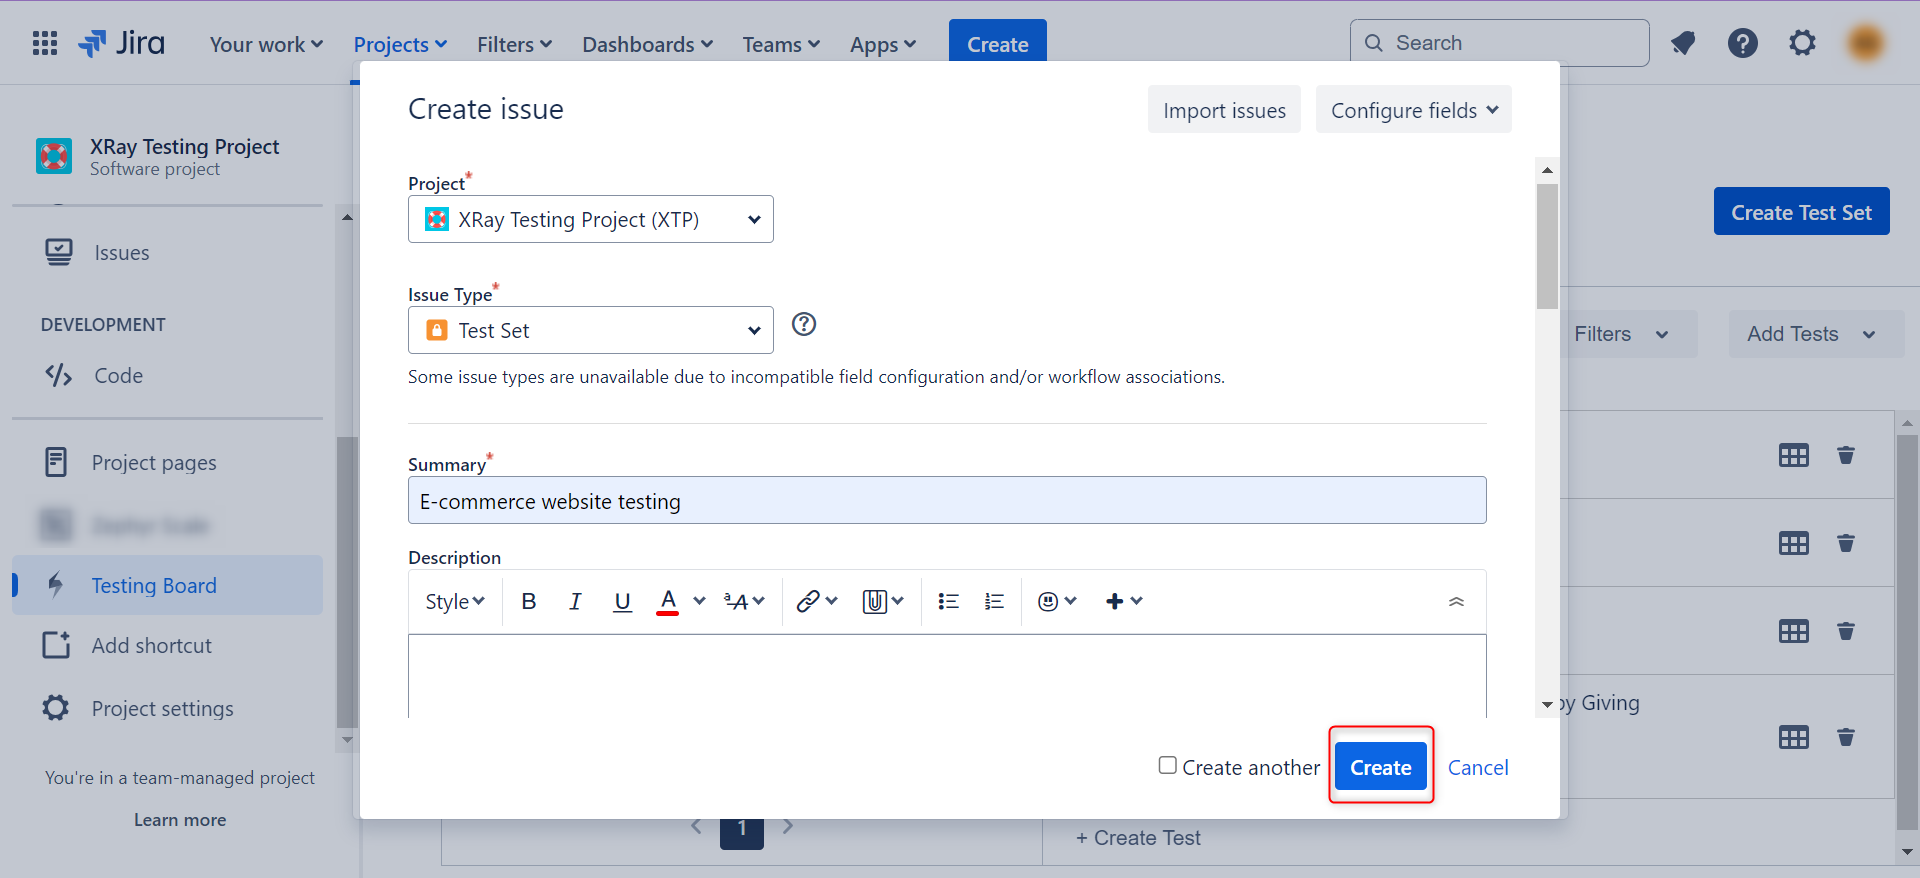
Step 2: You can organize your test cases within test sets and folders.
Click on Create Test Set, fill in the relevant information, and then click on Create.
The newly created test set will appear in the XRay Testing Dashboard.
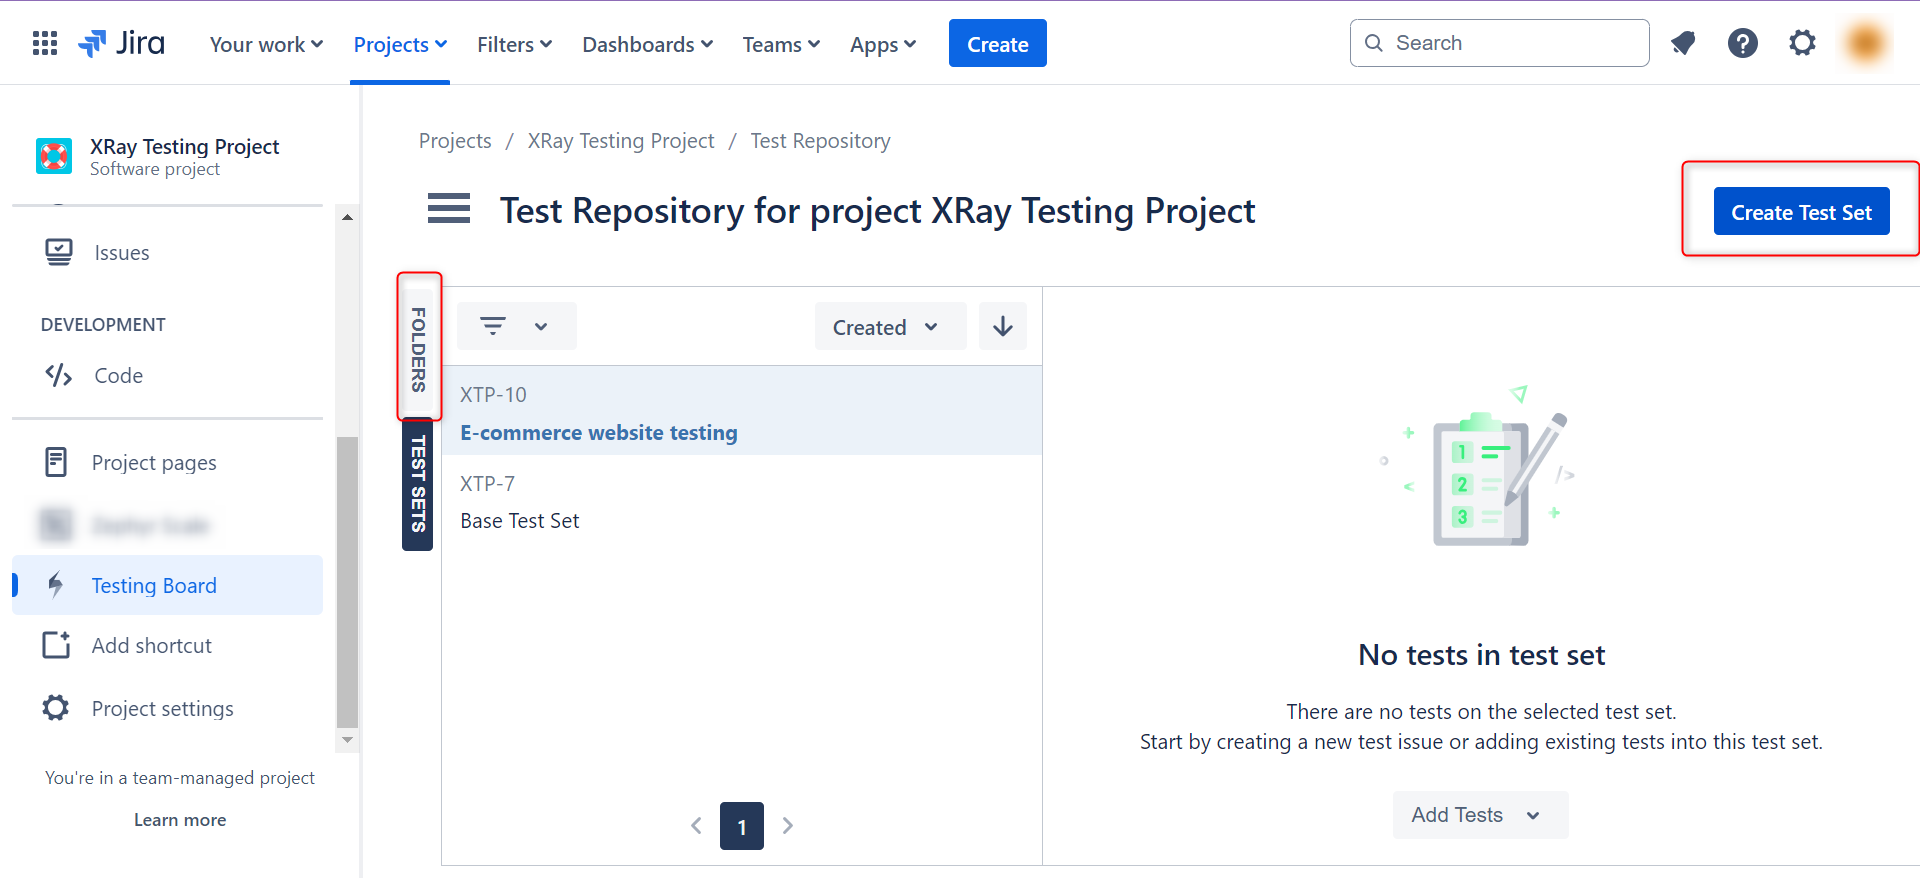
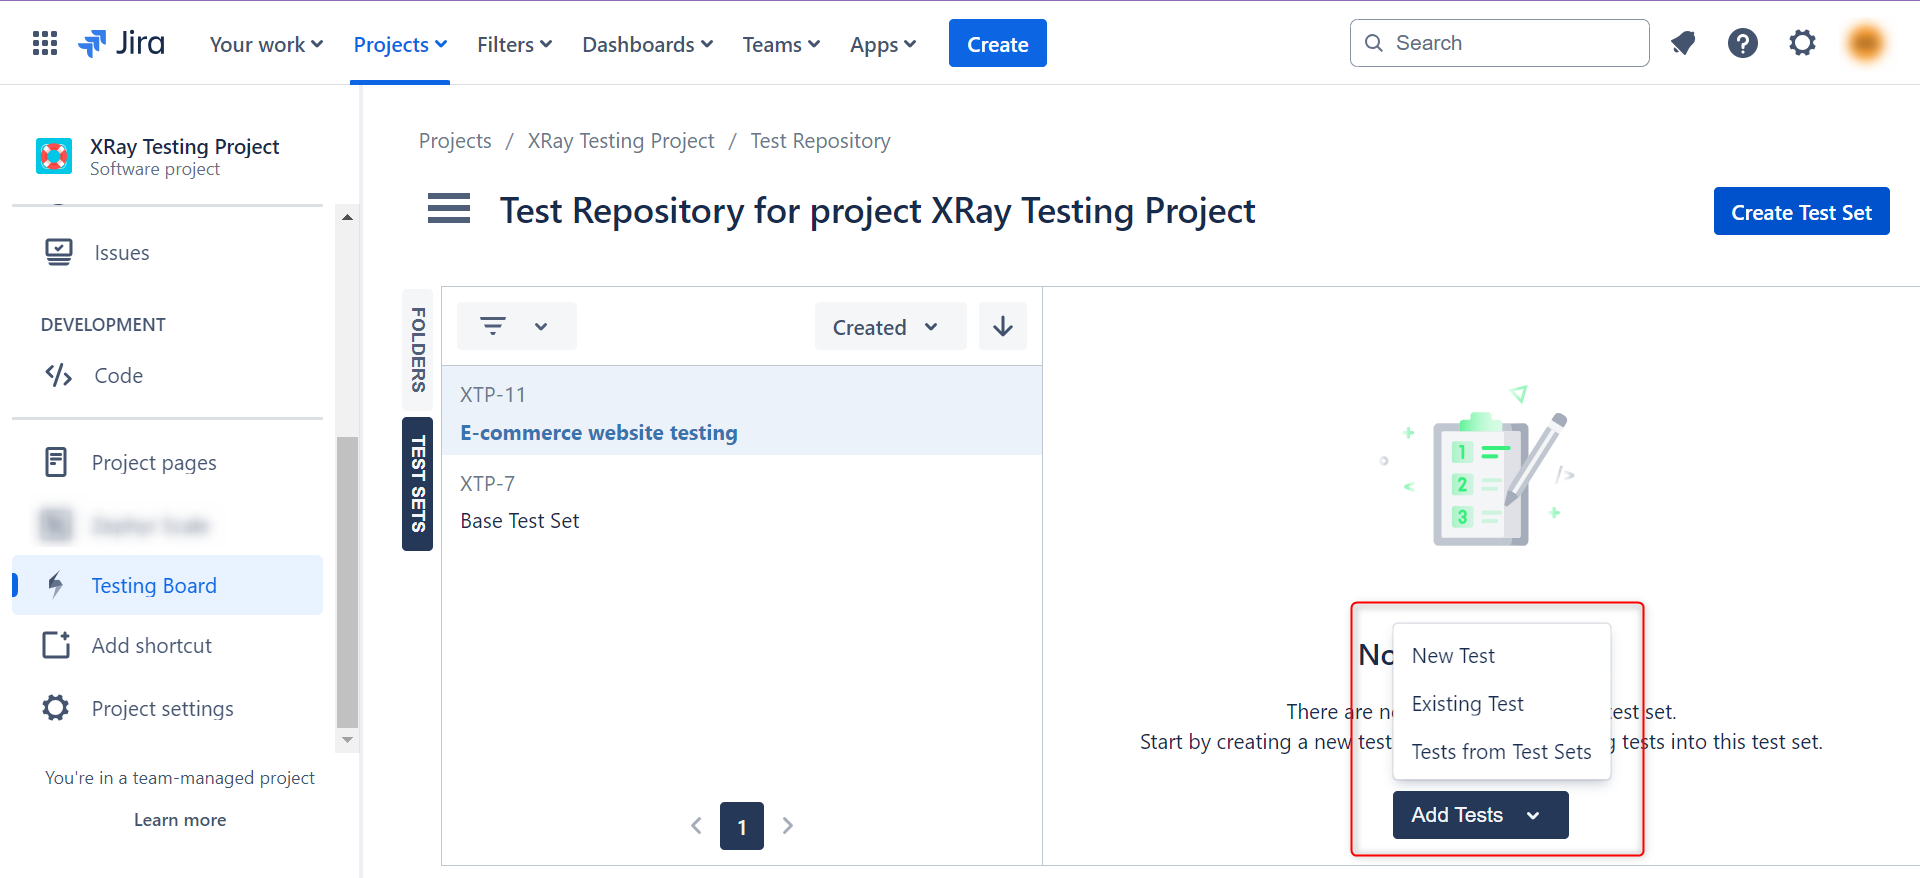
Step 3: Now start adding test cases to the test set. Click on Add Tests. You can choose from the various options available to add test cases.
Step 4: In this step, the New Test option has been used. Fill in the required details and click on Create.
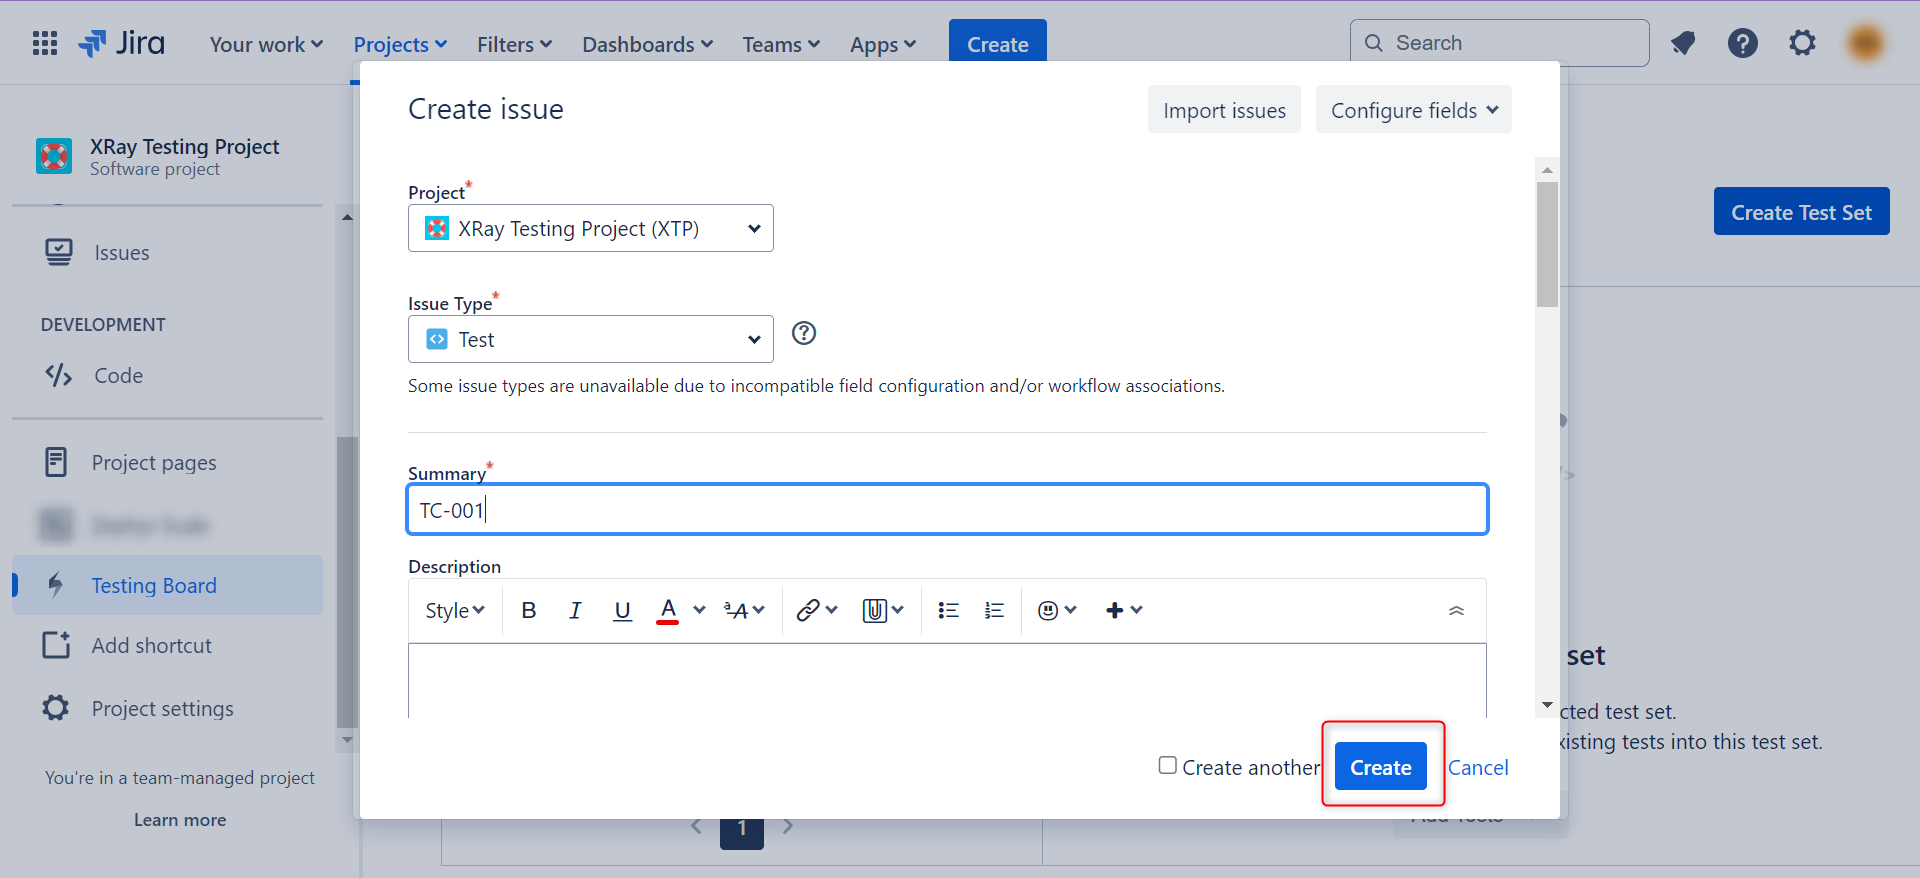
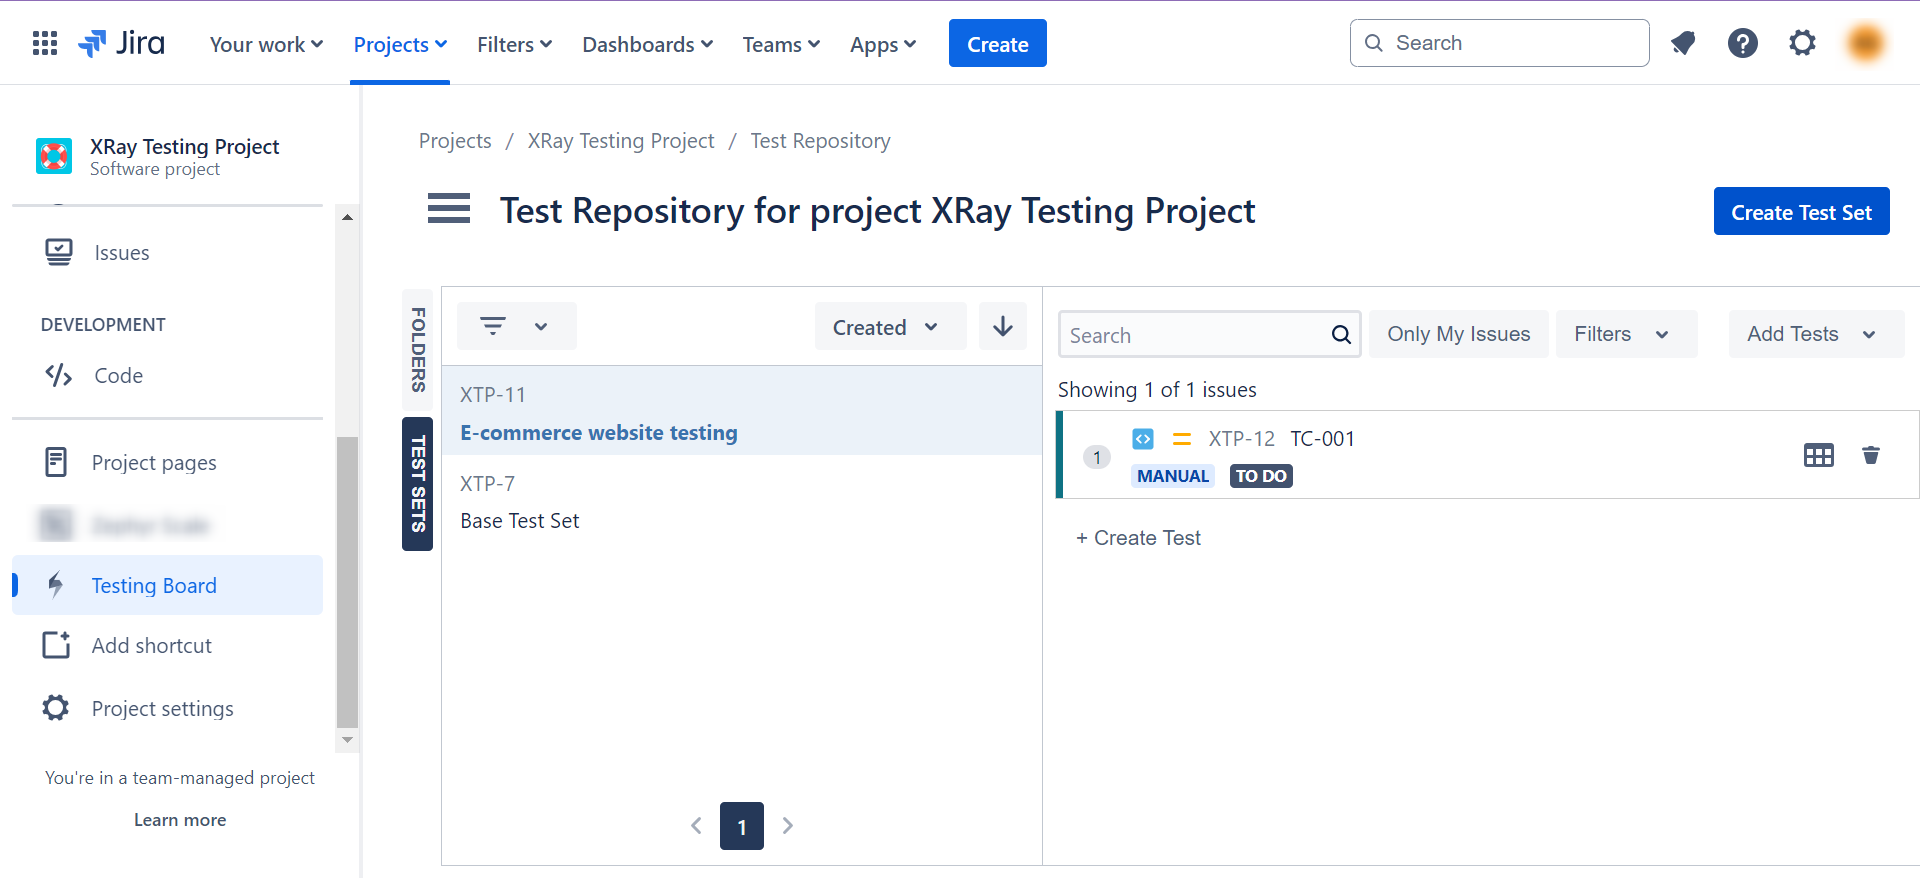
The newly created test case will appear within the test set.
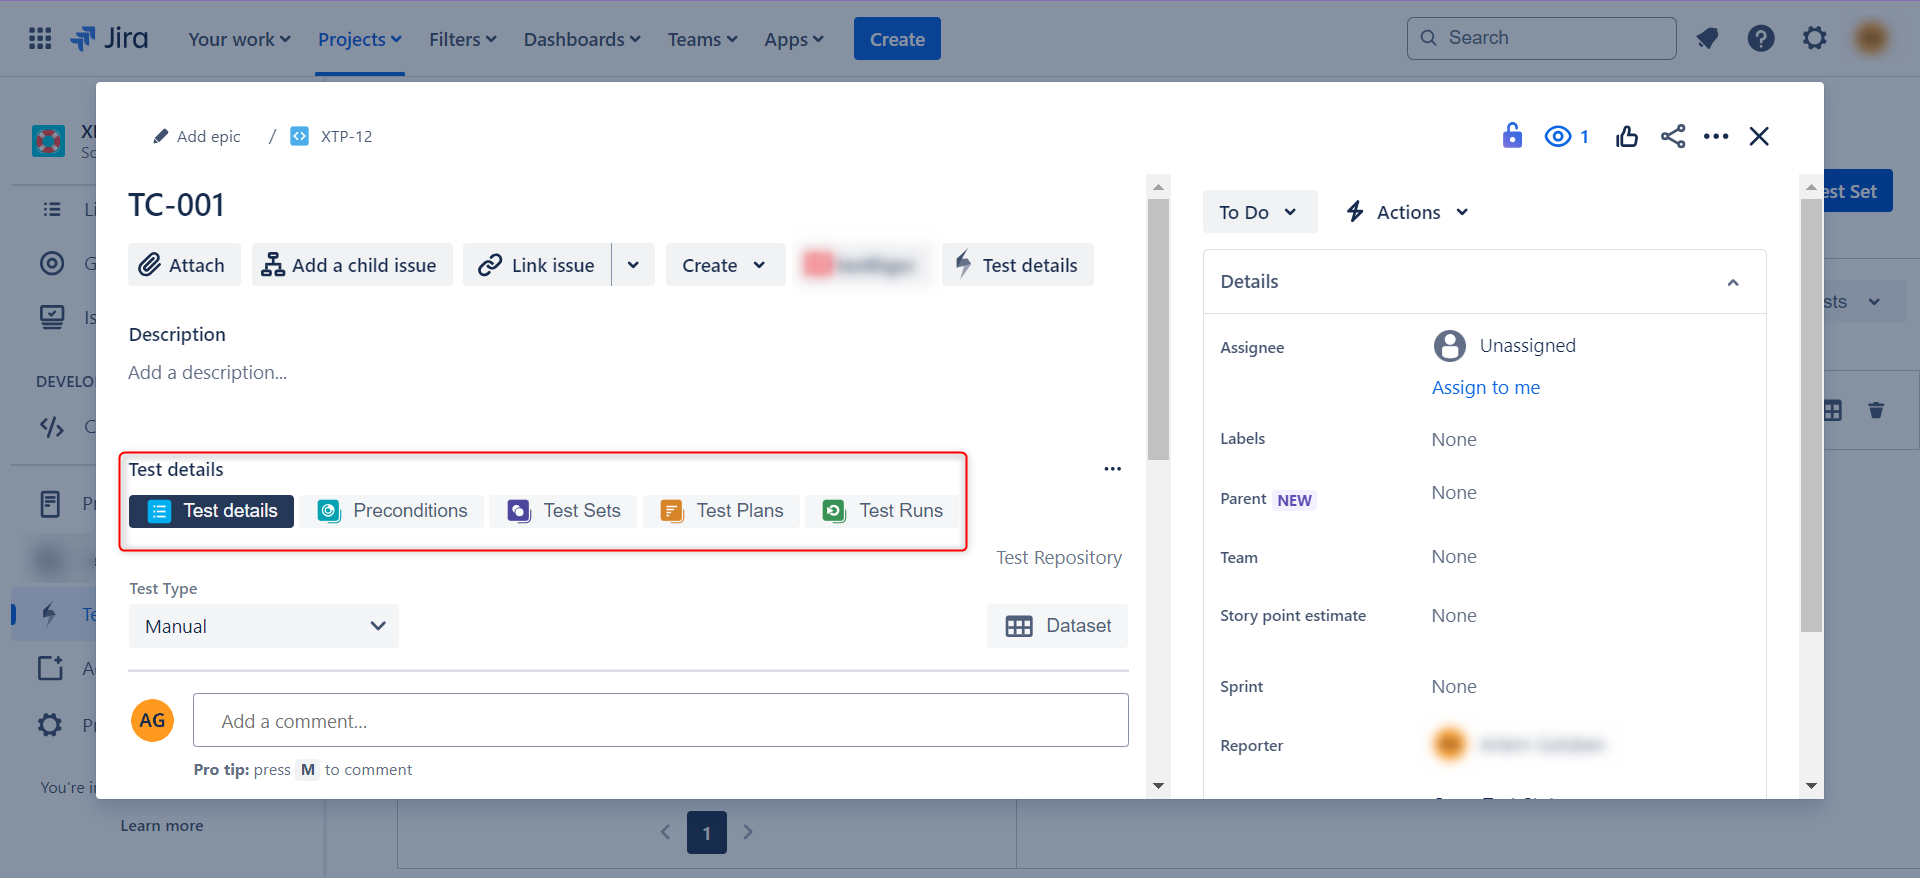
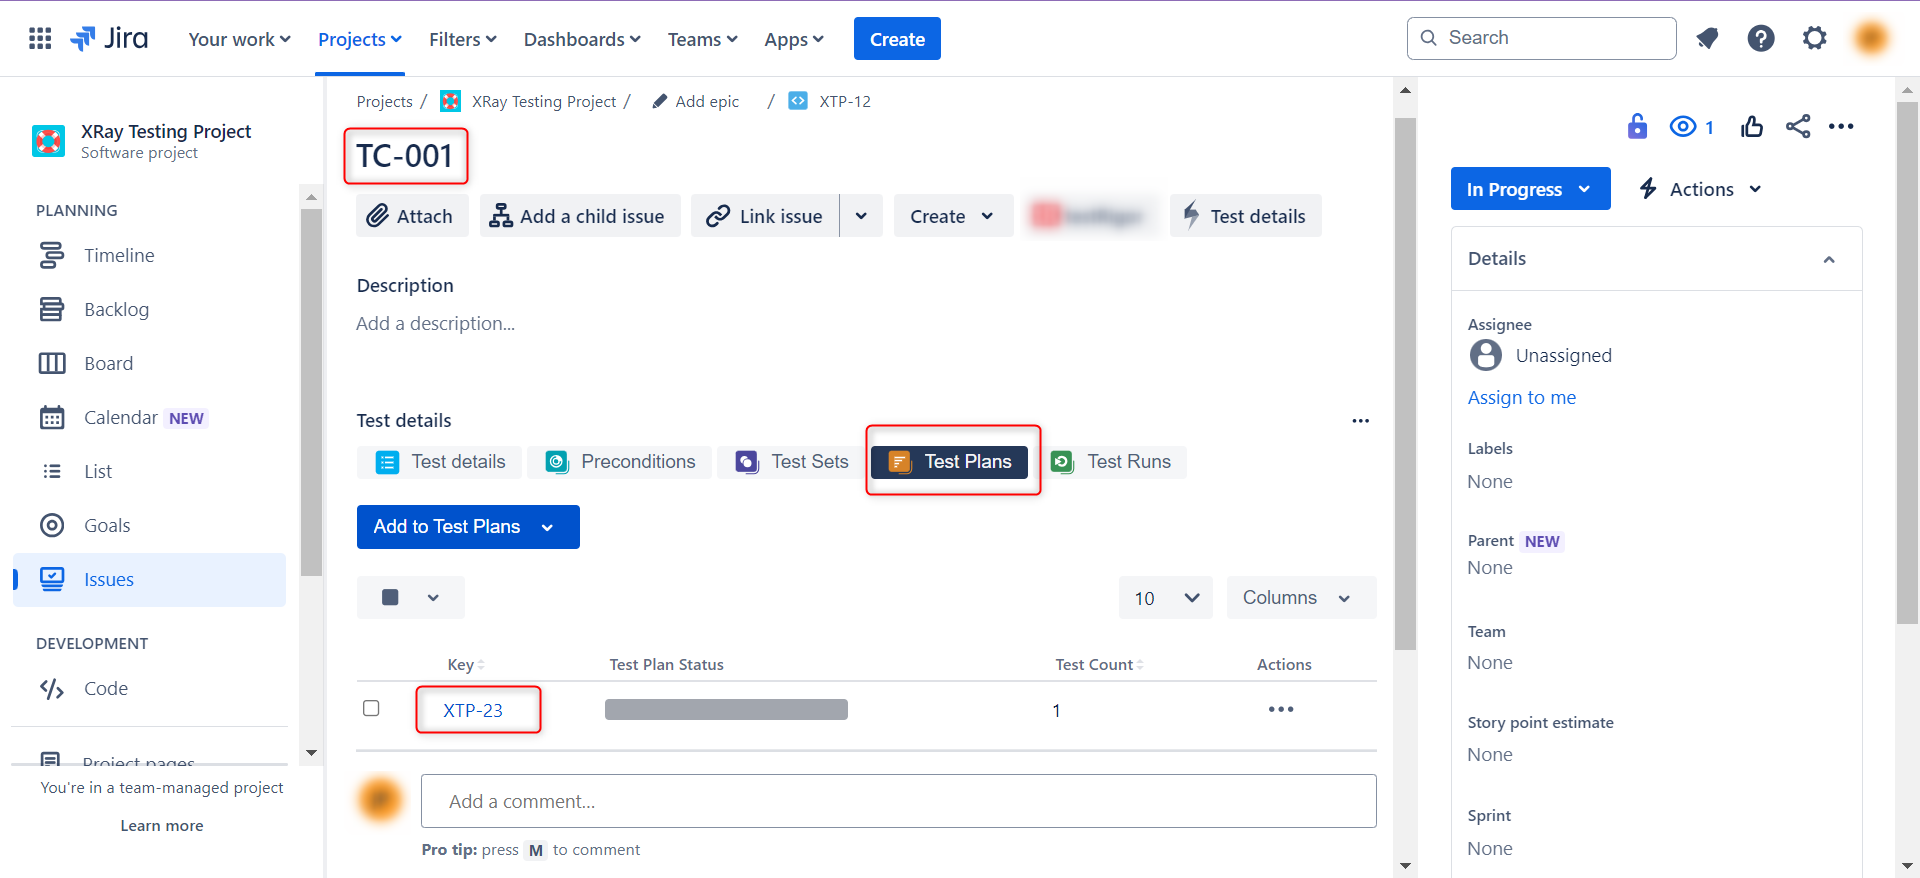
Step 5: A good thing about XRay test cases is that they allow you to create them in the JIRA ticket format, with customizable fields. Within each test case, you have a special section the shows the XRay-specific fields like Test Details, Test Sets, Test Plans, Test Runs, and Preconditions.
Test plans and executions
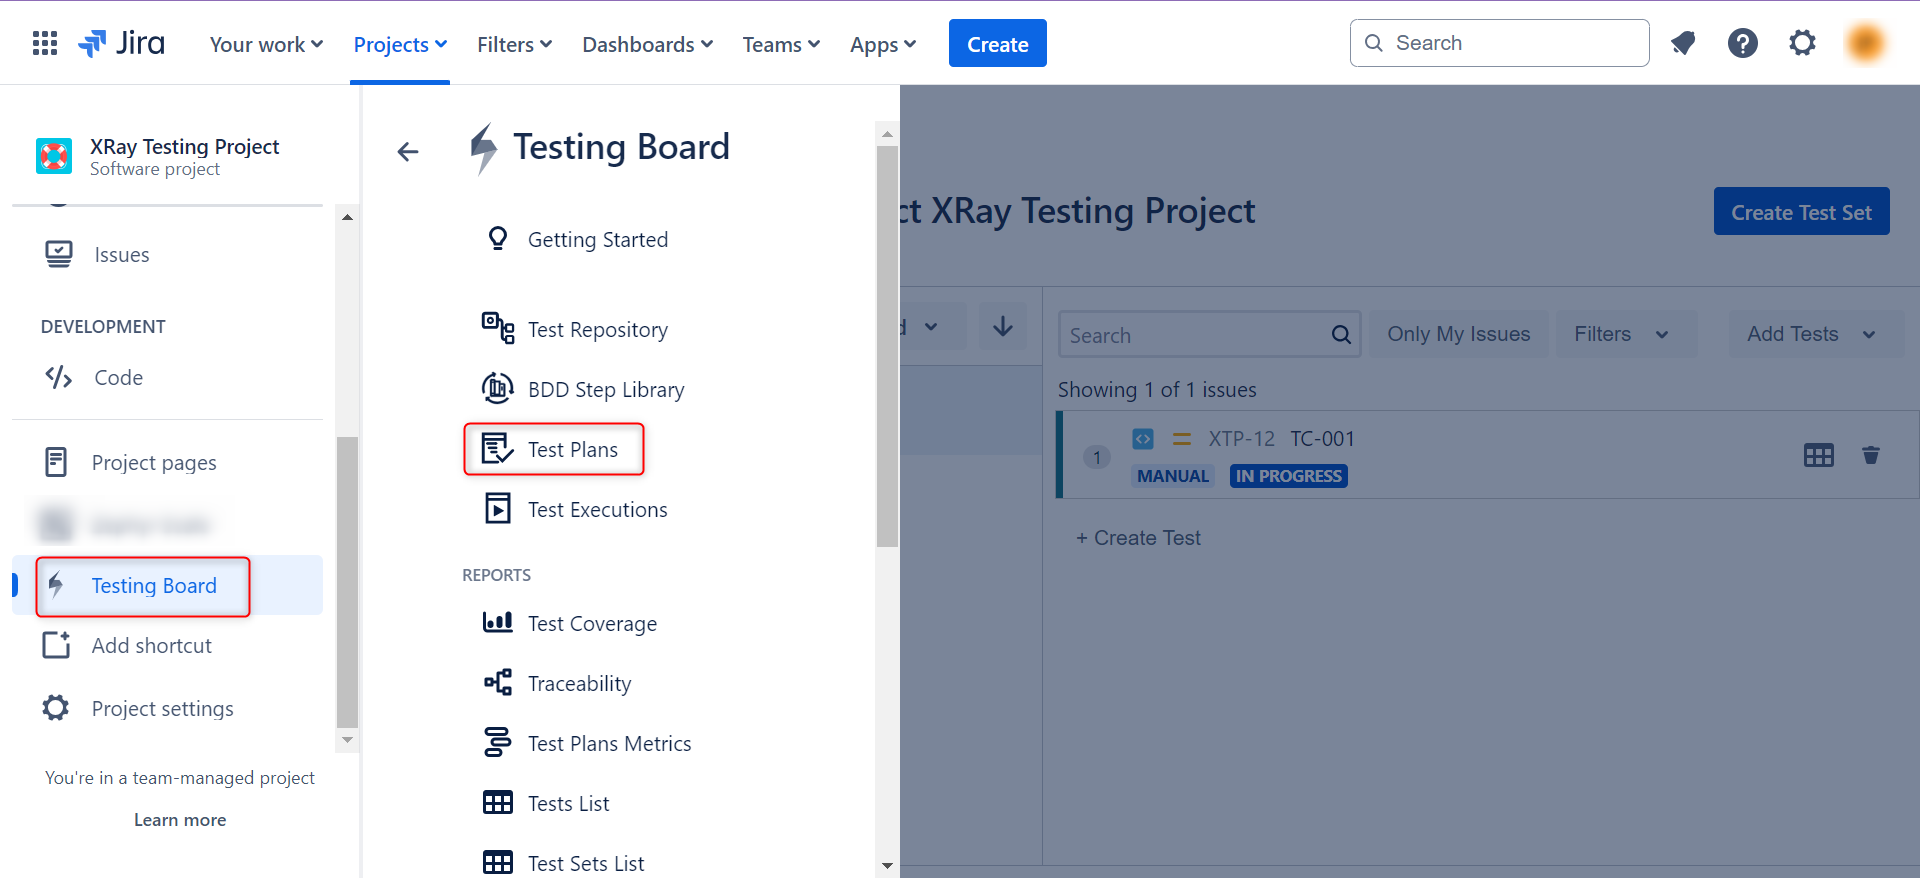
Step 1: You can create test plans, test runs, and create test reports through the main menu of XRay Testing Board.
Step 2: To create a test plan, click Test Plans.
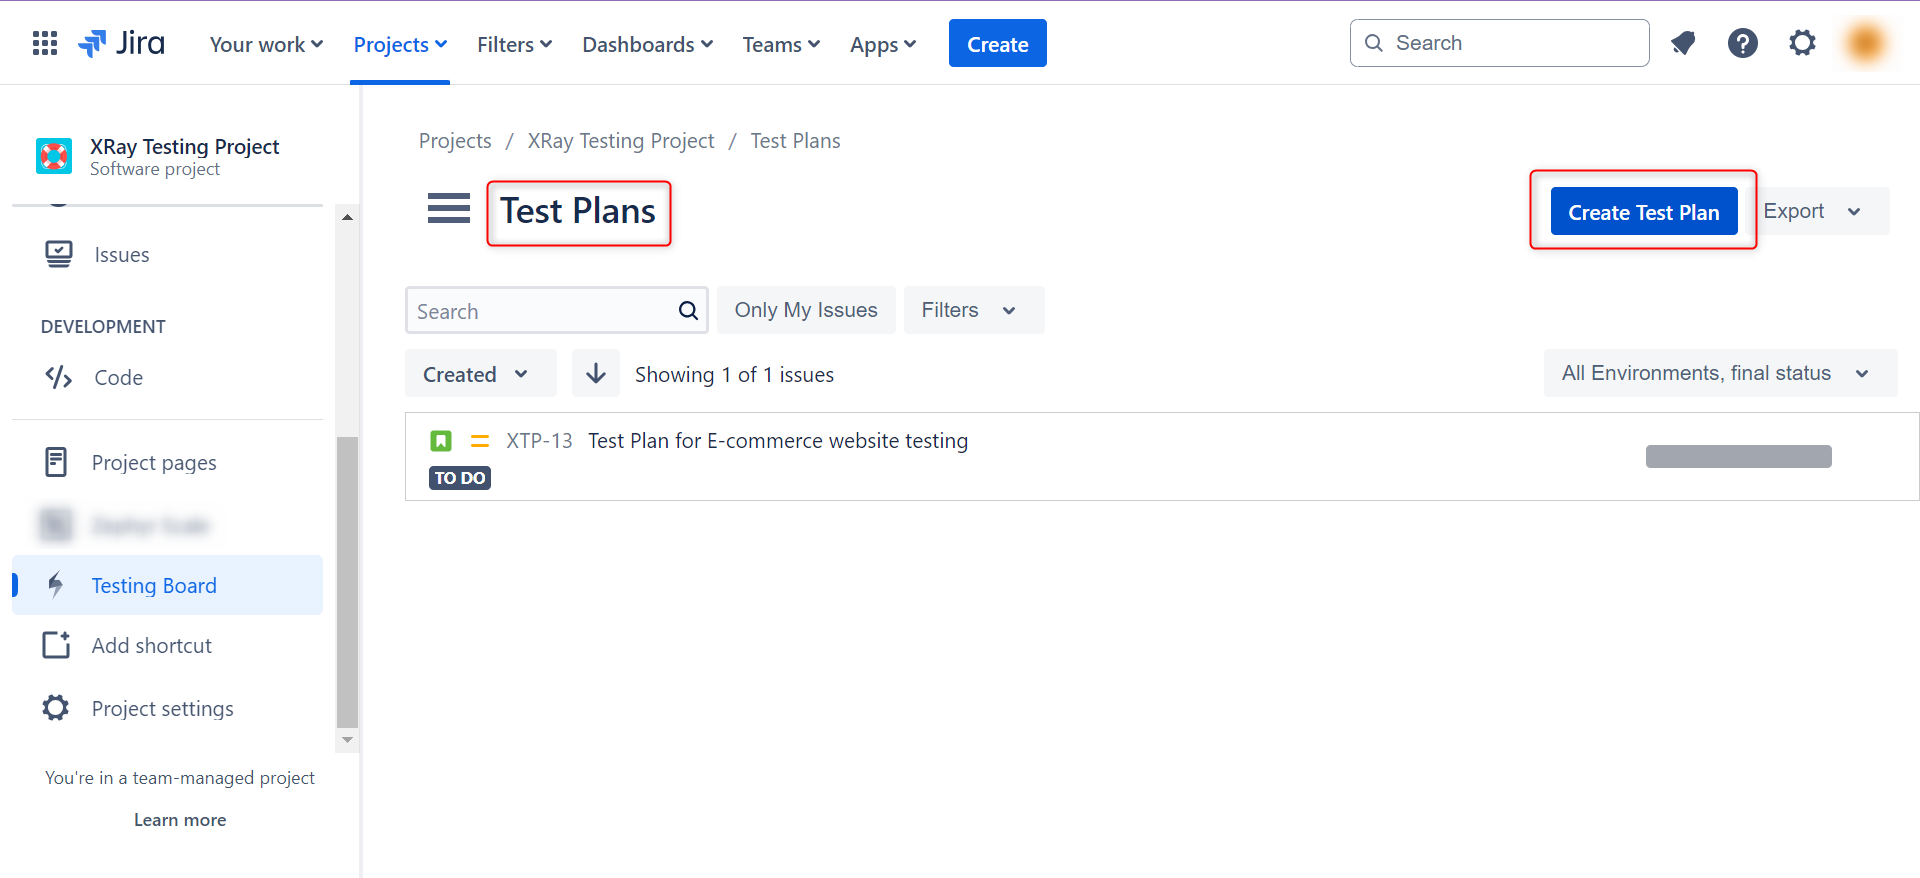
Step 3: Once on the Test Plans page, click Create Test Plan.
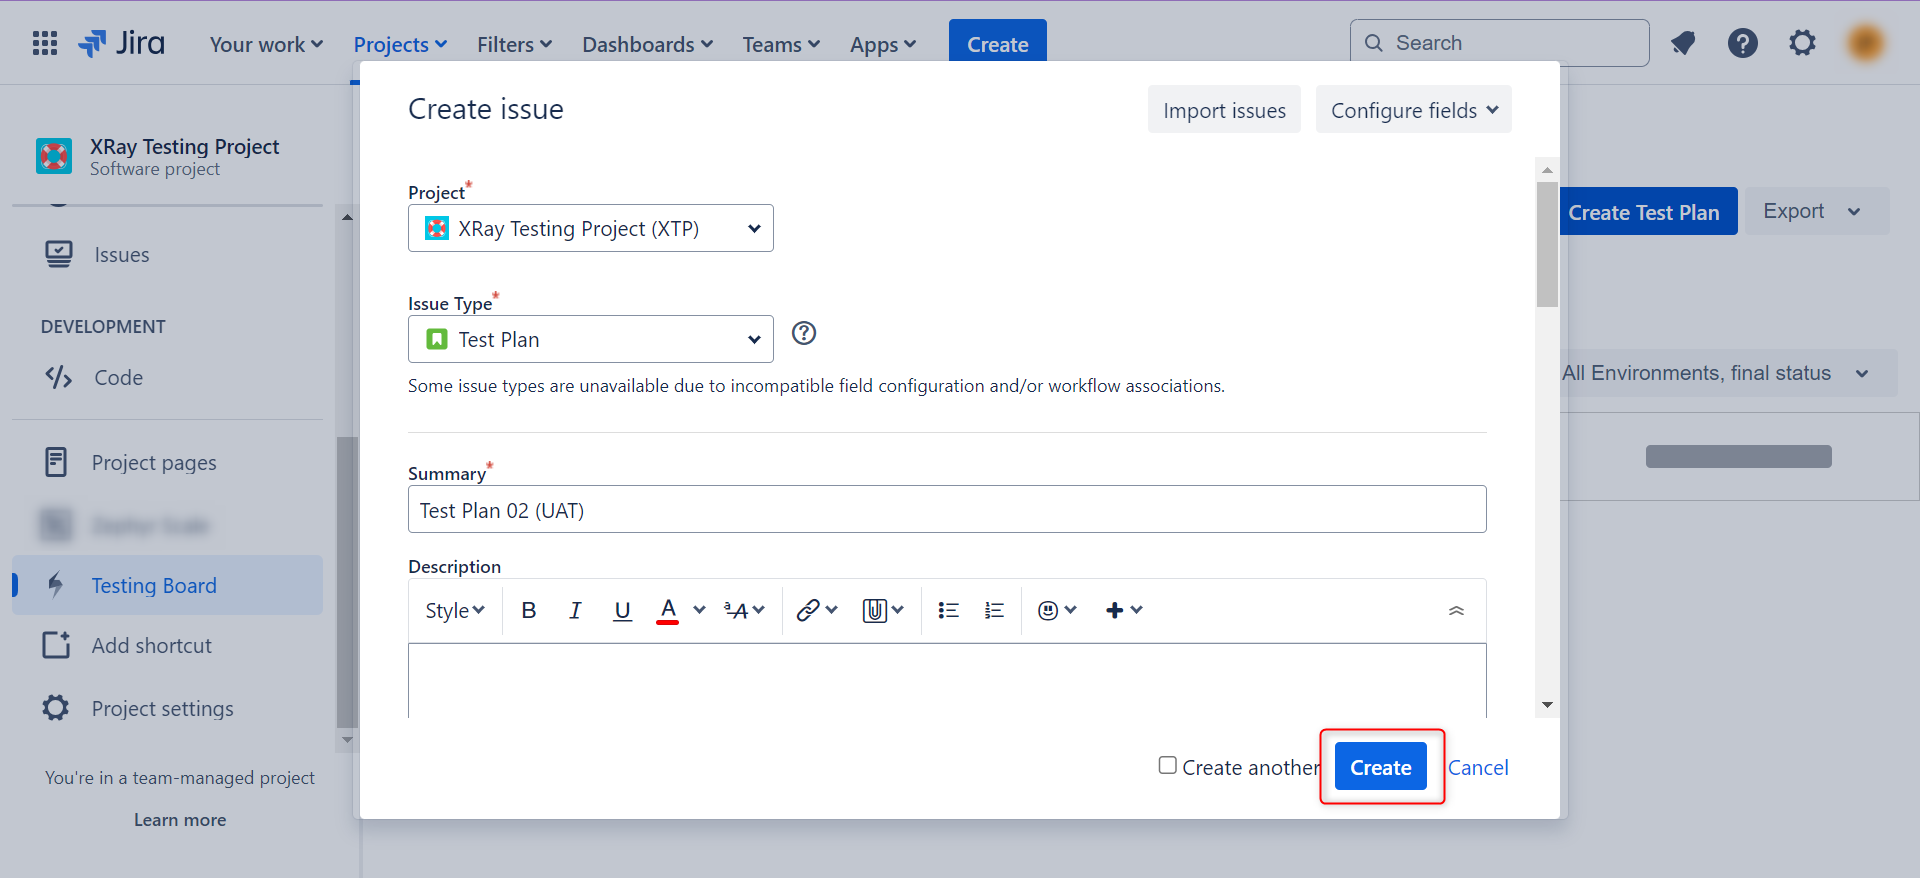
Step 4: A popup window will appear to let you create a ticket with issue type as test plan. Fill in all the necessary fields and click Create.
The newly created test plan will appear on the Test Plans page.
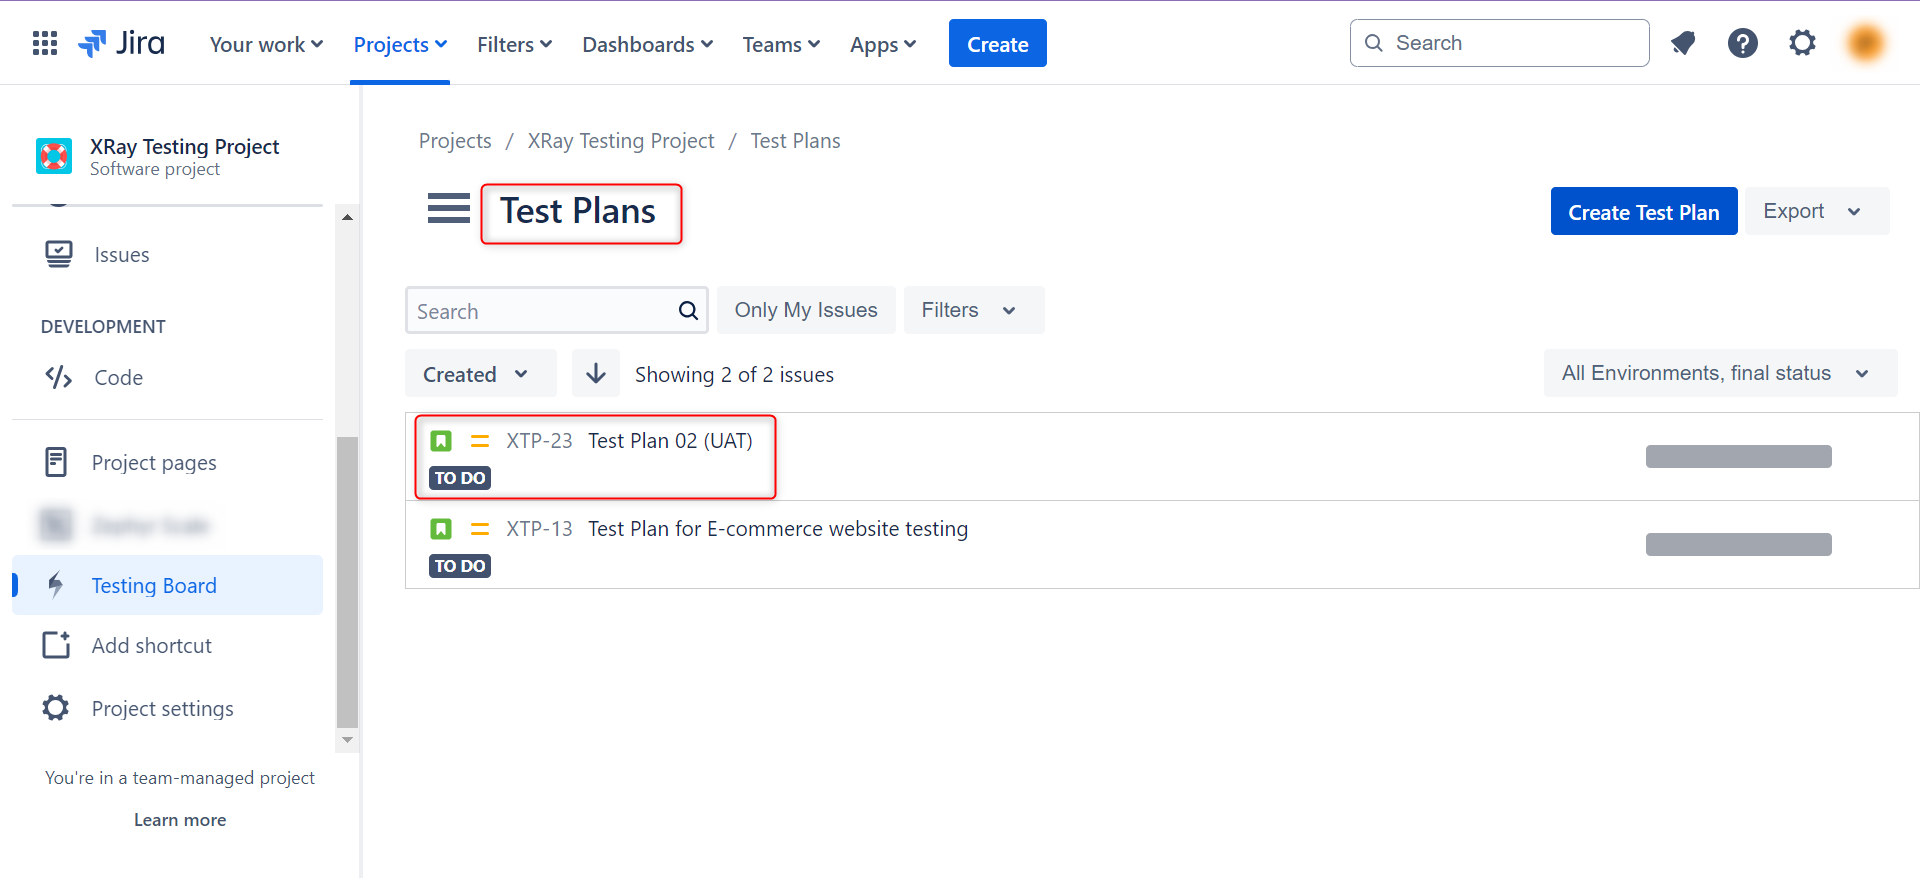
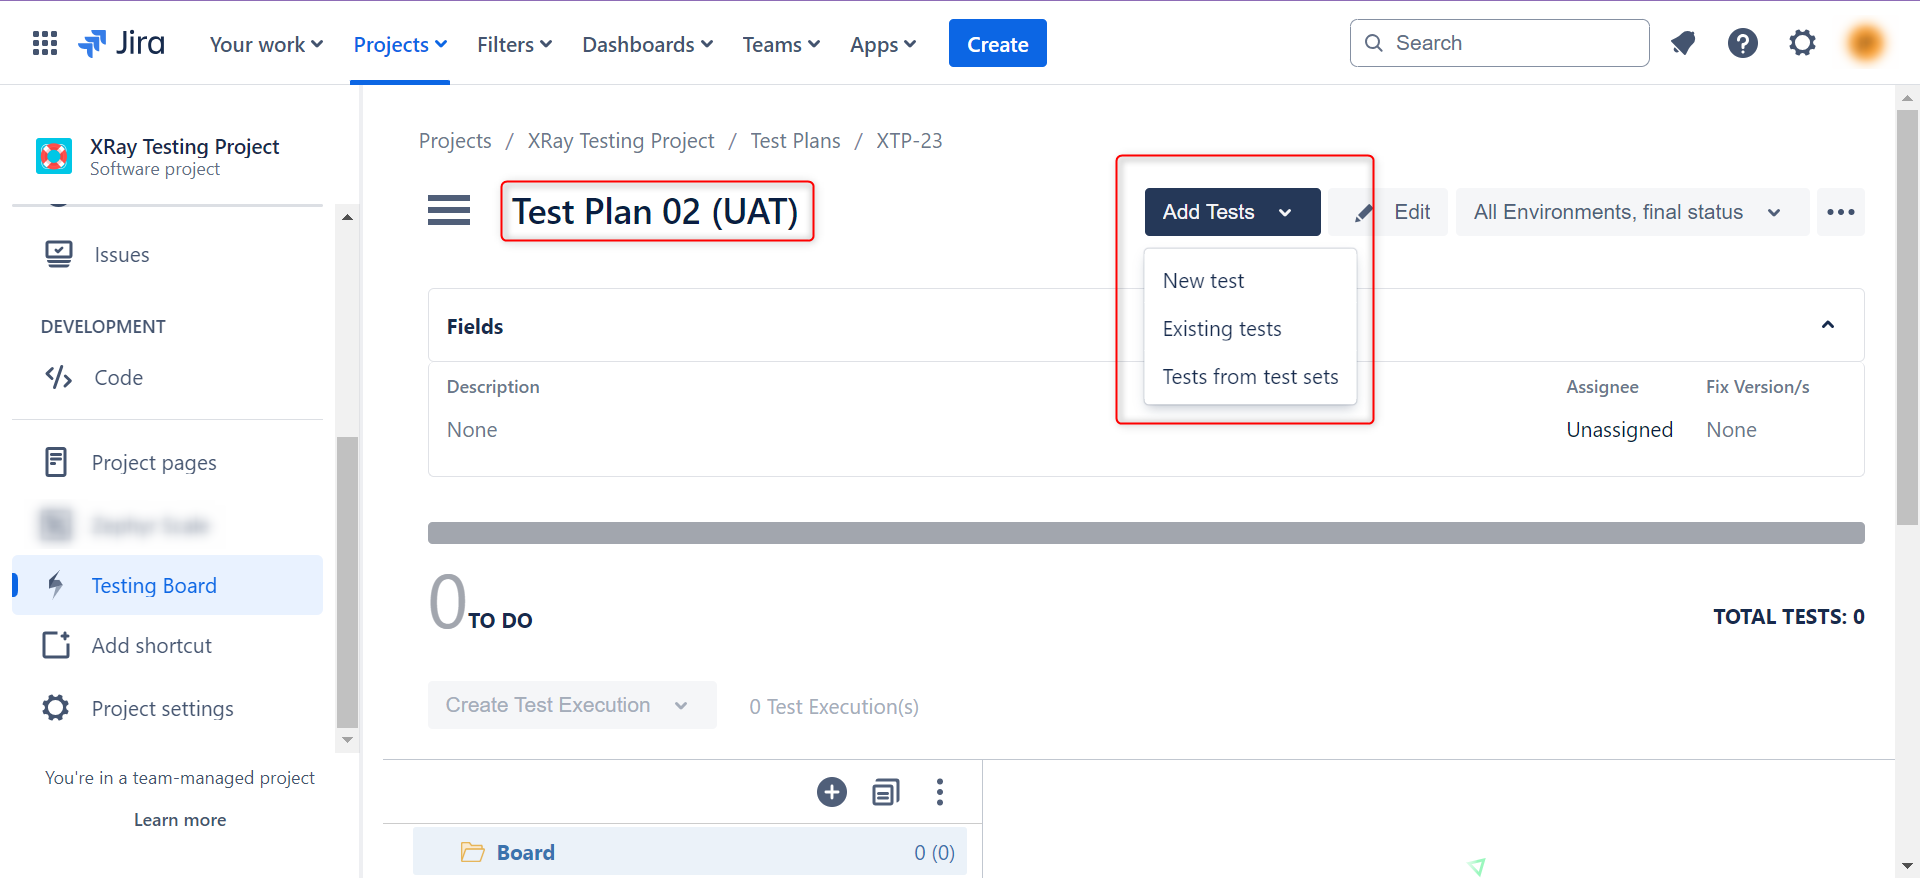
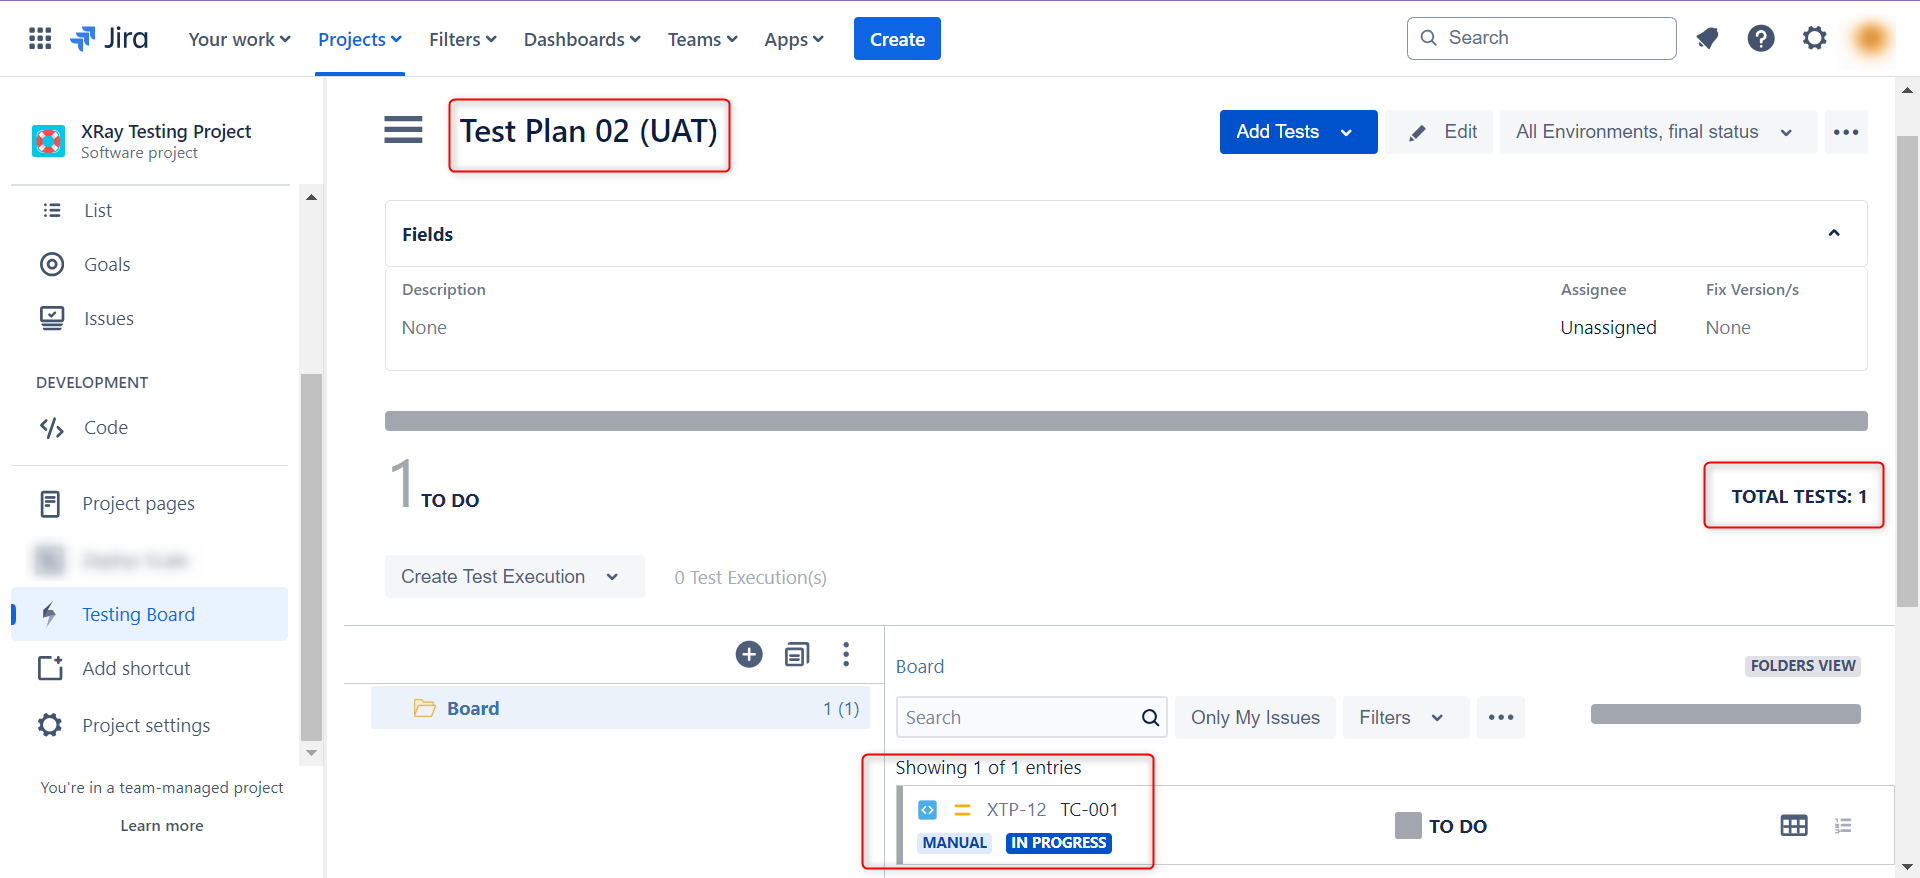
Step 5: Click on the issue id (in this example, XTP-23, as shown in the above screenshot), and you will be shown a detailed view of the test plan. Now, you can add test cases that need to be a part of this test plan. Use the Add Tests button to do this. Alternatively, you can choose to add existing tests as well to this test plan.
Step 6: Once you’ve added the test cases, you will see them linked to the test plan.
If you open any of the linked test cases, you will see this test plan in the Test Plans section.
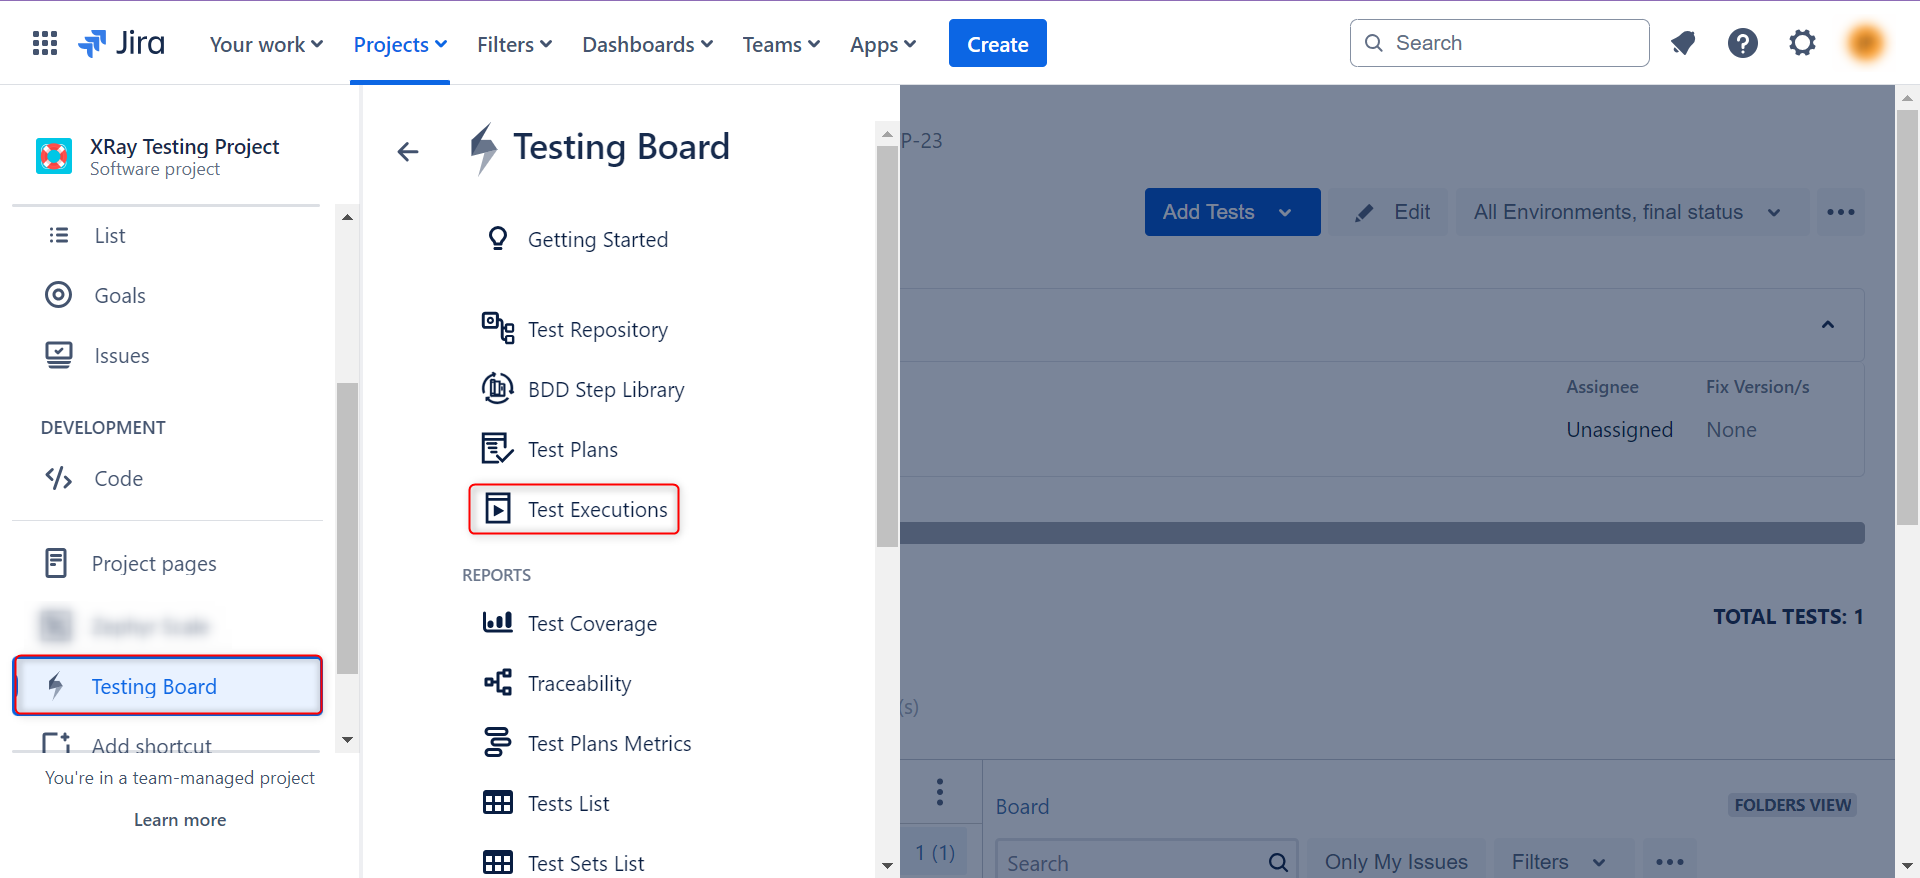
Step 7: You will need to create test executions or runs to document testing efforts. For that, again come to the main menu of the testing board. Click Test Executions.
Step 8: Once on the Test Executions page, click Create Test Execution.
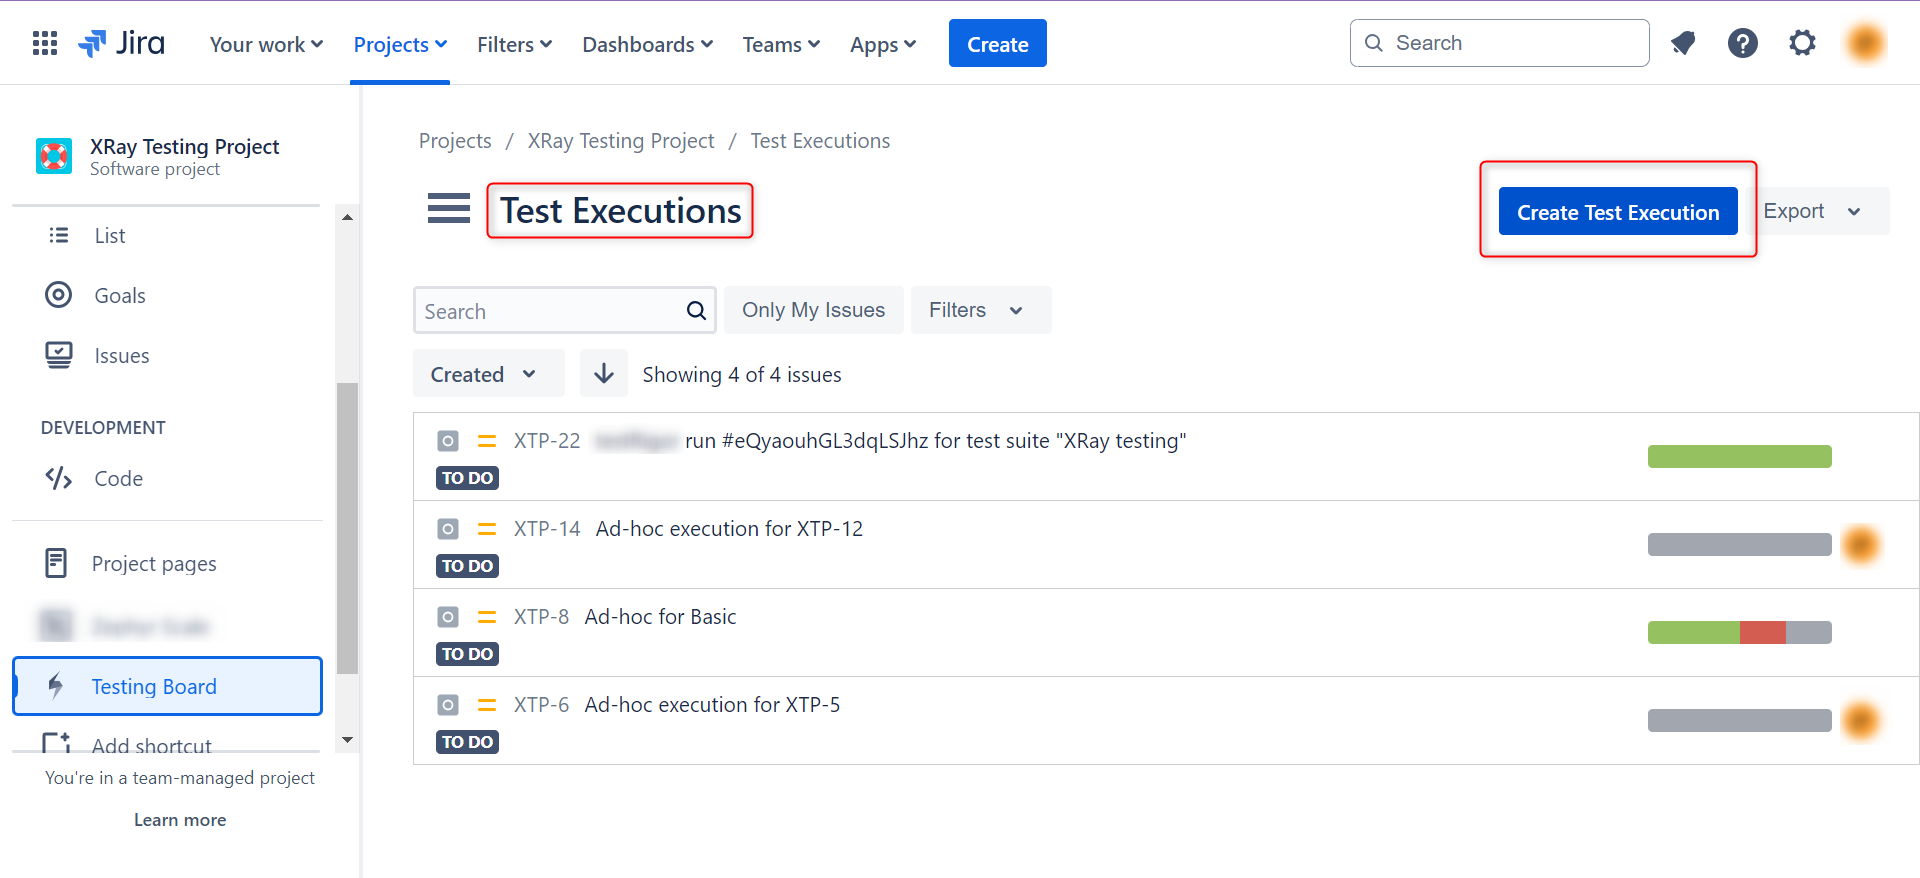
Step 9: A popup will appear to let you create a ticket with issue type as test execution. Fill in all the necessary fields and click Create.

The newly created test execution will appear on the Test Executions page.
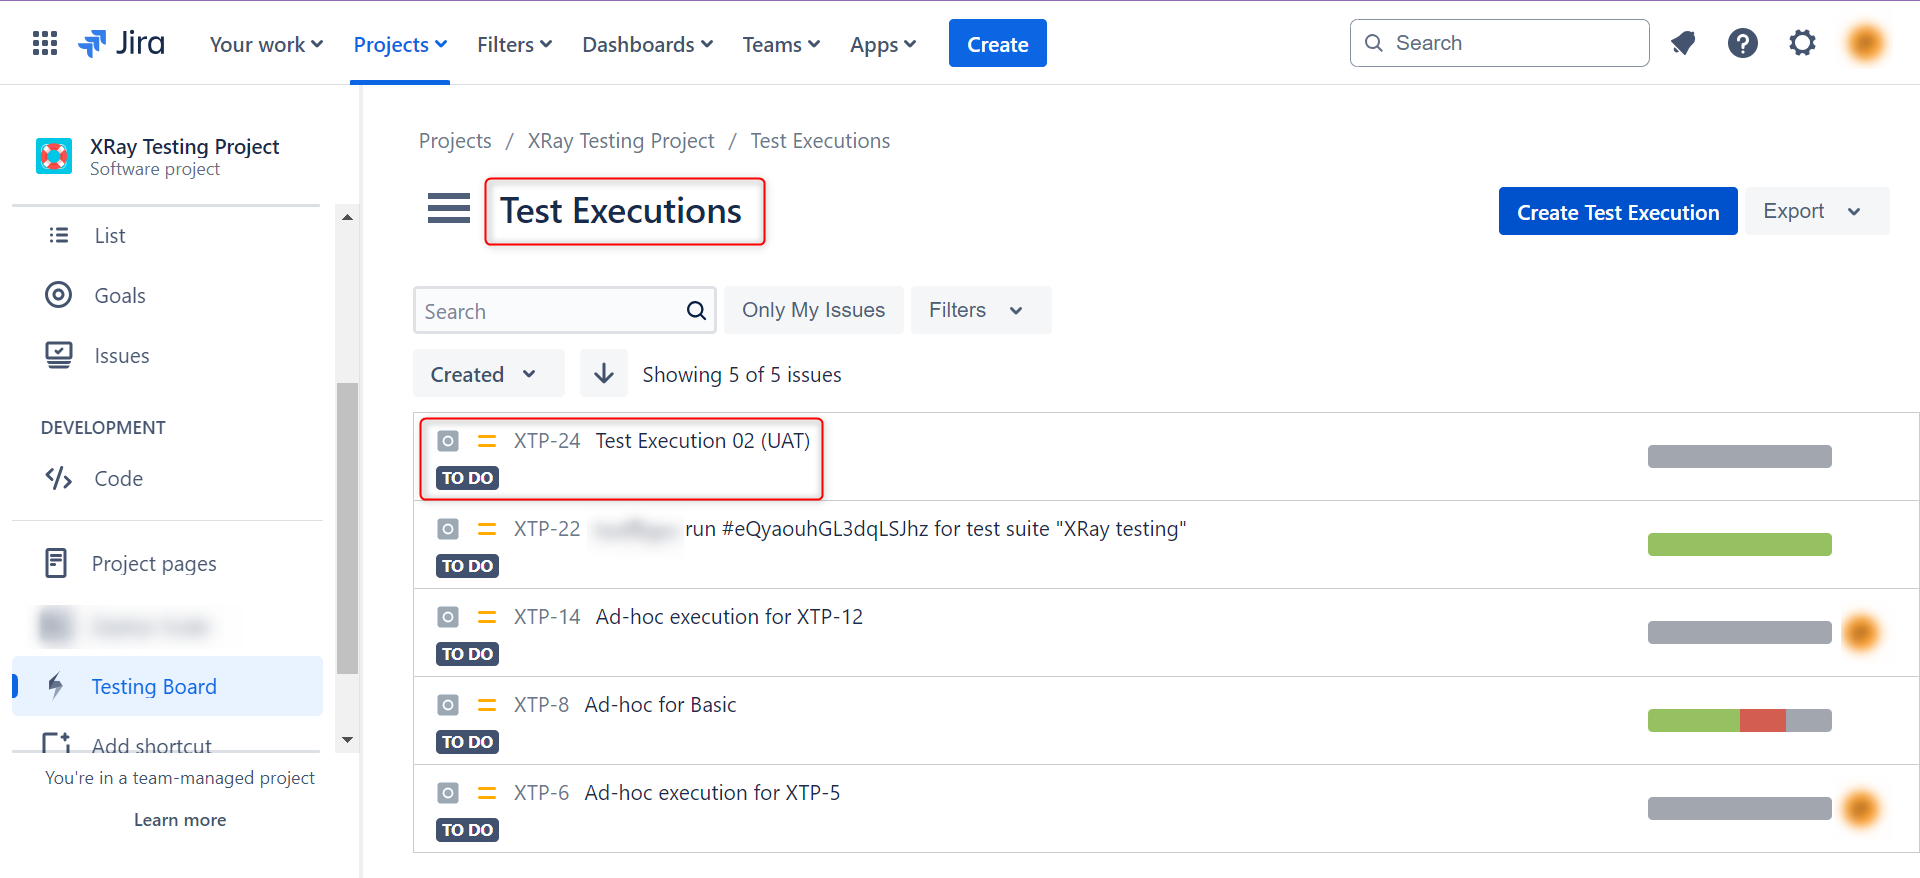
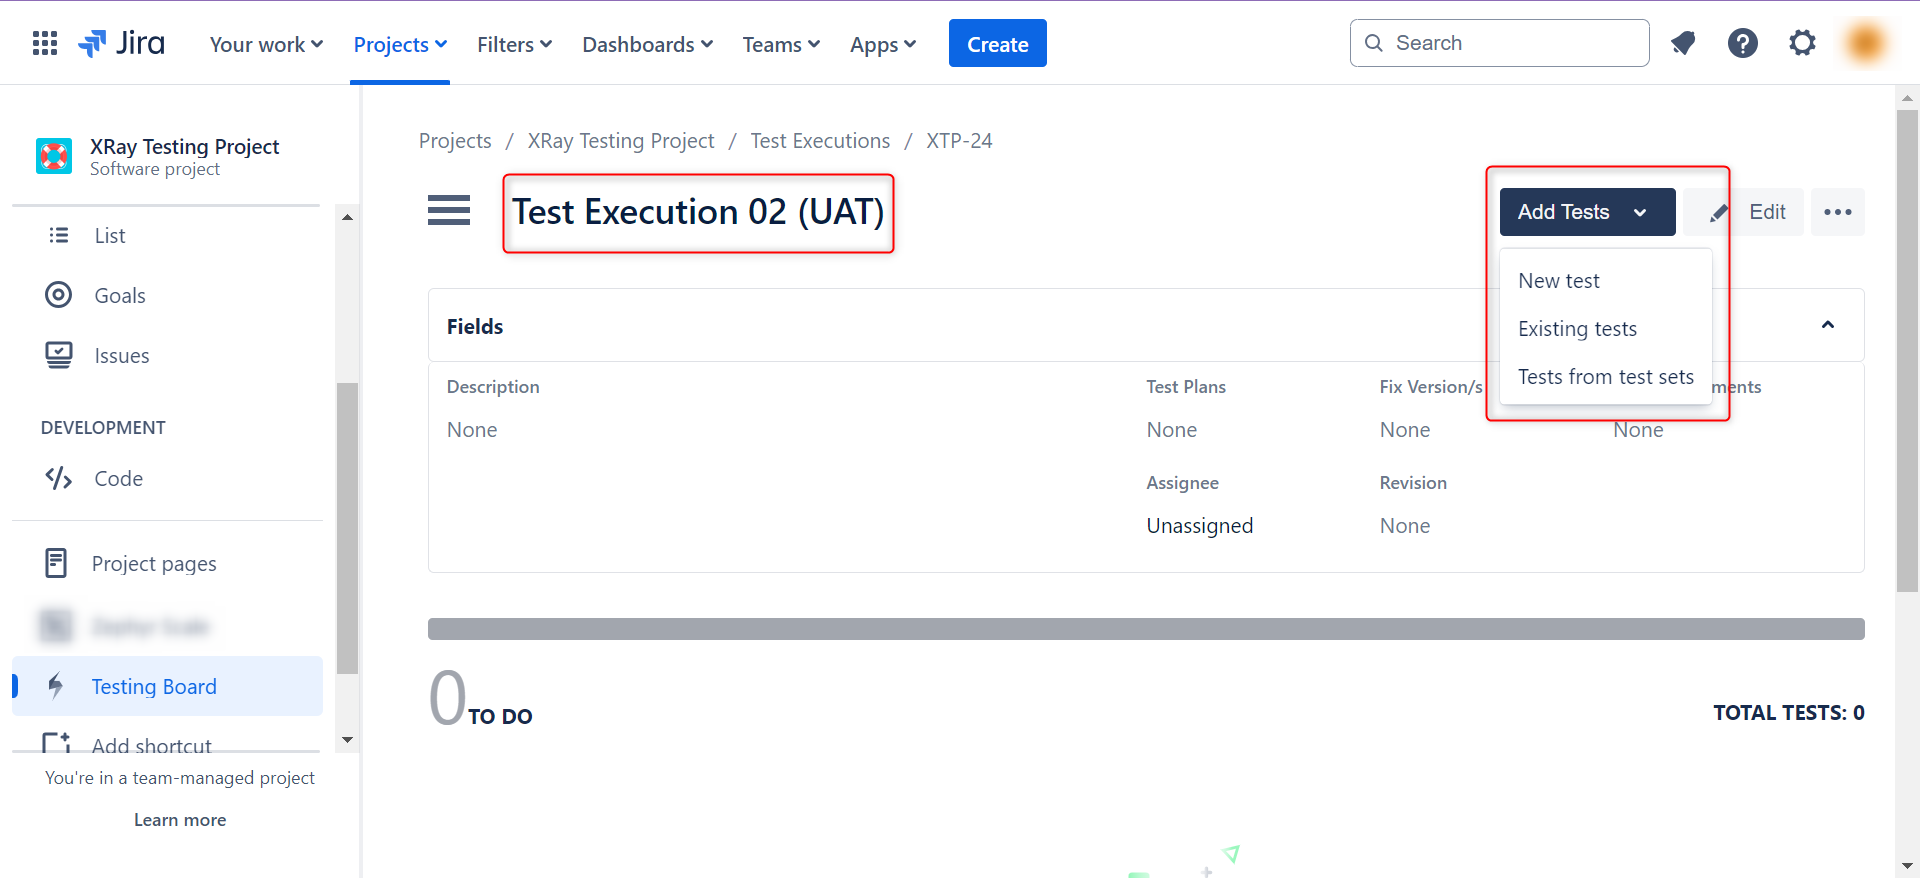
Step 10: Click on the issue id (in this example, XTP-24, as shown in the above screenshot), and you will be shown a detailed view of the test execution. Now, you can add test cases that need to be a part of this test execution. Use the Add Tests button to do this. Alternatively, you can choose to add existing tests as well to this test execution.
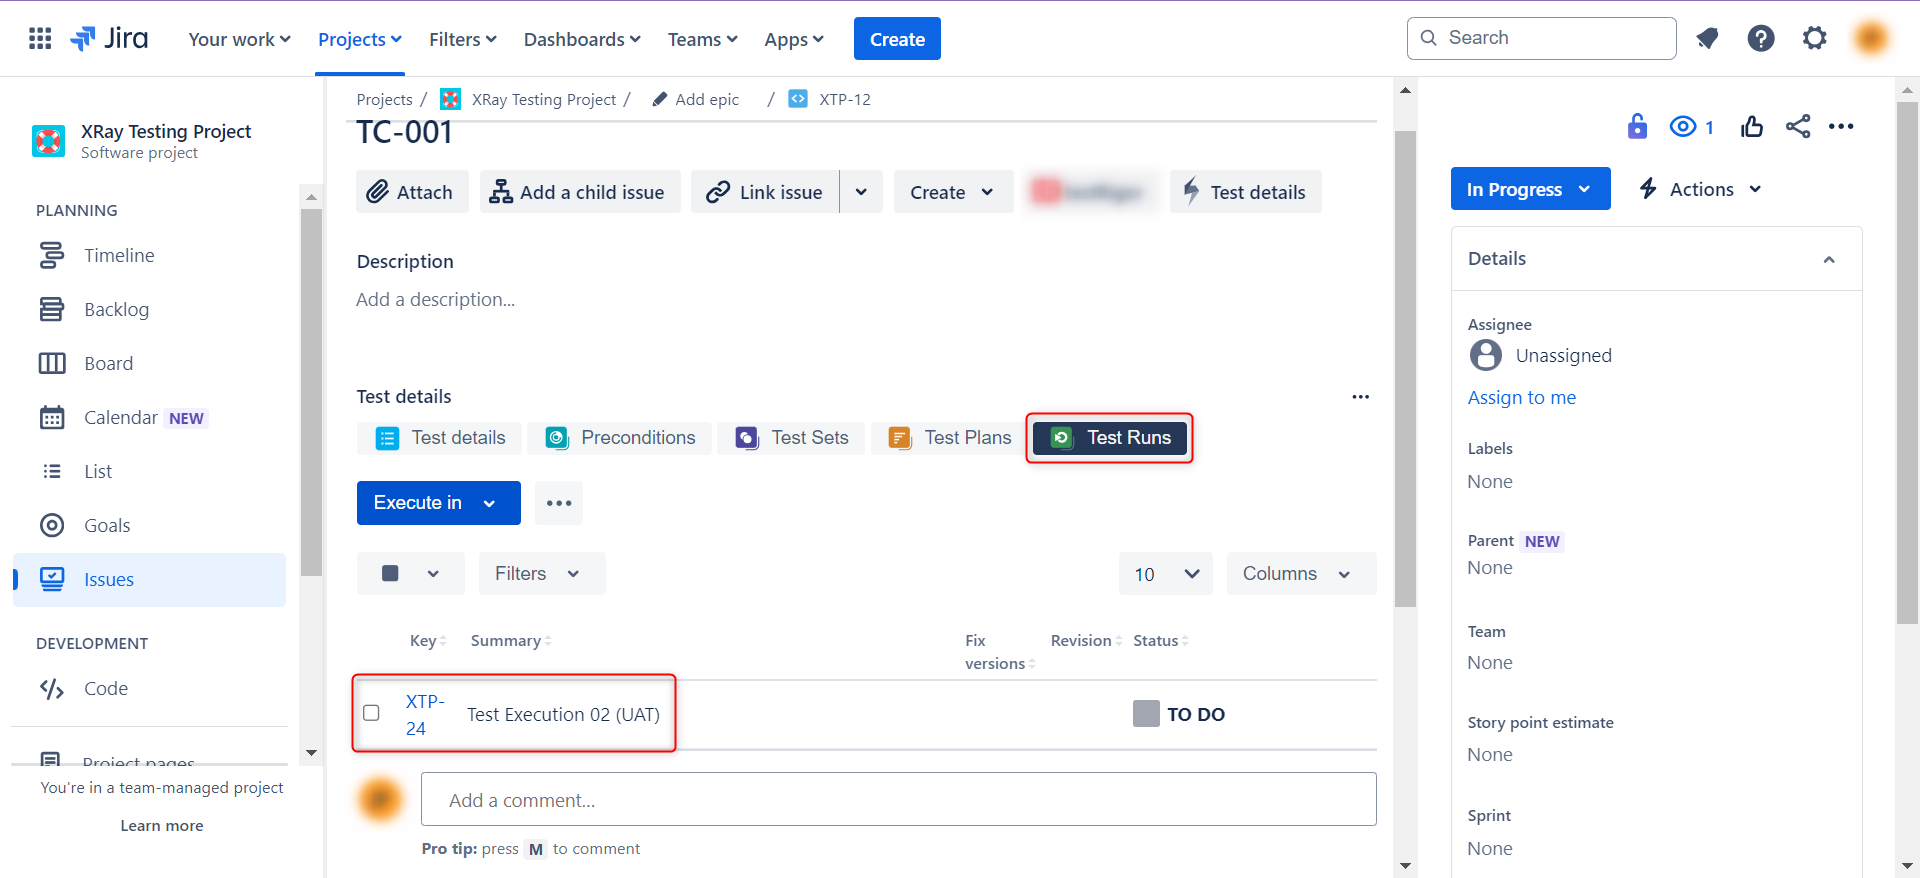
Step 11: Once you’ve added the test cases, you will see them linked the the test execution.
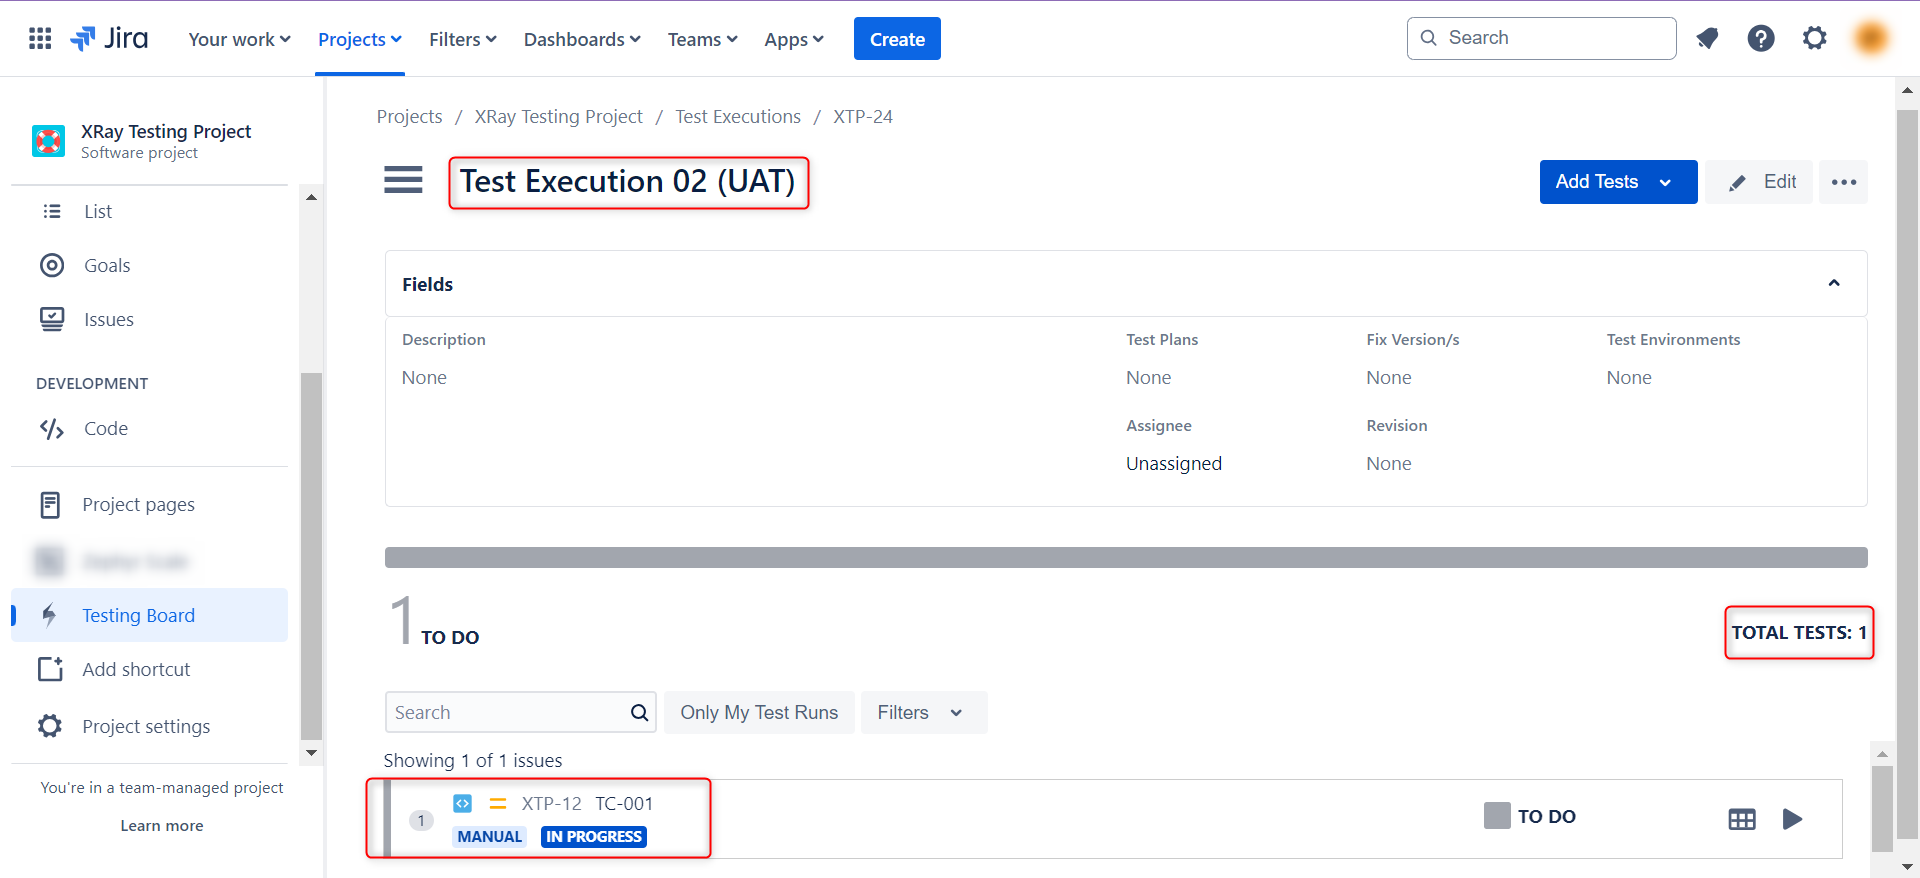
If you open any of the linked test cases, you will see this test plan in the Test Runs section.
Test reports
You can create various reports using XRay’s filters. Here’s how:
Step 1: Open the main menu associated with the Testing Board. Scroll down till you see the Reports section.
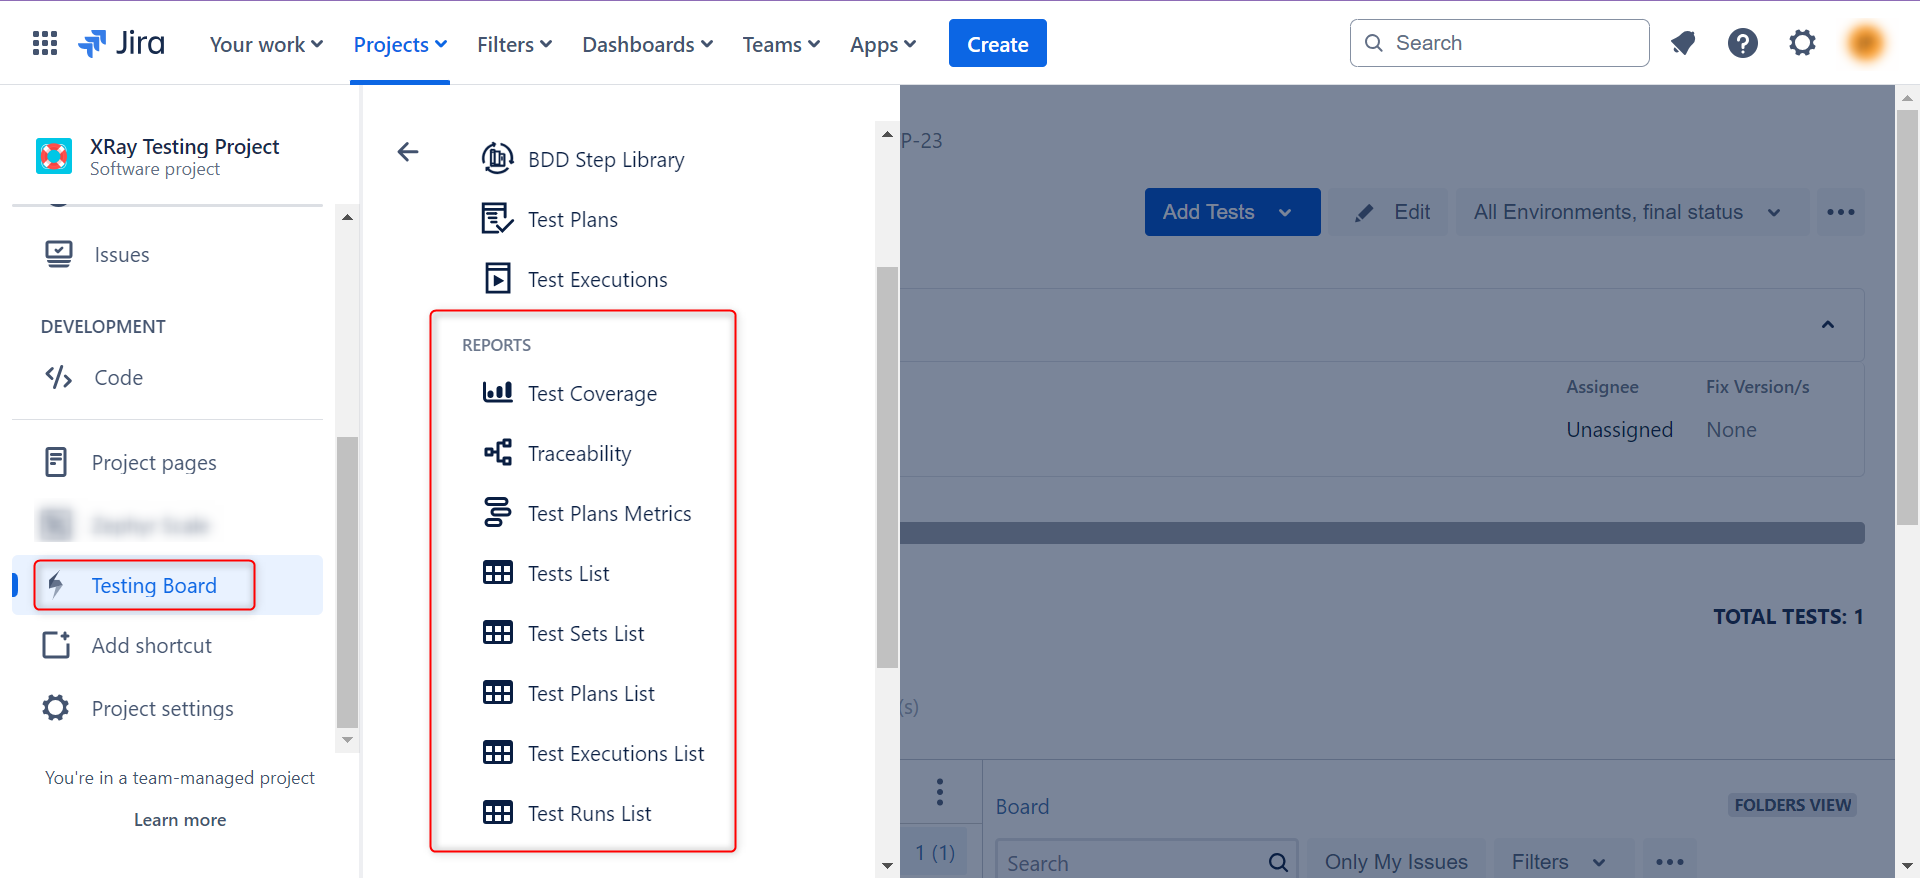
Step 2: Choose the kind of report you want to generate. For example, if you click on Test Plans Metrics, then you’ll see a page with – filters for parameters of the reports, which of those parameters to show (seen in the Show dropdown), and the Generate Report button.
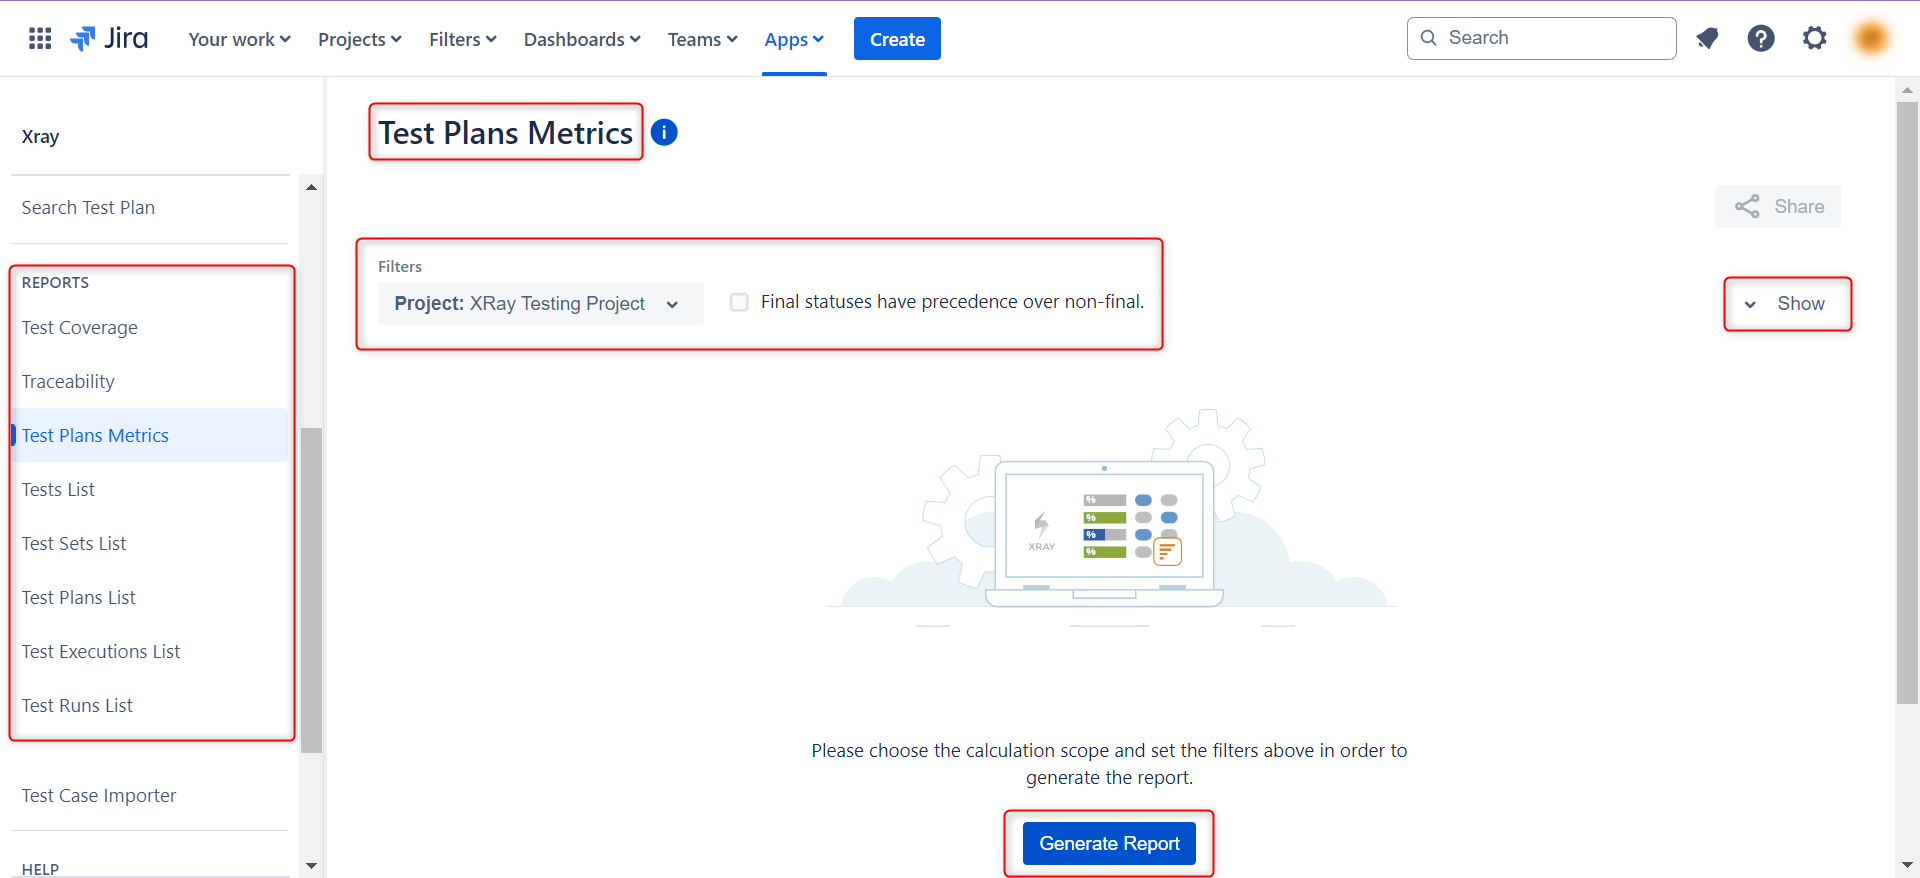
Step 3: You will get your report once you click on Generate Report.
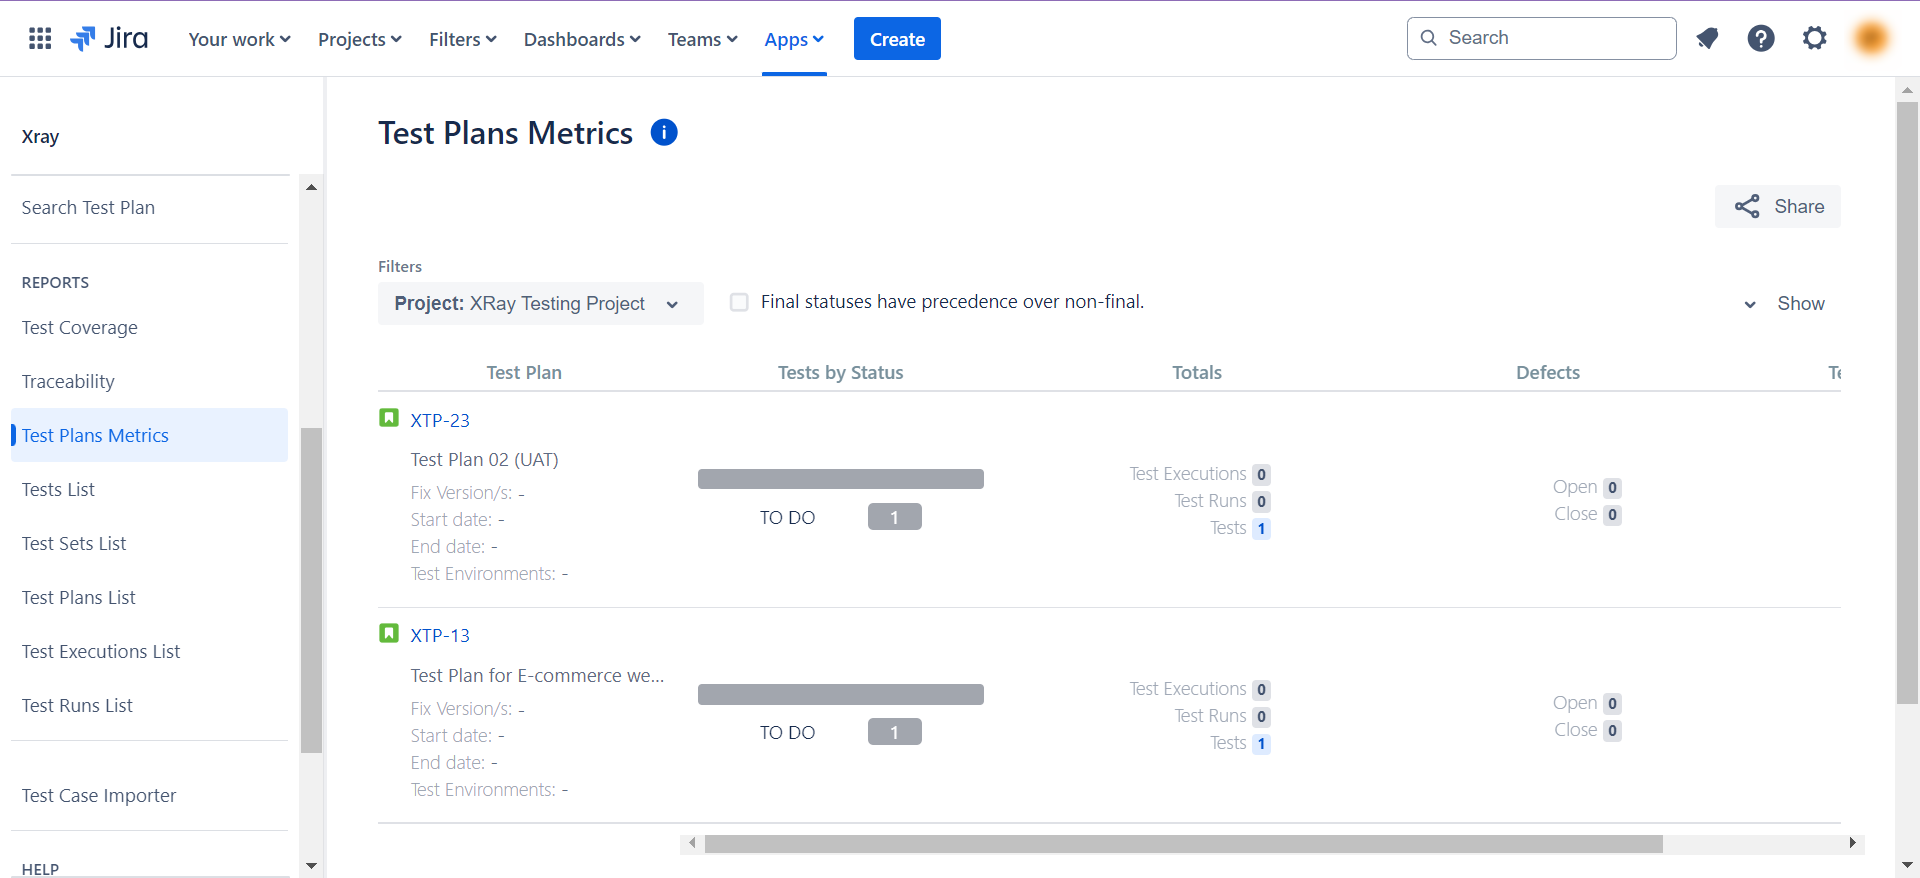
The issues along with their ids are available in these reports, thus making it easier to delve deeper during the analysis process.
Integrating XRay with test automation tools
To ensure good software testing, you need more than test management. You need to be able to integrate with other testing tools to make the process efficient. Luckily, XRay can be integrated with many test automation tools, one of which is testRigor.
Integrating XRay with testRigor
testRigor is one of the best options for effortless automated testing. This tool uses generative AI to make test case creation, execution, and maintenance easy on its intuitive cloud platform. It allows you to create various types of tests for different types of apps and platforms in plain English without requiring any kind of coding knowledge.
Easily and quickly automate web, mobile (hybrid, native), desktop, API, database, file handling, QR code, Captcha resolution, email, phone, SMS, 2FA, and many more complex scenarios in just plain English (or any other natural language).
Of the many integrations that testRigor supports, one is for XRay. Here’s how you can do it.
Step 1: Log into your testRigor account and create a test suite where you want to integrate your XRay test cases.
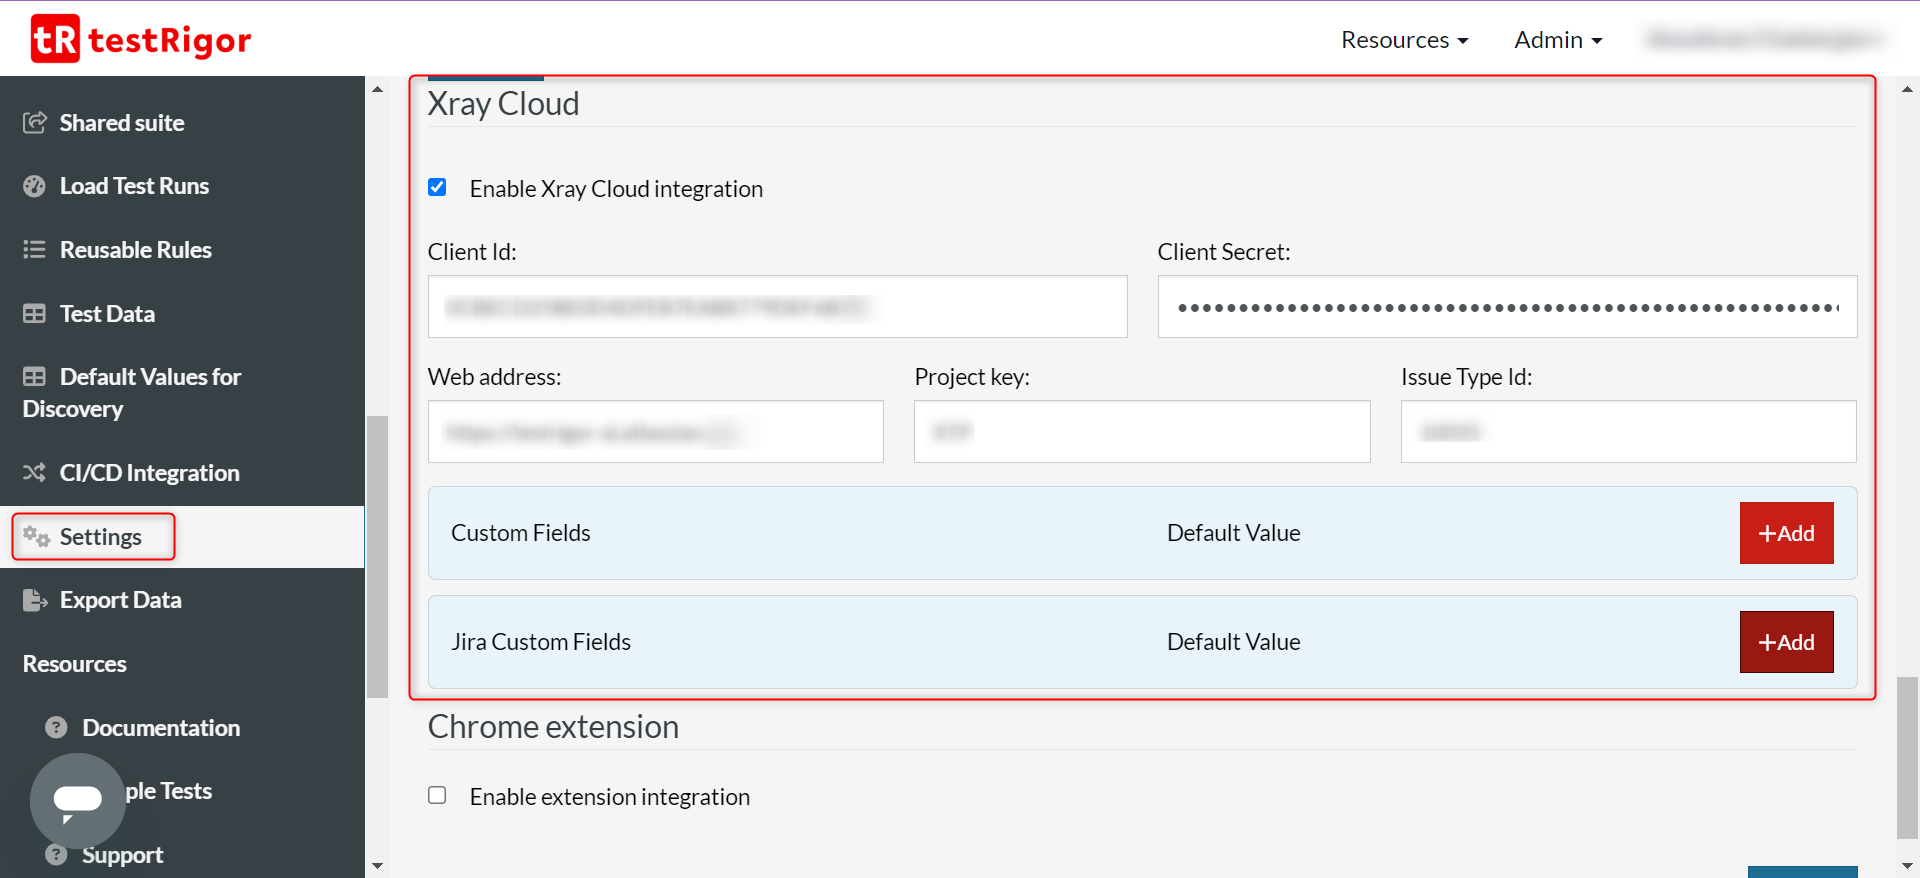
Step 2: Within the test suite, navigate to the Settings -> Integrations -> XRay section.
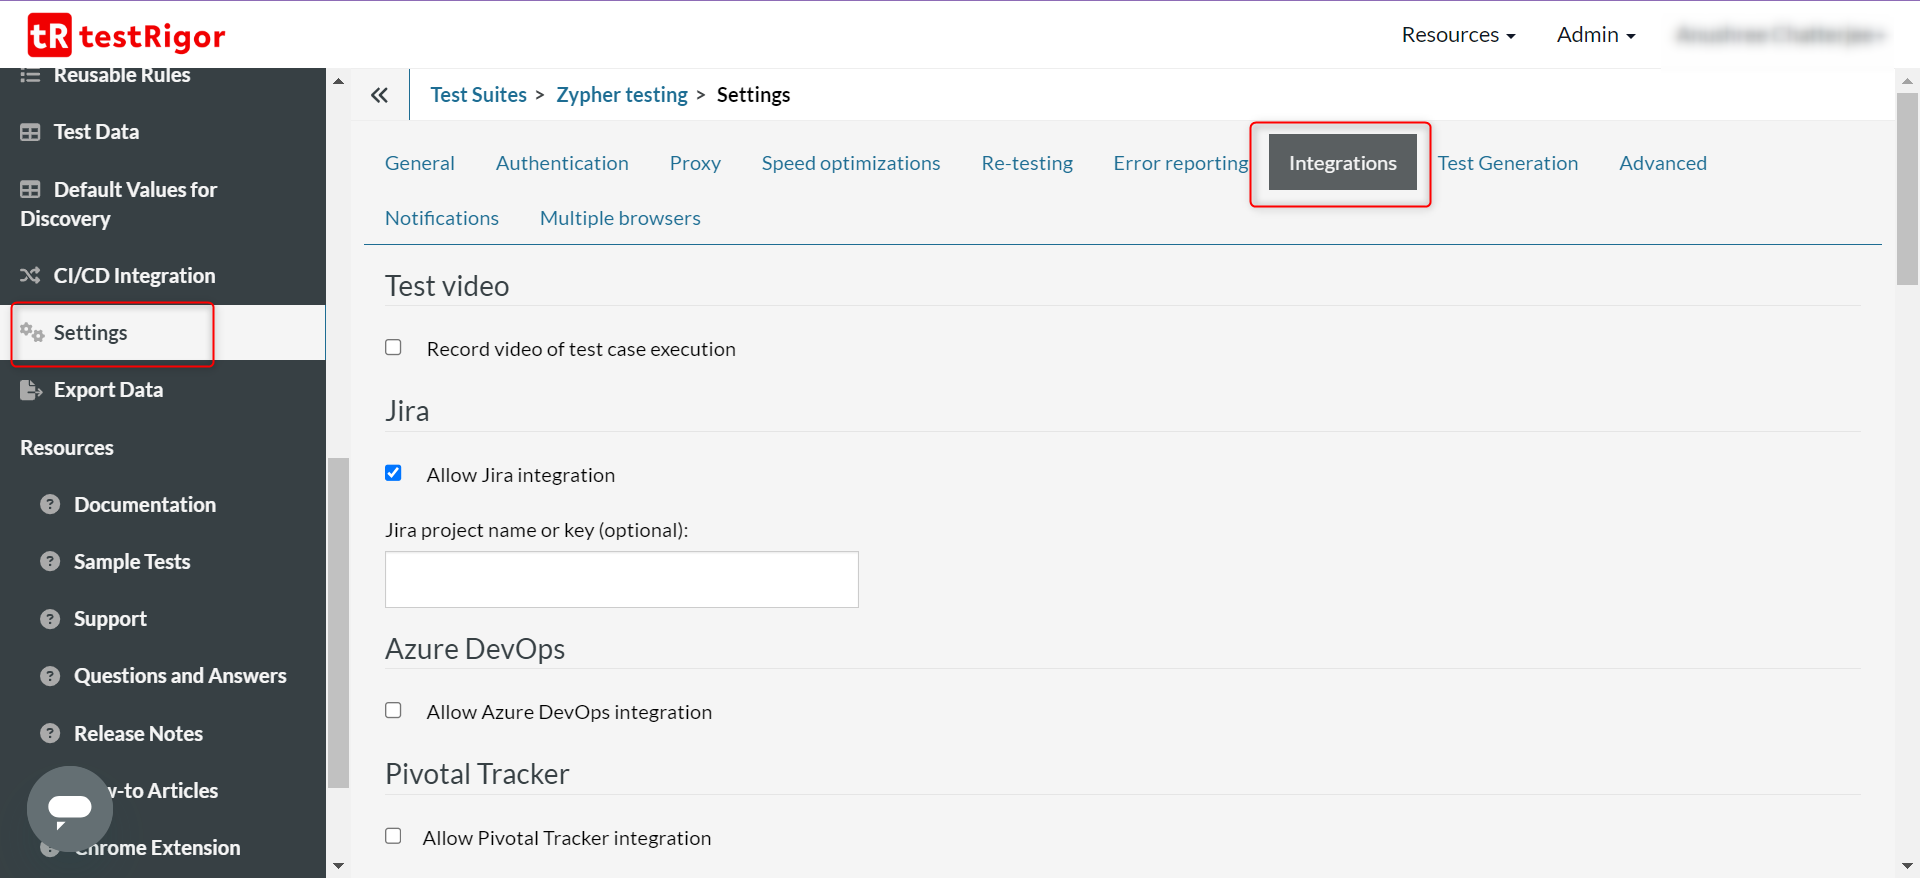
Refer to this detailed documentation on how to fill up the details in this section.
Step 3: Once you save these changes, return to the Test Cases section. You can now start adding test cases in testRigor and then link them to the ones you’ve created in JIRA using XRay. Here’s how to do it.
Step 3.1: You will see a new section associated with each testRigor test case, as shown below, called Xray Cloud. To link a testRigor test case to one of the XRay test cases, click Change.

Step 3.2: Type and select the XRay test case in the window that appears.
Step 3.3: Save changes.
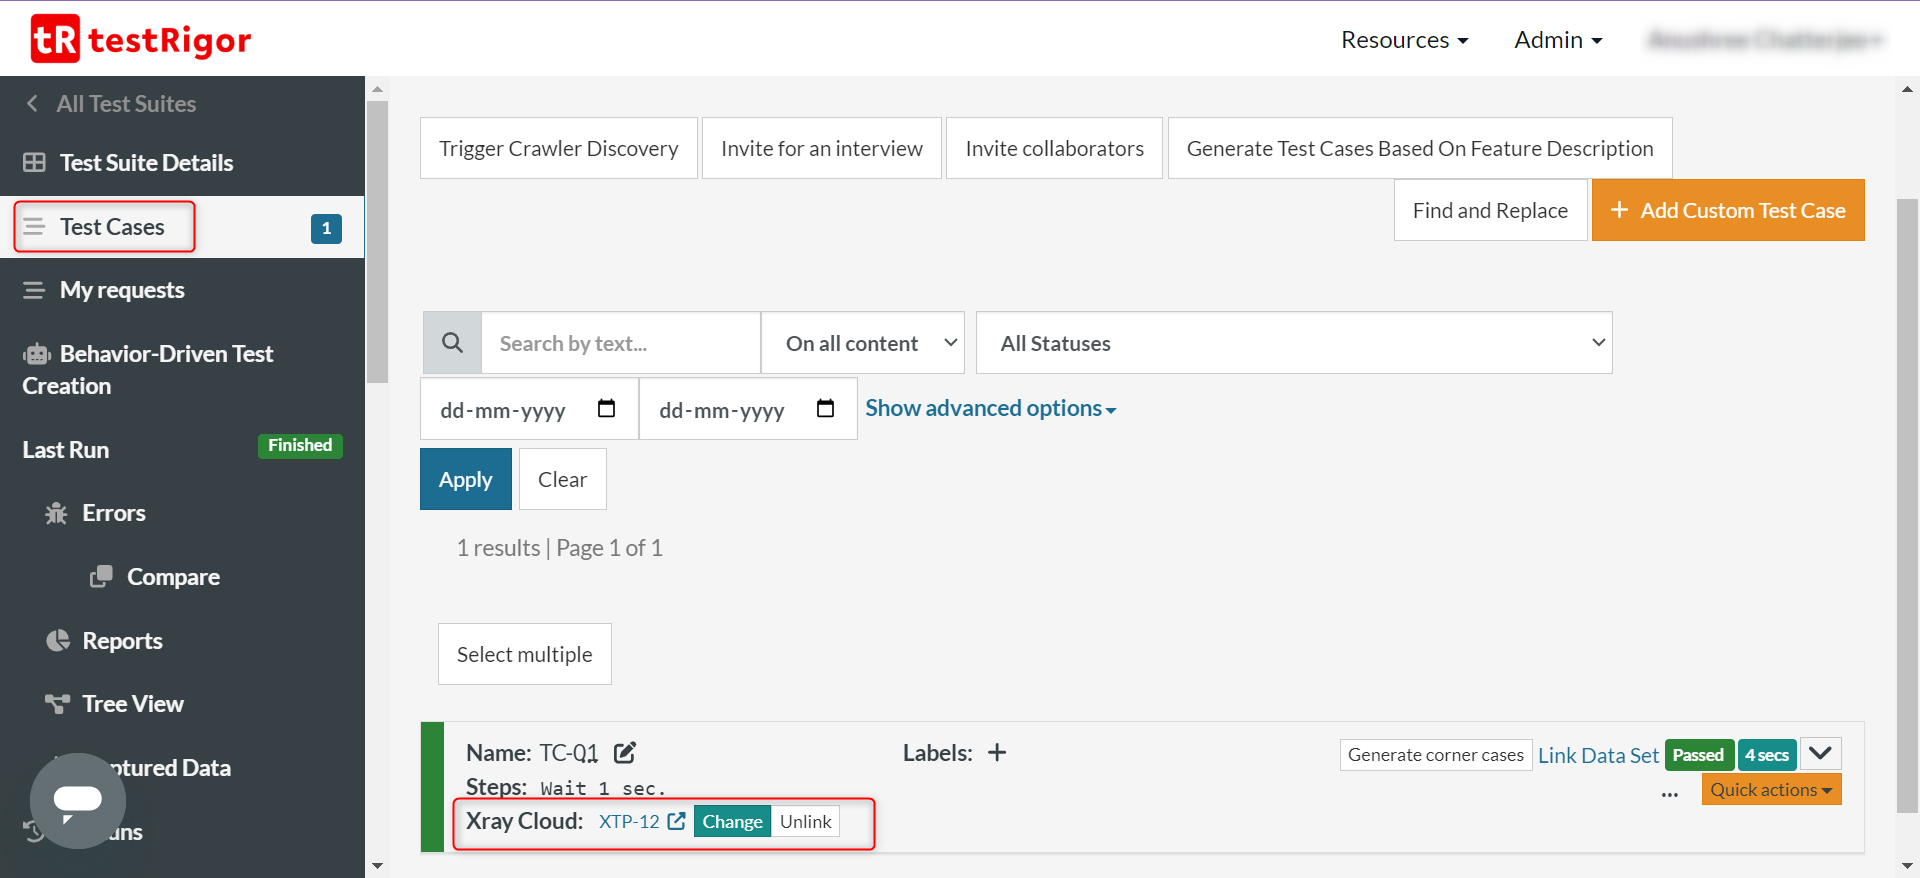
Step 4: You’ll see that the link is updated for that test case. Now the execution details will be updated not just in testRigor, but even in XRay (within JIRA). If you want to run the entire test suite, do it from the Test Suite Details section within testRigor. Here, you’ll get additional configurations, such as, not updating XRay with test execution results.
Thus, you can easily extend XRay’s capabilities and involve automated testing to improve testing efficiency. testRigor also offers test reporting, to have a summary of your test cases’ performance.
That’s not all. You can do a lot more with this tool. Here’s a full list of testRigor’s powerful capabilities.
| Achieve More Than 90% Test Automation | |
| Step by Step Walkthroughs and Help | |
| 14 Day Free Trial, Cancel Anytime |


