Record and Playback With Selenium IDE: How Do You Implement It?
|
|
Selenium IDE
Record and playback functionality in automated testing is the easiest way to enjoy the benefits of automation with minimal effort and knowledge. As the name suggests, the goal of such tools is to help you record a user’s activity and then imitate the user’s actions. Recording helps you build the test coverage needed to test your application and can save a significant amount of time, resulting in accelerated software development releases.
Unlike WebDriver, Selenium IDE does not require programming skills; anyone can record the necessary application steps to test and then execute these steps to generate the report. It is essential to mention that along with its advantages, Selenium IDE has its limitations: we wouldn’t recommend using it for any even moderately complex or large projects. In this case, convenience comes at the cost of test speed execution, the robustness of tests, and maintenance.
There are a lot of tools in the market that provide you with the record and playback feature and also generate logs of the application’s behavior when a specific action is performed. However, Selenium IDE is one of the oldest on the market and the most well-known.
Record and playback is one of the key features of Selenium IDE, among other features that help manual testers get a taste of automation and its benefits. Selenium IDE has a rich set of commands powered by Selenese, allowing you to record various interactions of a web app with the browser.
How to record a test case with Selenium IDE?
Let’s now jump into action! Selenium IDE provides add-ons for Chrome and Firefox browsers. We will now install the tool and walk you through recording your first test case using a Chrome extension.
1) Download the Selenium IDE Chrome Extension
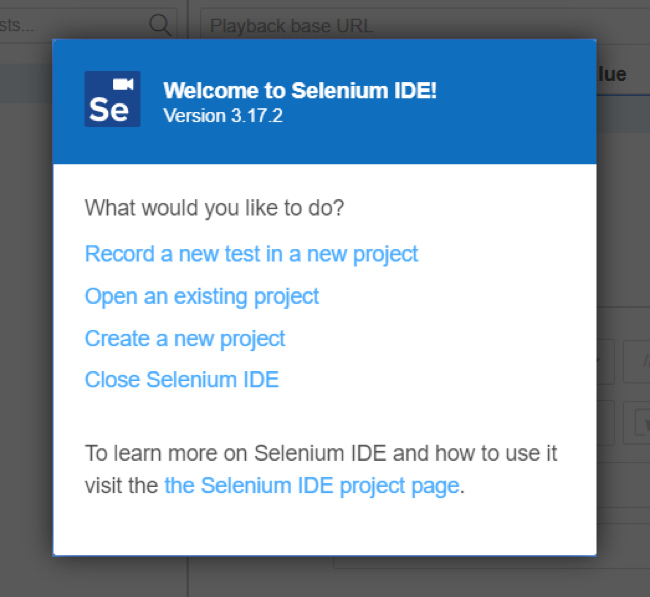
2) Create a new project
Once you open the Selenium IDE extension in the browser, a popup with various actions will appear. Click on “Create a new project” and give your project a new name. You can also easily change the name later.
3) Create a new test
After naming your project, you’ll see a new window with your freshly created project. To create a new test case, you need to provide the name of the test. Once done, save the project.
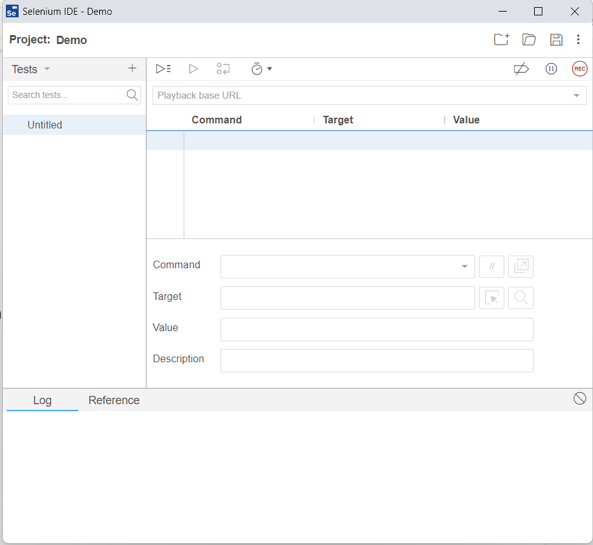
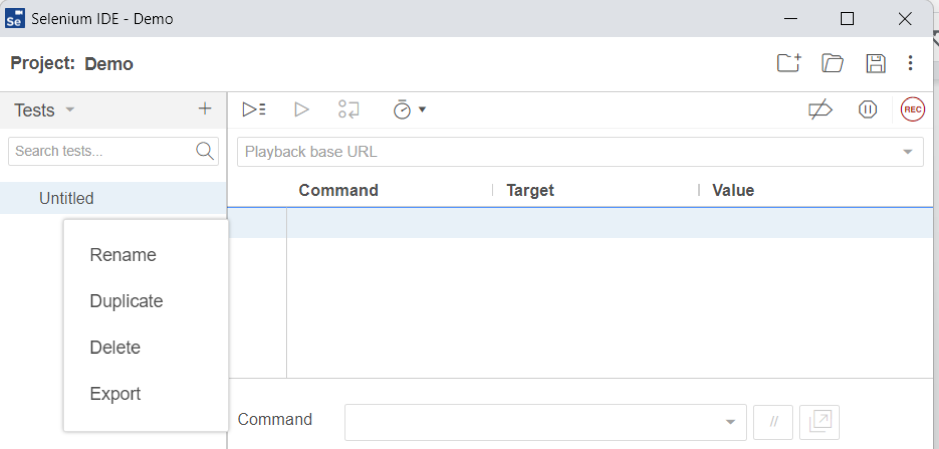
By default the test case name is set to “Default”. You can rename, duplicate, delete and export the test cases by clicking on the title bar link.
4) Start with Record & Playback
All the preparation steps have been completed, and it’s time to start recording your first action. Click on the “REC” button to start recording.
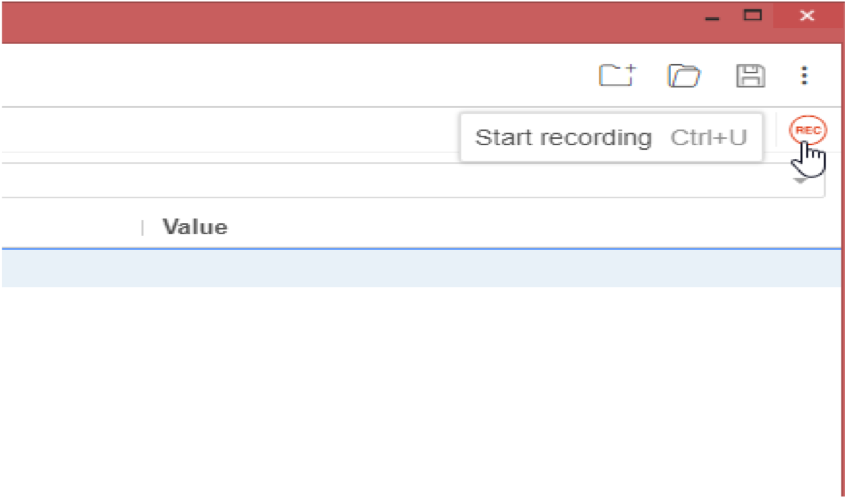
Once you click on the “REC” button, you will see a popup on your screen. Enter the base URL (which is the URL of the application you want to test) and click “START RECORDING”

A target website page will then open, where you can record the actions according to the steps of your test case. Once you are done recording the test case steps, go back to Selenium IDE and finish the recording by clicking on the Stop button. Save the project again.
5) Replay your recorded action
Click on “Run current test” to see the test being executed.
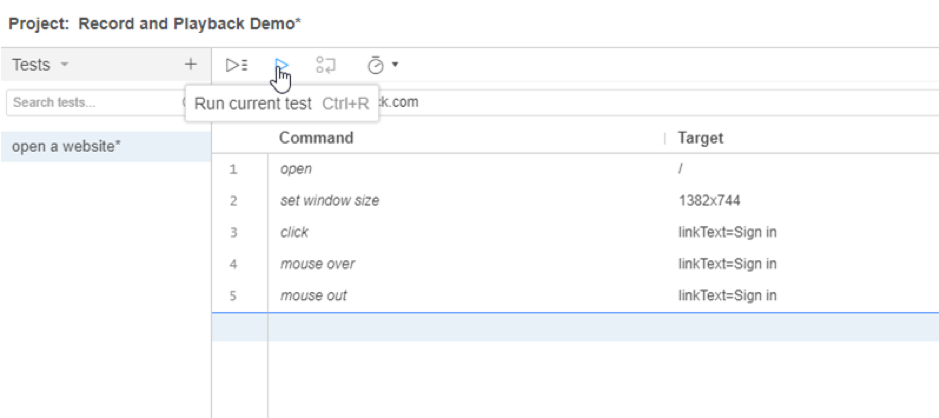
Once it finishes, you will see the test log with the steps executed along with their timestamps at the bottom.

Congratulations! You have successfully recorded the test, and then re-played the recorded test. You have the liberty to playback this test any number of times as per your requirements.
As you can see, record and playback is a very handy and easy to use feature of Selenium IDE. Let’s now talk about the main advantages and disadvantages that you should consider when choosing an automation tool for your project.
Advantages of using Selenium IDE
We will now explain the key advantages of using Selenium IDE and how it helps in smoothening and fastening your software releases.
- Doesn’t require prior code knowledge, or knowledge with other testing frameworks.
- Provides a significant level of flexibility when executing the test cases. For instance, QAs can either run a single test case or execute the entire test suite consisting of multiple test cases.
- Tests are easily exportable into Web Driver and Selenium RC.
Disadvantages of using Selenium IDE
Selenium IDE is one of (if not the oldest) tools of its kind, since it first came out back in 2006. It’s getting harder and harder for it to compete with the new, more advanced AI-enhanced automation tools (such as testRigor). We’ll now mention some of the main drawbacks you have to keep in mind when considering Selenium IDE for your project.
- Only available for Chrome and Firefox browsers.
- Due to multiple architectural factors, it’s almost impossible to achieve highly stable tests. One of them is that Selenium IDE relies on details of implementation, meaning that a test will break if the underlying locator will change.
- There are no easy ways to add wait times.
- Test maintenance on a large project will quickly become an issue, since there’re no ways to bulk edit test cases.
To sum it up, Selenium IDE is still a good solution for a small project with a very limited number of test cases. However if you want to take your test automation to the next level (while still considering it being codeless) – you might want to look into testRigor, since it’s a much more powerful tool capable of complex end-to-end UI test coverage.


