How to Use testRigor to Test Your Website or Mobile App
|
|
In this article, we will discuss how to test your website or mobile app using testRigor. To do that, let’s take the Best Buy website as an example. Our scenario will be to navigate to the Best Buy website, search for iPhone 15 Pro 256GB, check the full specs, add it to the cart, and finally confirm if it’s added to the cart.
Let’s start with the prerequisites.
Step 1: Log in to your testRigor app with your credentials.
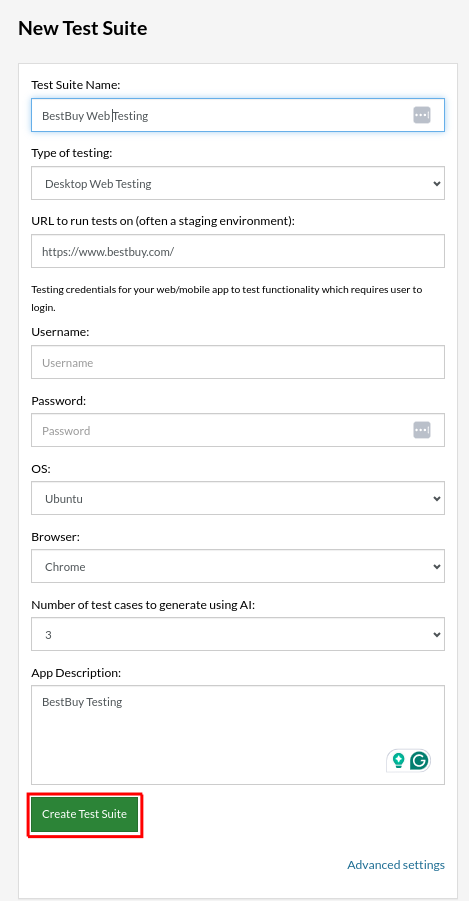
Step 2: Set up the test suite for the website testing by providing the information below:
- Test Suite Name: Provide a relevant and self-explanatory name.
- Type of testing: Select from the following options: Desktop Web Testing, Mobile Web Testing, Native and Hybrid Mobile, based on your test requirements.
- URL to run test on: Provide the application URL you want to test.
- Testing credentials for your web/mobile app to test functionality which requires user to login: You can provide the app’s user login credentials here and need not write them separately in the test steps then. The login functionality will be taken care of automatically using the keyword login. Filling out this field is optional and not mandatory.
- OS and Browser: Choose the OS Browser combination on which you want to run the test cases.
- Number of test cases to generate using AI: You can simplify your test creation further by opting to generate test cases based on the App Description text. This feature works on generative AI. You have an option to select from 0,1,3,5,10,15,20,25,50,100 to 200 from the dropdown. So, let’s choose the value of 3.
Step 3: Click on Create Test Suite.
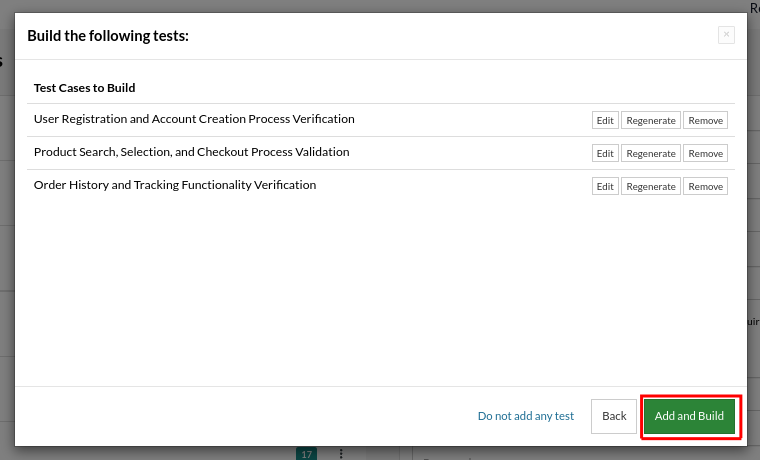
On the next screen, since we mentioned the number of test cases generated by AI as 3, we can see three test cases being created. You have the option to edit, regenerate, or remove the test cases.
Step 4: Click Add and Build.
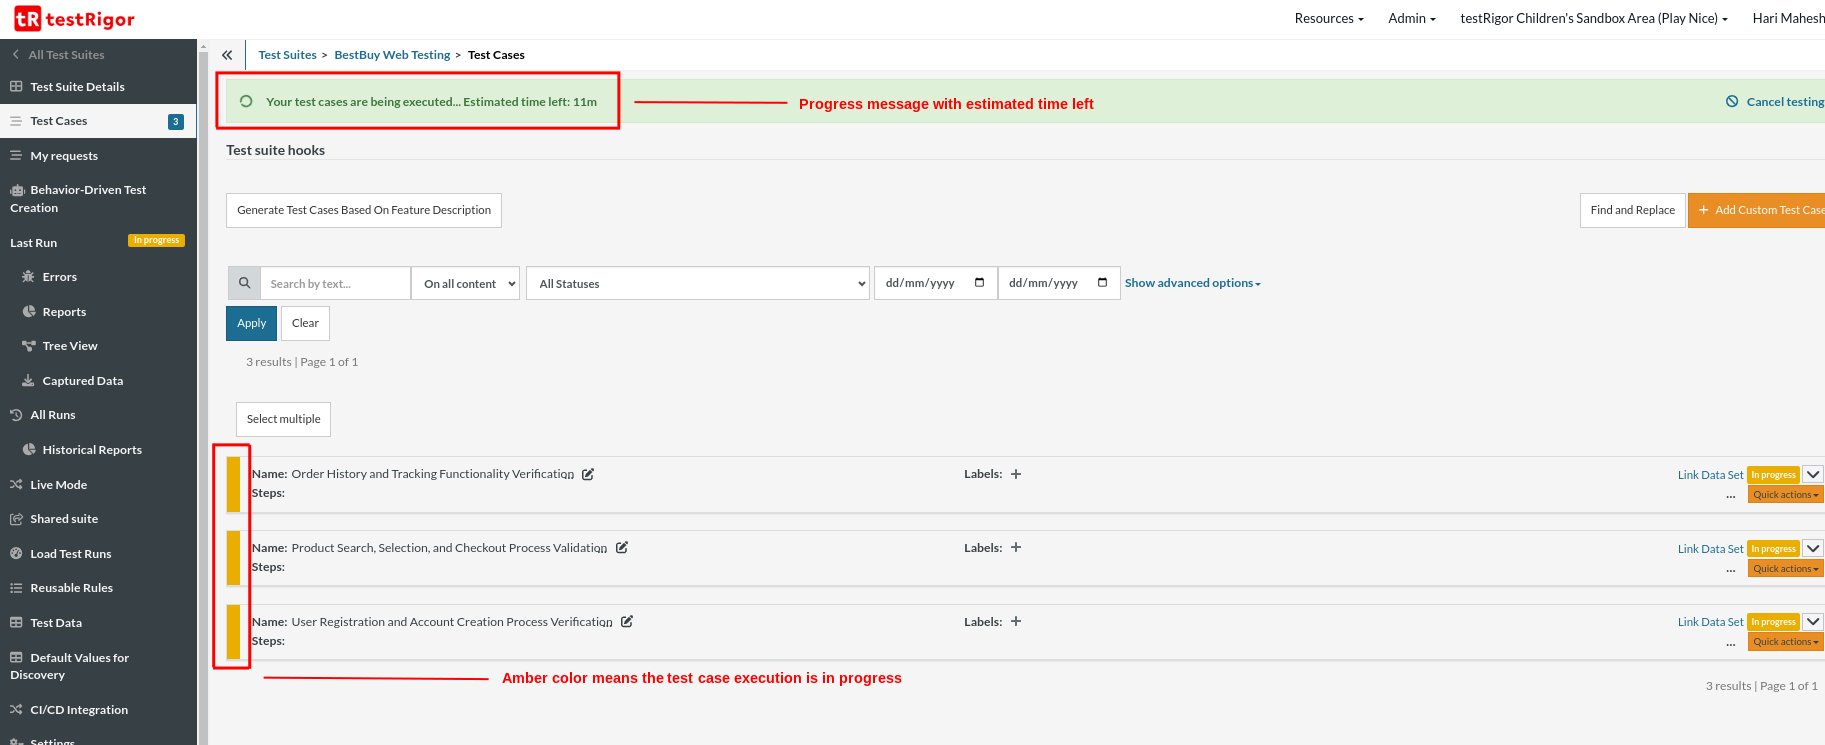
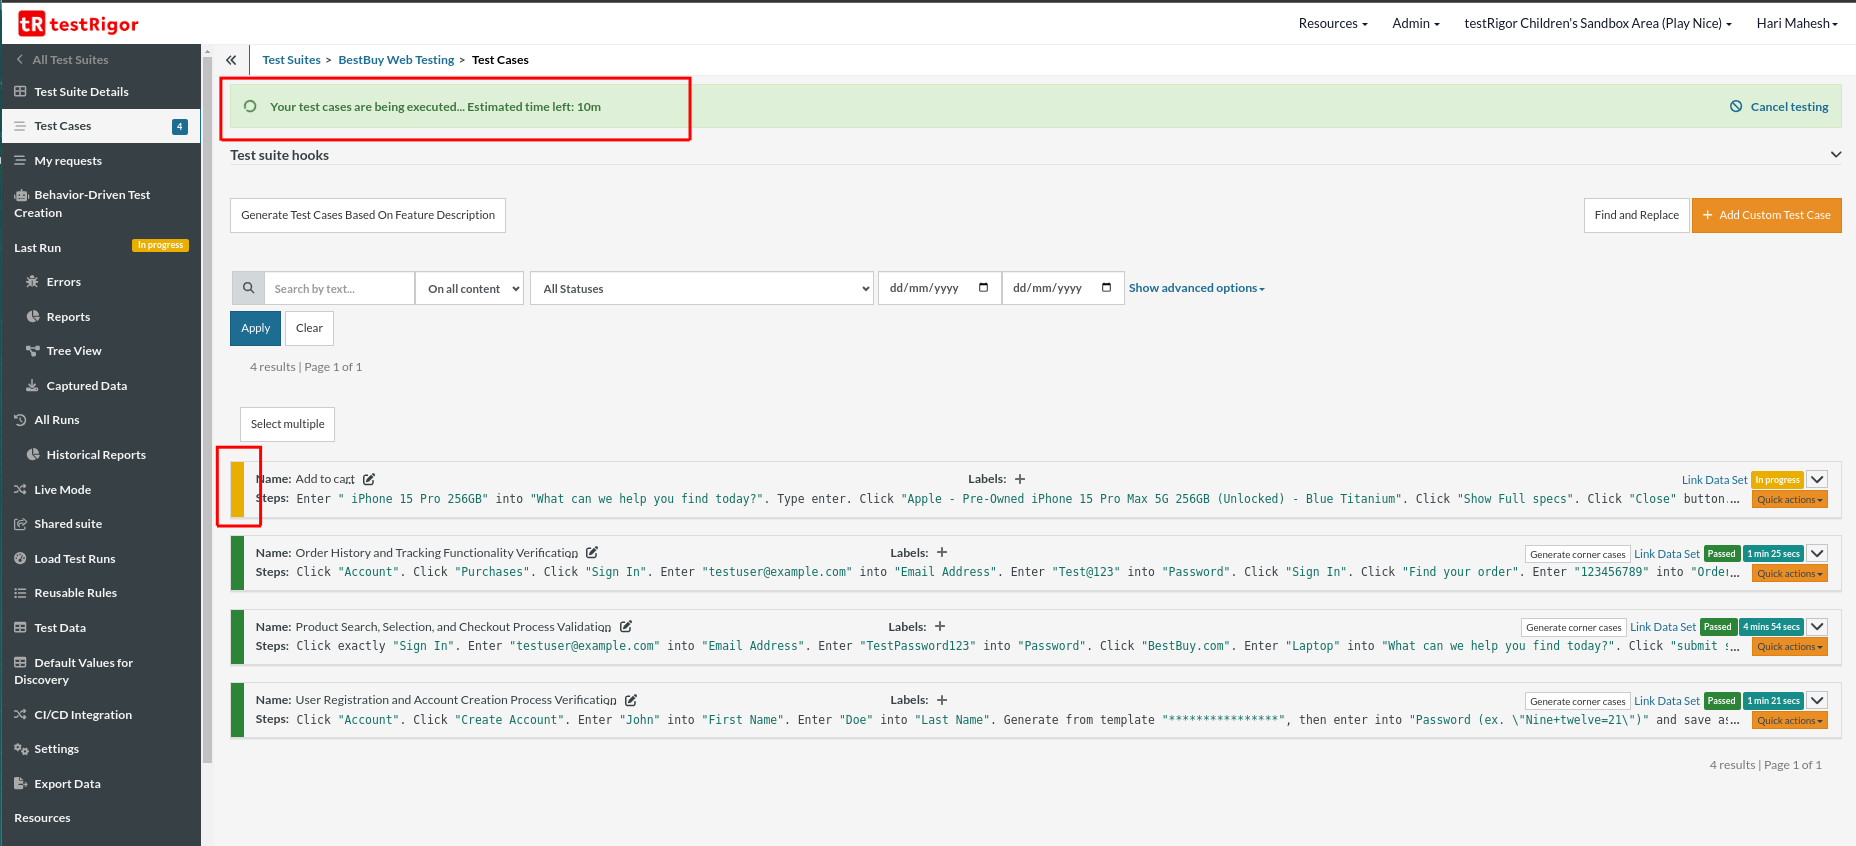
Step 5: Now, you will be on the test cases page. You can see the AI-generated test cases are getting executed. Since the test case execution is in progress, you can see the amber color for all test cases. Also, you can see the progress message with an estimated time left.
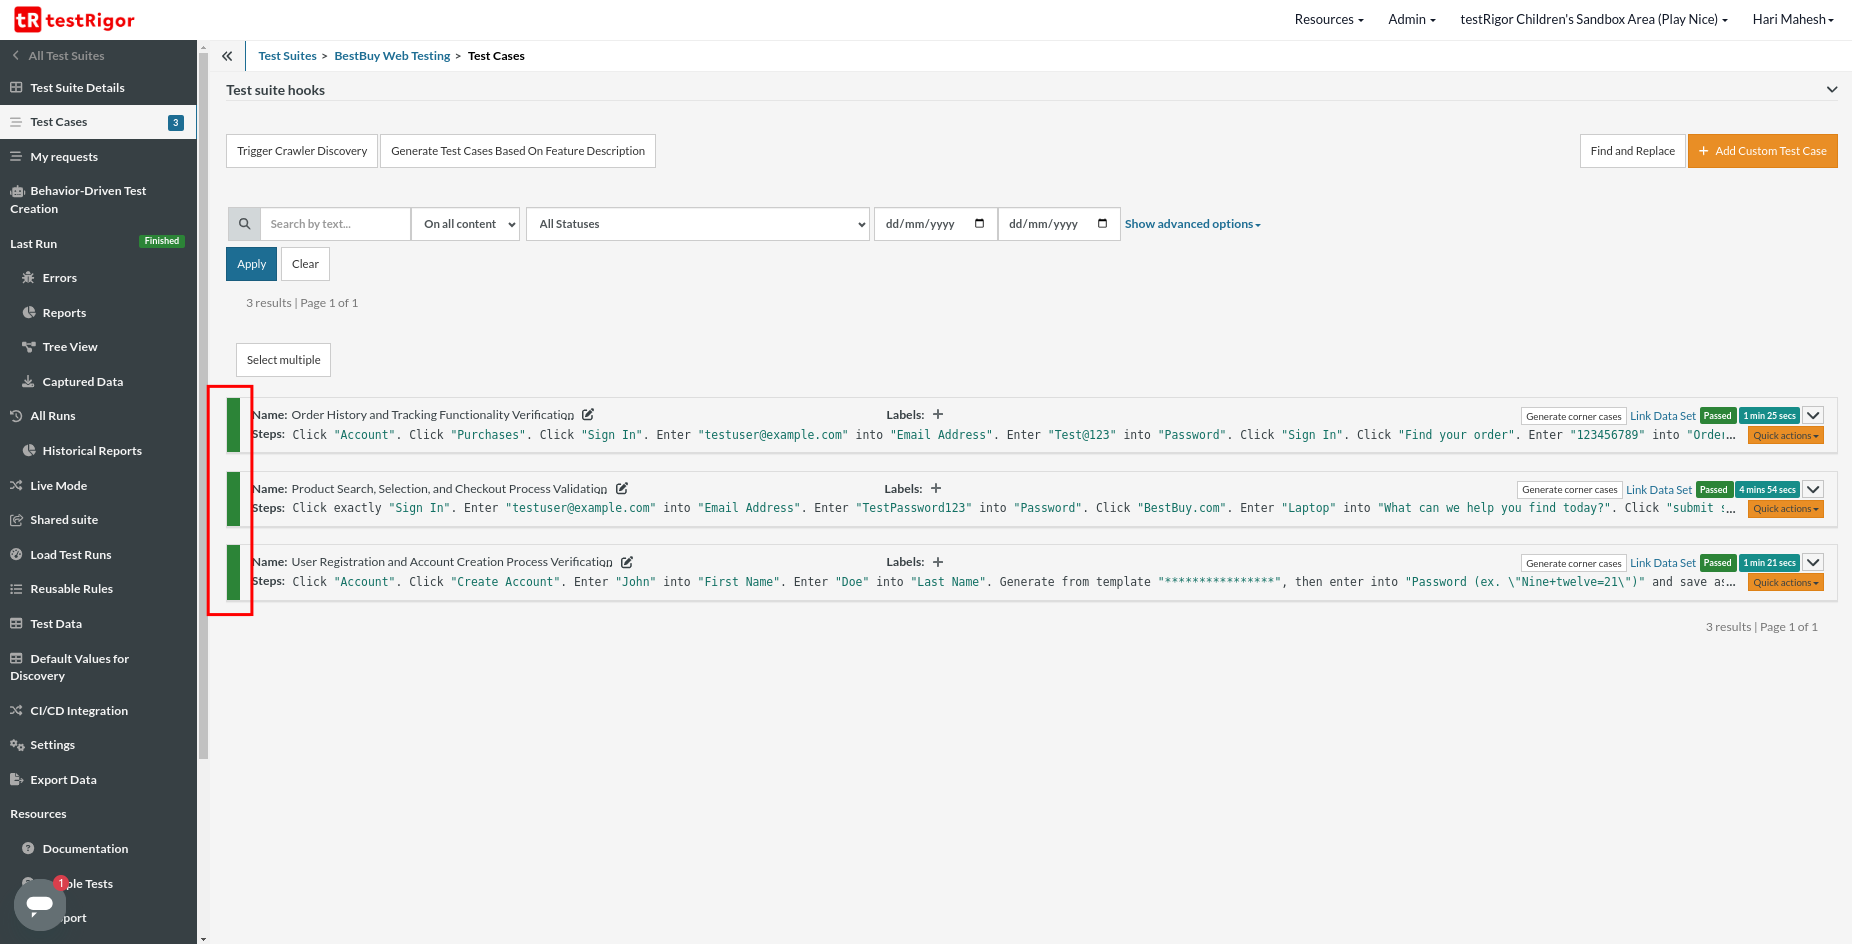
Step 6: Once the execution is complete, the amber color changes to green if the test case passes and red if it fails. You can also see the detailed logs. We will discuss logs in a later section of this article.
Step 7: Now, let’s create a new test case. To do so, click Add Custom Test Case on the top left side of the screen.
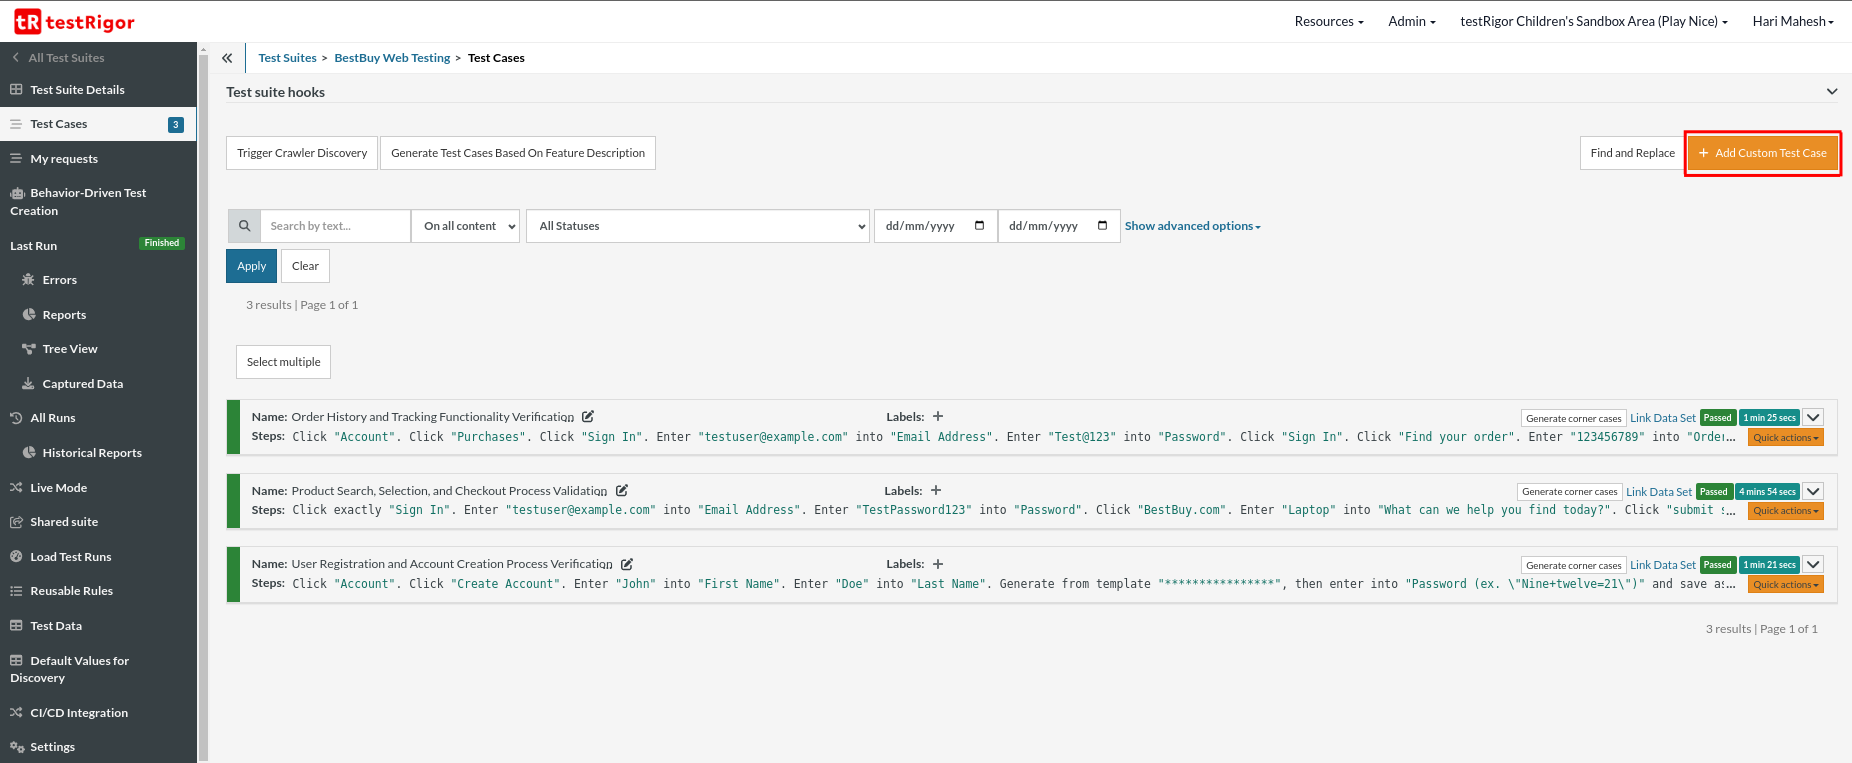
Step 8: A popup page is displayed. Now, add the description for the test case and the test steps. Click Add and Run.

Step 9: Now, the popup is closed, and on the test case page, the newly created test case is being executed.
Now, let’s go through each test step.
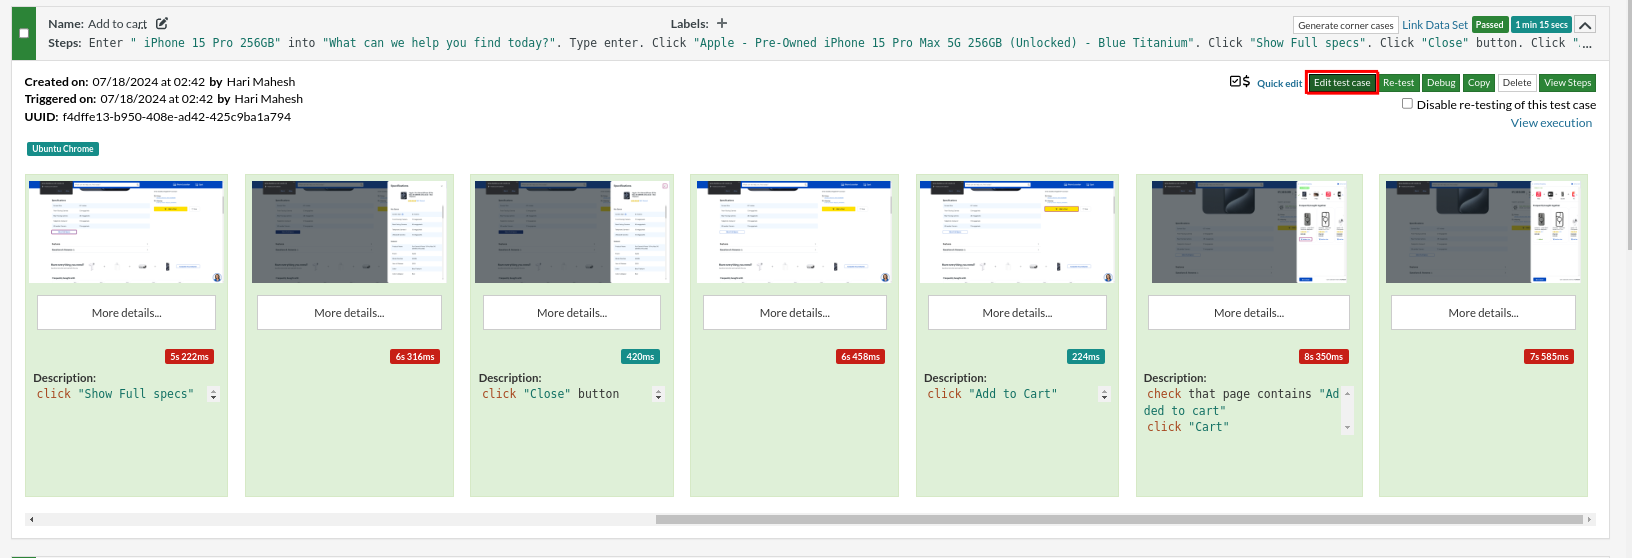
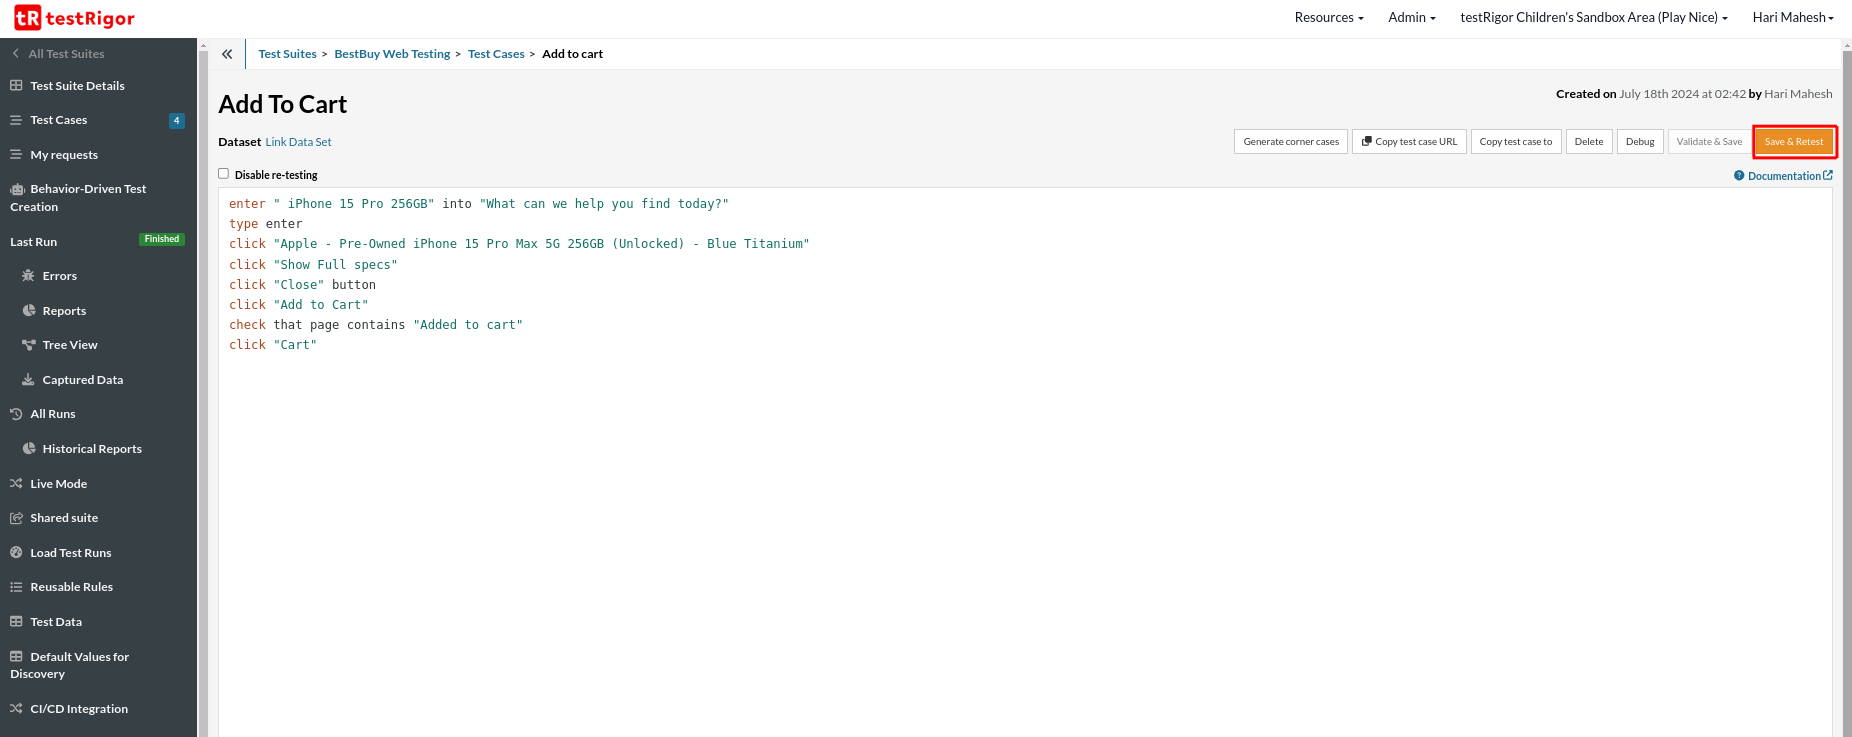
Test Case: Search and Add to Cart
Step 1: Once we have added the application URL, testRigor automatically navigates to that URL. Thus, the BestBuy home is displayed by default.
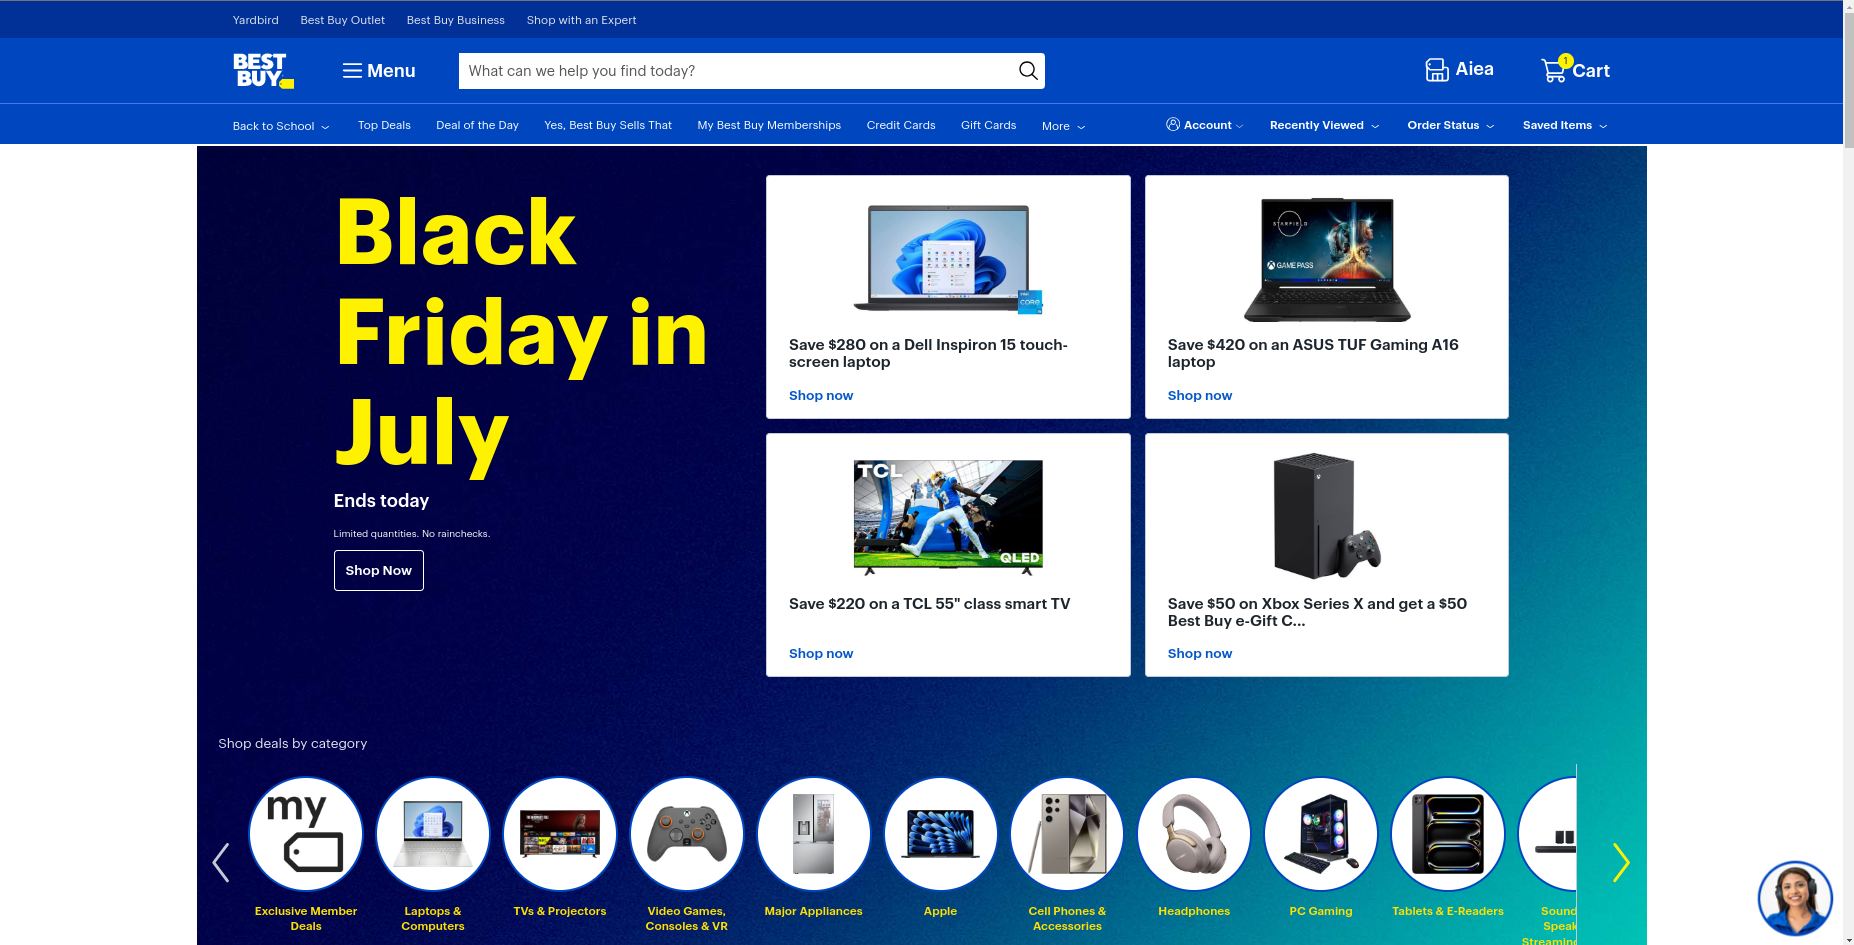
enter " iPhone 15 Pro 256GB" into "What can we help you find today?"
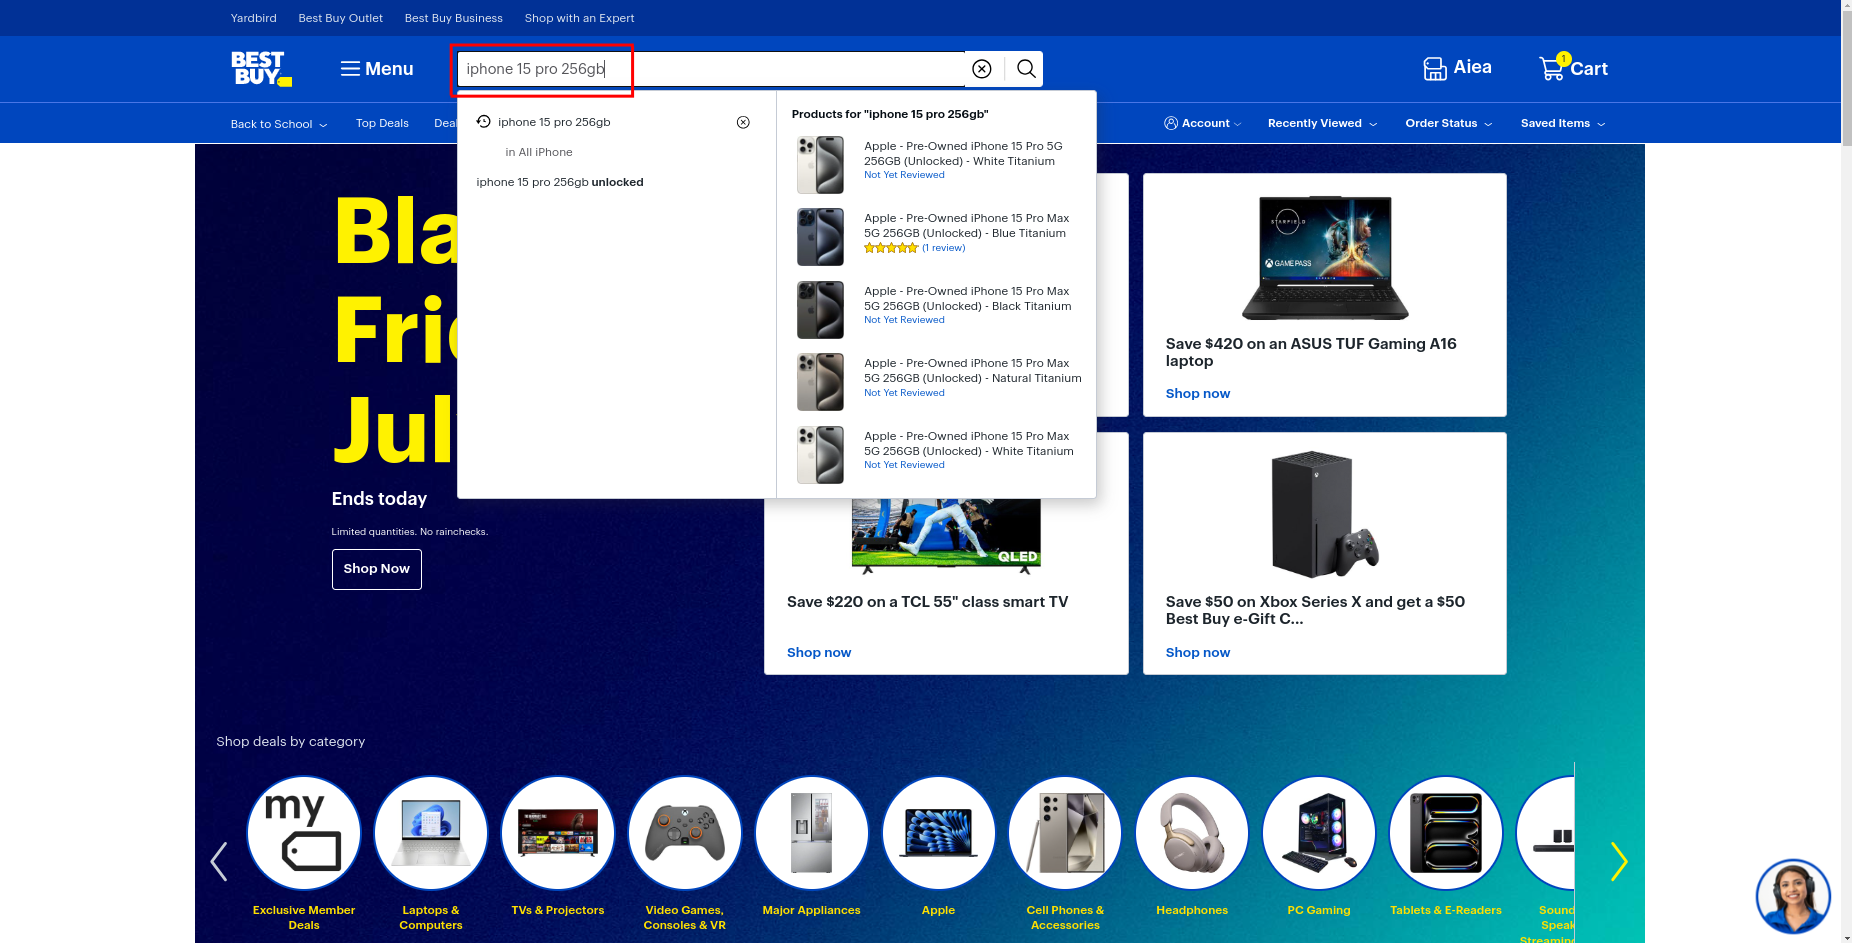
type enter
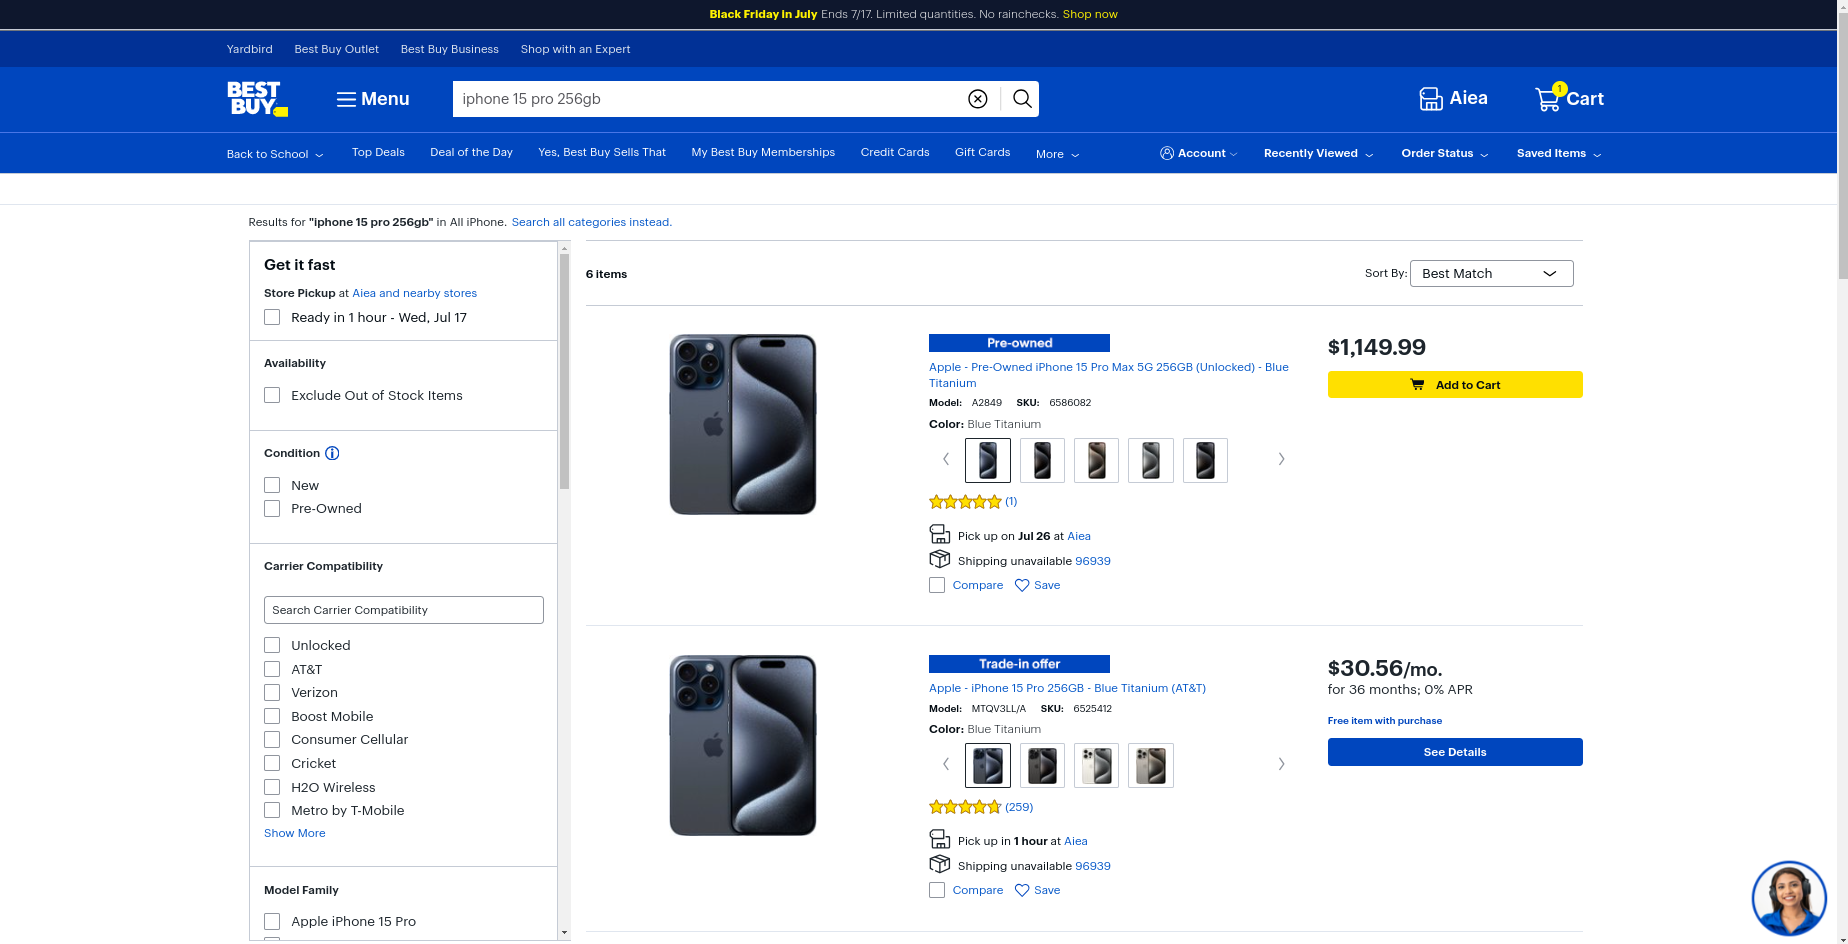
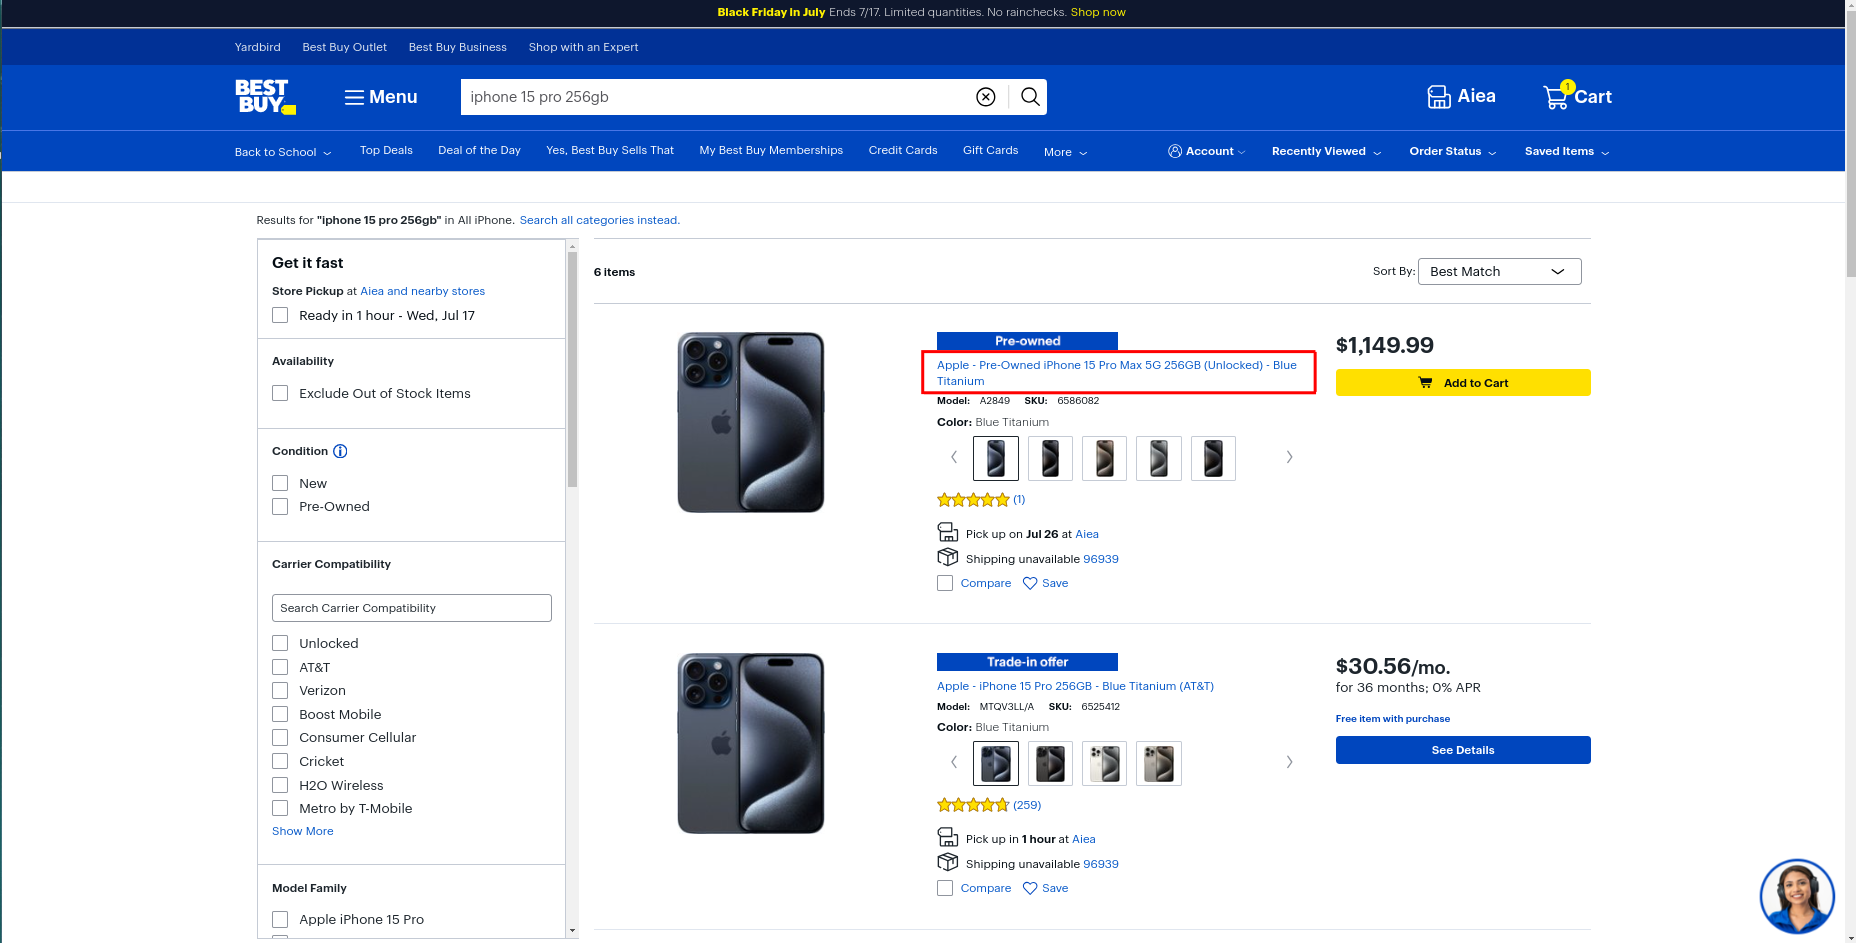
click "Apple - Pre-Owned iPhone 15 Pro Max 5G 256GB (Unlocked) - Blue Titanium"
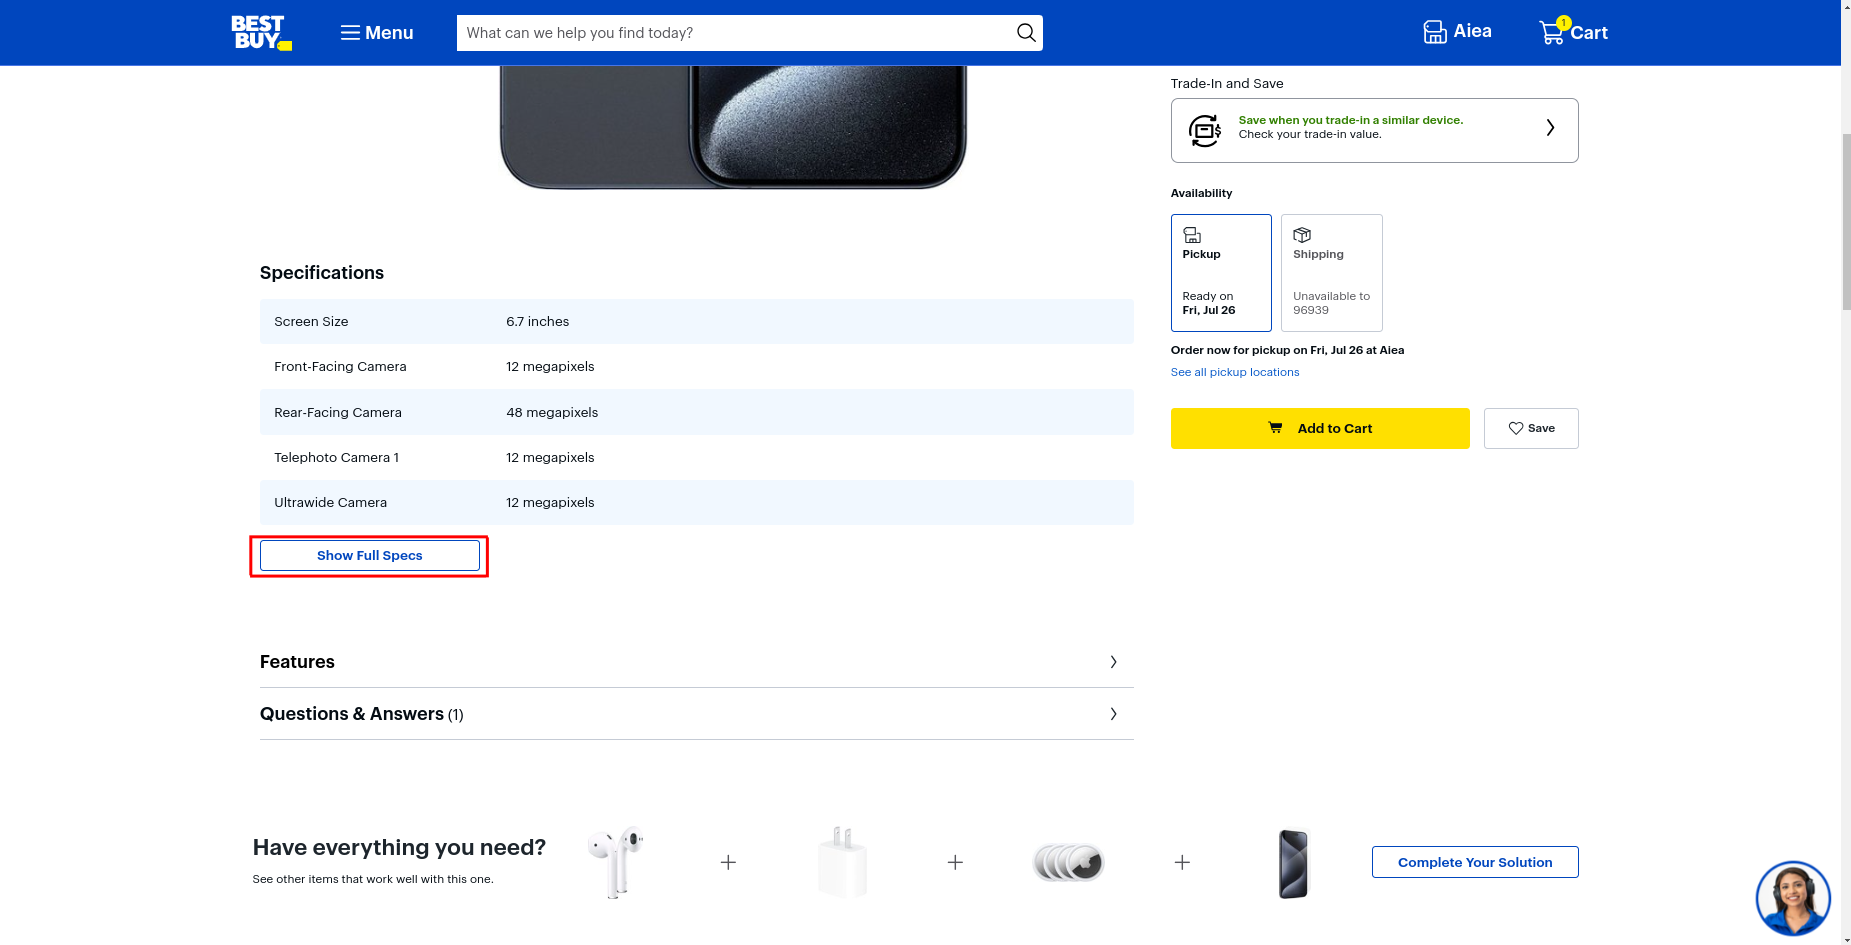
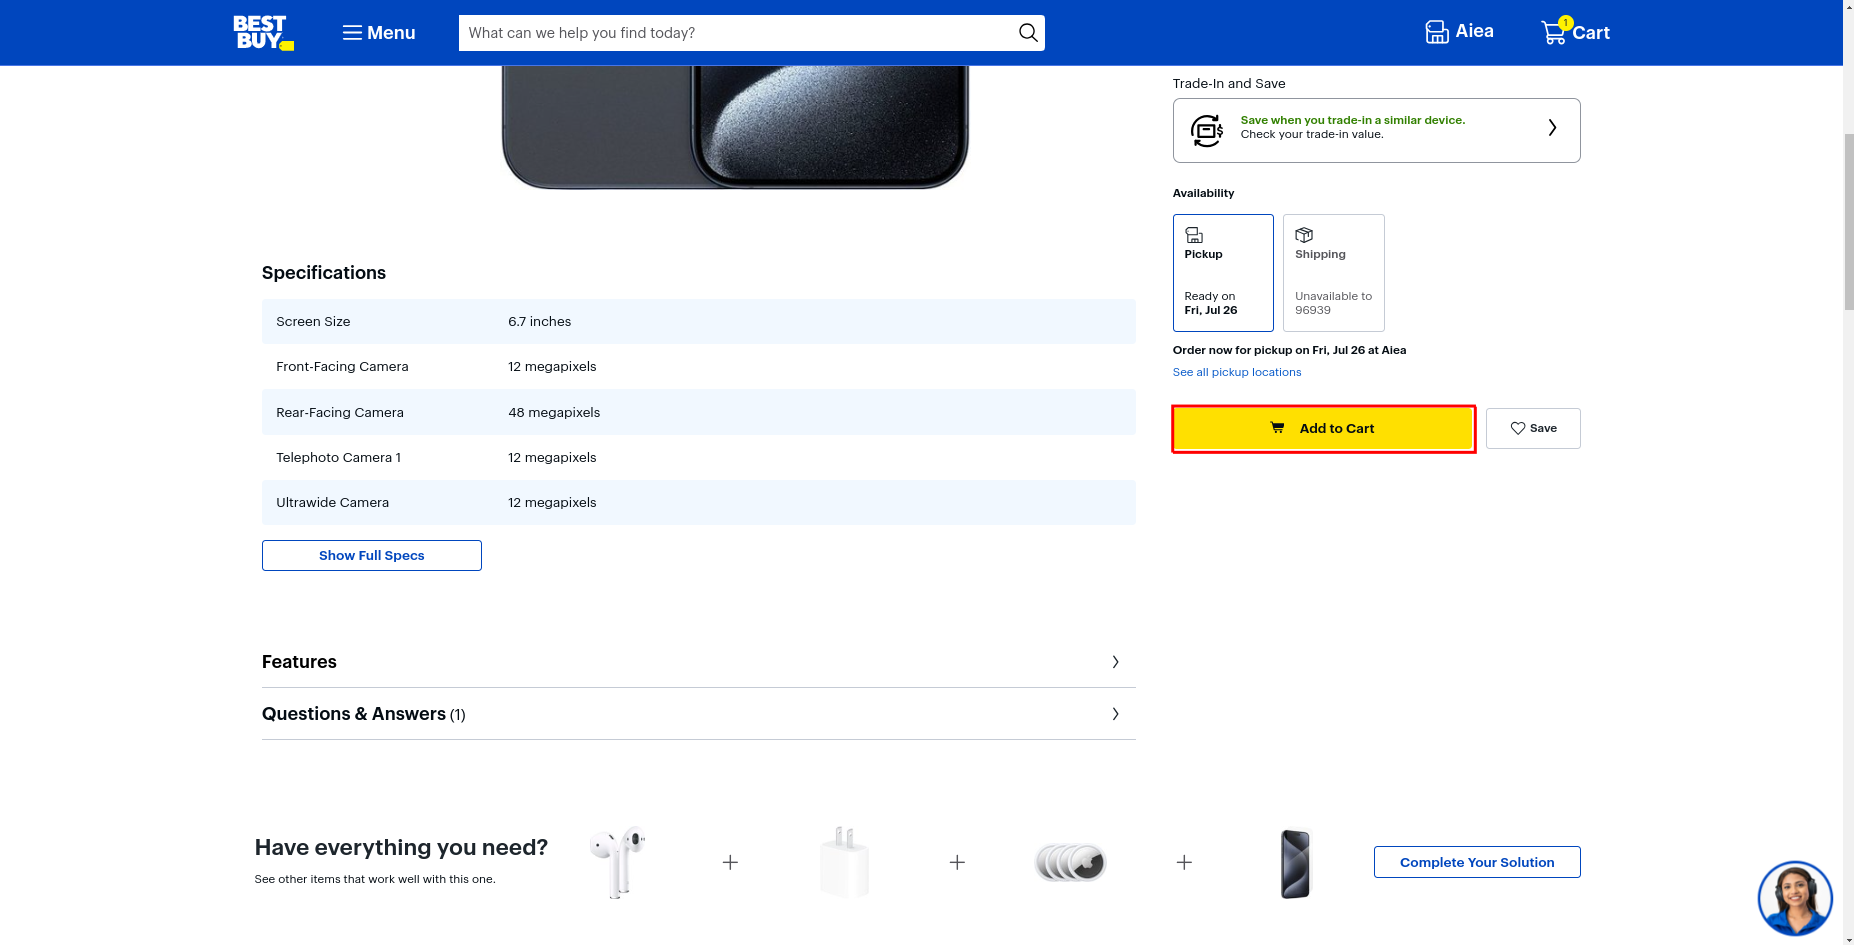
click "Show Full specs"
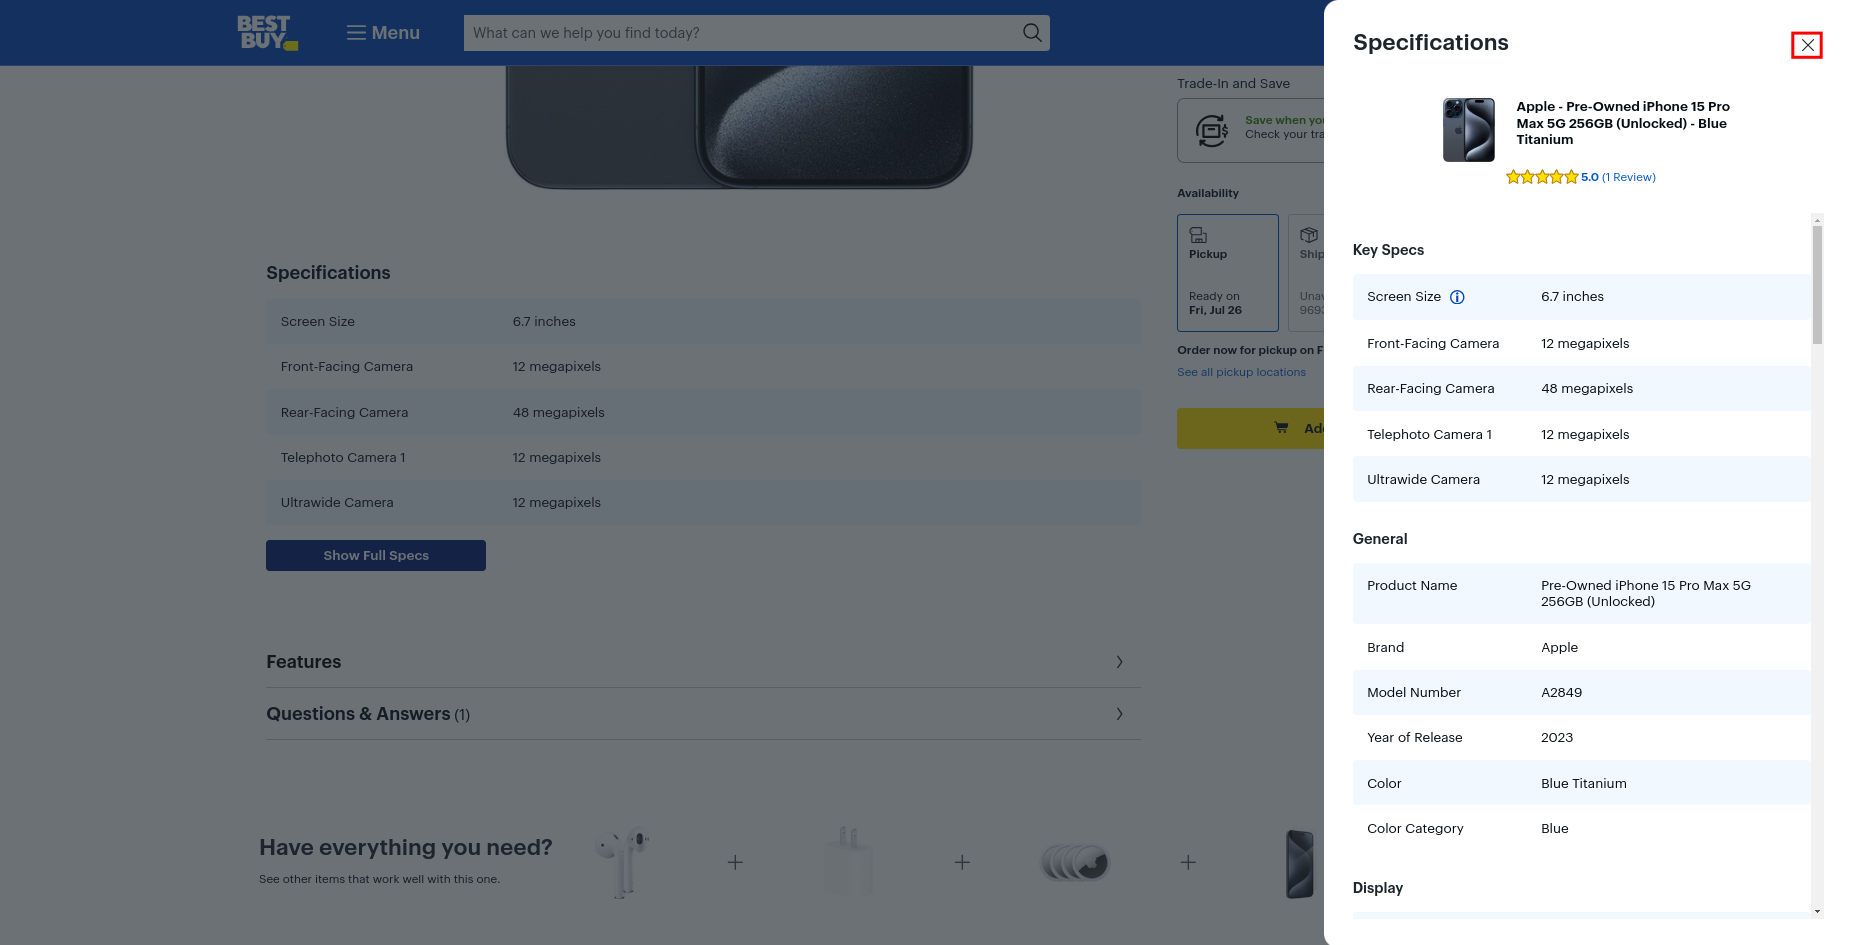
click "Close" button
click "Add to Cart"
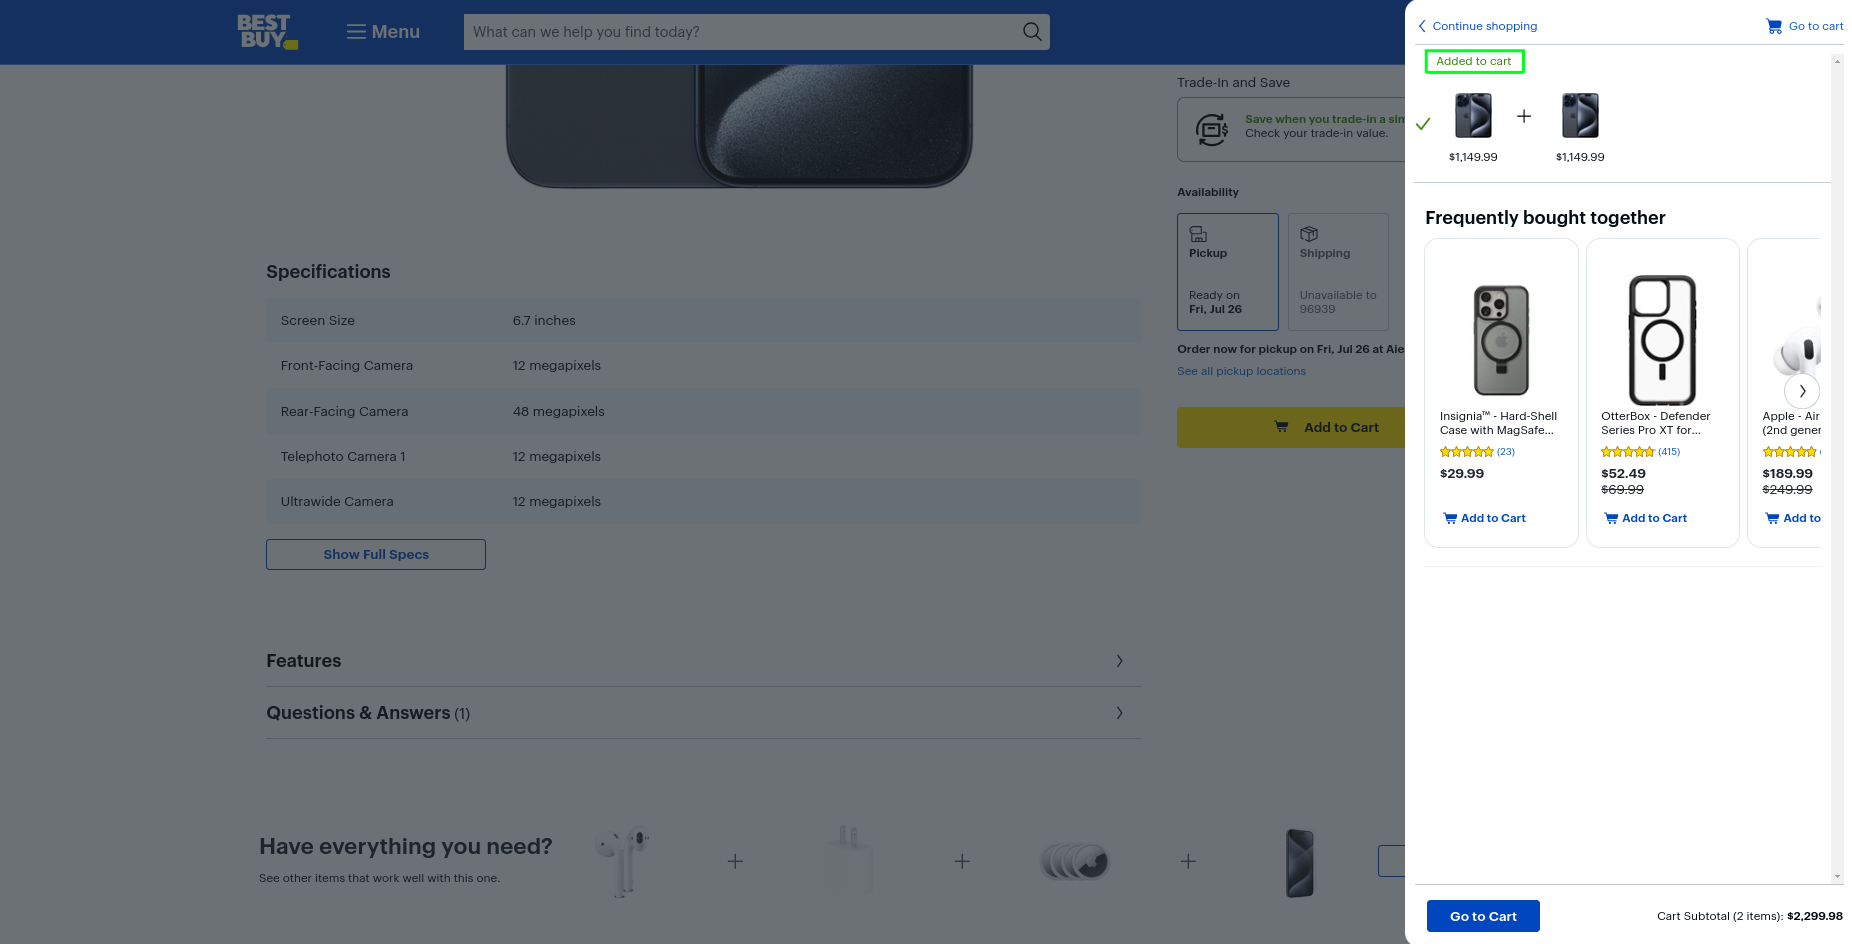
check that page contains "Added to cart"
Complete Test Case
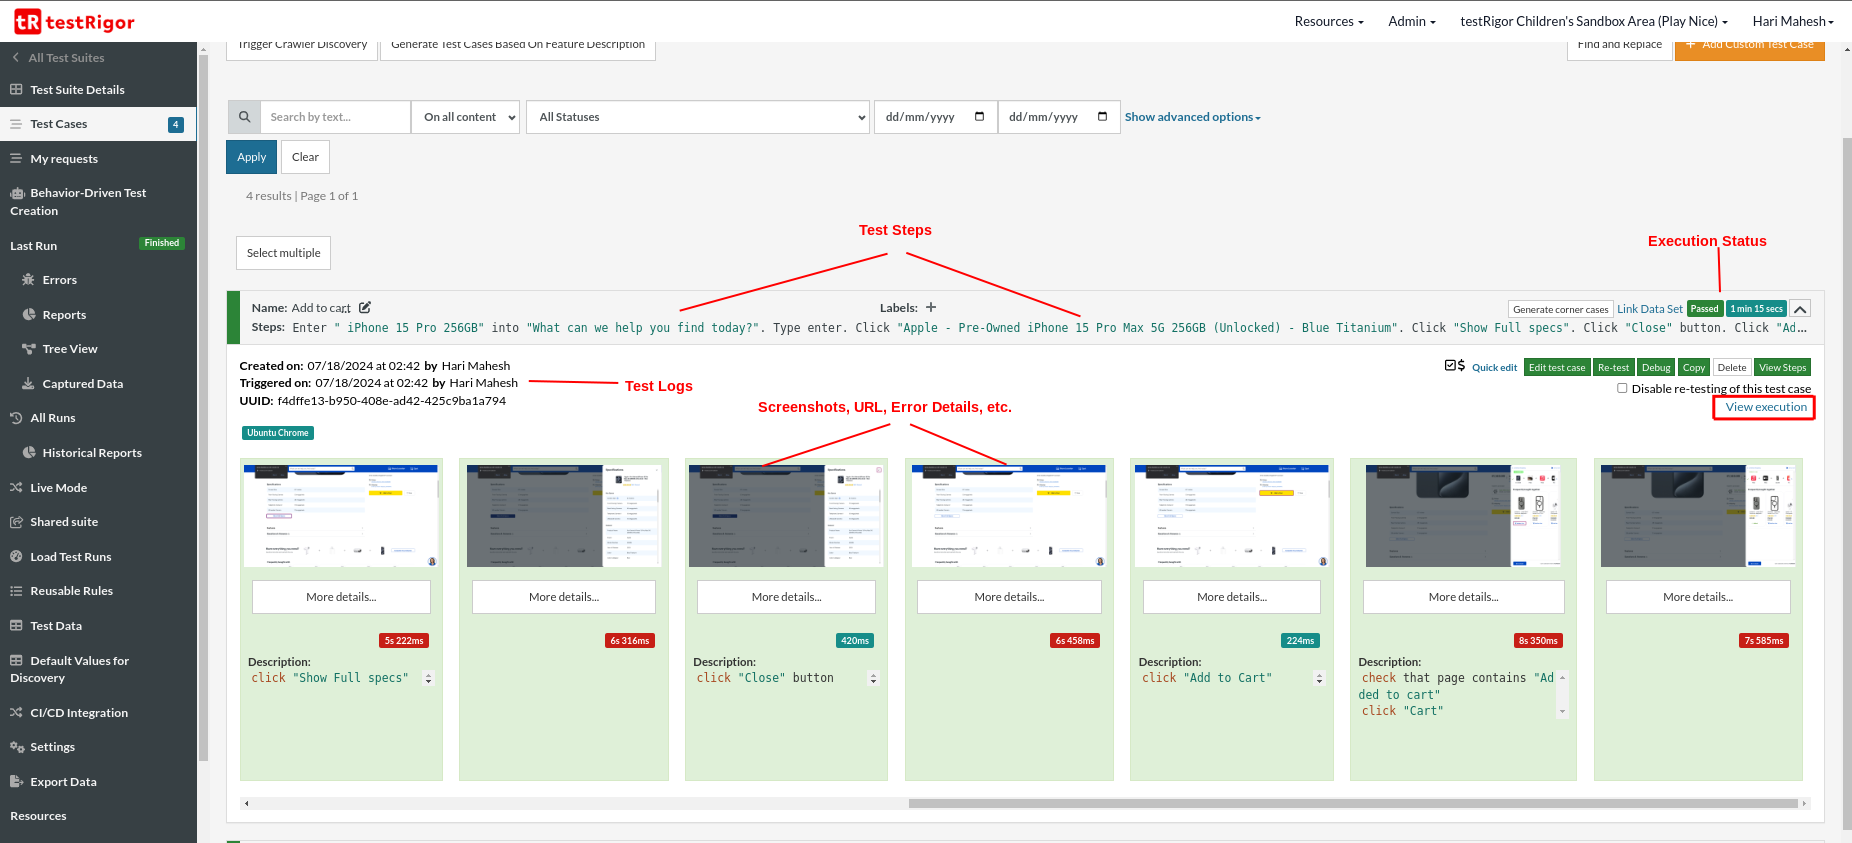
Here is how the complete test case will look in the testRigor app. The test steps are in plain English, enabling everyone in your team to write and execute them easily.

Execution Results
Once the test is executed, you can view the execution details, such as execution status, time spent in execution, screenshots, error messages, logs, video recordings of the test execution, etc. In case of any failure, there are logs and error text that are available easily in a few clicks.
You can also download the complete execution with steps and screenshots in PDF or Word format through the View Execution option.
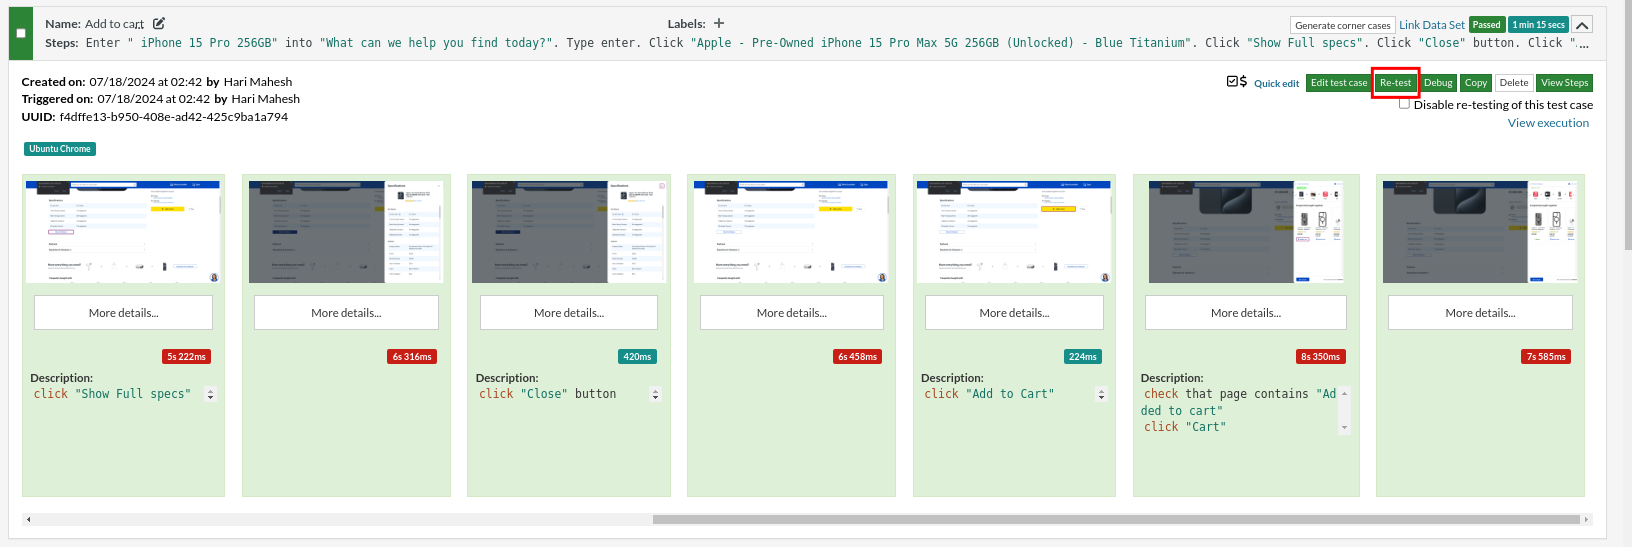
Retest
Consider a new version of the application has been released, and there is a minor change on only one module. So you don’t need to run all test cases. In that case you can select one single test case and click the ‘Re-test‘ button. Our system will go through all your functionality again and compare it with previous version. testRigor does functional comparisons by comparing texts, input elements, links and buttons on your screen. It does not perform pixel-perfect comparisons.
Also, consider that you need to edit any parameter or test step in a particular test case. You can click Edit test case for the same.
The test case edit will be opened in a new window. Make the necessary changes and then click the Save & Retest button. The updated test case will be saved, and execution will start.
testRigor’s Capabilities
Apart from the simplistic test case design and execution, some advanced features help you test your application using simple English commands.
- Reusable Rules: You can create functions using Reusable Rules and call them in test cases by simply writing their names. Here is an example of Reusable Rules.
- Global Variables and Data Sets: For data-driven testing, import data from external files or create global variables and data sets in testRigor.
- 2FA, QR Code, and Captcha Resolution: Manage 2FA, QR Codes, and Captcha resolution efficiently with simple English commands in testRigor.
- Email, Phone Call, and SMS Testing: Test email, phone calls, and SMS using simple English commands. These commands are helpful for validating 2FA scenarios with OTPs and authentication codes sent via email, phone calls, or text messages. Read: How to do SMS, 2FA, and phone call testing using testRigor?
- File Upload/Download Testing: Perform test steps involving file uploads or downloads without any third-party software and then validate the contents of the files. Read: How to do file testing using testRigor?
- Database Testing: Execute database queries and validate the results. Read: How to do database testing using testRigor?
- AI Feature Testing: Test LLMs, chatbots, graphs, and other AI features with testRigor’s AI-powered capabilities. Know more about AI Features Testing.
testRigor enables you to test web, mobile (hybrid, native), API, and desktop apps with minimum effort and maintenance.
Additional Resources
- Access testRigor documentation to learn about more valuable capabilities
- Top testRigor’s features
- testRigor’s benefits
- How to perform end-to-end testing using testRigor
| Achieve More Than 90% Test Automation | |
| Step by Step Walkthroughs and Help | |
| 14 Day Free Trial, Cancel Anytime |


