How to Create Tests Using Live Mode in testRigor?
|
|
testRigor offers a unique capability known as the ‘Live Mode‘ to create and validate test cases. Using it, you can interact with the application in real time and create testRigor commands on the go. As it is with all testRigor features, this one is easy to use as well.
Here’s how you can use the live mode in testRigor.
Create a Test Suite in testRigor
First and foremost, you need to create a test suite based on the type of testing you intend to do. For that, follow these steps:
Step 1: Log in to your testRigor app with your credentials.
Step 2: Set up the test suite by providing the information below
- Test Suite Name: Provide a relevant and self-explanatory name.
- Type of testing: Select from the following options: Desktop Web Testing, Mobile Web Testing, Native and Hybrid Mobile, based on your test requirements.
- URL to run test on: Provide the application URL that you want to test.
- Testing credentials for your web/mobile app to test functionality which requires user to login: You can provide the app’s user login credentials here and need not write them separately in the test steps then. The login functionality will be taken care of automatically using the keyword login. However, this is an optional field and can be skipped if not relevant.
- OS and Browser: Choose the OS Browser combination on which you want to run the test cases.
- Device: You can choose from a host of devices to run your tests on. This setting is applicable only for mobile testing.
- Number of test cases to generate using AI: You can simplify your test creation further by opting to generate test cases based on the App Description text. This feature works on generative AI.
Step 3: Click on Create Test Suite.
On the next screen, you can let AI generate the test case based on the App Description you provided during the Test Suite creation. However, for now, select do not generate any test, since we will write the test steps ourselves.
How to Use the Live Mode?
Step 1: Once you’ve created your test suite, scroll down to the ‘Live Mode‘ option in the left menu and click on it.
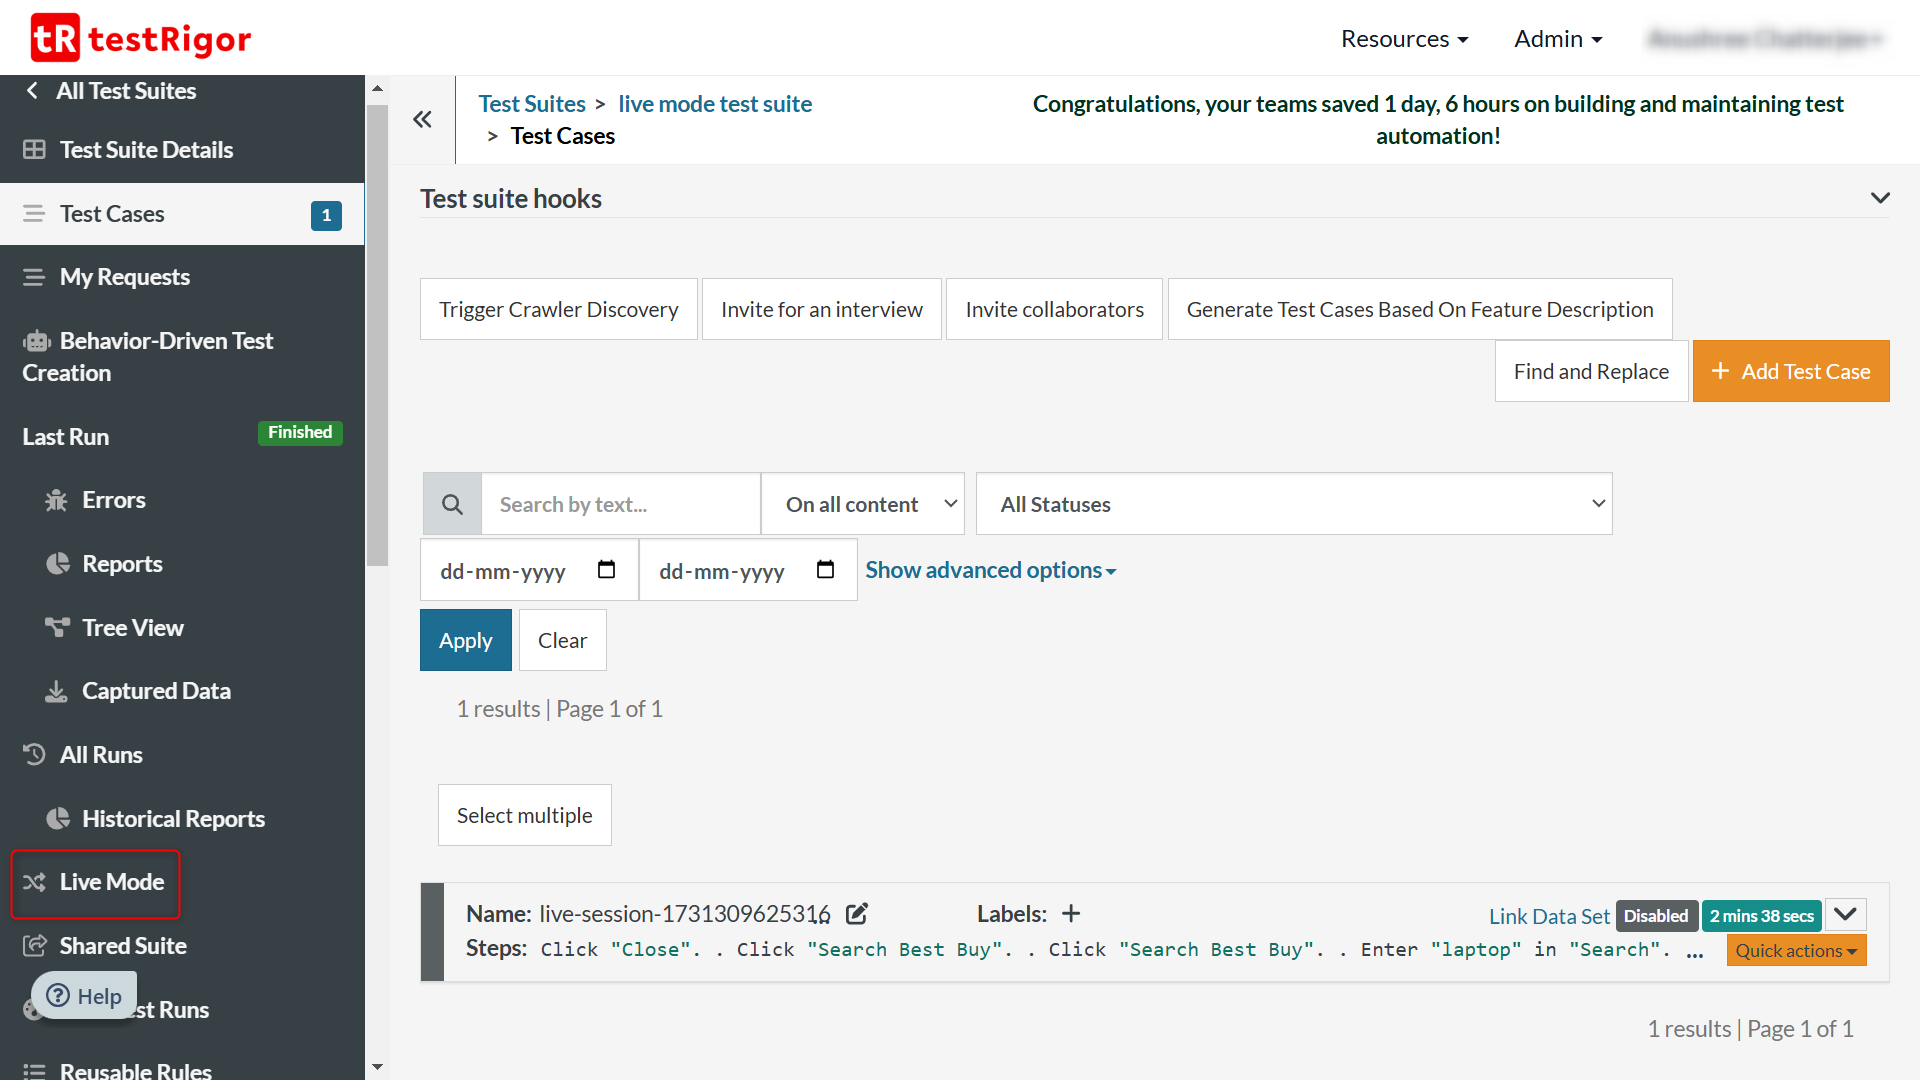
Step 2: On this screen, you need to configure the following details:
-
Select the OS-browser combination based on what you’ve enabled for the Test Suite. You can do it through Settings -> Multiple Browsers
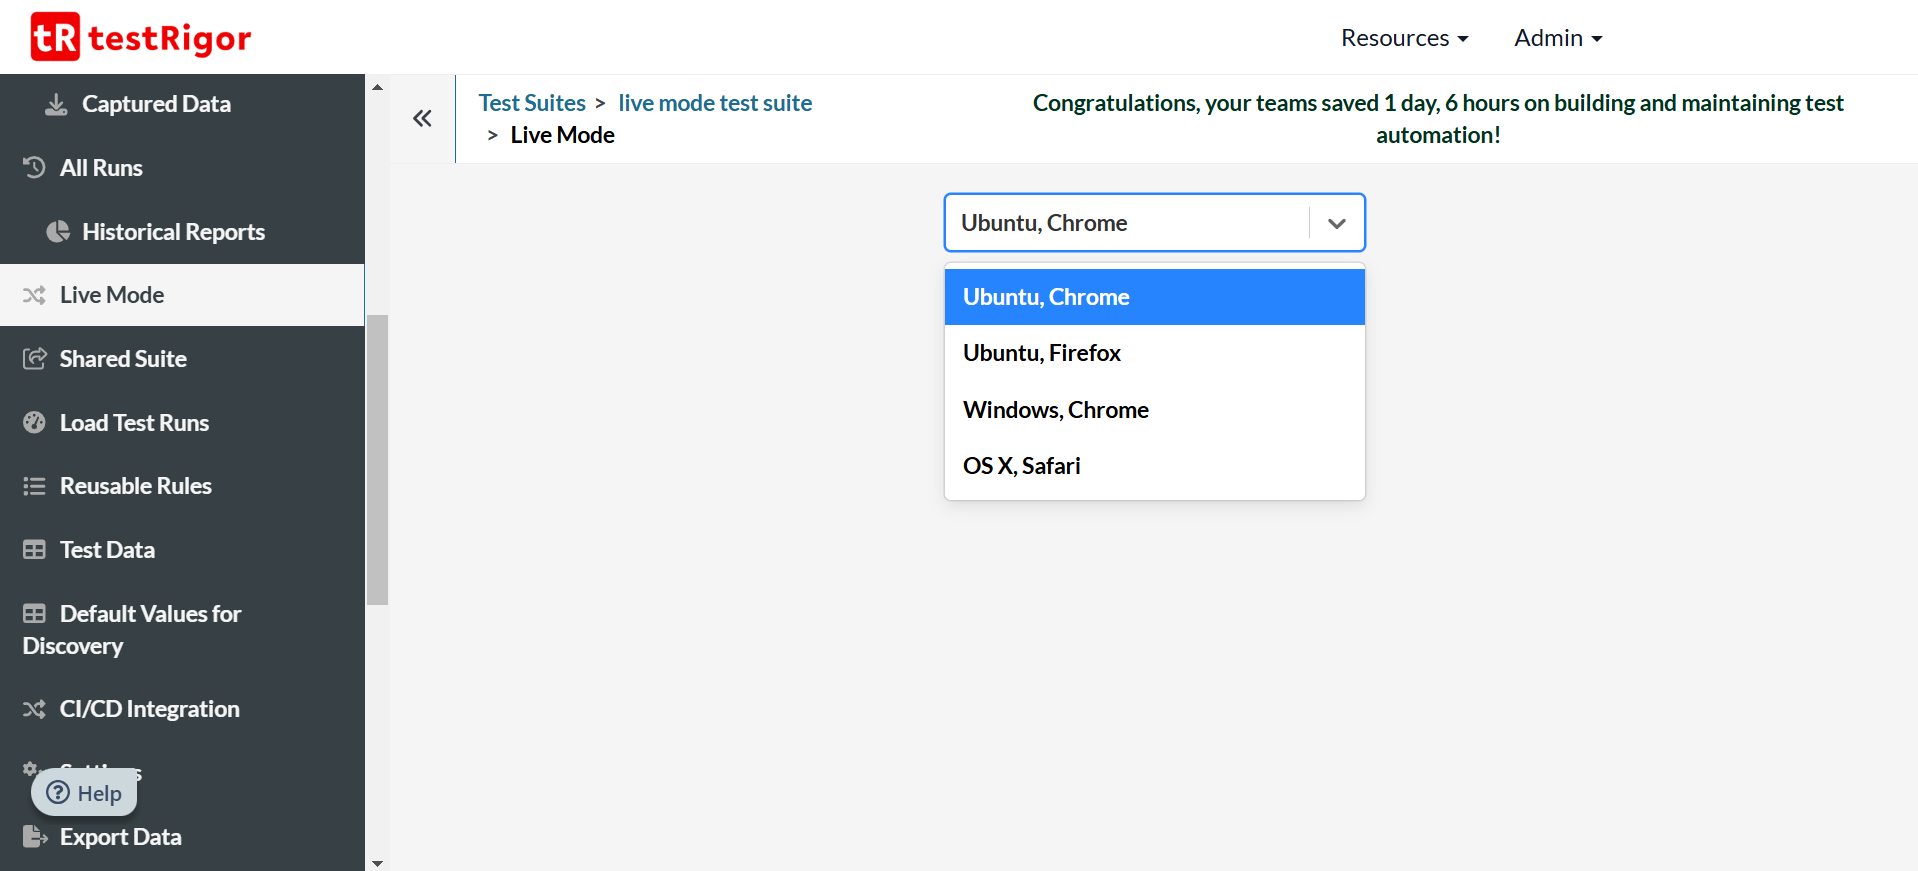
-
A data set and the row you want to use. To do this, you need to create a data set in the Test Data section. Here’s a detailed guide to create data sets in testRigor. This isn’t a necessity though, you can work even without a data set.
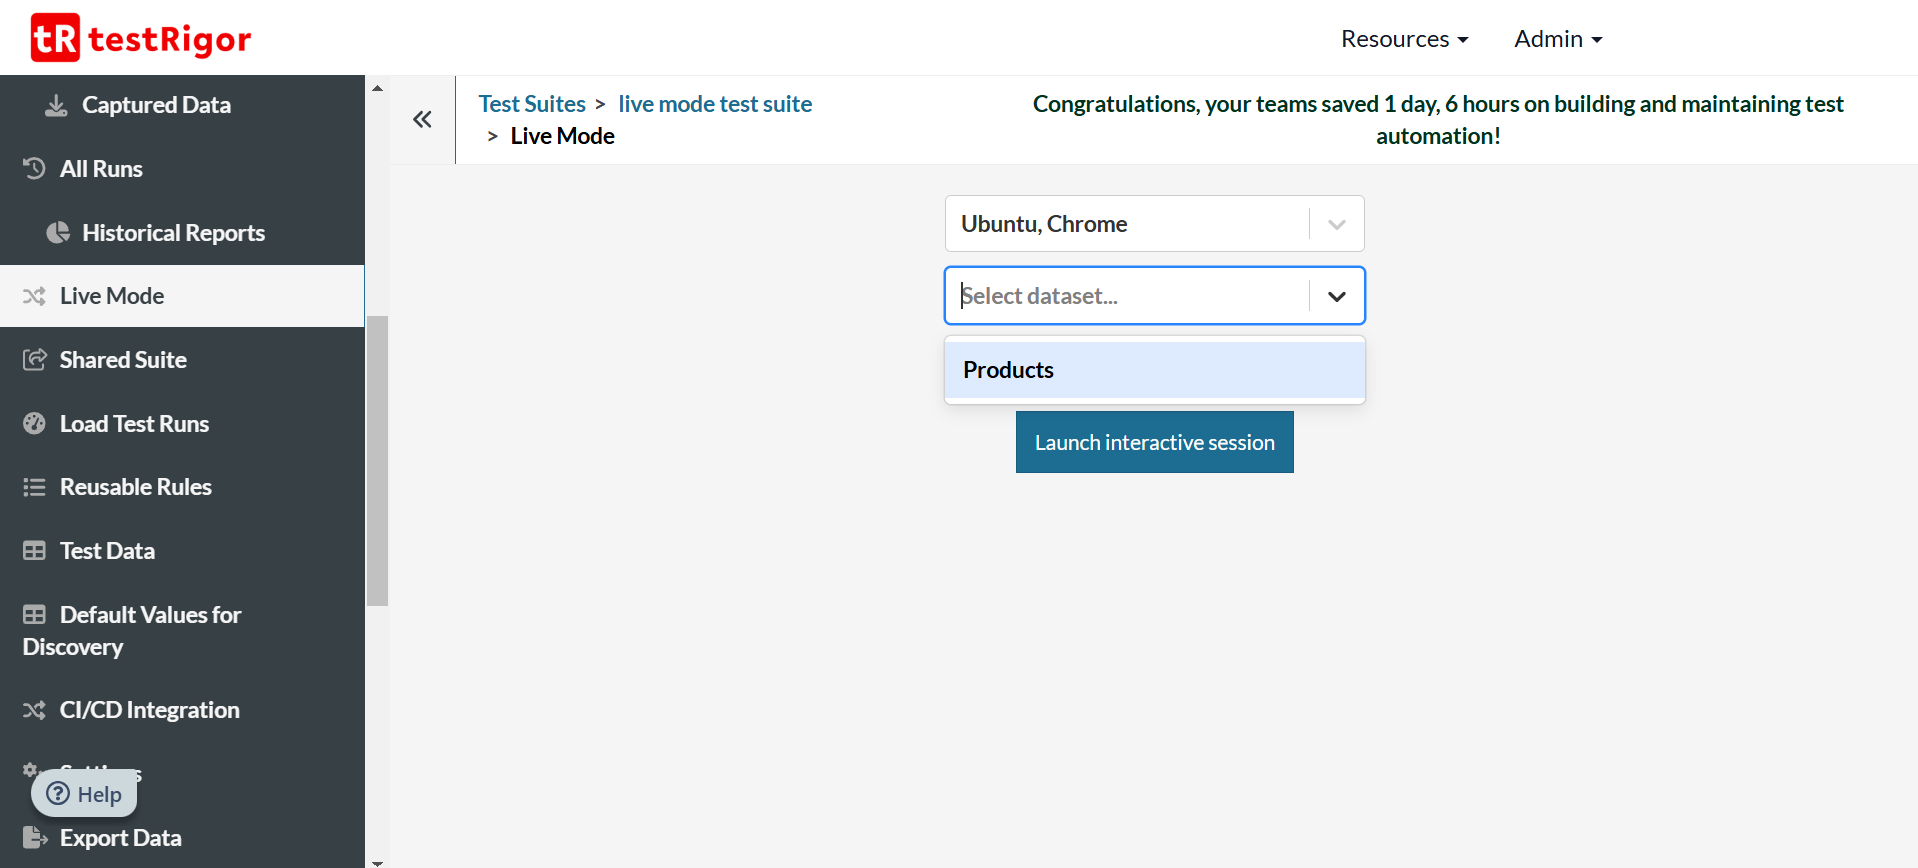
Step 3: Click on Launch interactive session to begin the live mode session.
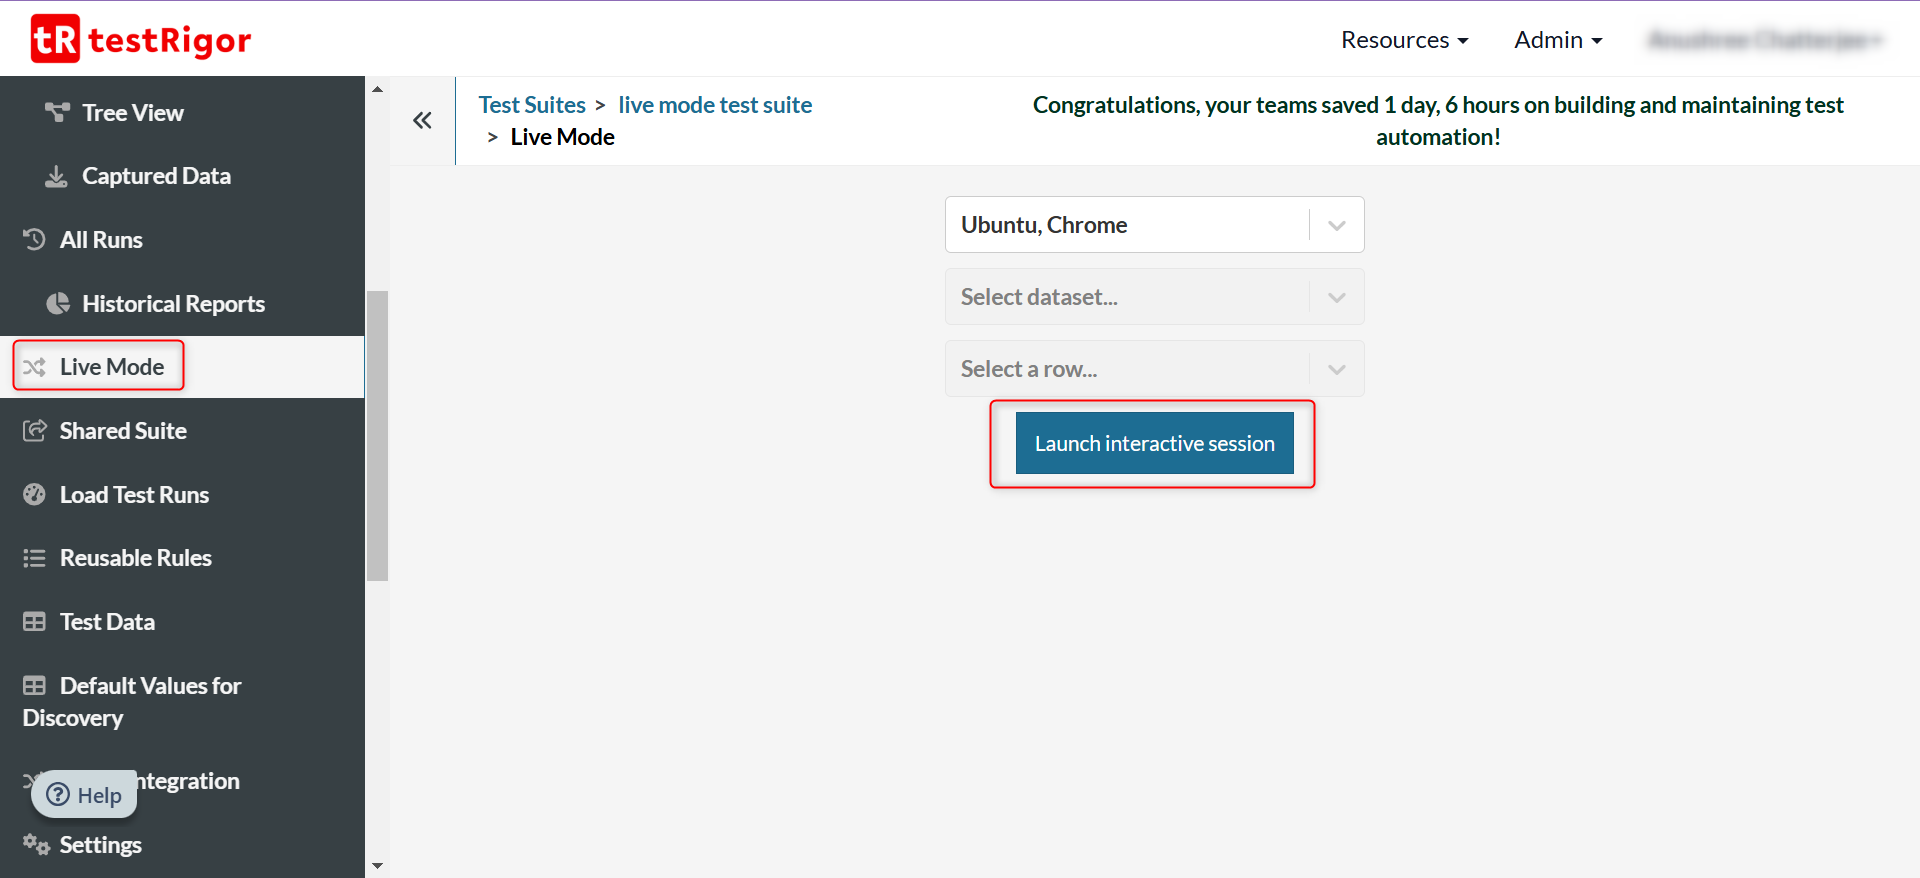
Step 4: This is how the live mode screen will look. You have the test editor where the commands go in and the application under-test right next to it. Executed commands and their corresponding results appear in the region below.
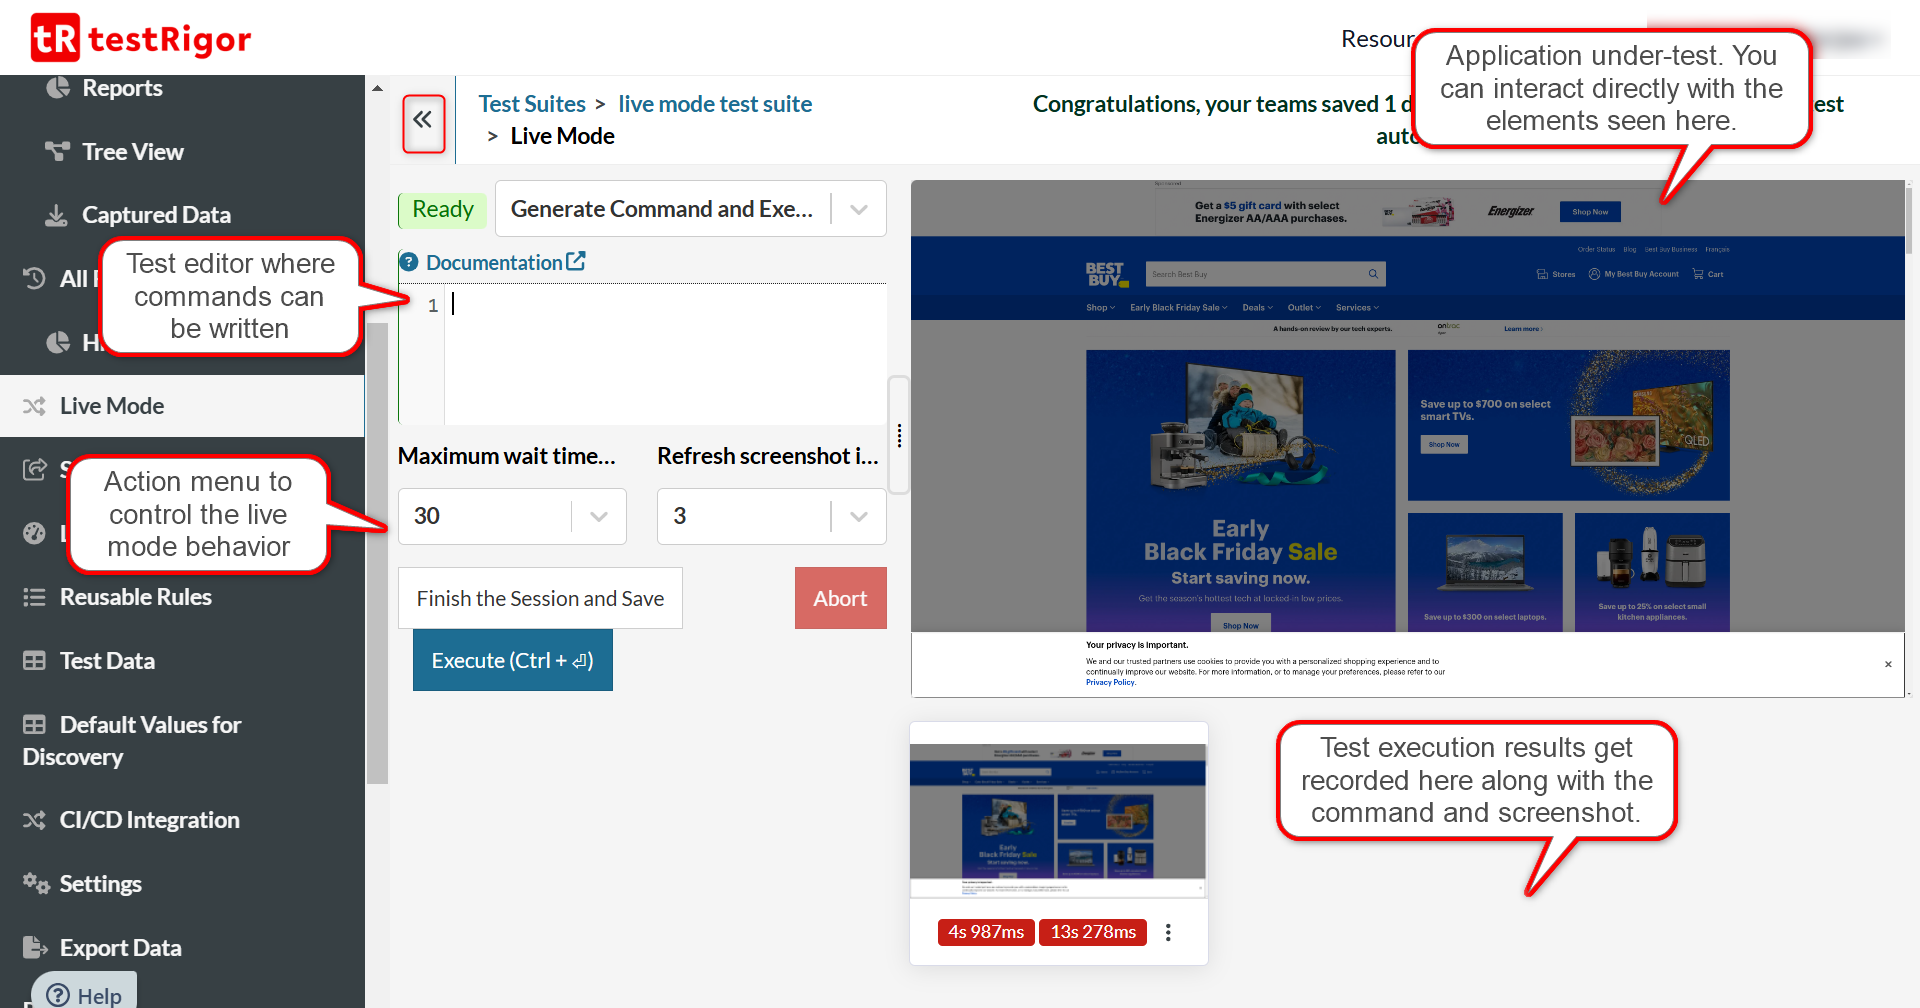
Tip: You can collapse the left menu to get more screen space.
Step 5: On this screen, you can interact with the UI application in real time.
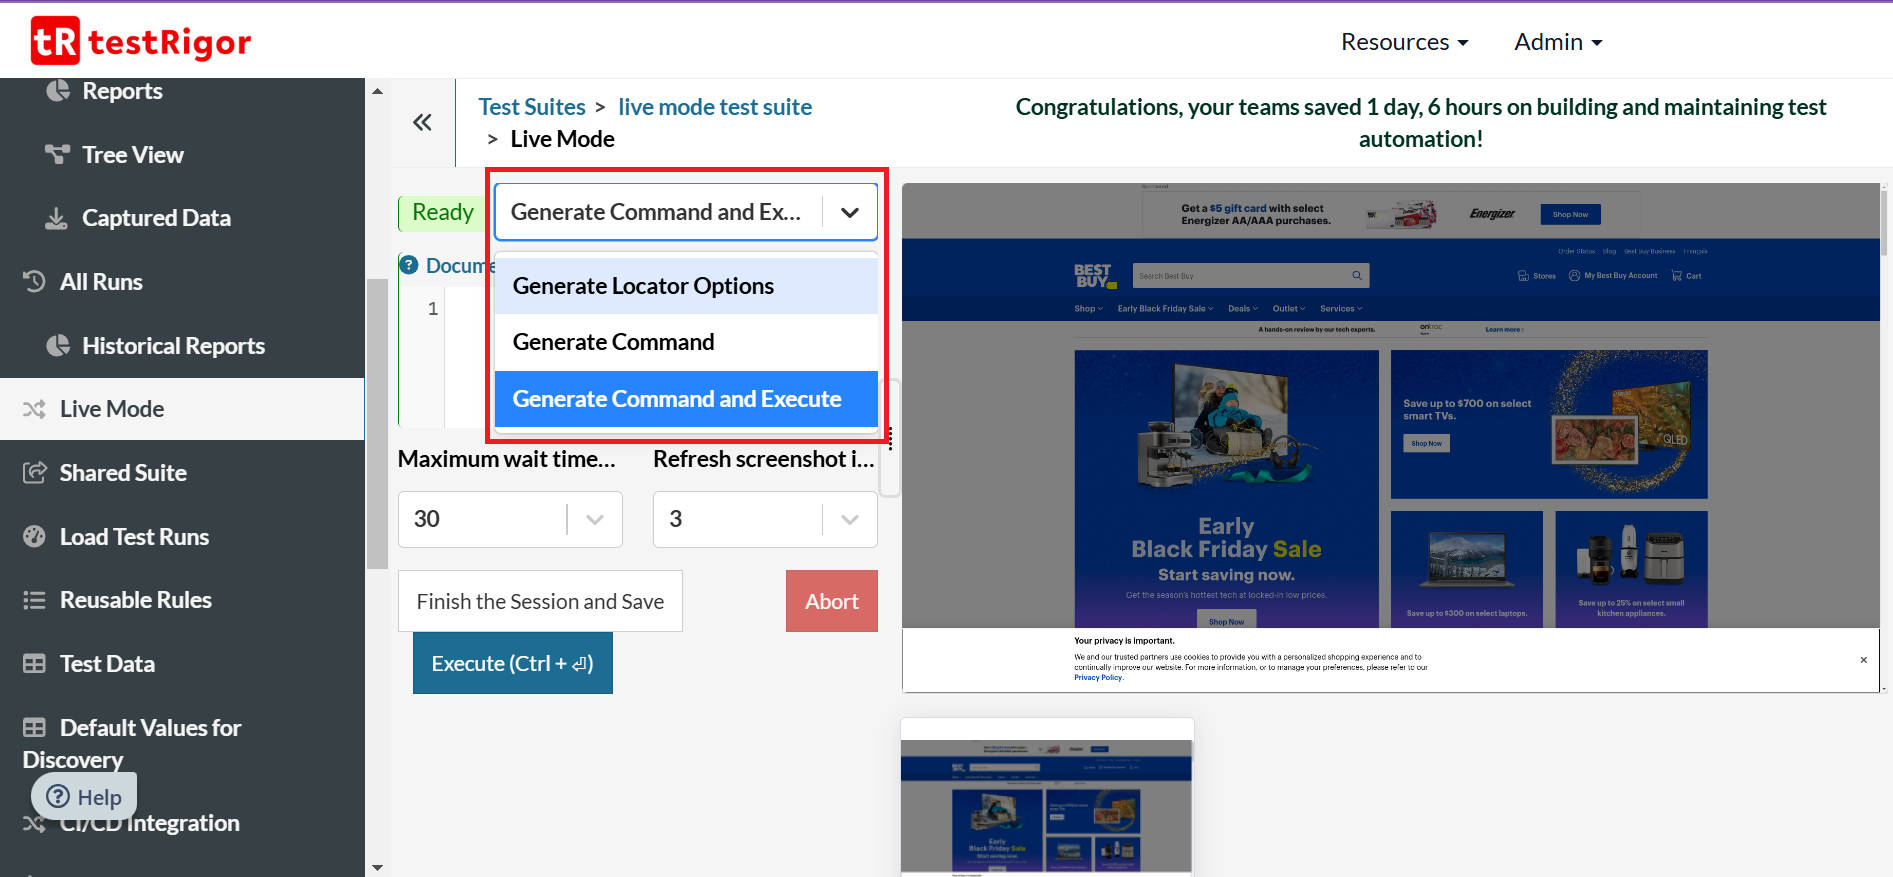
You have three options to choose from:
-
Generate Locator Options: Mentions the identifiers for particular elements seen on the screen. This is great for debugging purposes.
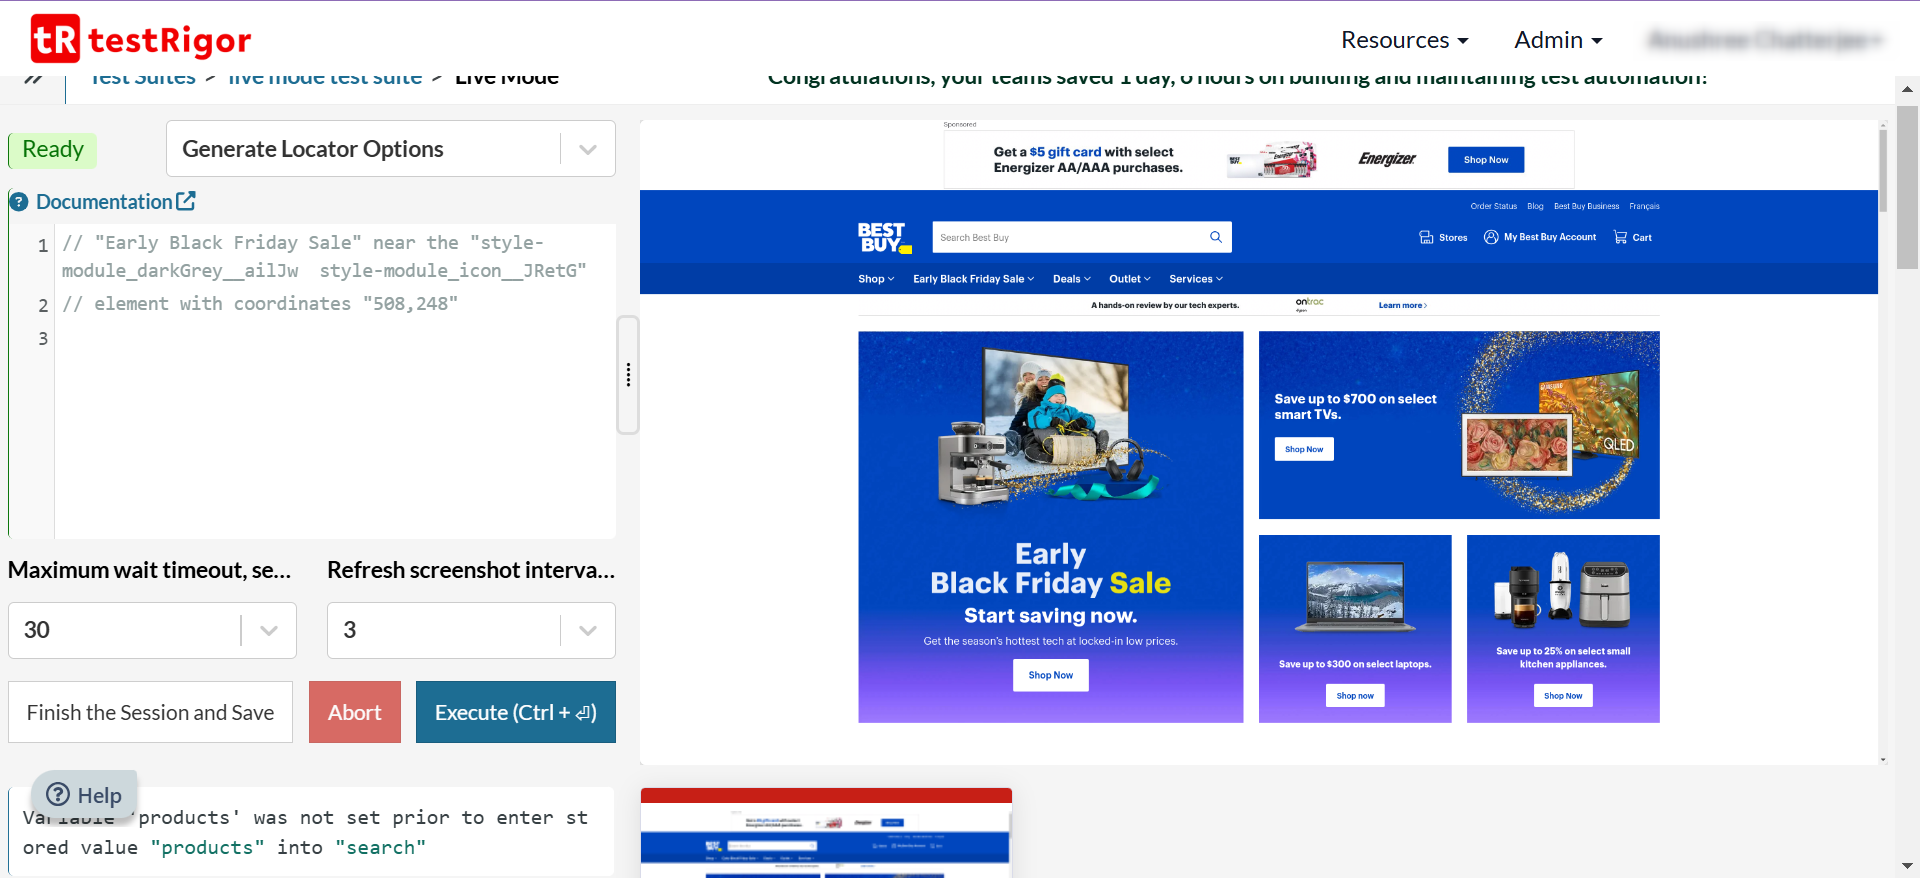
-
Generate Command: It is for the interactions you perform. The command will appear in the test editor box to the left of the application-under-test window. You can manually execute commands once they appear in the test editor by clicking on the Execute button. You can also abort a running command by clicking on the Abort button.
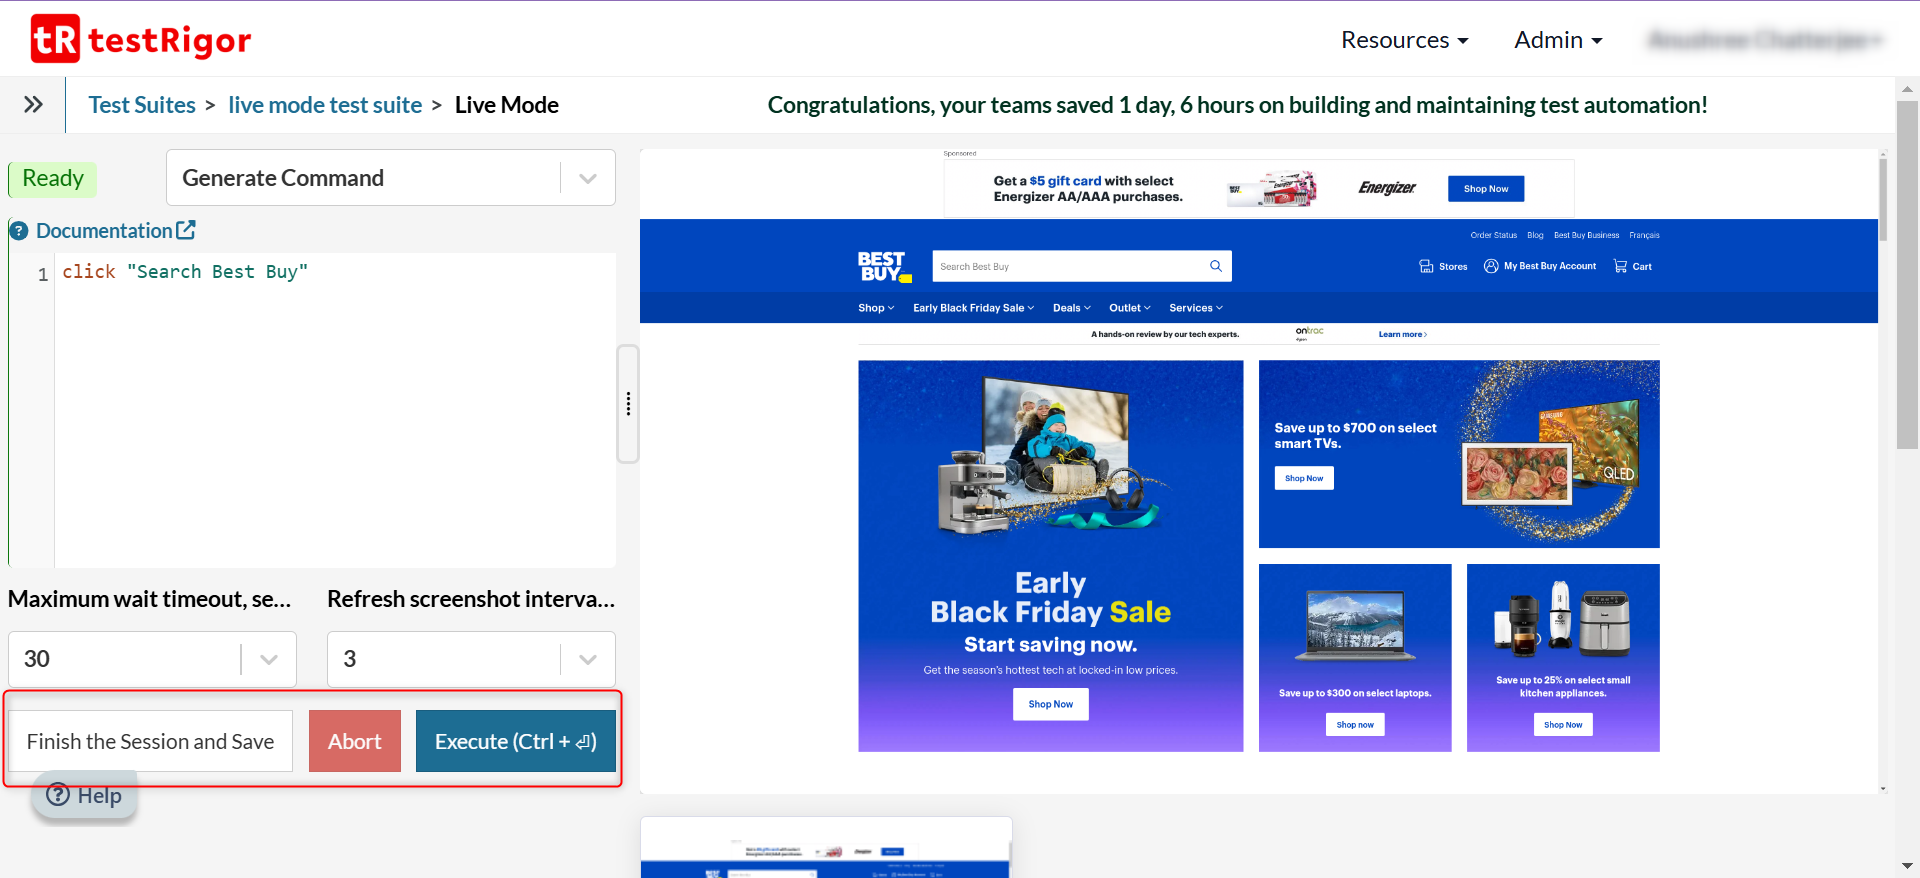 Generate Command and Execute: Your interactions with the application-under-test will be recorded in the test editor on the left, and once the command gets executed, it will disappear from the test editor and appear below as documentation. You will be able to see the command that got executed along with the screenshot of the execution.
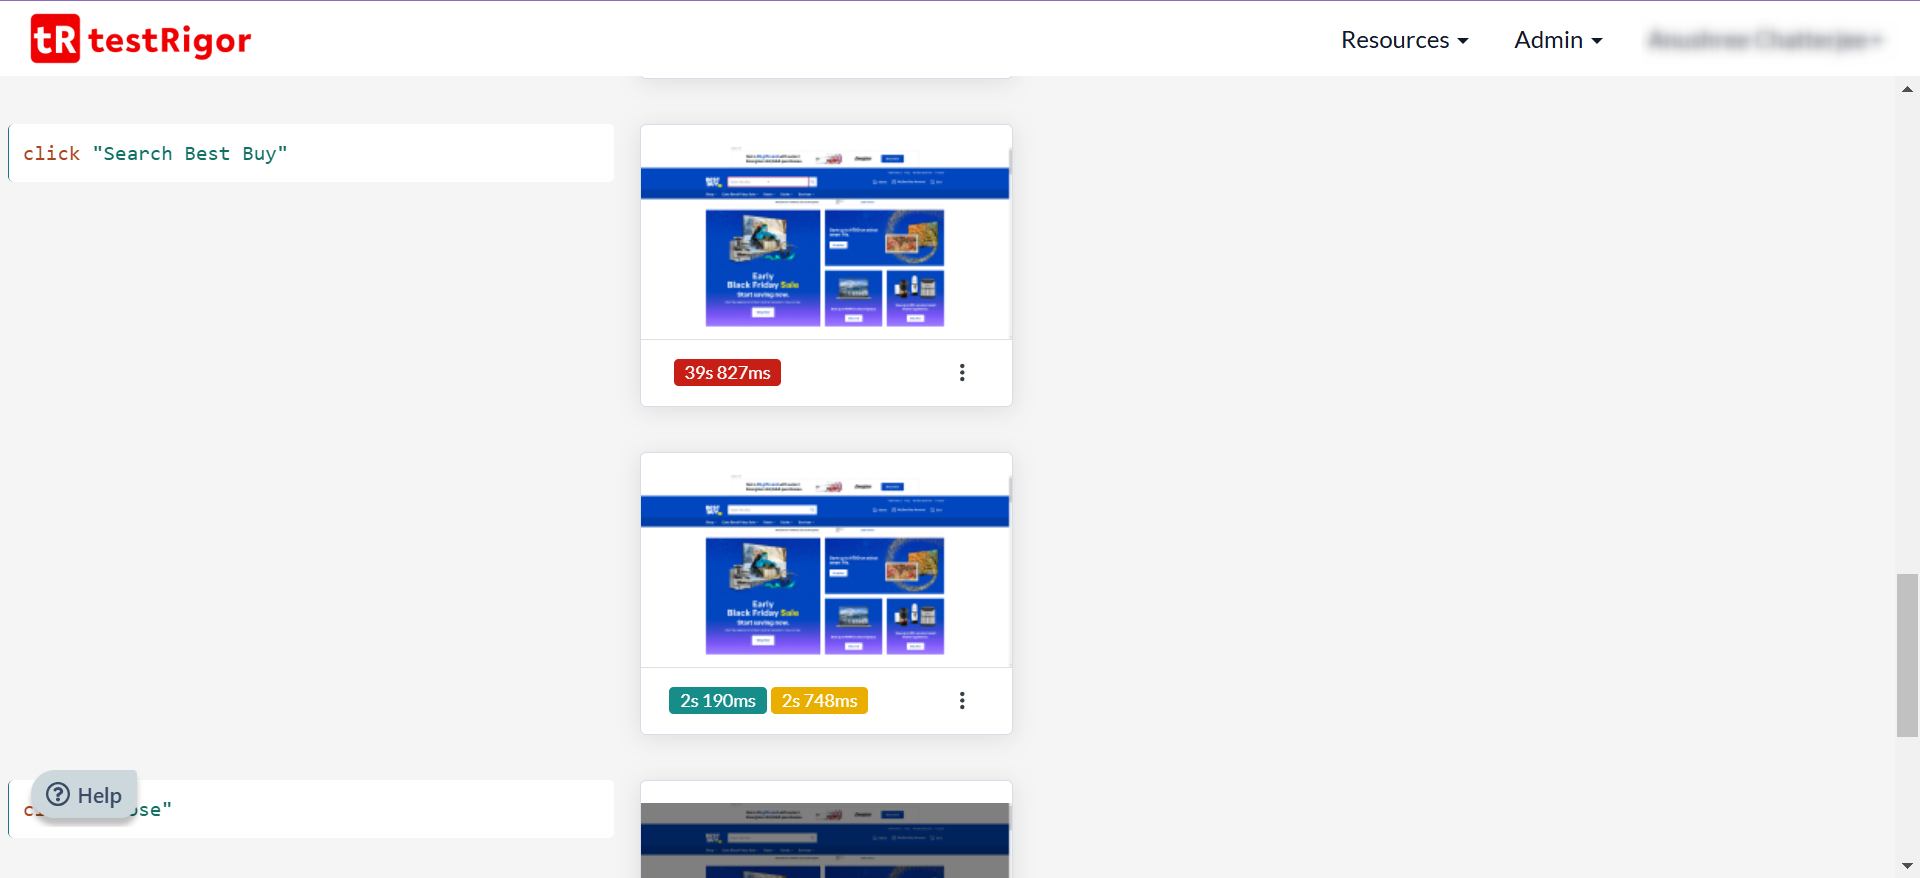
Step 6: Click on ‘Finish the Session and Save‘ to end the live mode session. A live mode session is usually active for 15 minutes.
Note:- Failed steps will not get saved as a part of the test case.
- If your recorded test cases appears to have taken a lot of time, then attribute it to the live mode, since you were manually recording them. When testRigor reruns it, the execution will be much faster.
Step 7: The test case recorded via live mode gets saved in a disabled state.
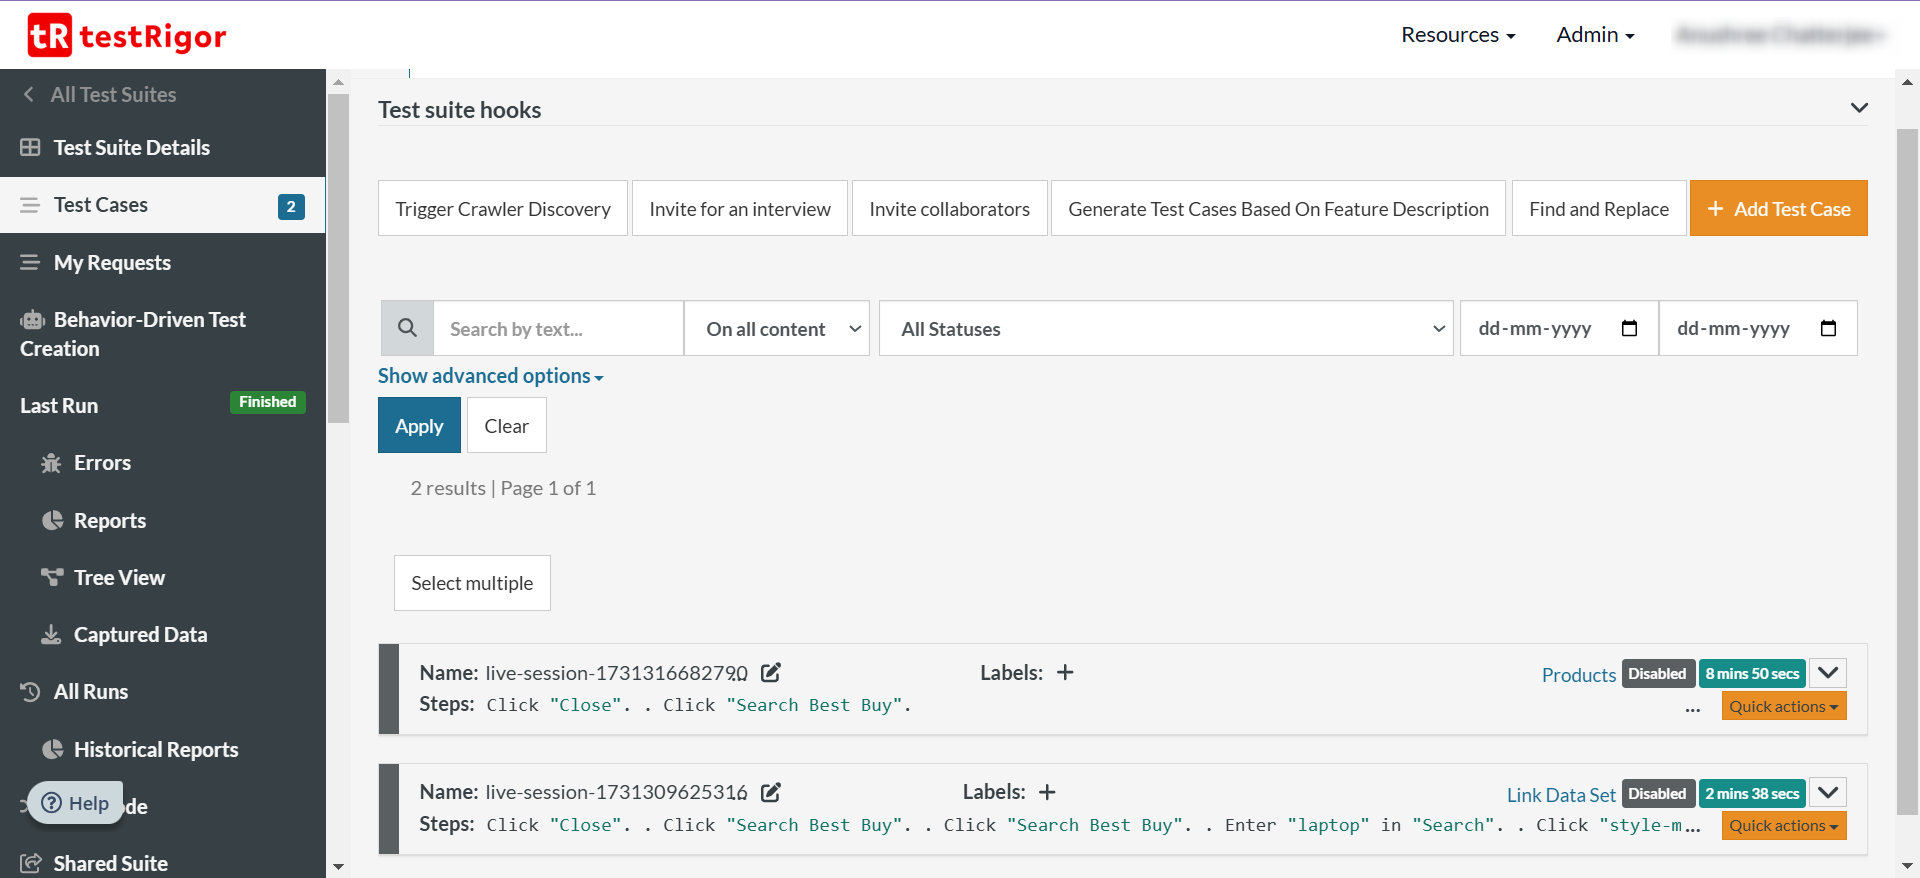
Test Case Using Live Mode
Now that you’ve seen how to use live mode, you can easily create a test case using it. Here’s a simple interaction with an e-commerce website.
Step 1: Set up live mode as explained in the above section.
Step 2: Once the screens load, start interacting with the application under test. Close the privacy settings banner at the bottom of the application page.click "Close"
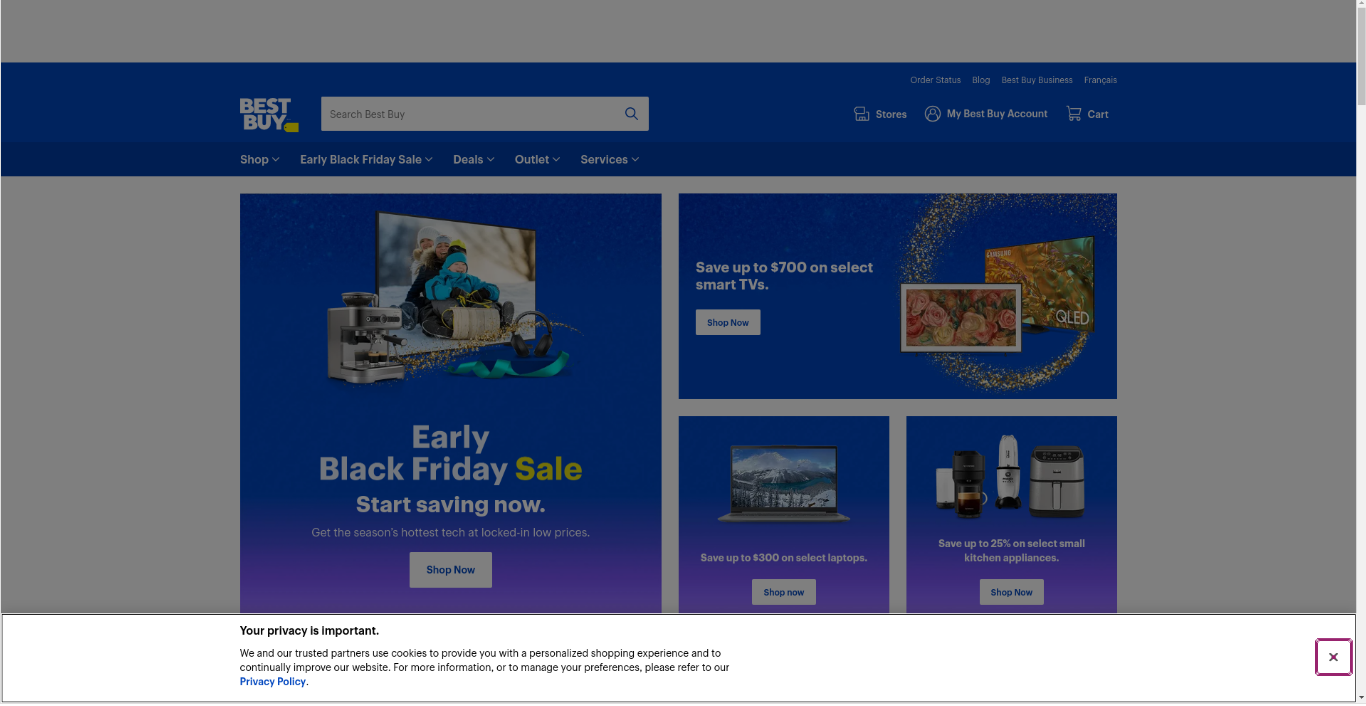 Step 3: Click on the Shop menu to select an item.
click "Shop"
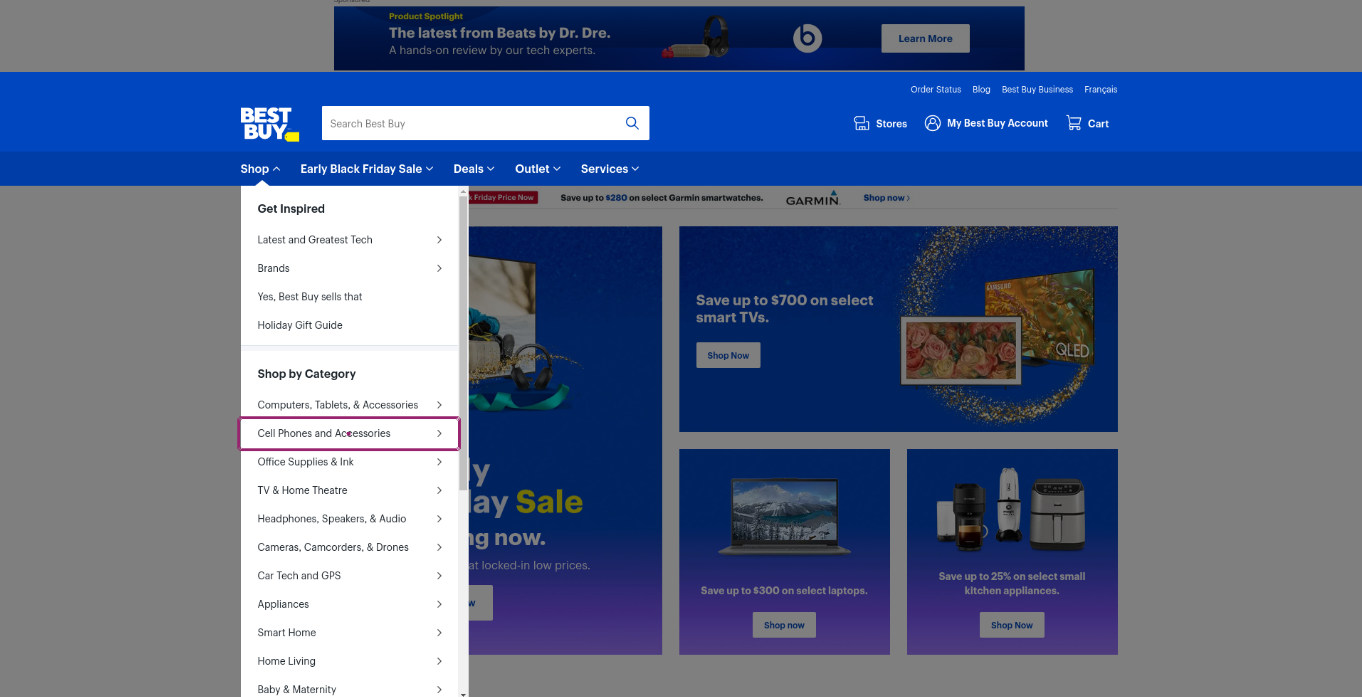
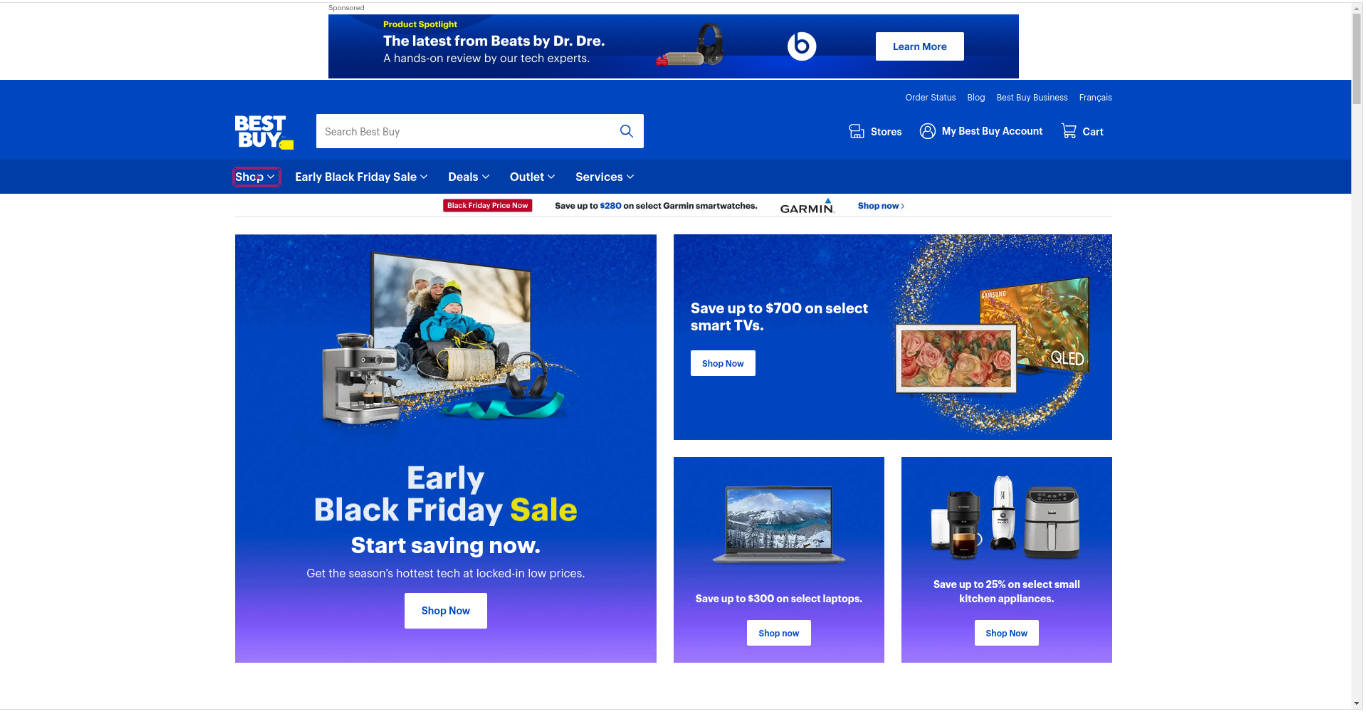 Step 4: Going further into the menu, click on ‘Cell Phones and Accessories’.
click "Cell Phones and Accessories"
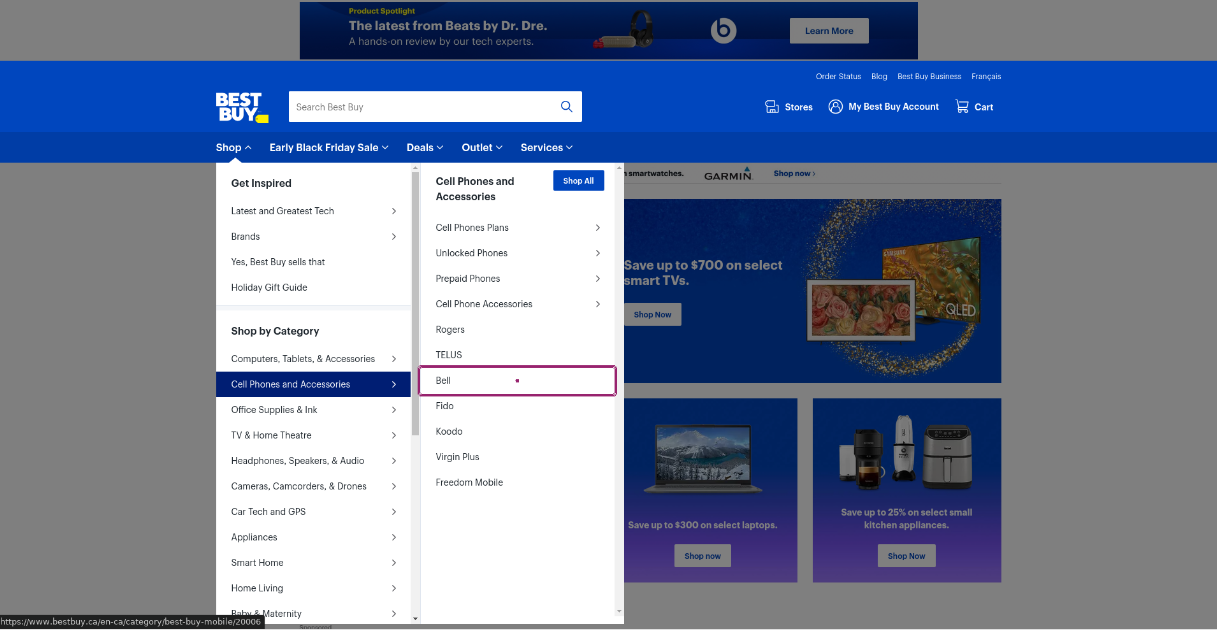
 Step 5: At the next level, click on ‘Bell’.
click "Bell"
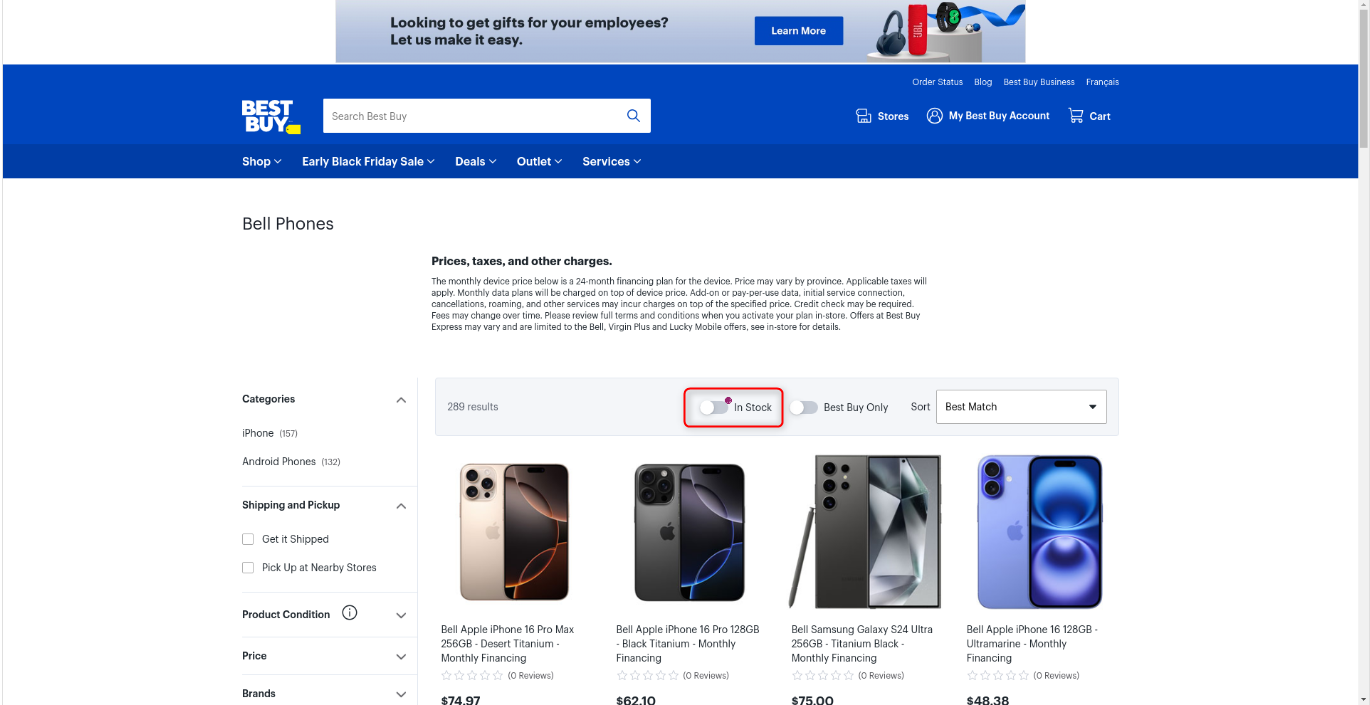
 Step 6: On the product listing page, set the toggle switch so that the application shows only those products that are in stock.
click "in Stock"
 Step 7: The corresponding testRigor test case will look like this:
click "Close"
click "Shop"
click "Cell Phones and Accessories"
click "Bell"
click "in Stock"
Step 8: Once the test is executed, you can view the execution details, such as execution status, time spent in execution, screenshots, error messages, logs, video recordings of the test execution, etc. In case of any failure, there are logs and error text that are available easily in a few clicks.
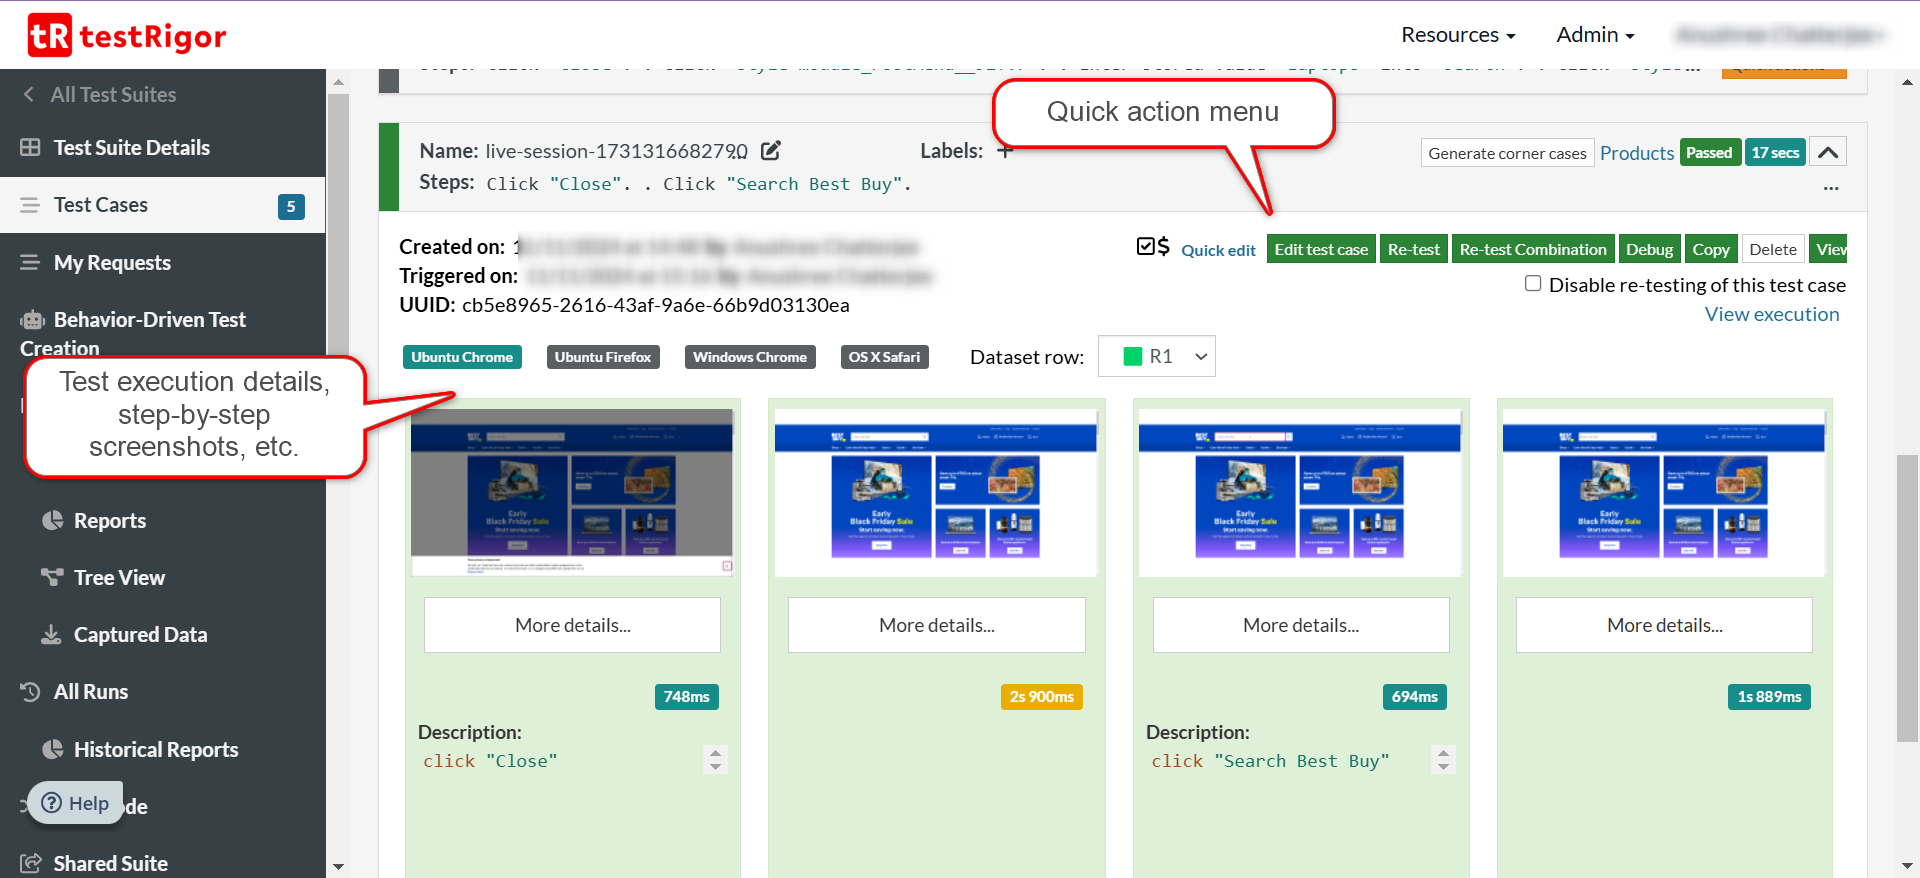
You can also download the complete execution with steps and screenshots in PDF or Word format through the View Execution option.
Using Live Mode to Debug test cases
The live mode is accessible from a test case through Debug.
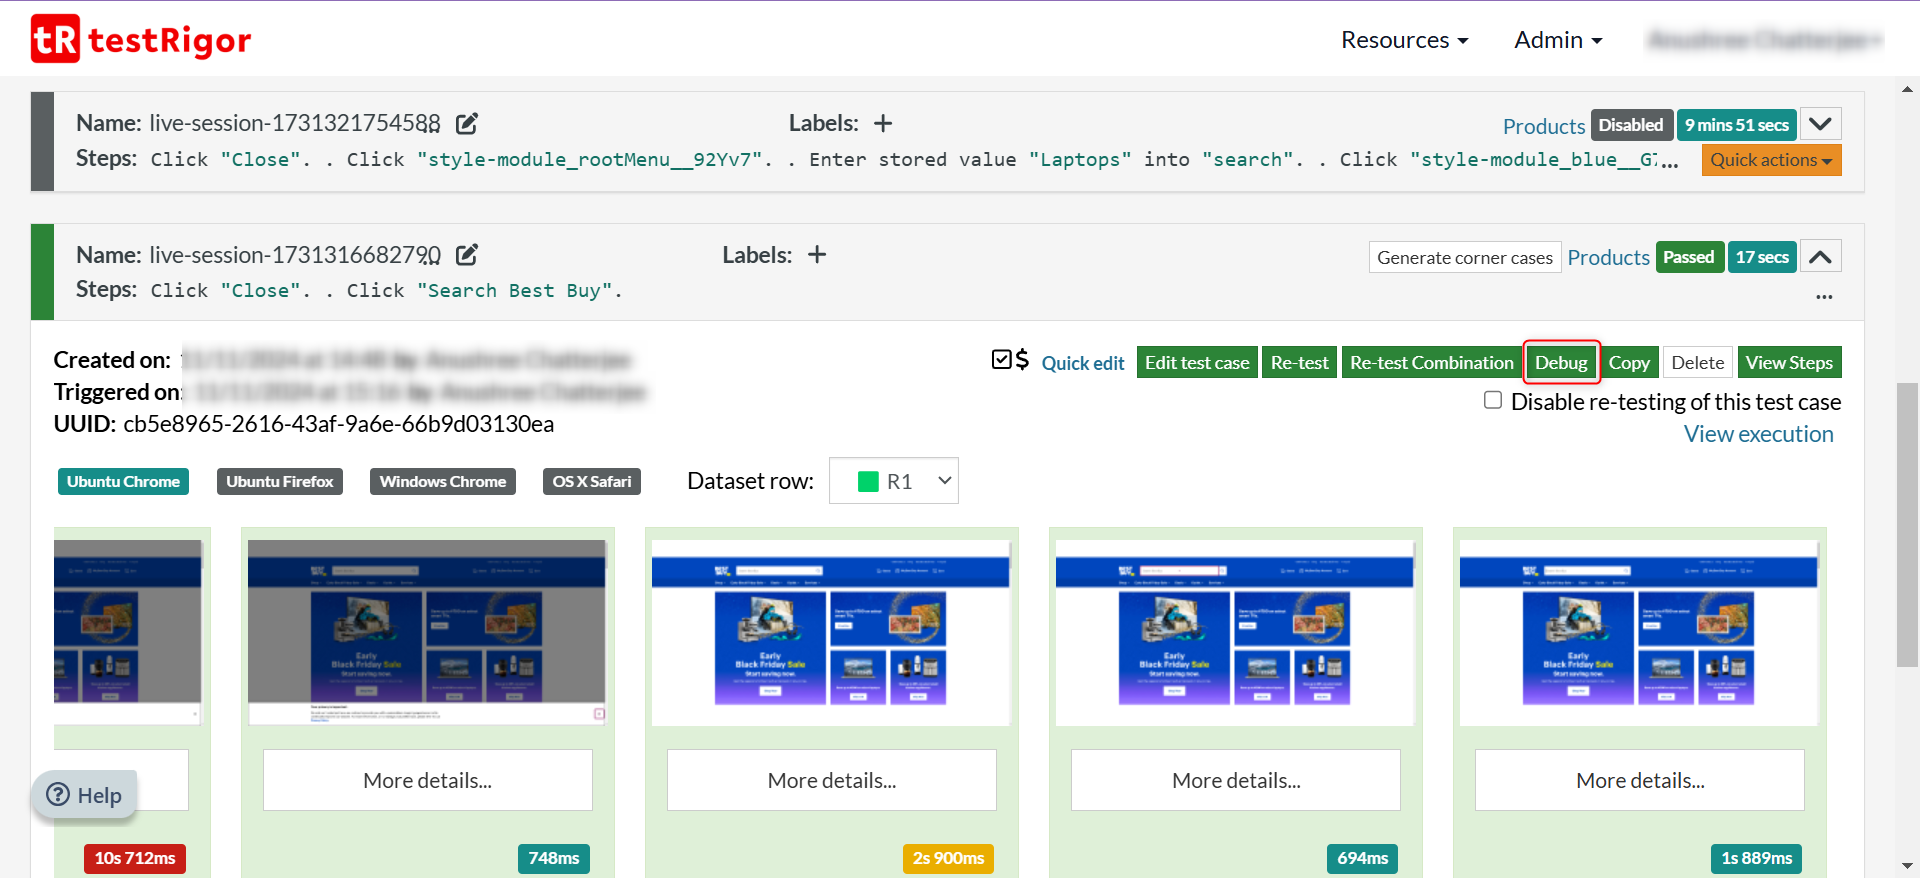
This will open the live mode screen with the test case steps pre-populated. You can execute them one by one and figure out real-time behavior to make changes accordingly.
testRigor’s Capabilities
Apart from the simplistic test case design and execution, some advanced features help you test your application using simple English commands.
- Reusable Rules (Subroutines): You can easily create functions for the test steps that you use repeatedly. You can use the Reusable Rules to create such functions and call them in test cases by simply writing their names. See the example of Reusable Rules.
- Global Variables and Data Sets: You can import data from external files or create your own global variables and data sets in testRigor to use them in data-driven testing.
- Visual Testing: testRigor’s Vision AI lets you compare the current screenshot with a baselined one, as a human would “see” it. This let you perform visual testing just in plain English commands, saving your team’s enormous time and effort.
- 2FA, QR Code, and Captcha Resolution: testRigor easily manages the 2FA, QR Code, and Captcha resolution through its simple English commands.
- Email, Phone Call, and SMS Testing: Use simple English commands to test the email, phone calls, and SMS. These commands are useful for validating 2FA scenarios, with OTPs and authentication codes being sent to email, phone calls, or via phone text.
- File Upload/ Download Testing: Execute the test steps involving file download or file upload without the requirement of any third-party software. You can also validate the contents of the files using testRigor’s simple English commands.
- Database Testing: Execute database queries and validate the results fetched.
- Accessibility and Exploratory Testing: You can efficiently perform accessibility testing through testRigor. Read here how to build an ADA-compliant app. This intelligent tool helps you run exploratory testing with its AI-powered features. Read how to perform exploratory testing with testRigor.
In this way, you can use testRigor to test your apps with minimal effort. This AI-based tool not only makes test creation and execution easy but also reduces the burden of test maintenance that tends to arise during automation testing.
Additional Resources
- testRigor Documentation to learn about more useful capabilities
- testRigor’s Top Features
- How to Execute Tests in Parallel Using testRigor?
- How to Write Test Cases? (+ Detailed Examples)
- How to do End-to-end Testing with testRigor
You're 15 Minutes Away From Automated Test Maintenance and Fewer Bugs in ProductionSimply fill out your information and create your first test suite in seconds, with AI to help you do it easily and quickly.Achieve More Than 90% Test Automation Step by Step Walkthroughs and Help 14 Day Free Trial, Cancel Anytime  “We spent so much time on maintenance when using Selenium, and we spend nearly zero time with maintenance using testRigor.”Keith Powe VP Of Engineering - IDT


