How to Automate Native Desktop Testing with testRigor?
|
|
What is Native Desktop Testing?
Native desktop testing refers to testing software applications that are designed to run directly on a computer’s operating system (like Windows or macOS), rather than in a web browser or on mobile devices. Examples of these applications include Microsoft Word, Adobe Photoshop, or any other desktop software.
When we talk about “testing” these applications, we’re making sure that they
- Work properly while interacting with the operating system
- Do not have functional bugs
- Do not have performance or security issues
- Are meeting the user’s needs
- Handles file management
- Functions on various screen sizes and hardware configurations
WPF (Windows Presentation Foundation) Testing
WPF, or Windows Presentation Foundation, is Microsoft’s UI framework for building visually rich desktop applications on Windows. It’s used in programs like Visual Studio, SAP Business Client, and AutoCAD. With testRigor, you can automate WPF applications testing, ensuring that complex interfaces and interactions perform reliably across different scenarios.
Win32 Framework Testing
Win32 is the core Windows API used to develop native desktop applications with deep system-level access. Many familiar tools such as File Explorer, Notepad, and older versions of Photoshop and VLC Media Player are built using this framework. testRigor enables full Win32 applications test automation as well, allowing teams to verify functionality and maintain consistency even in legacy systems.
Why do Most Tools Struggle to Automate Native Desktop Testing?
It is easier to test web applications and APIs, which is the reason why you’ll see most tools for automating those test cases. But when it comes to native desktop applications, the availability of test automation tools becomes scarce, mainly because of
- Different Environment: Native desktop apps run directly on the computer’s operating system, which is different from how web apps run in a browser or mobile apps run on a mobile operating system. Testing tools that are designed for the web or mobile can’t easily interact with the OS, hardware, or specific features of desktop applications.
- UI Complexity: The user interface (UI) of desktop apps can be much more complex and customized compared to web apps, which follow standardized HTML structures. Native desktop applications are built using a wide array of UI frameworks (WinForms, WPF, Qt, Java Swing, etc.). Each framework has unique rendering and interaction models. This makes it harder for automation tools to “recognize” and interact with them in the same way they do for simpler web interfaces.
- Complex Interactions: Desktop apps often have advanced features like drag-and-drop, resizing windows, or interacting with other programs. These types of interactions can be harder for automation tools to replicate accurately.
- Resource Constraints: Desktop apps may need specific hardware or configurations (like printers, scanners, or special devices) to test properly, which makes it harder to create automated tests that work in all environments.
With such challenges, most of your traditional test automation tools struggle to give you reliable native desktop testing without maintenance issues.
Luckily, with a powerful, AI-based tool like testRigor, you can test more than just web applications on your desktop. In fact, with this tool, you can test scenarios to transition from web testing to desktop application testing as well. For example, a test case can initiate the browser on the user’s machine, verify an email for a Zoom link to join a meeting, and then proceed to open a desktop client via this link.
Let’s take a look at how this can be done with an example.
Pre-requisites to writing the test case
Before we jump into the test case creation process, we need to set up a reliable connection between the remote desktop and testRigor.
1. Enable Remote Desktop (RDP) for Windows
testRigor supports remote desktop testing for Windows. The first step to achieve this will be to enable the remote desktop setting on your computer. For that, head to Windows Settings -> System -> Remote Desktop and switch Enable Remote Desktop to On.
2. Create a Test Suite in testRigor
Step 1: Log in to your testRigor app with your credentials.
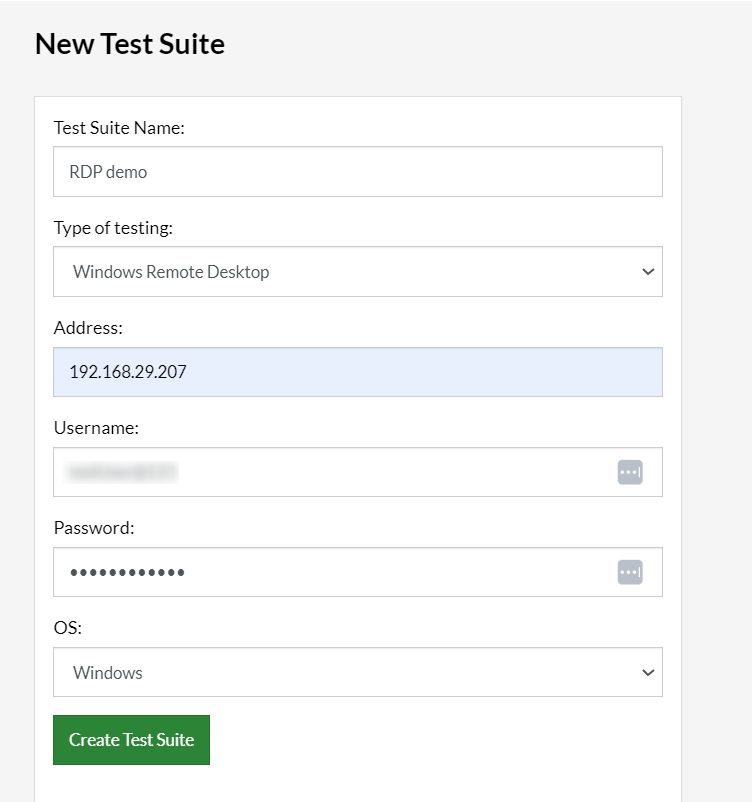
Step 2: Set up the test suite for the website testing by providing the information below:
- Test Suite Name: Provide a relevant and self-explanatory name.
- Type of testing: Select from the following options: Desktop Web Testing, Mobile Web Testing, Native and Hybrid Mobile, and Windows Remote Desktop based on your test requirements. We will use Windows Remote Desktop as the testing type for this case.
- Address: Address refers to the IPv4 address. To set up the connection with testRigor, click the Windows (or Start) -> Settings -> Network & Internet -> Hardware Properties. The computer’s IPv4 address should be visible there.
- Username and Password: You need to provide the remote device/system’s username and password so that testRigor can log in and move on with the testing.
This is how the test suite creation screen will look like.
If the computer is behind a VPN or firewall, access will need to be granted via tunneling. See the documentation here.
Step 3: Click on Create Test Suite.
Step 4: To create a new custom test case yourself, click Add Custom Test Case.
3. Setup Microsoft Windows Application Driver
Microsoft Windows Application Driver (WinAppDriver) is an open-source framework designed for automated testing of desktop applications on Windows 10 machines. You need this application to set up the remote testing environment. You can do it the following way:
Step 1: Download the latest stable release of Windows Application Driver installer from the official homepage https://github.com/microsoft/WinAppDriver/releases/ and install it. You will need administrator rights for this.
Step 2: Enable Developer Mode in Windows settings. To do this, head to Windows Settings -> Update & Security -> For Developers and enable Developer mode.
Step 3: Run WinAppDriver.exe from the installation directory (e.g., C:\Program Files\Windows Application Driver\). You will need administrator rights to run it if you want to change the listening address/port (http://127.0.0.1:4723 by default).
Step 4: Specify a URL of the running WinAppDriver in the testRigor test suite settings. To do this, head to Settings -> Remote Desktop -> Windows Application Driver URL. For configured tunneling, it will look like http://tunnel.testrigor.com:XXXX, where XXXX is the port number from the tunneling configuration for the WinAppDriver.
Note: If the computer is behind a VPN or firewall, secure access from the testRigor servers to the local Microsoft Windows Application Driver (WinAppDriver) will need to be granted via tunneling. You can do that by referring to this document.
This video explains the above steps for desktop application testing very well.
Test Case: Testing a CRM application remotely on a Windows desktop
In the following test case, we will test a native CRM application on a Windows desktop.
Let’s take a look at every step that will be part of the testRigor test case.
Test Steps
Step 1: Navigate to the Test Cases section, provide the test case Description, and add the test steps. We will add test steps in the test case editor screen.
Step 2: As we have set up RDP and ensured that it is securely connected with testRigor, we can proceed with our test case writing.
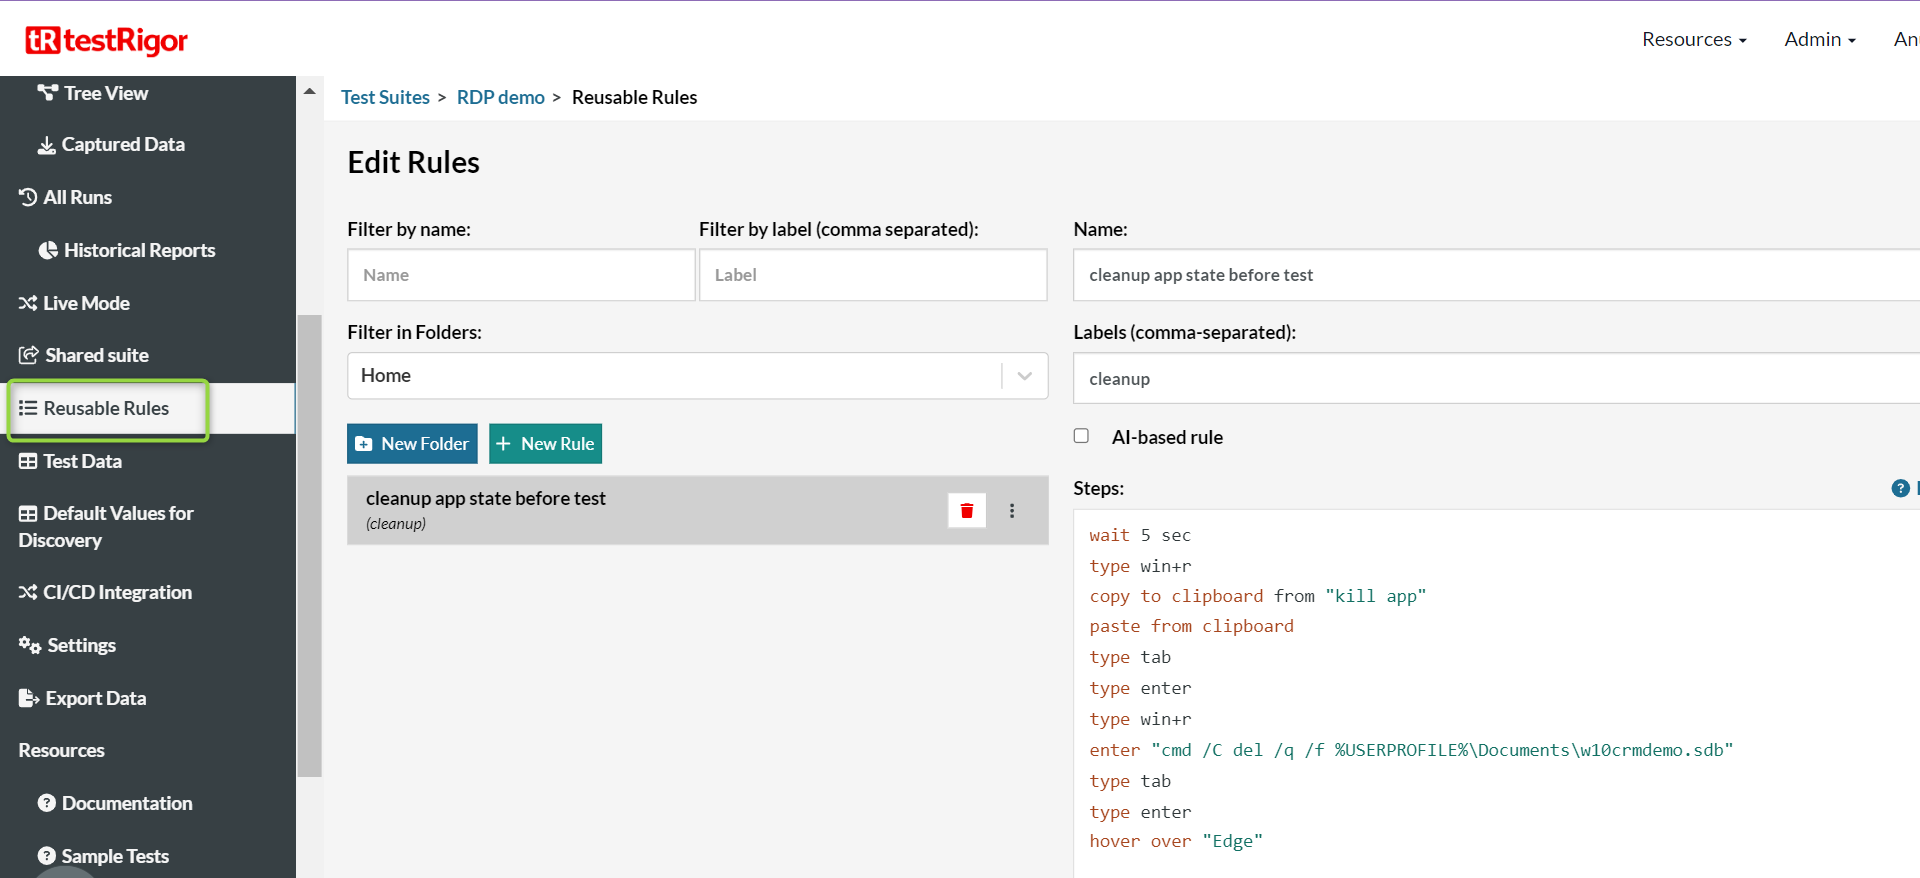
Step 3: Before we move on to our actual test case, we will perform a clean-up to close windows and delete specific files. For this, we are using a reusable rule. Reusable rules are singular English statements representing a group of plain English commands. They can be used across test cases to perform a repetitive function. In our case, the reusable rule we are using is
cleanup app state before test
To create a reusable rule, go to Reusable Rules in the left panel. Provide details and save the rule. The above rule looks like this.
Let’s break down the rule.
-
wait 5 sec
Simple wait command. -
type win+r
Shortcut to open the ‘Run’ window in Windows. -
copy to clipboard from "kill app"
‘Kill app’ has a value of ‘taskkill /IM “CRM*”‘ which is saved in the Test Data section. The command terminates processes whose image name starts with “CRM”.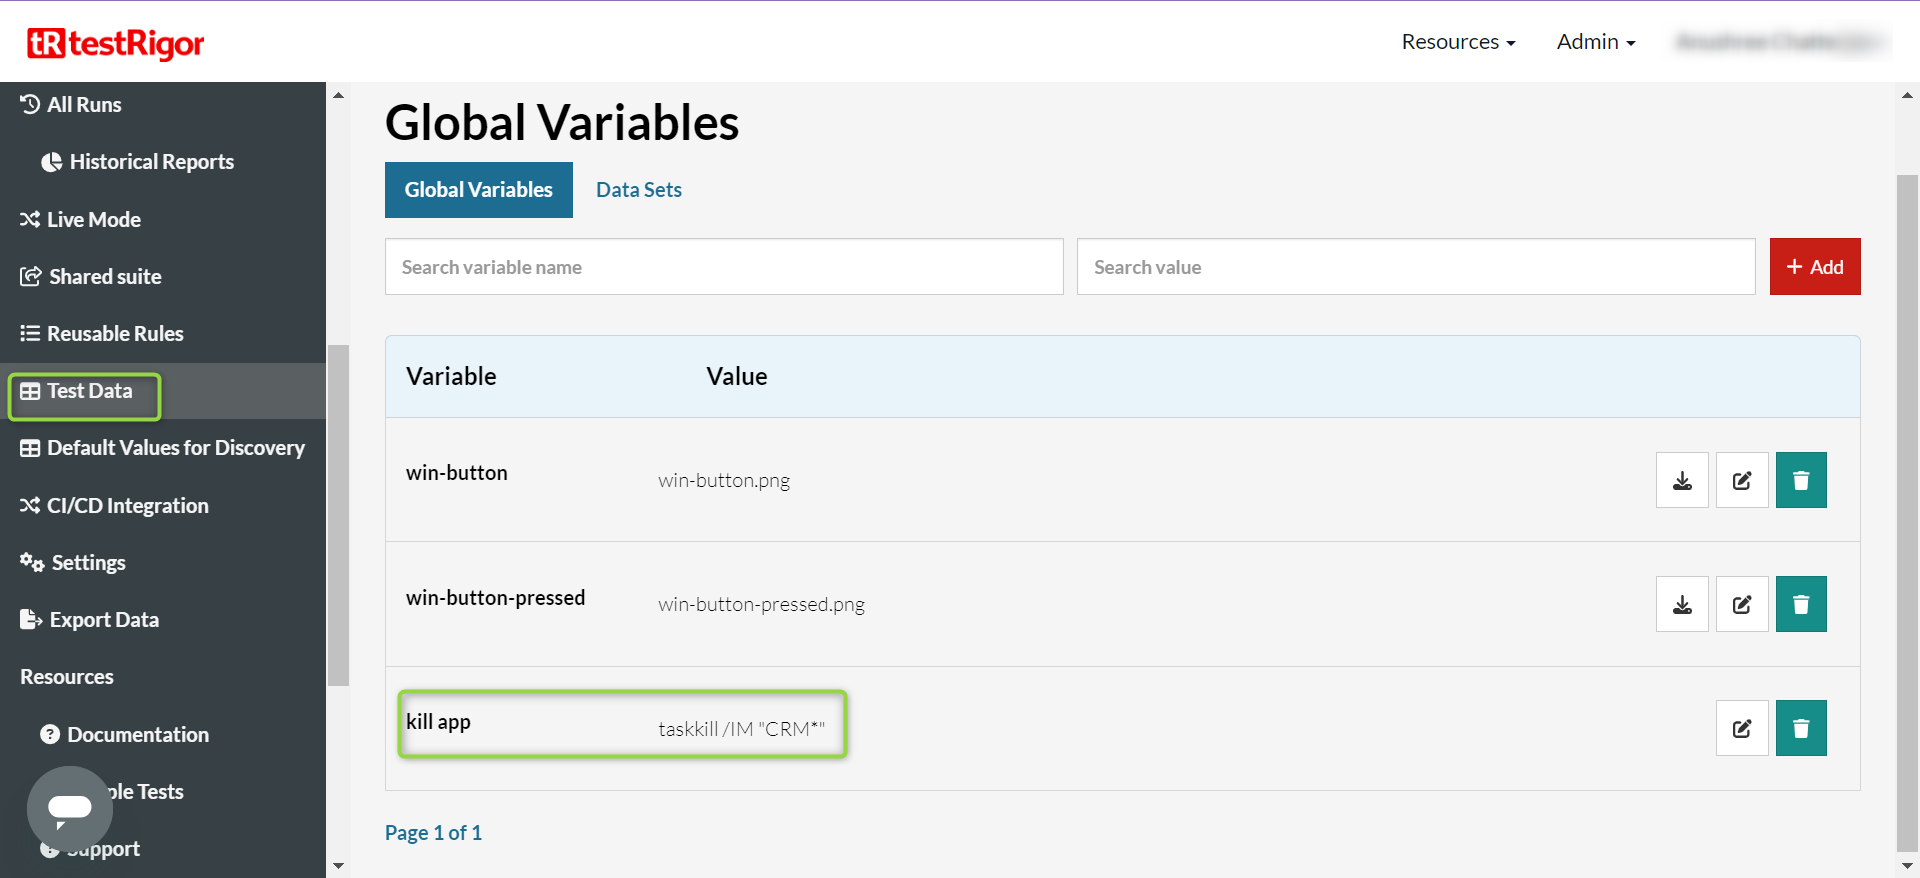
-
paste from clipboard
The value of the ‘kill app’ variable is pasted into the text input field of the ‘Run’ window.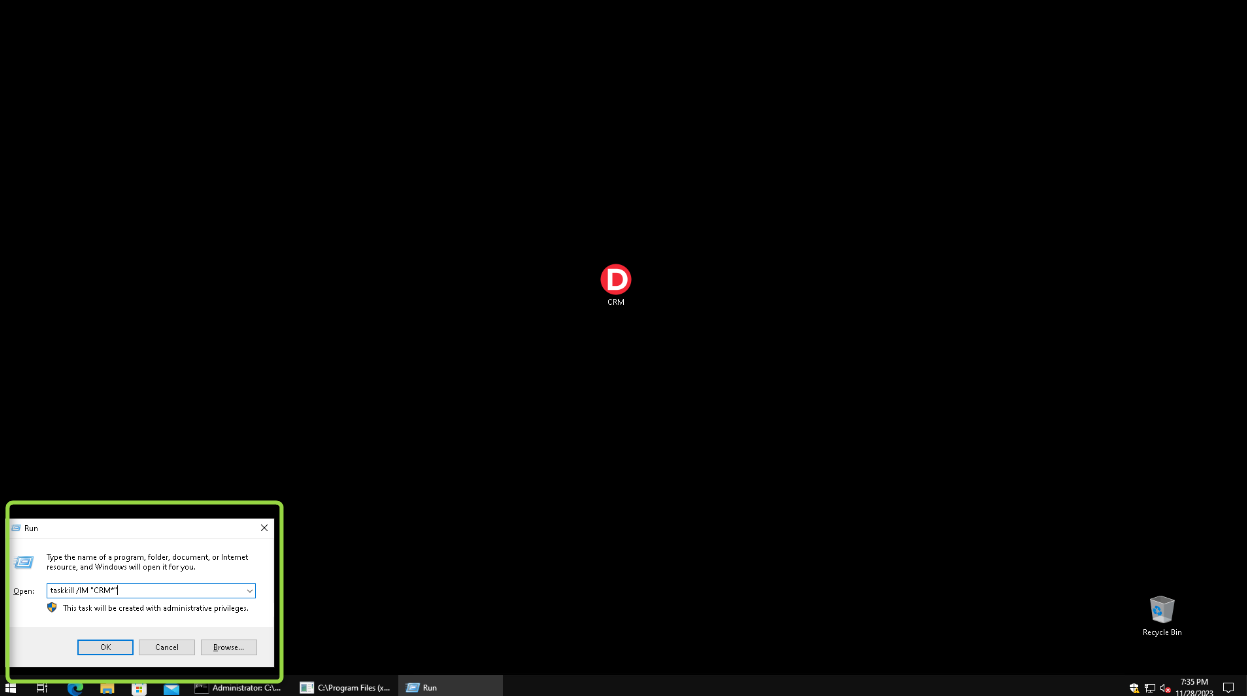
-
type tab
Simple command to enter ‘tab’ in the text input field. -
type enter
Command to enter ‘enter’ in the text input field. This also ensures that the ‘kill app’ command works, thus clearing the system. -
type win+r
Shortcut to open the ‘Run’ window in Windows. -
enter "cmd /C del /q /f %USERPROFILE%\Documents\w10crmdemo.sdb"
This, again, is a Windows command to delete a file named “w10crmdemo.sdb” located within the user’s Documents folder. We are entering this command into the text input field of the ‘Run’ window. -
type tab
Simple command to enter ‘tab’ in the text input field. -
type enter
This command is to enter ‘enter’ in the text input field, which also executes the command. -
hover over "Edge"
Command to bring the mouse cursor over the Edge browser icon present in the taskbar.
Step 4: After the clean-up operation is complete, we will start with our actual test case. First, we open the CRM application on the desktop.
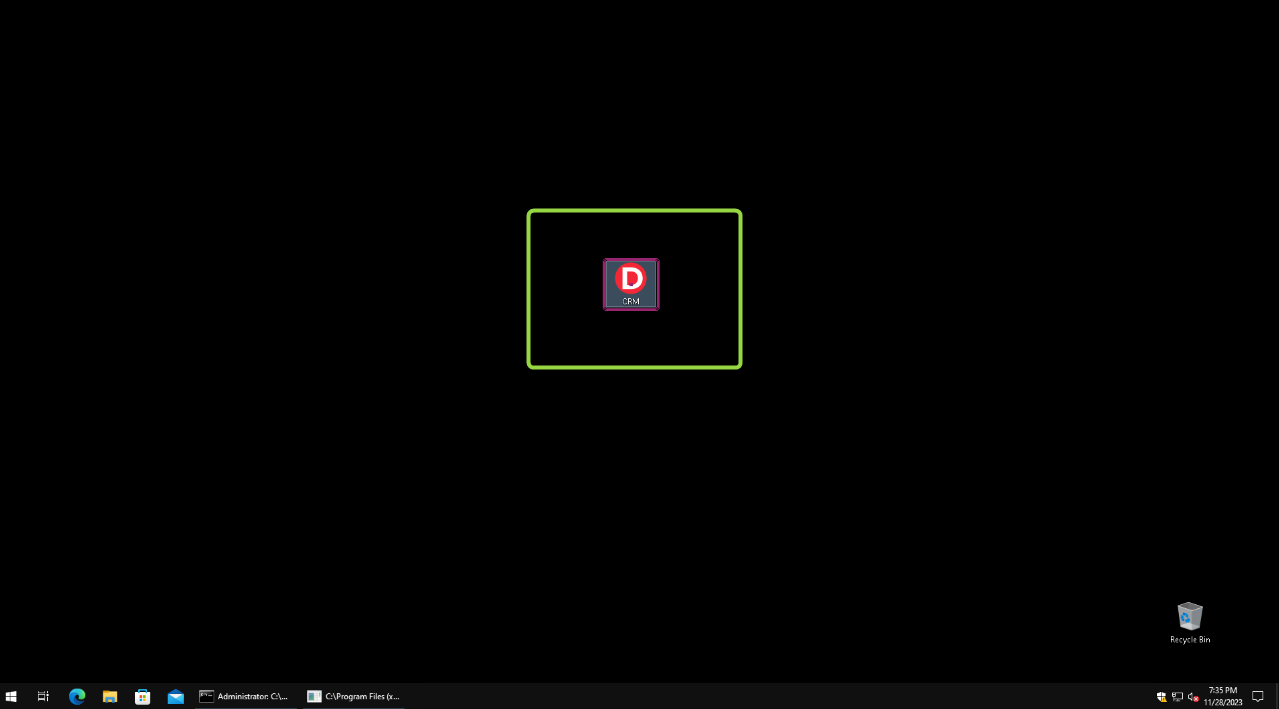
double click "CRM"
Step 5: Now click on the ‘Accounts’ tab.
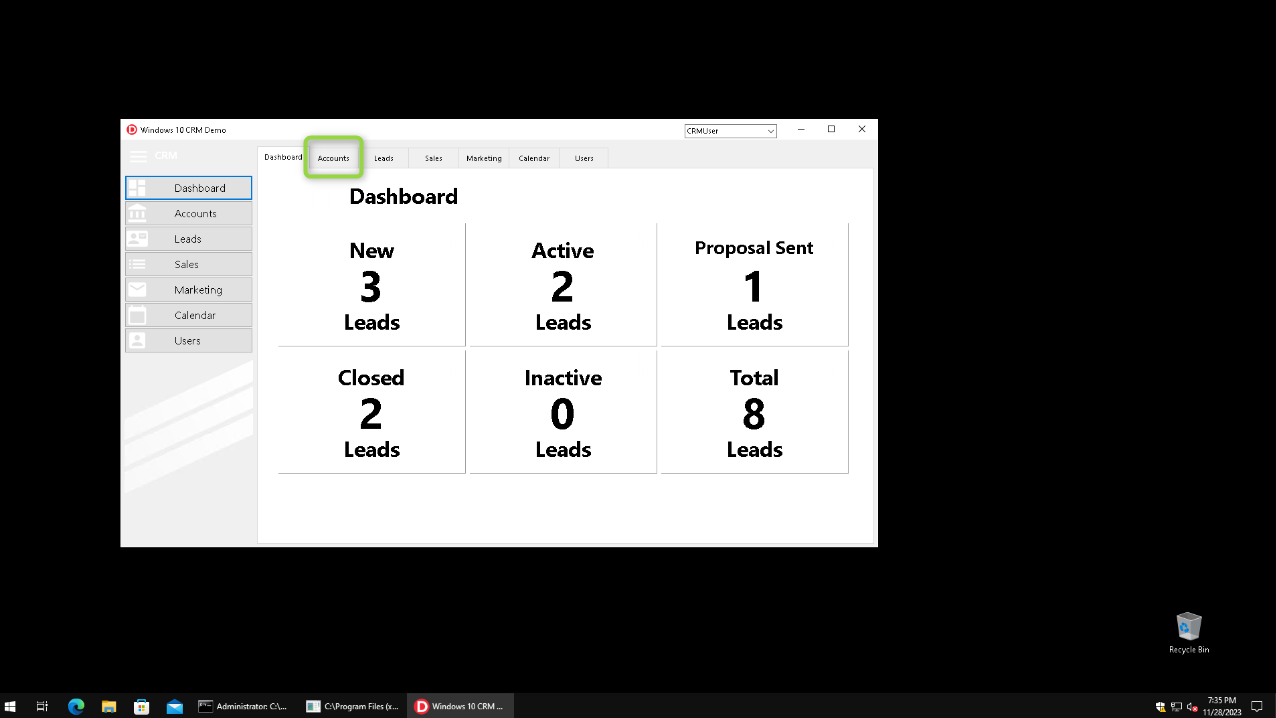
click "Accounts"
Step 6: Click on ‘Leads’.

click "Leads"
Step 7: Now click on the ‘Users’ tab.
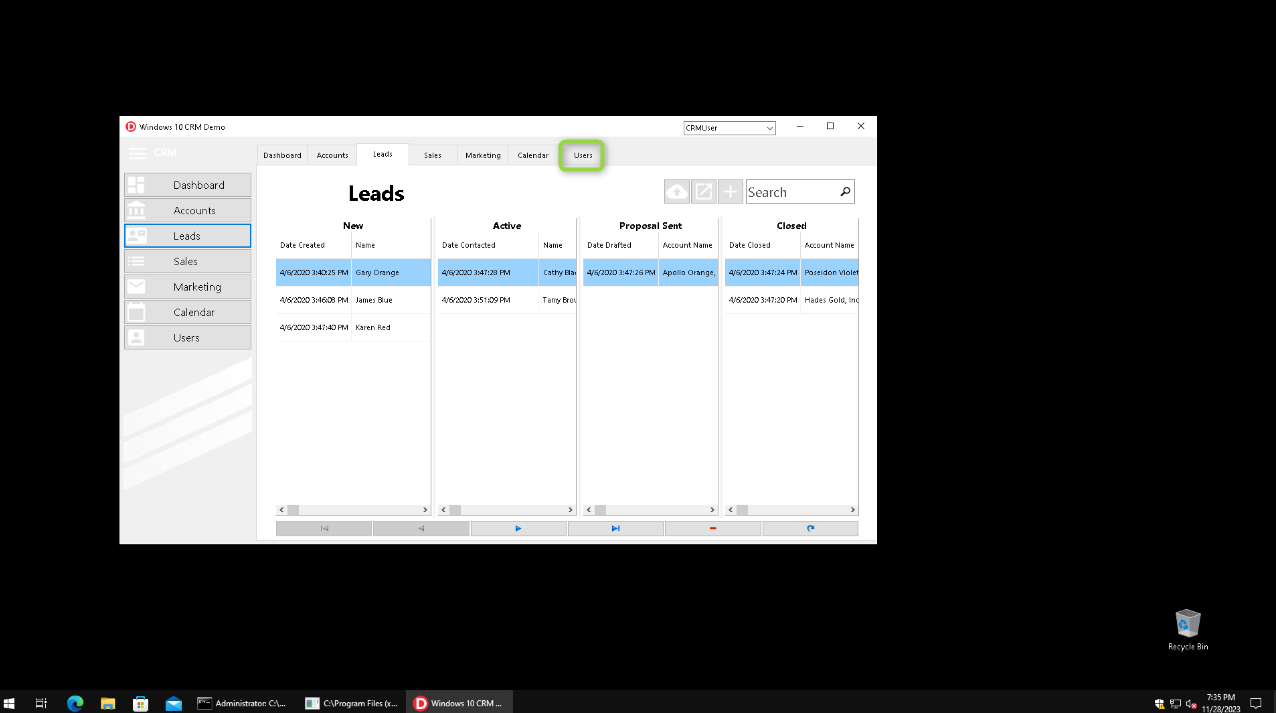
click "Users"
Step 8: Let’s create a new user. For that, click on ‘Create’ first.
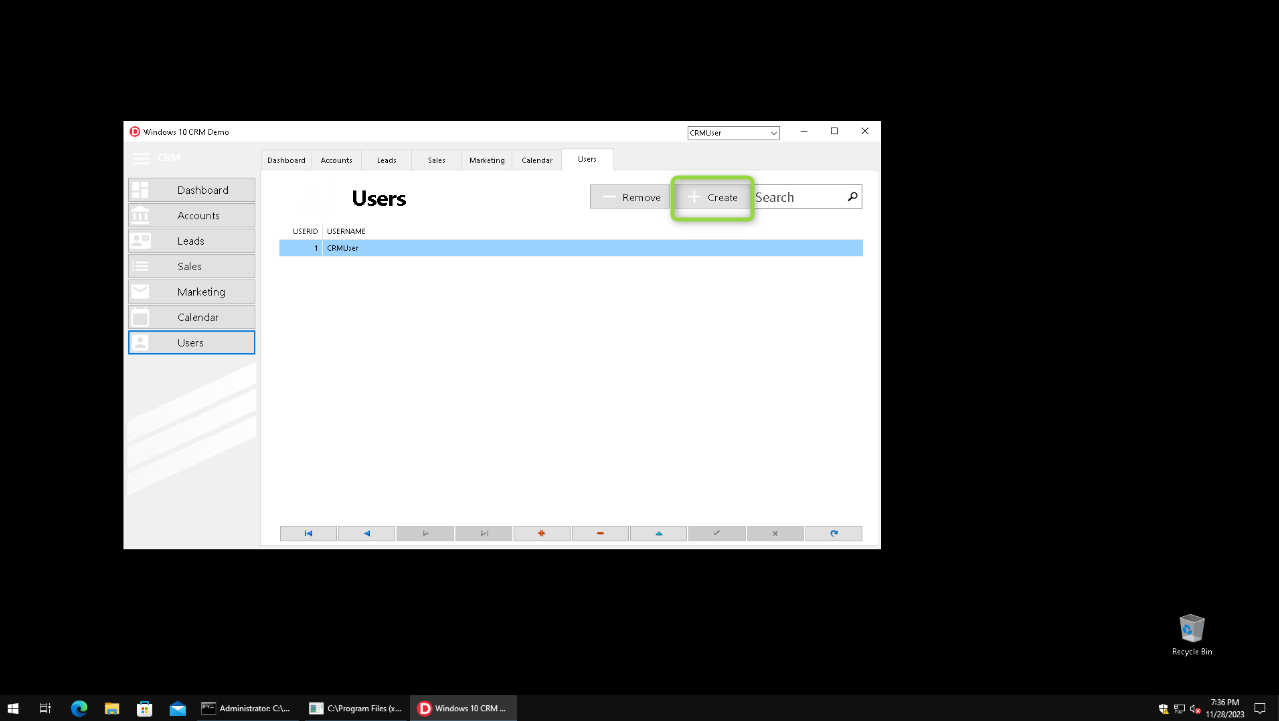
click "Create" using OCR only
Step 9: Type in the name of the user and save it.
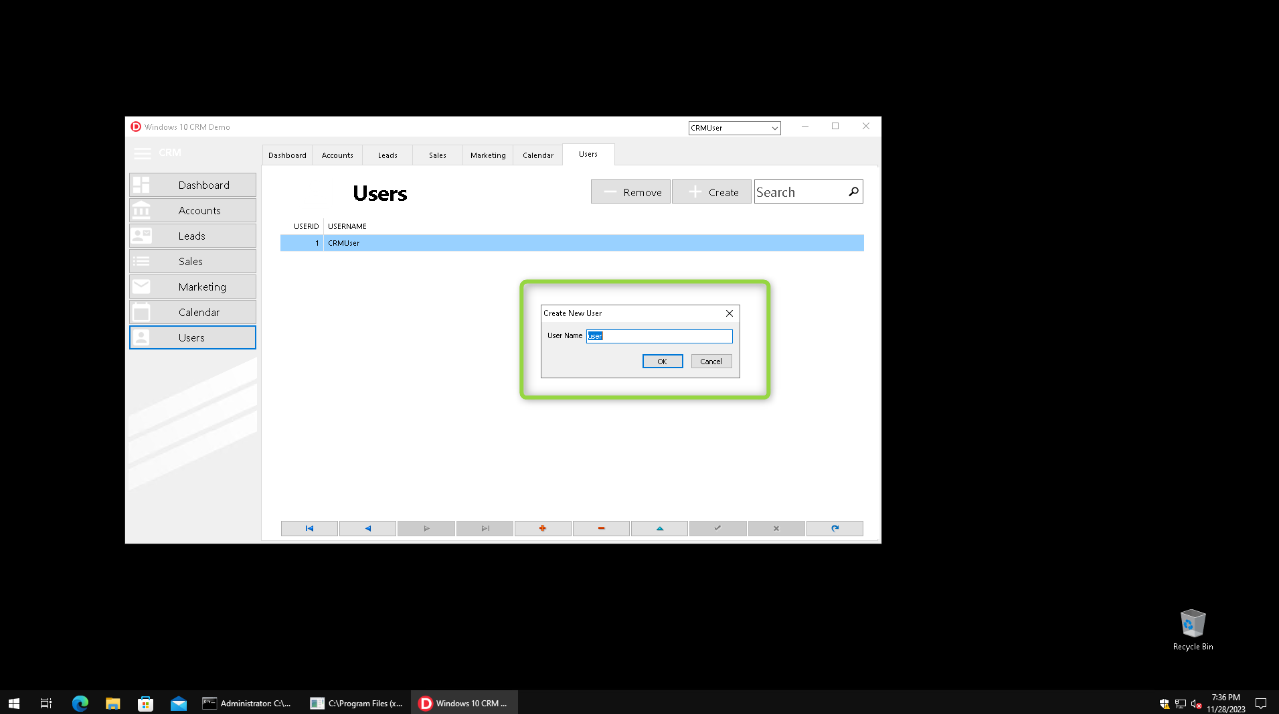
type "john"
click "OK"
Step 10: The Users dashboard will show two users now: CRMUser, which was present right from the start, and John, the new user we just created. Using testRigor’s special commands to interact with the keyboard, we will click on CRMUser using the ‘arrow down’ key input.
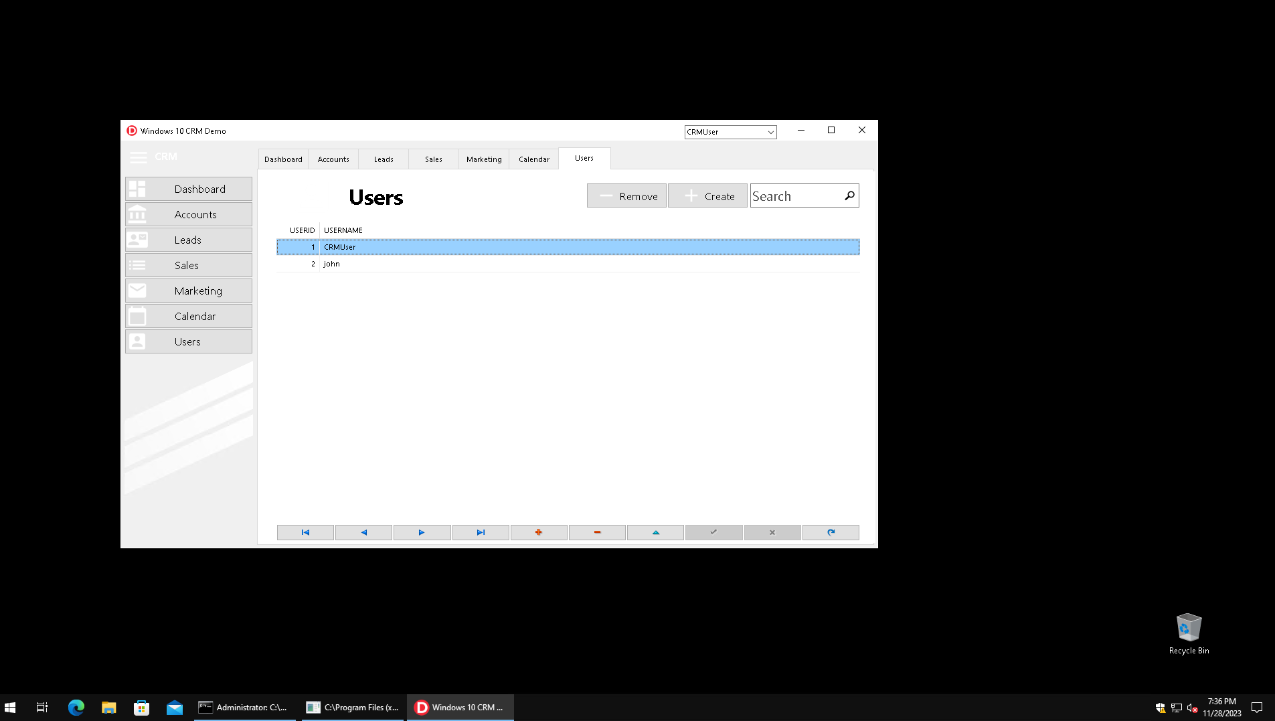
click "CRMUser" using OCRtype arrow down
Step 11: We will switch tabs within the CRM application from ‘Users’ to ‘Leads’.
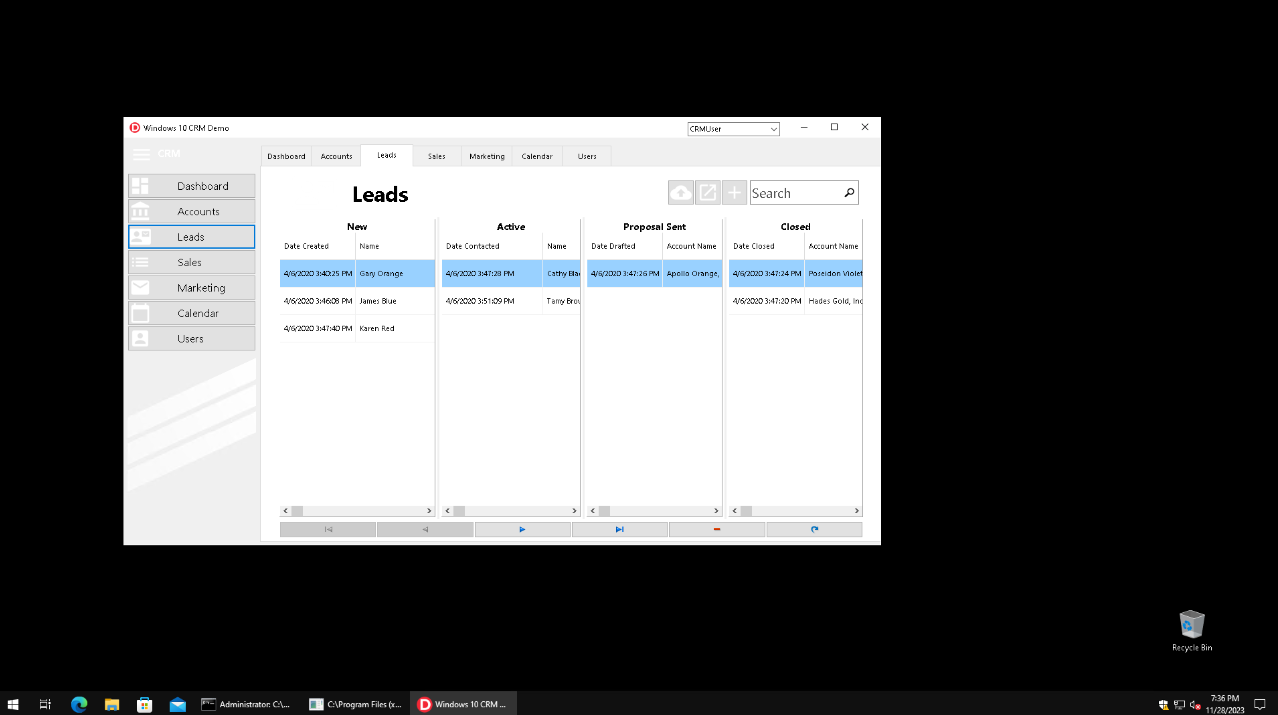
click "Leads"
Step 12: Finally, we will close the CRM application using a keyboard shortcut.
type alt+f4
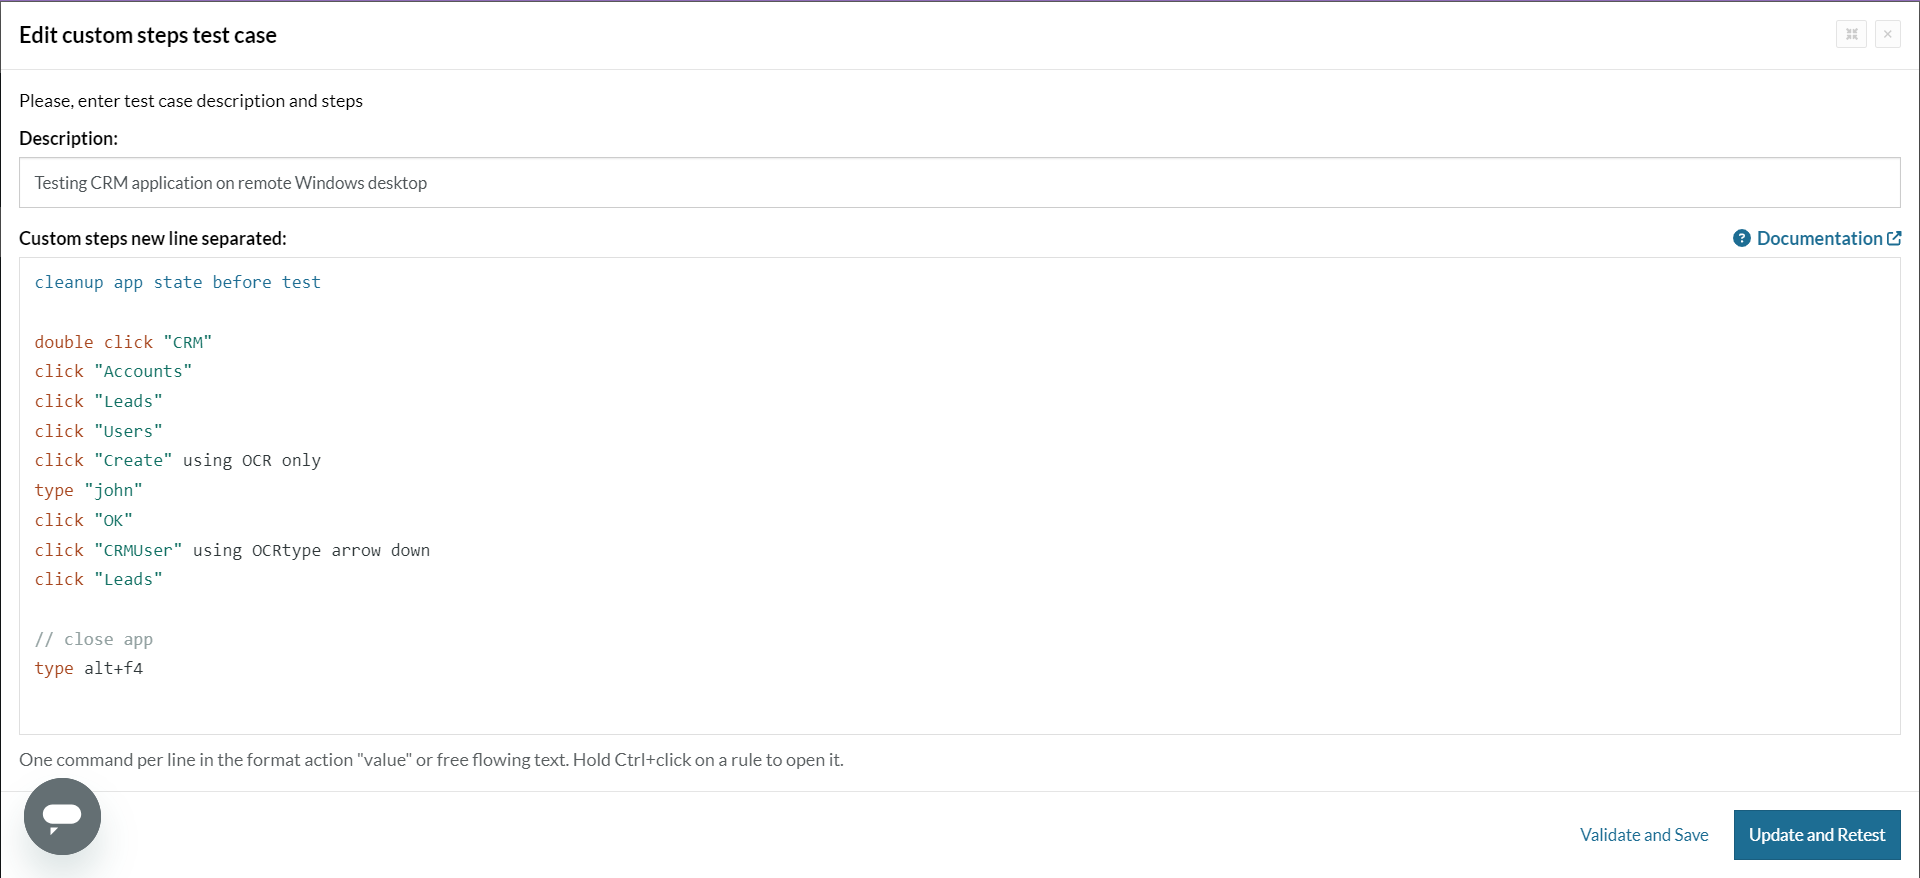
Complete Test Case
Here’s what the full test case will look like in testRigor.
cleanup app state before test

double click "CRM"
click "Accounts"
click "Leads"
click "Users"
click "Create" using OCR only
type "john"
click "OK"
click "CRMUser" using OCRtype arrow down
click "Leads"

//close app
type alt+f4
Viewing Test Results
Once the test is executed, you can view the execution details, such as execution status, time spent in execution, screenshots, error messages, logs, video recordings of the test execution, etc. In case of any failure, there are logs and error text that are available easily in a few clicks.
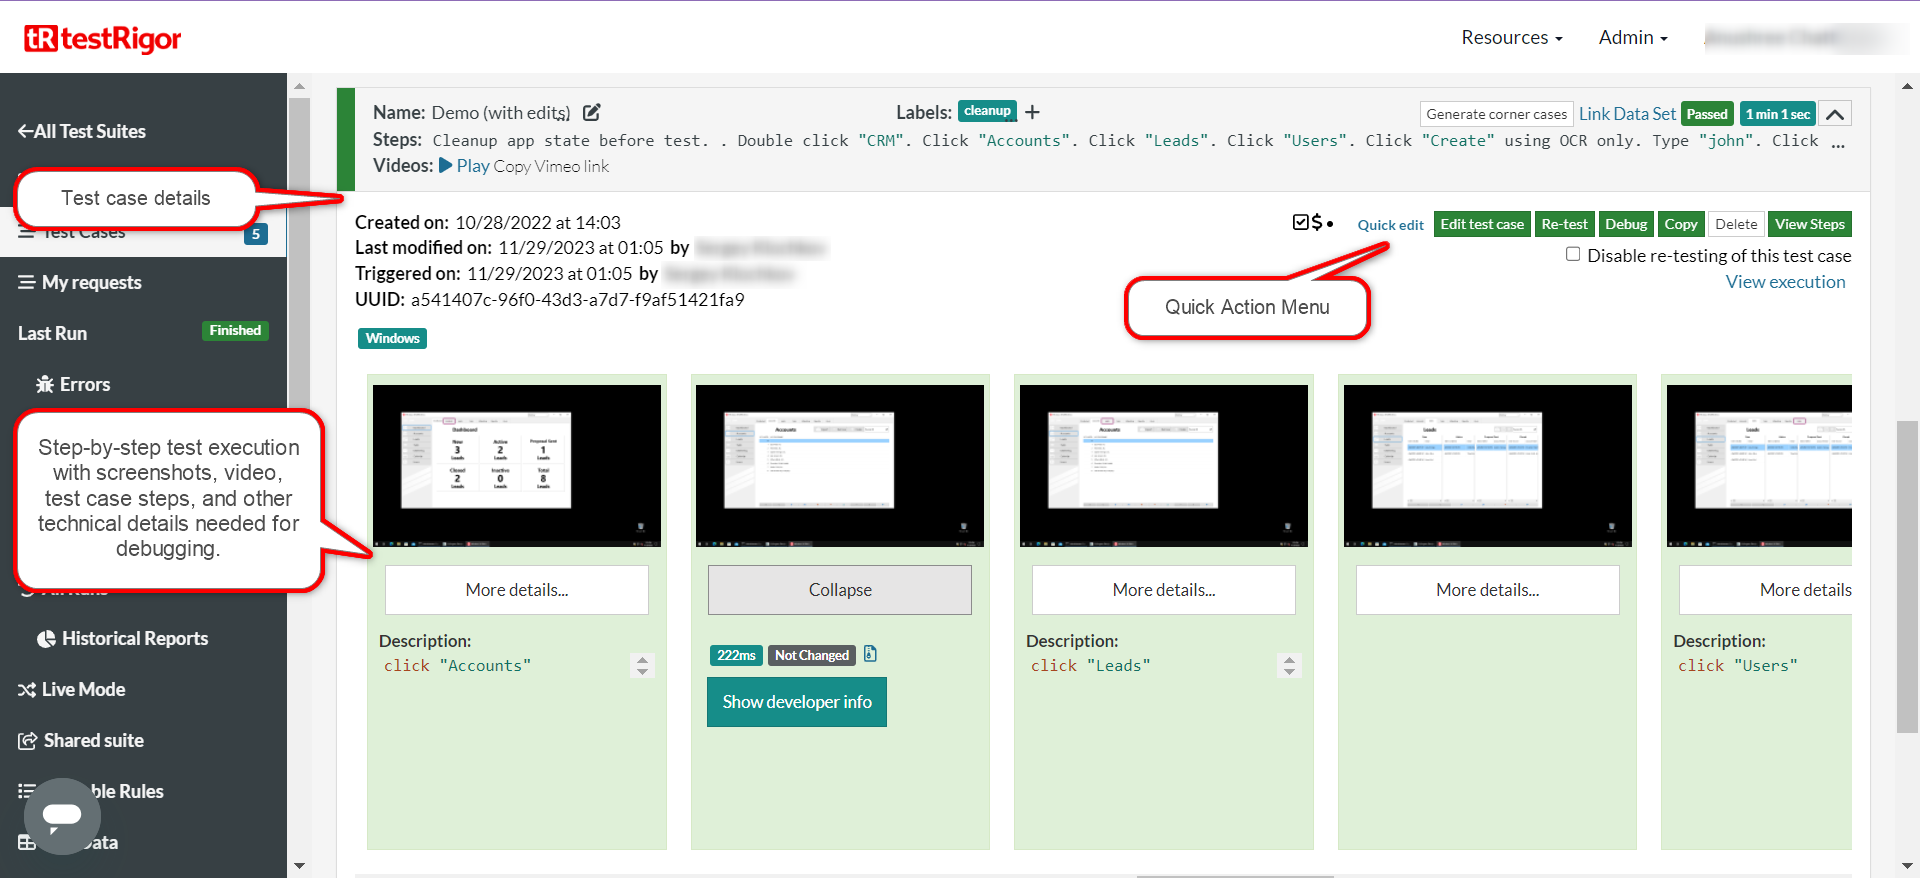
You can also download the complete execution with steps and screenshots in PDF or Word format through the View Execution option.
testRigor’s Capabilities
The above example shows how powerful a tool testRigor is for end-to-end testing across various platforms, including native apps meant for desktops. You can do a lot more with testRigor.
- Reusable Rules (Subroutines): We saw a glimpse of this feature in the above test case. You can easily create functions for the test steps that you use repeatedly. You can use the Reusable Rules to create such functions and call them in test cases by simply writing their names. See the example of Reusable Rules.
- Global Variables and Data Sets: You can import data from external files or create your own global variables and data sets in testRigor to use them in data-driven testing.
- 2FA, QR Code, and Captcha Resolution: testRigor efficiently manages the 2FA, QR Code, and Captcha resolution through its simple English commands.
- Email, Phone Call, and SMS Testing: Use simple English commands to test the email, phone calls, and SMS. These commands help validate 2FA scenarios, with OTPs and authentication codes being sent via email, phone calls, or via phone text.
- File Upload/ Download Testing: Execute the test steps involving file download or file upload without the requirement of any third-party software. You can also validate the contents of the files using testRigor’s simple English commands.
- Database Testing: Execute database queries and validate the results fetched.
- One Solution for All Problems: You can test across multiple platforms and browsers using testRigor. Whether it is functional testing, visual testing, end-to-end testing, desktop, mainframe, web, database, or API testing, this tool can take care of it for you. Read: How to use AI to test AI.
testRigor’s documentation library has commands specific to various platforms like desktops, examples of which you can see in the form of keyboard shortcuts in the above test case and mobile devices.
Additional Resources
- Setup for desktop app testing (Windows apps only)
- Quick video guide on how to test native desktop applications using testRigor
- Access testRigor documentation to learn about more useful capabilities
- Top testRigor’s features
How to perform end-to-end testing
| Achieve More Than 90% Test Automation | |
| Step by Step Walkthroughs and Help | |
| 14 Day Free Trial, Cancel Anytime |


