GitHub Actions CI with testRigor
|
|
In this video, you will learn how to integrate GitHub Actions CI with testRigor.
testRigor supports inbuilt integrations with most of the leading test management tools, CI platforms, repositories, etc. So, you do not need to depend on any third-party plugins or create hundreds of lines of code to integrate with any other application.
This article will explain how we integrate testRigor with the GitHub repository in a few simple steps.
Integrating testRigor with GitHub Repository
As we know, every growing organization has adopted Continuous Integration and Continuous Development today. Automation tests need to be triggered and executed for any code merge happening in the GitHub code branch to verify there is no failure due to the latest code changes. With testRigor, you can easily create this continuous integration pipeline.
Prerequisite
- You need to have a testRigor account. Also, you need to create a test suite with test cases for execution. If you are new to testRigor and want to learn about creating test scripts for different scenarios, these How-to Articles will help you.
- You need to have a GitHub account with a valid repository.
Steps for Integration
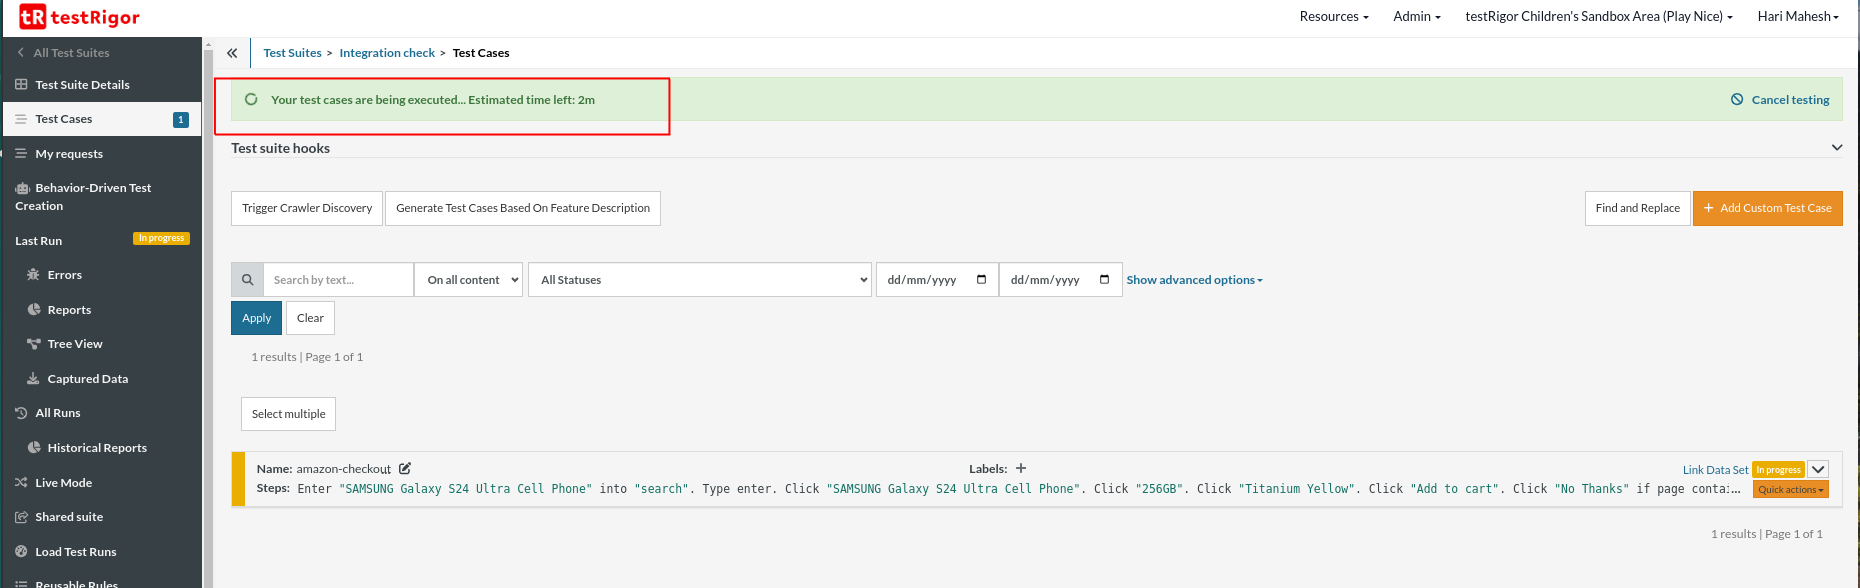
Step 1: Open the Test Suite in testRigor. On the left side menu, click the CI/CD Integration link. The CI/CD integration page is populated with pre-defined scripts.
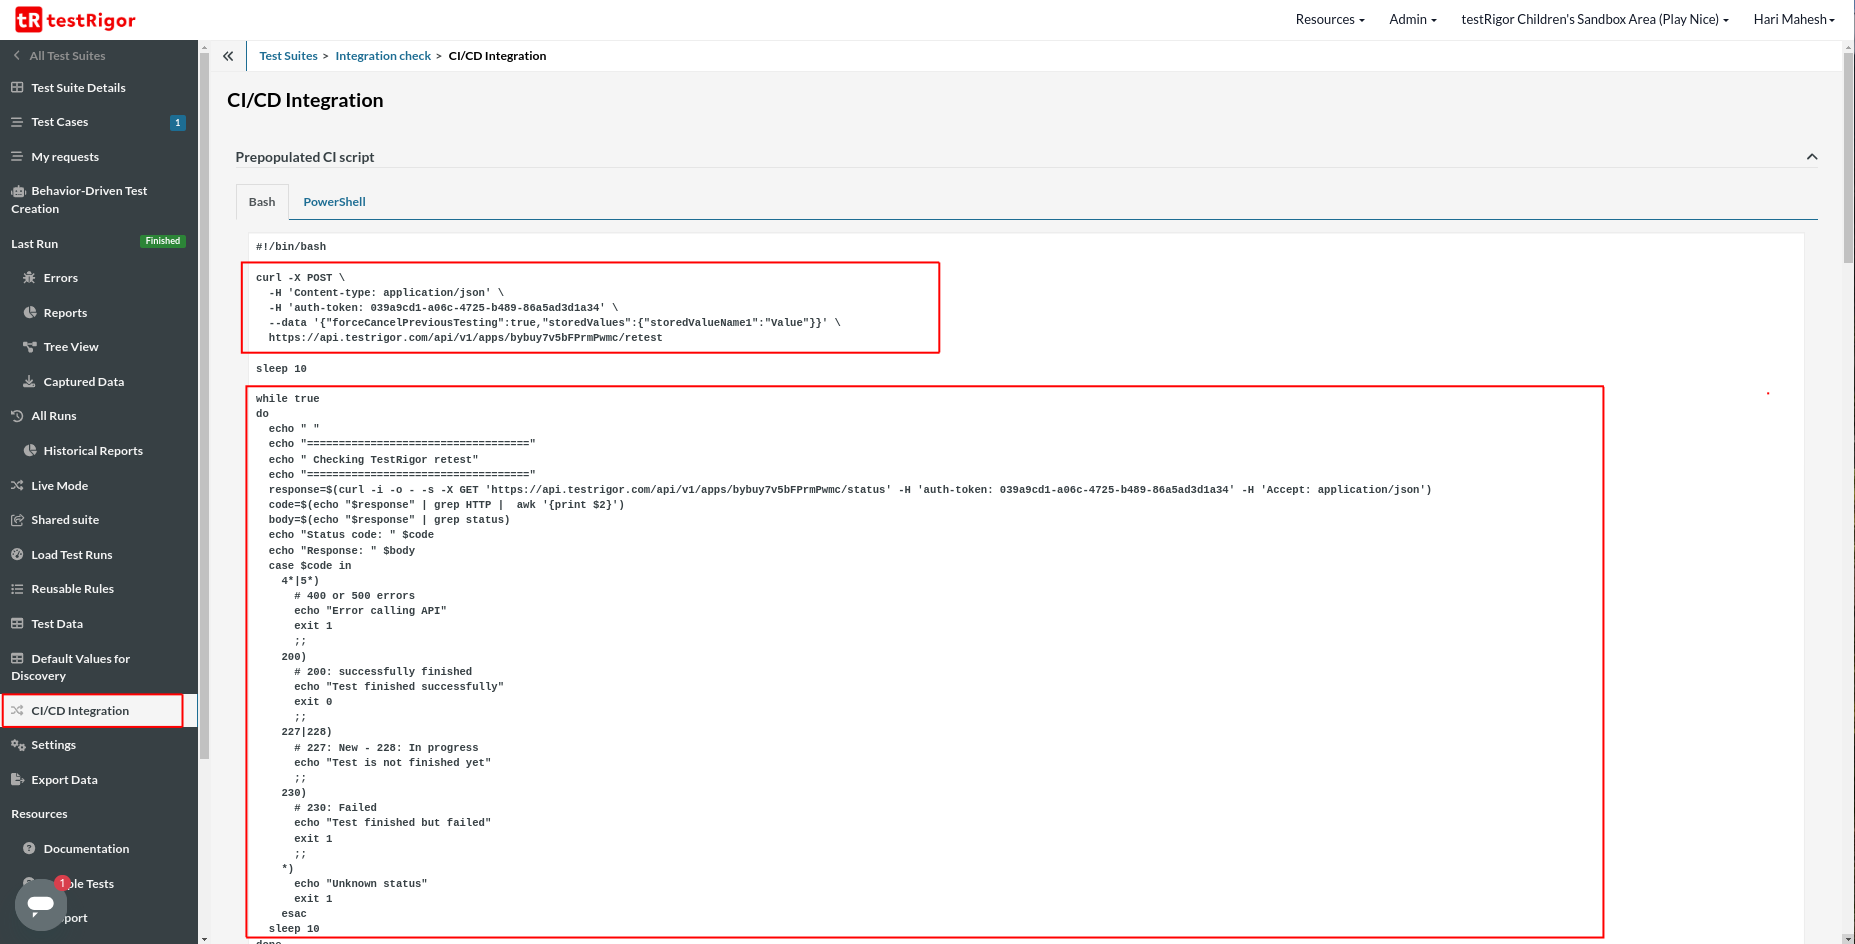
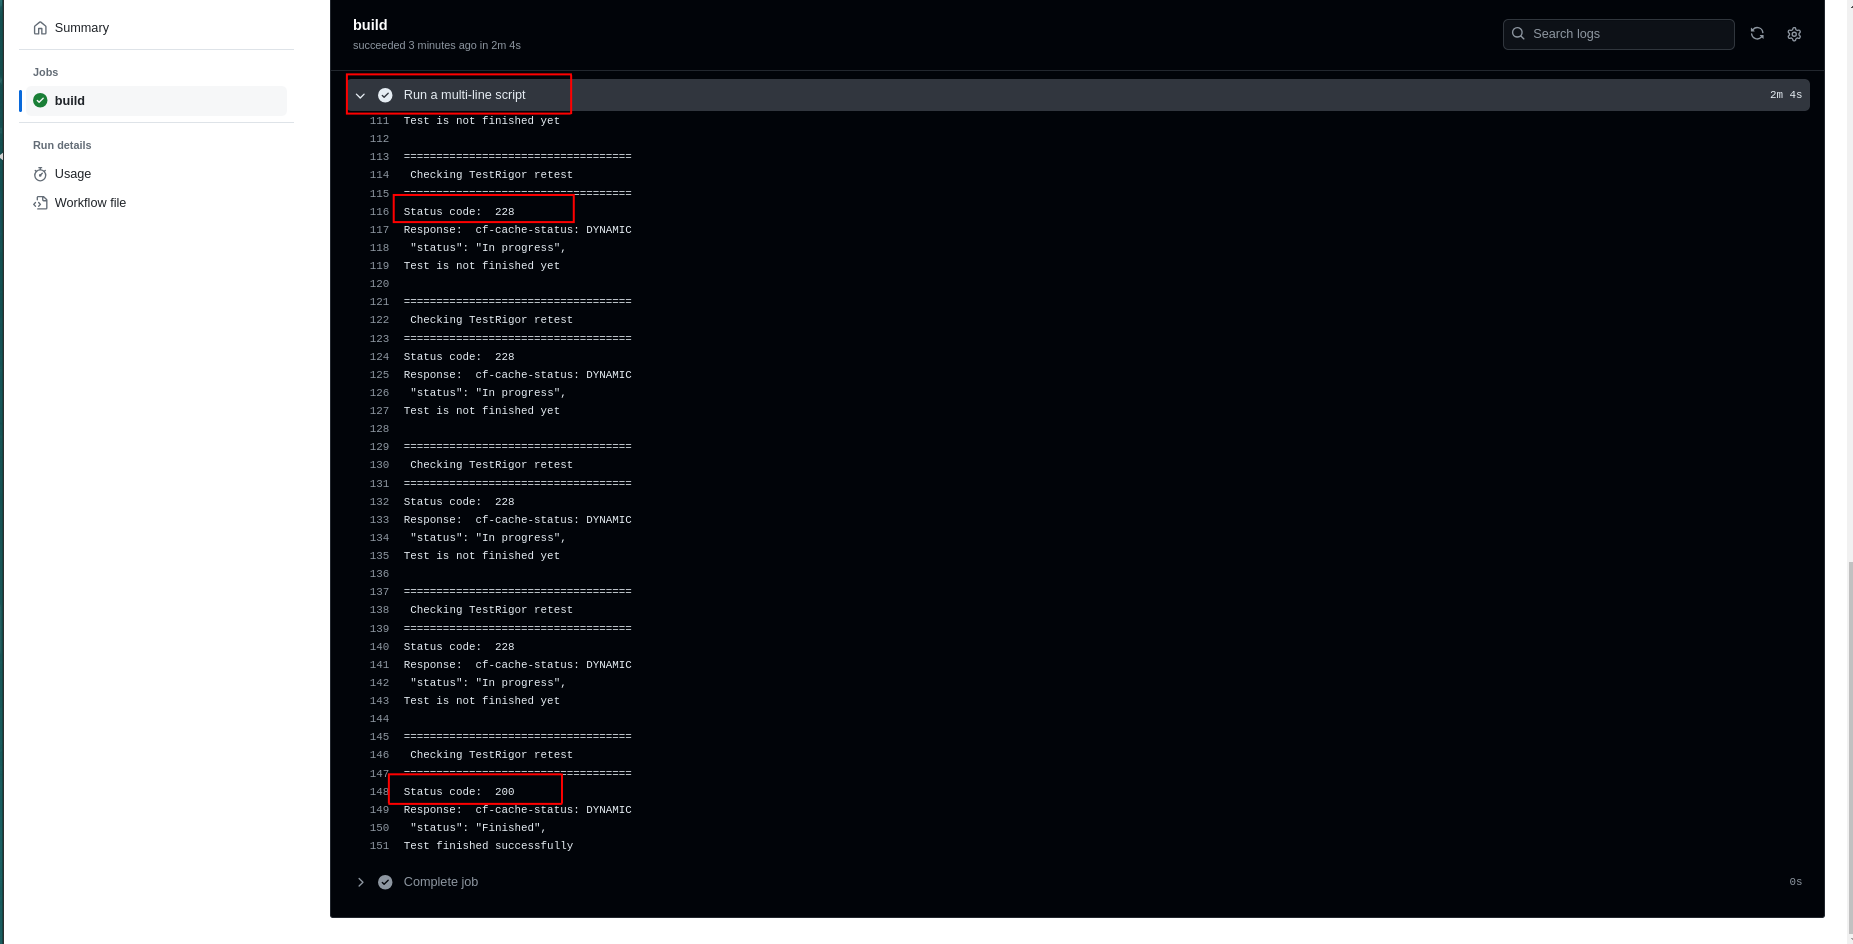
The above test script consists of multiple parts. The first part executes the tests in the test suite. The command contains the test suite authentication token unique to every test suite. Once that command is executed, the test suite will wait for 10 seconds, and then the loop will continue to execute. The script will check the results of the retest. Once the retest is complete, the script will exit.
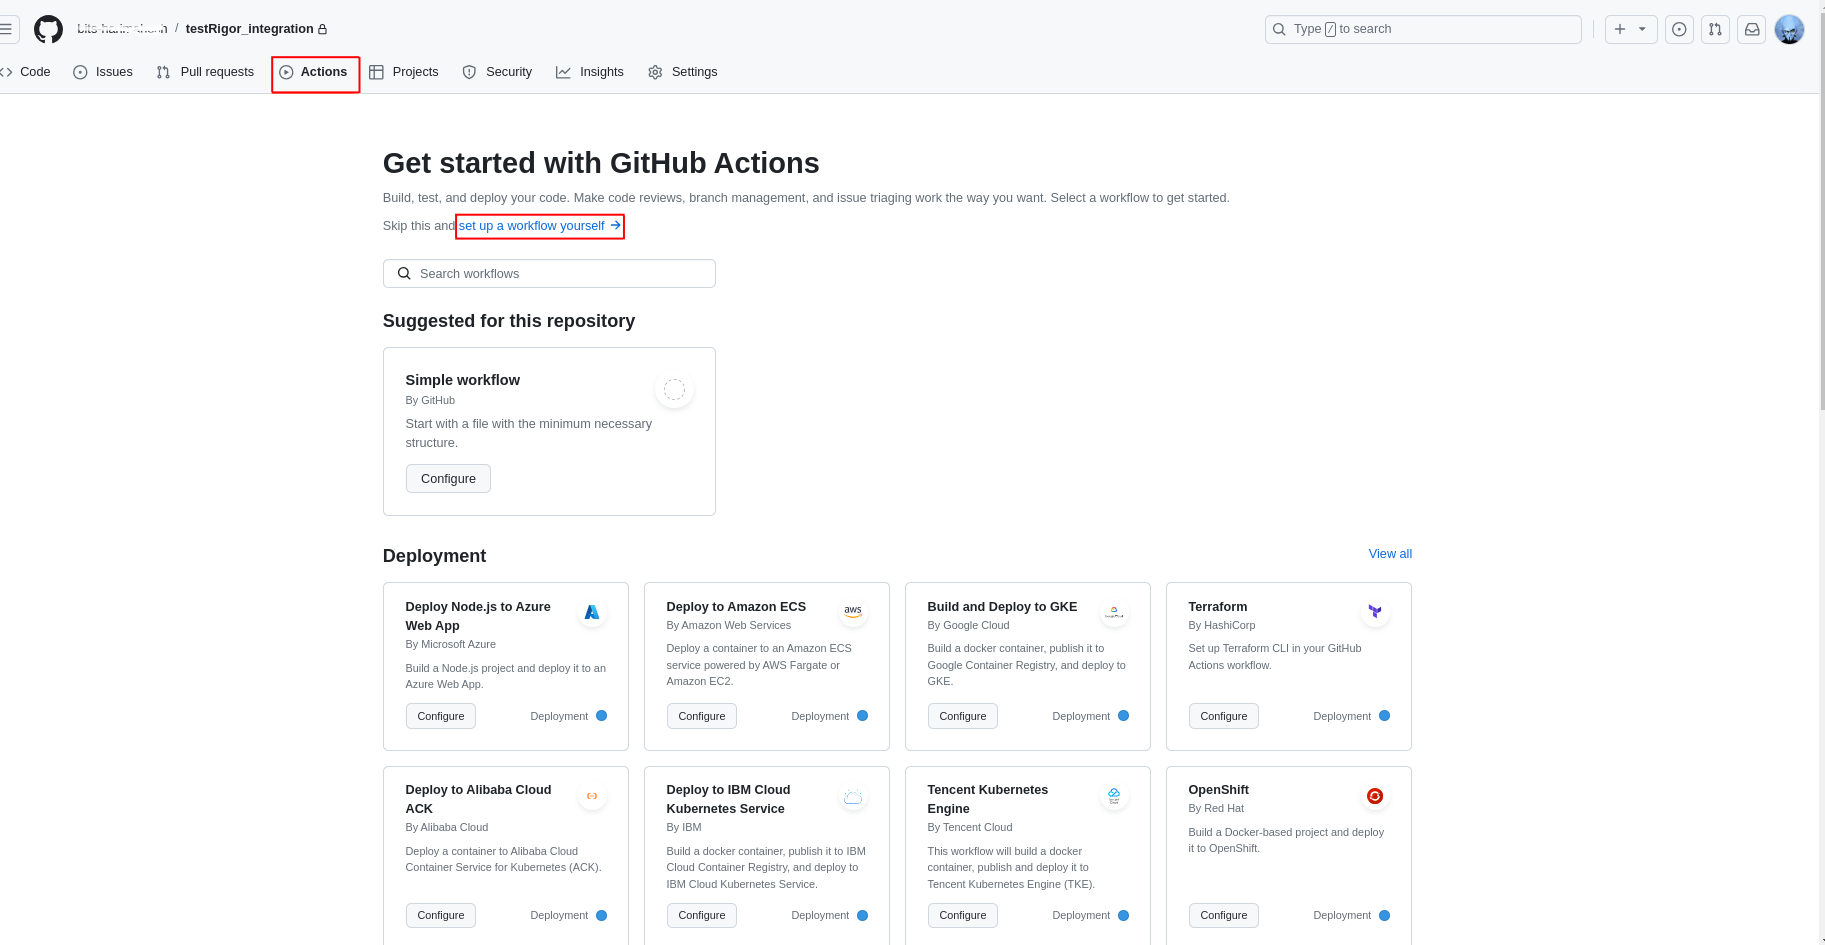
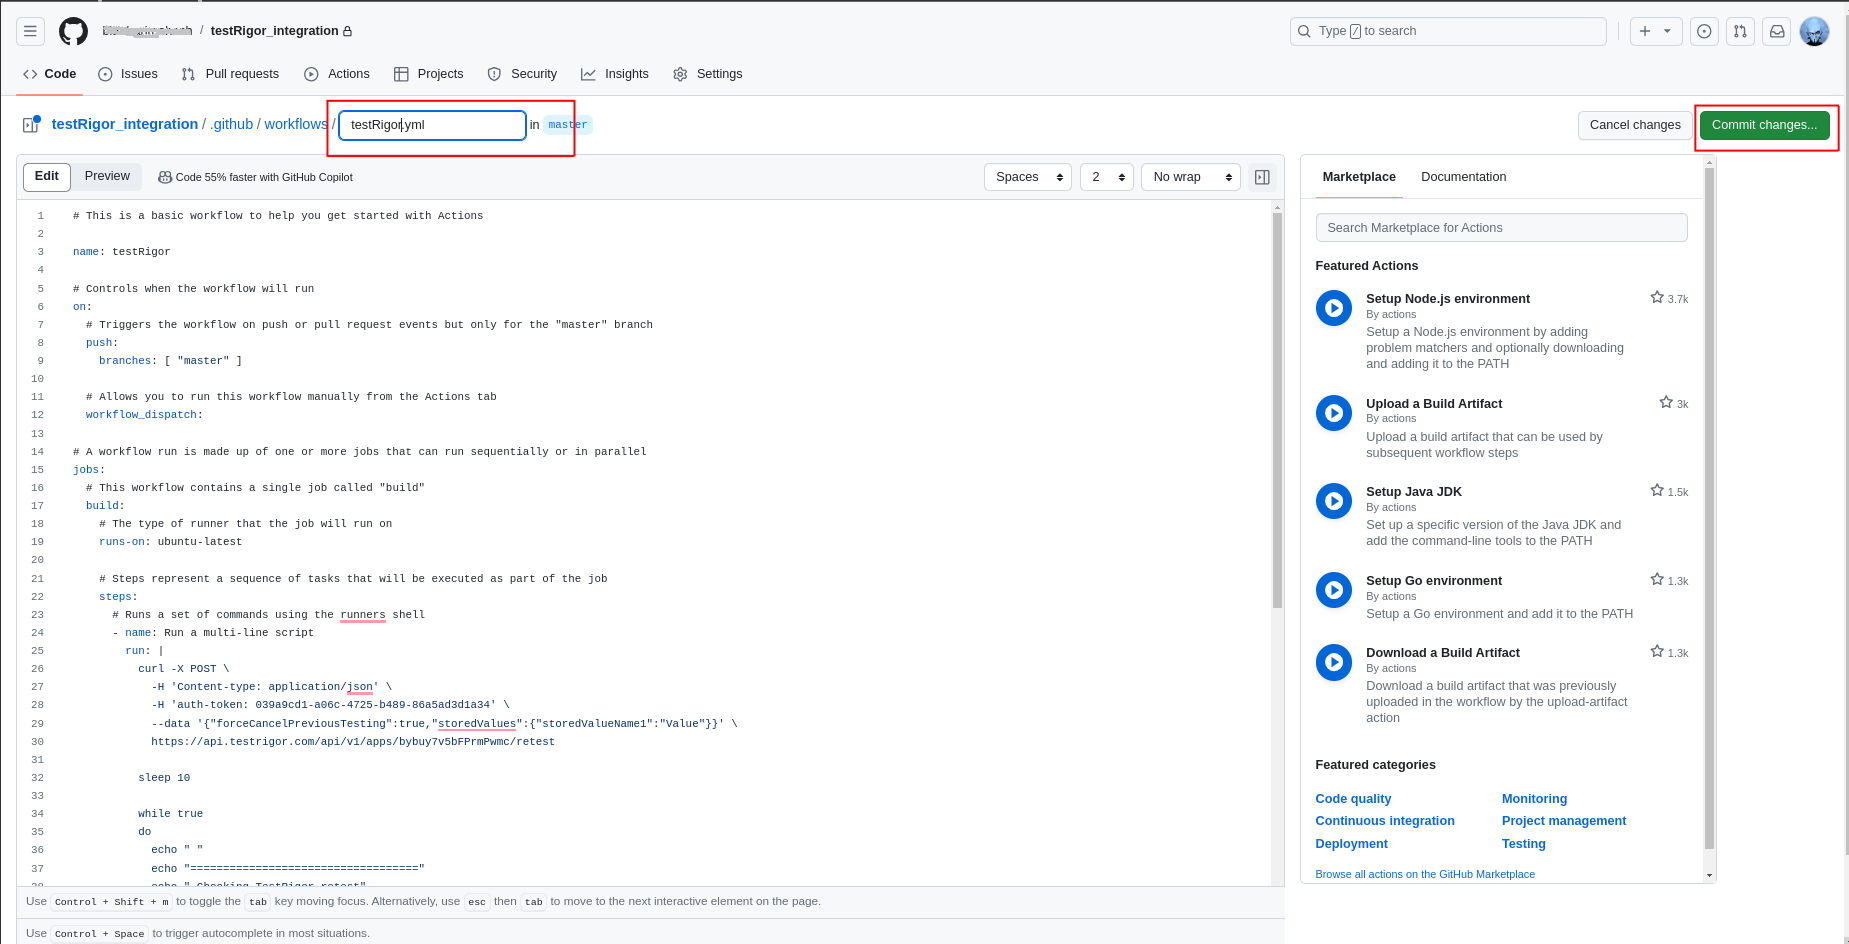
Step 2: Copy this script from the CI/CD Integration page, go to the GitHub repository, click on the Actions tab, and click the Set up a workflow yourself link.
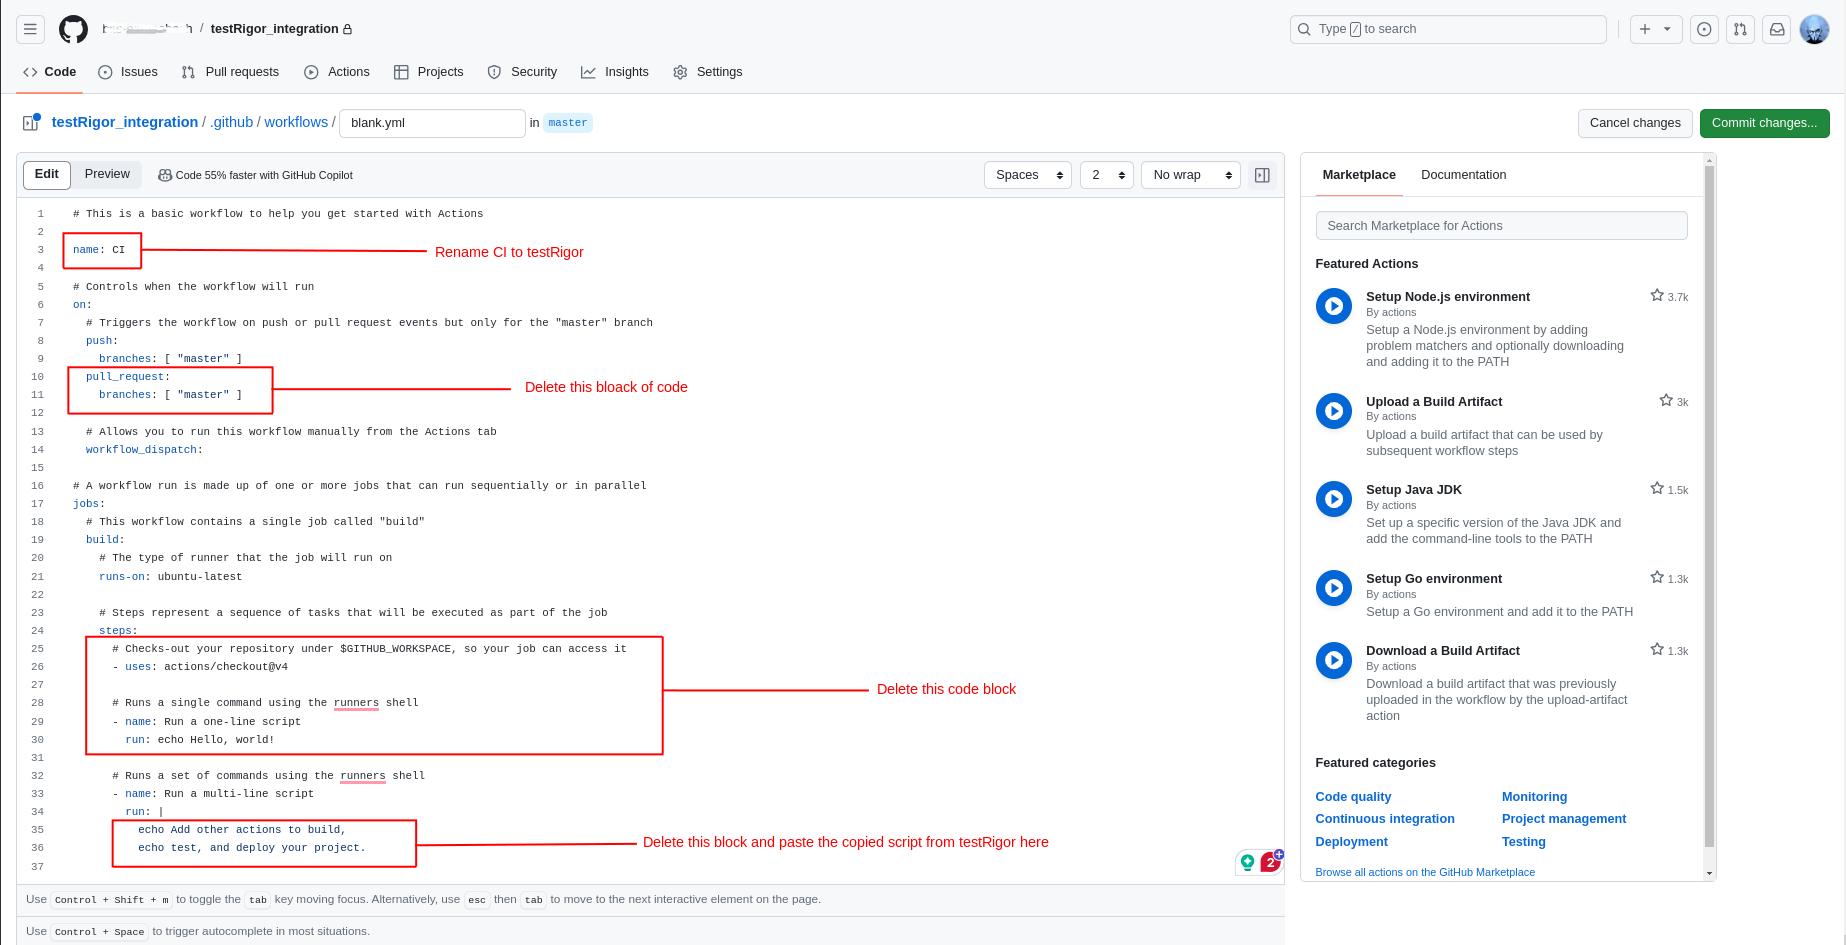
Step 3: The editor window will be displayed in GitHub with a file named “main.yml”. You need to make a few changes in that file.
- name: Rewrite it to “testRigor”
- pull_request: Not required, so let’s delete that option.
- steps: Delete the one-line script
You can check the below image for more details.
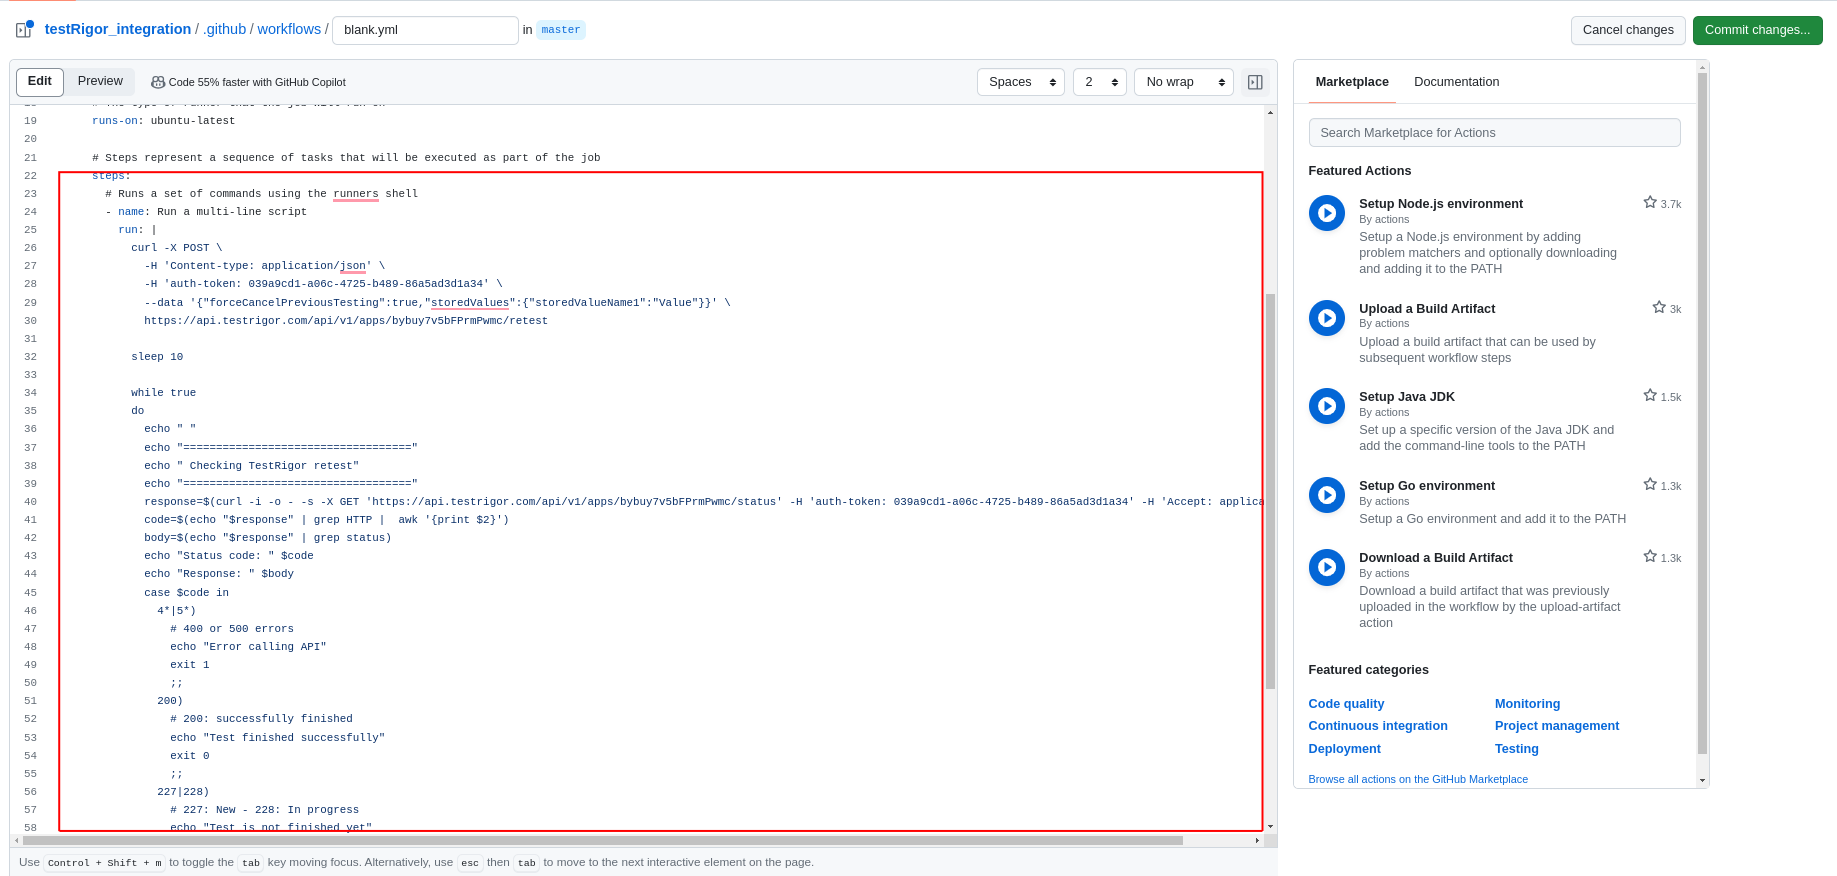
So, the updated file (after deletion and renaming) and before pasting the script will look like this.

Step 4: Paste the copied script from testRigor’s CI/CD Integration screen to the mentioned place in Github’s main.yml file.
Step 5: Let us change the file name from main.yml to testRigor.yml and commit the file. Click Commit changes.
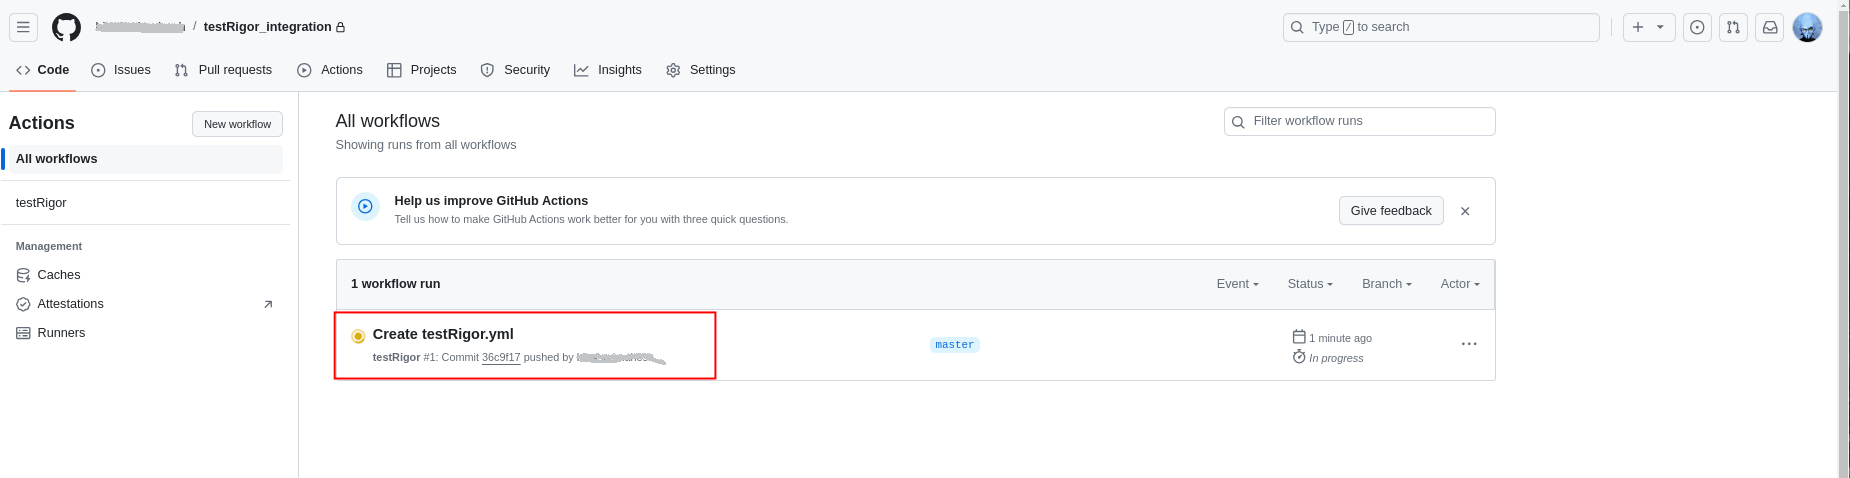
Step 6: Once you commit the file, you can see the test suite is triggered in testRigor, and the workflow is also in progress in GitHub.
Once the test execution is complete in GitHub, click the file to see the execution summary. Click on Run a multi-line script. The initial response will be 228, which means the test execution is in progress. Finally, you get status code 200, which means the execution result is passed. That is why the build has a green tick mark.
Step 7: Now, let’s create another file in the repo branch and see if the test execution triggers. Click on Add file and then Create a new file.

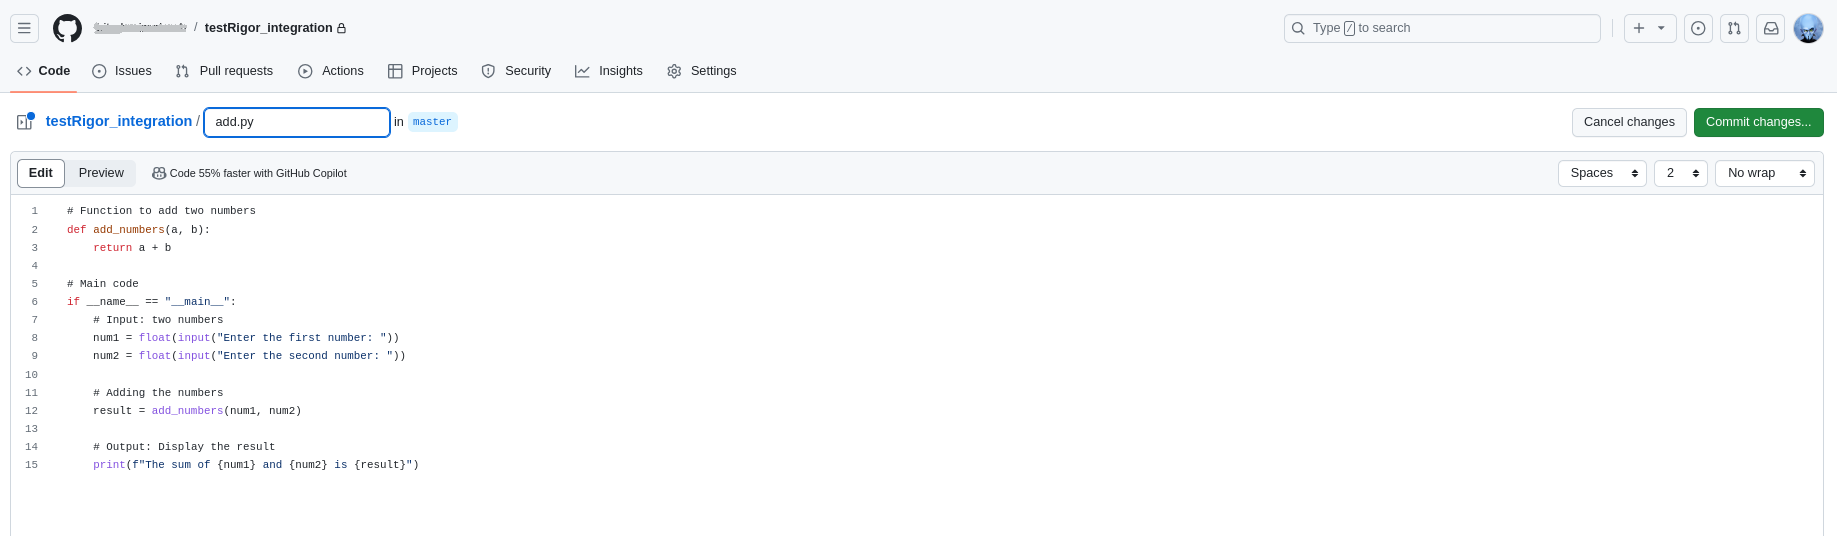
Step 8: Let us add a Python script file add.py for adding two numbers and commit the file.
Step 9: Now, you can see that the test execution has been triggered, and the result will be shown.

That’s all about integrating testRigor with GitHub Actions CI for continuous integrations. As you can see, it’s very simple, quick, and easy. You can also watch this video tutorial to see how to integrate testRigor with GitHub Actions CI:
testRigor’s Capabilities
Apart from the simplistic test case design and execution, testRigor’s advanced features help you test your application using simple English commands.
- Reusable Rules (Subroutines): You can easily create functions for the test steps that you use repeatedly. You can use the Reusable Rules to create such functions and call them in test cases by simply writing their names. See the example of Reusable Rules.
- Global Variables and Data Sets: You can import data from external files or create your own global variables and data sets in testRigor to use them in data-driven testing.
- 2FA, QR Code, and Captcha Resolution: testRigor efficiently manages the 2FA, QR Code, and Captcha resolution through its simple English commands.
- Email, Phone Call, and SMS Testing: Use simple English commands to test the email, phone calls, and SMS. These commands help validate 2FA scenarios, with OTPs and authentication codes being sent via email, phone calls, or via phone text.
- File Upload/ Download Testing: Execute the test steps involving file download or file upload without the requirement of any third-party software. You can also validate the contents of the files using testRigor’s simple English commands.
- Database Testing: Execute database queries and validate the results fetched.
testRigor enables you to test web, mobile (hybrid, native), API, and desktop apps with minimum effort, time, and maintenance, singlehandedly.
| Achieve More Than 90% Test Automation | |
| Step by Step Walkthroughs and Help | |
| 14 Day Free Trial, Cancel Anytime |


