WooCommerce Testing
|
|
WooCommerce transforms ordinary WordPress websites into complete online shops with its open-source and adaptable features. It has many different functions, such as safe payment methods, adjustable delivery choices, and so on, which you can customize for your own business requirements.
The plugin comes with many add-ons that provide extra features like making reservations, handling recurring payments, and working together with different software applications. WooCommerce is mainly created with PHP, the same programming language that WordPress uses.
PHP is a server-side scripting language widely used for web development. Besides PHP, WooCommerce utilizes different web technologies for both its user interface and server-side operations.
According to the testing pyramid, you can test your WooCommerce application through
Unit Testing
As a project grows, it becomes difficult to keep track of every single method and class written. Through unit testing, you can ensure that your methods and classes, that is, various units of code, are working as expected.
Like WordPress, WooCommerce works with PHP. Thus, PHPUnit is the best way to get your unit testing done. When it comes to unit testing, you want your test cases to be lightweight and focus on just a single outcome at a test case level. You can make use of stubs and mocking to mimic all those complex WordPress functionalities without booting the entire application for every test run.
There are some pre-defined unit tests that you can import and use to test your project, along with creating custom test cases. Using these pre-defined test cases also gives you access to a couple of useful helper functions, like creating customers or sample orders.
// Use the necessary PHPUnit and WooCommerce classes

class ProductFunctionsTest extends TestCase {
  private $product_id_on_sale;
  private $product_id_not_on_sale;

  protected function setUp(): void {
    $this->product_id_on_sale = $this->create_product(true);  //on sale product
    $this->product_id_not_on_sale = $this->create_product(false); //not on sale product
  }

  private function create_product($on_sale) {
    $product = new WC_Product_Simple();
    $product->set_regular_price(10);

    if ($on_sale) {
      $product->set_sale_price(5);
    }

    $product->save();
    return $product->get_id();
  }

  // Test if 'is_product_on_sale' returns true for products on sale
  public function testProductOnSale() {
    $this->assertTrue(is_product_on_sale($this->product_id_on_sale), 'Product should be on sale');
  }

  // Test if 'is_product_on_sale' returns false for products not on sale
  public function testProductNotOnSale() {
    $this->assertFalse(is_product_on_sale($this->product_id_not_on_sale), 'Product should not be on sale');
  }

  // Clean up the created products
  protected function tearDown(): void {
    wp_delete_post($this->product_id_on_sale);
    wp_delete_post($this->product_id_not_on_sale);
  }
}
Integration Testing
Through integration testing, you can ascertain if different modules are working properly together or not. In websites dealing with online stores, you will have the need for this. As the project grows, you need to have such checks and balances where the interworking of modules is tested instead of relying completely on end-to-end testing for it.
Here are some scenarios where you might need to perform integration testing:
- Plugins/Extensions: You need to test how your own-made plugins or extensions from others work with WooCommerce’s main functions.
- External Services: When we do integration testing, it also includes checking how well the system works with outside services like those that calculate shipping costs, figure out taxes, manage customer relationships, and analyze data.
- Subscriptions: When your application integrates WooCommerce subscriptions, it’s important to check the ongoing payment system, the renewal of subscriptions, and how users control their subscriptions.
- Order Management UI: Checking the connection between our system for handling orders and what customers see on their screens covers placing orders, tracking order progress, managing stock levels, and linking up with delivery services.
- Account Management Services: Making certain that the functionalities for user sign up, signing in, password changing, and managing account details integrate smoothly with the WooCommerce shop.
You can use the same tools you used for unit testing, like PHPUnit, to write integration tests.
End-to-End Testing
Imagine if your customer placed an order but is not able to see a confirmation for the same. This will impact business and create a bad reputation for the company. When it comes to websites behaving as storefronts, ensuring that common workflows are functioning properly is a must-have.
This is where end-to-end testing comes in, as it looks at verifying user workflows. End-to-end testing is focused on the user’s experience of the product rather than the developer’s.
There are many tools in the market that can be used to perform end-to-end testing on WooCommerce-based applications.
testRigor
Software testing has come a long way since the incorporation of AI. This has made it simpler to create tests and lessened the time needed for maintaining them, expanding its influence broadly.
Evidence can be seen in the growing amount of tools for test automation that provide these advantages. One such generative AI-powered tool is testRigor.
testRigor overcomes Selenium’s limitations by leveraging AI to give you a seamless testing experience. It emulates a human tester to give you an unparalleled experience.
Using this tool you can create test cases in plain English language without worrying about XPaths or CSS locators of UI elements. Even test maintenance efforts are reduced drastically through self-healing.
Selenium
Selenium is a well-known open-source framework that enables you to automate many different testing scenarios from start to finish. WebDriver plays a vital role in Selenium, enabling users to program browser tasks like opening websites, clicking on links, completing forms, and retrieving information from web pages.
Selenium also gives ways to confirm and check different elements and attributes on websites, helping users make sure the expected actions and information are correct. It supports various programming languages like Java, Python, C#, Ruby, and more.
However, Selenium has limitations, such as the need for a lot of work to maintain tests, challenges with testing across different platforms, and some instability from using locators based on elements like CSS and XPaths.
login
navigate to catalog
check that page contains "Chargable toothbrush C511X" to the left of "$50"
click on "Order" below "Chargable toothbrush C511X"
check that page contains "Chargable toothbrush C422W" to the left of "$60"
click "Order" below "Chargable toothbrush C422W"
click "cart"
click "checkout"
check that page contains "2 items"
check that page contains "Order total : $110"
Not just that, it also offers great features that make testing easy across different platforms. This proves useful since WooCommerce can also be integrated into mobile apps for cross-platform testing. If you wish to integrate your tests with CI/CD pipelines, you can easily do so by utilizing the various integrations testRigor offers.
How to perform End-to-end testing with testRigor
Consider we have a Woo Commerce store setup already. In the following steps we’ll be showing how to create a test suite to start creating end to end test cases.
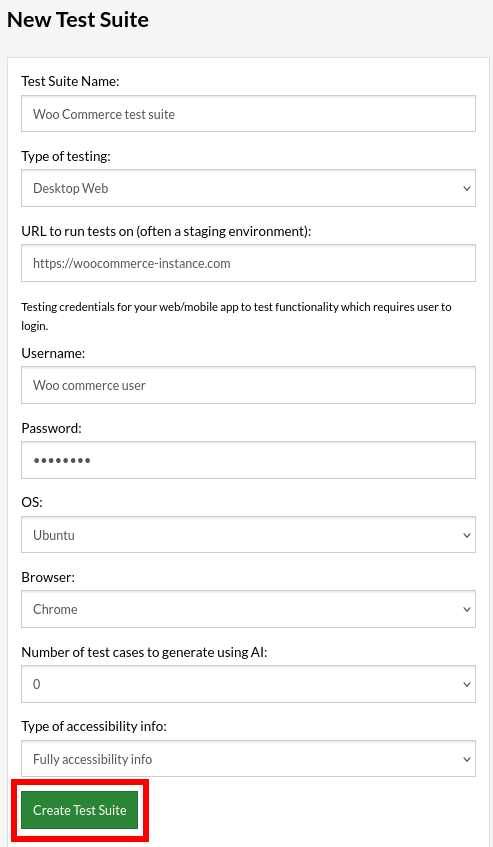
Step 1: Log in to your testRigor app with your credentials.
- Test Suite Name: Provide a relevant and self-explanatory name.
- Type of testing: Select from the following options: Desktop Web Testing, Mobile Web Testing, Native and Hybrid Mobile.
- URL to run test on: Input the application URL that you want to test.
- Testing credentials for your web/mobile app to test functionality which requires user to login: You can provide the app’s user login credentials here and need not write them separately in the test steps then. The login functionality will be taken care of automatically using the keyword
login. - OS and Browser: Choose the OS Browser combination on which you want to run the test cases.
- Number of test cases to generate using AI: If you wish, you can choose to generate test cases based on the App Description text, which works on generative AI.
Step 3: Click Create Test Suite.
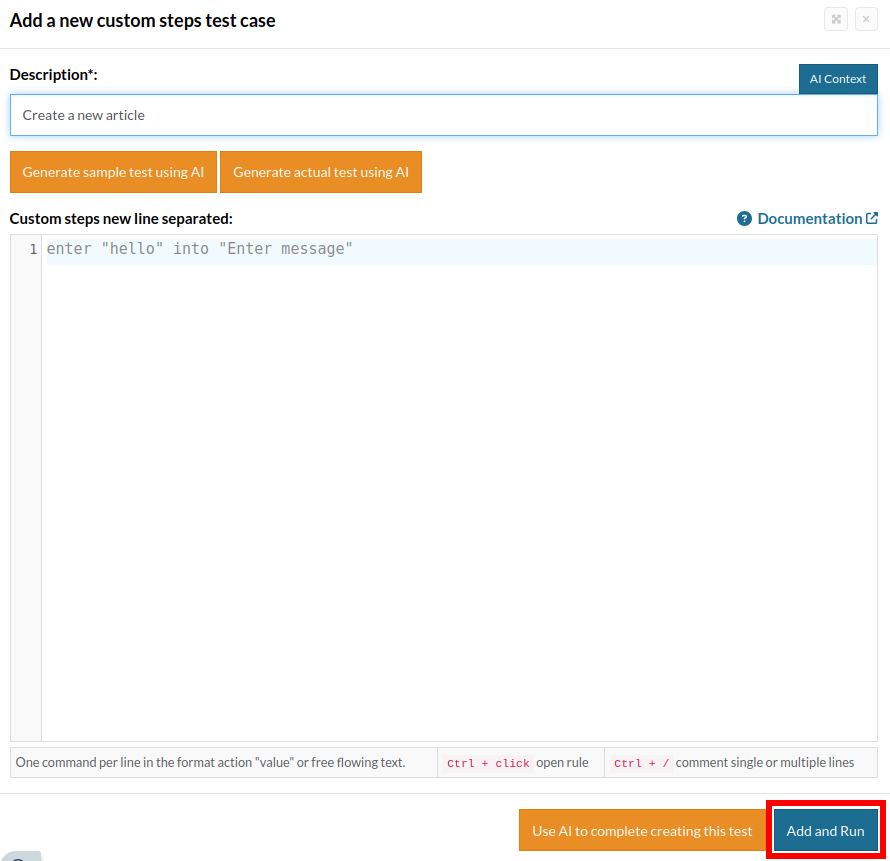
On the next screen, you can let AI generate the test case based on the App Description you provided during the Test Suite creation. However, for now, select do not generate any test, since we will write the test steps ourselves.
Step 4: To create a new custom test case yourself, click Add Test Case.

Step 5: Provide the test case Description and start adding the test steps, once finished, click “Add and Run”
Test Case: Create a new brand, assign it to a product and verify it’s visible on the online store
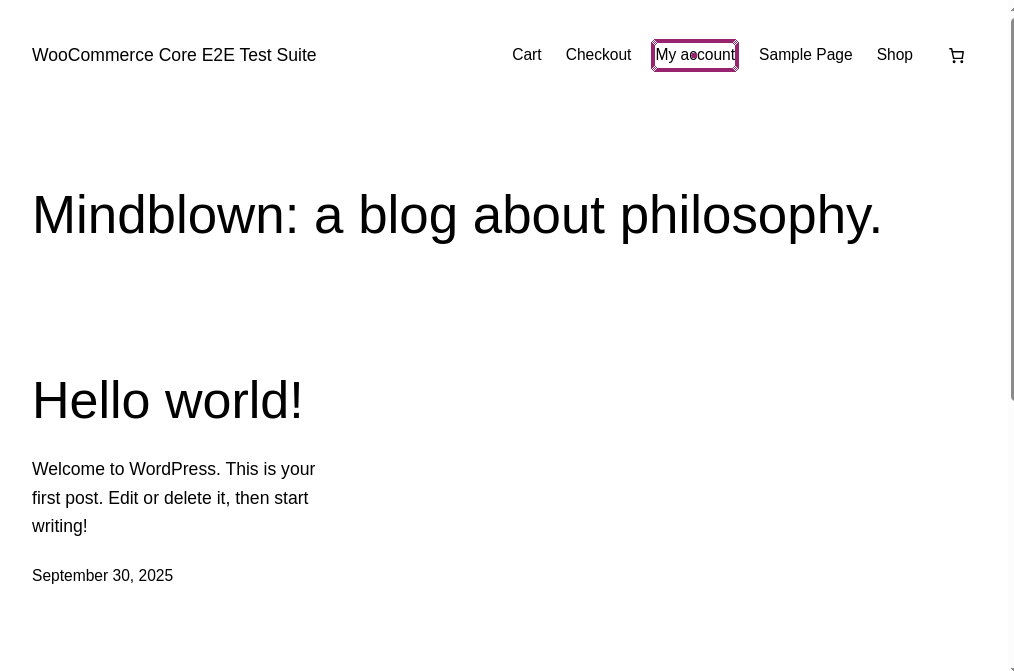
Now that we know how to set up a test suite, let’s create a test case. We will add the test steps on the test case editor screen one by one.
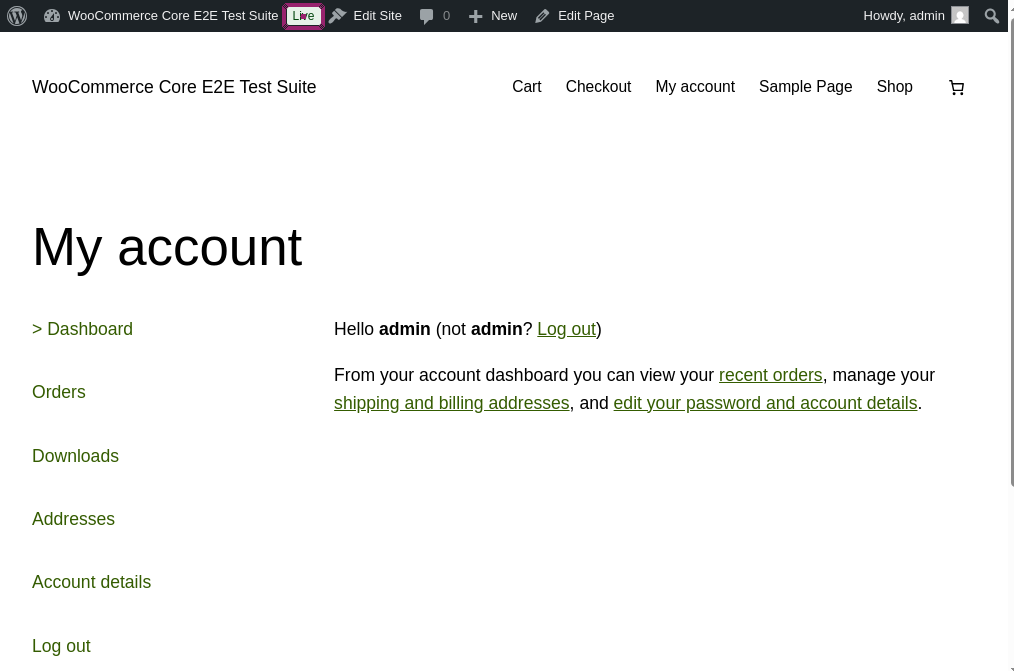
click "My account"
Step 2: now that we’re in the login screen we can use the login reusable rule to input all the data required to complete the login process. This rule will utilise the credentials we provided earlier in the suite creation section.
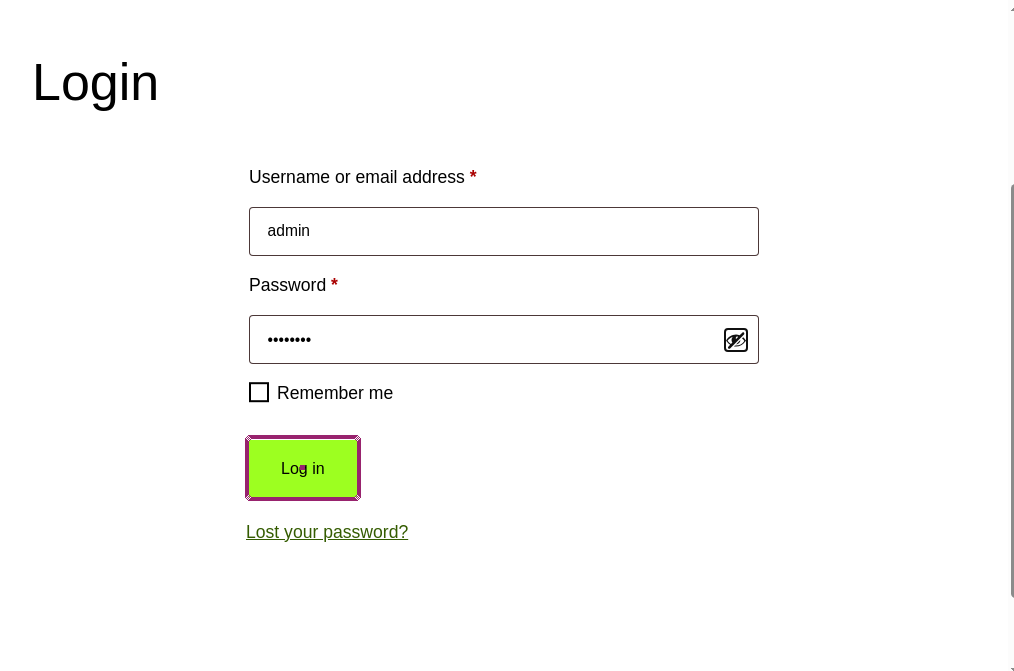
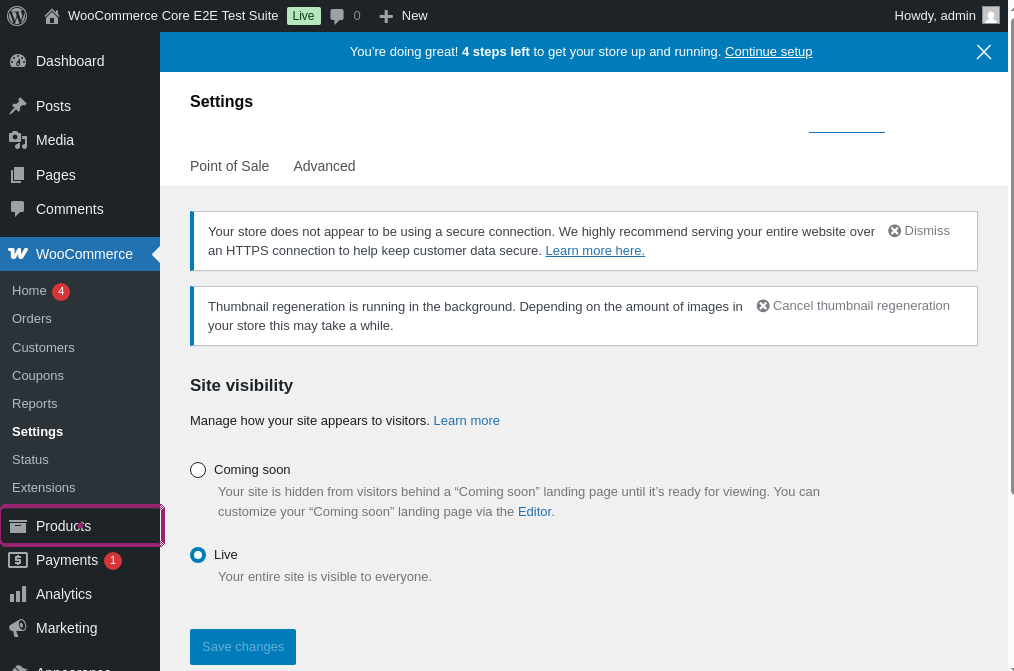
click "Live"
click "Products"
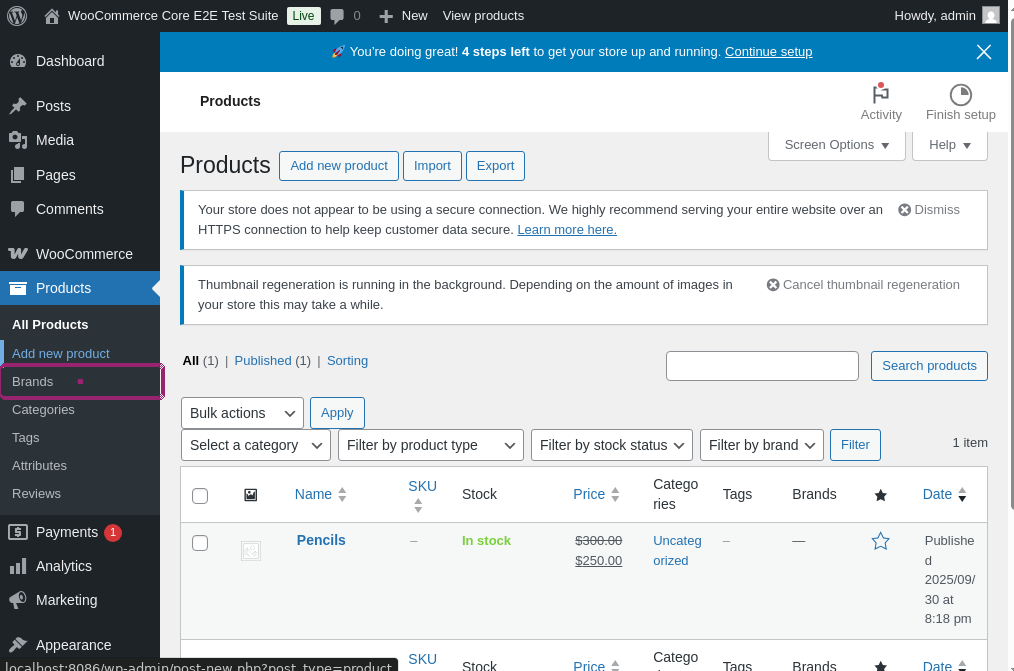
click "Brands"
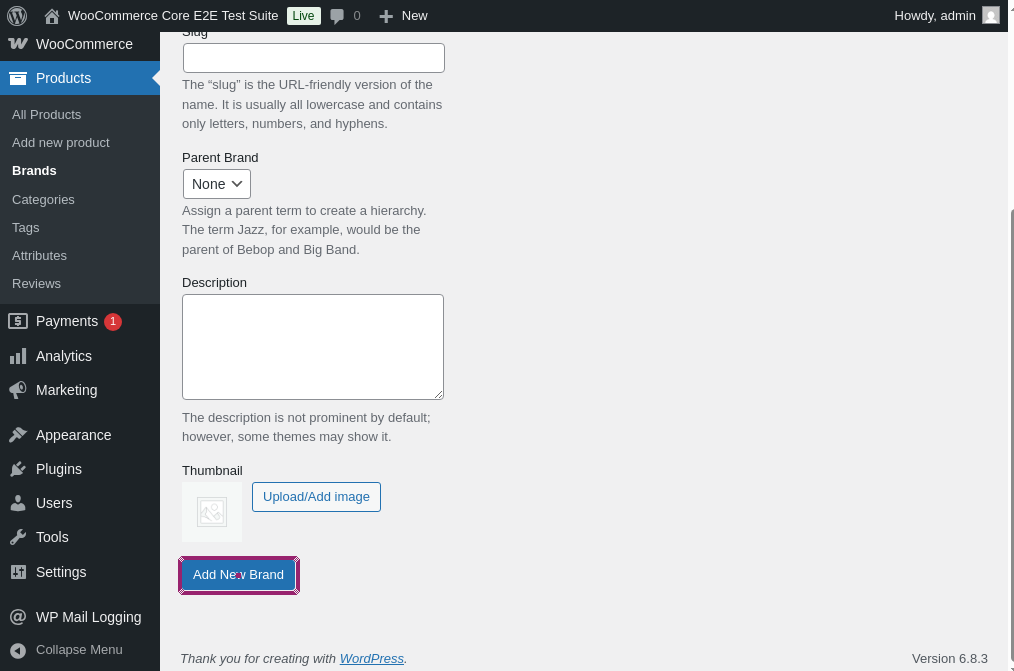
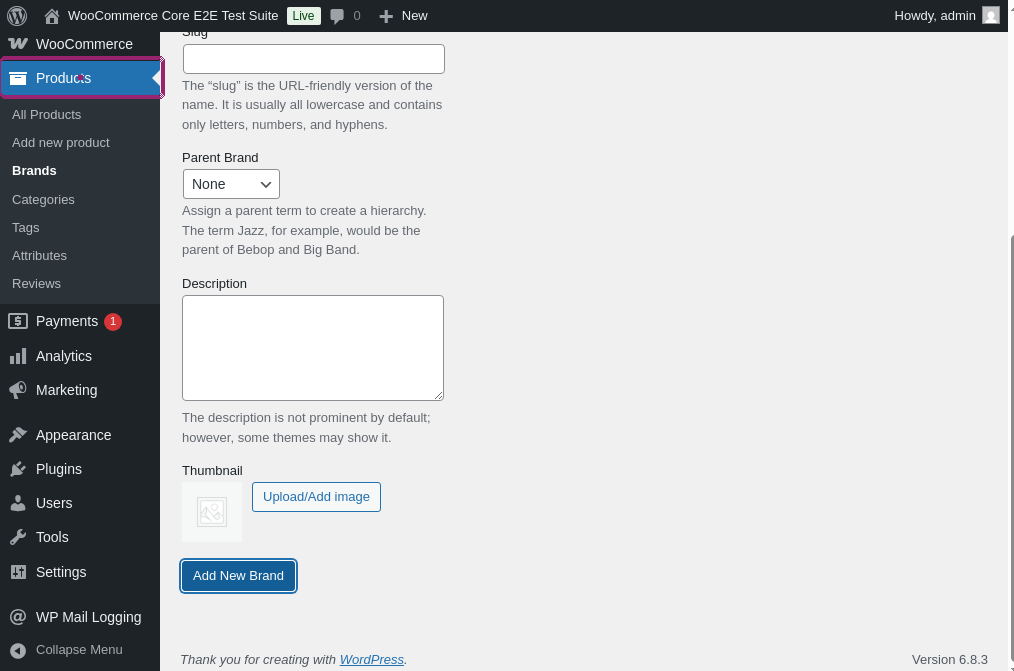
Step 6: having reached the brand menu, we are required to input a custom brand name.

enter "test brand" into "Name"
click "Add New Brand"
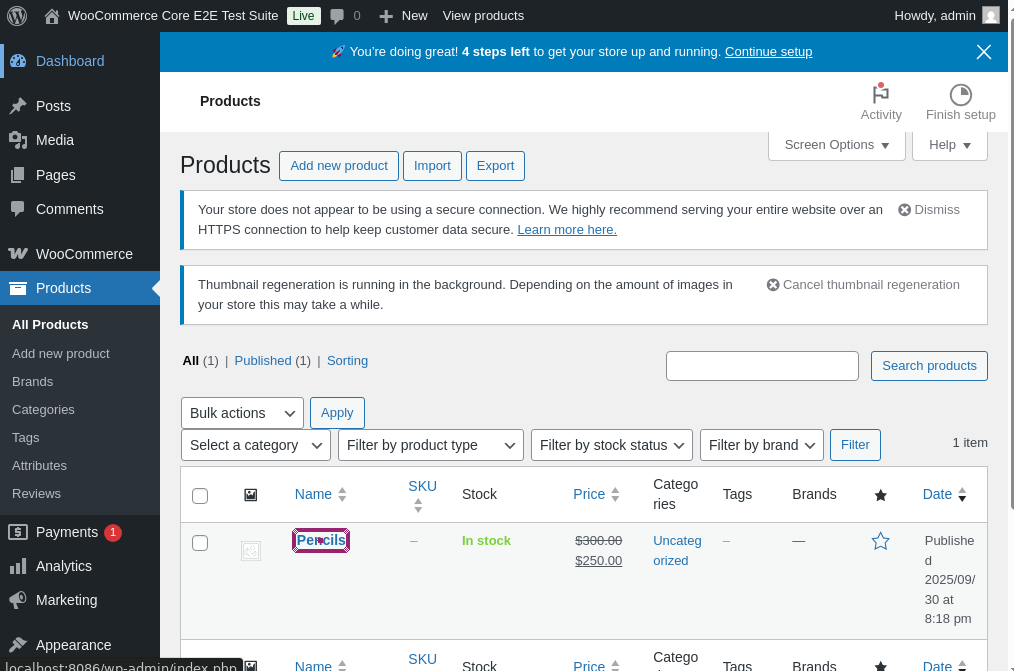
click "Products"
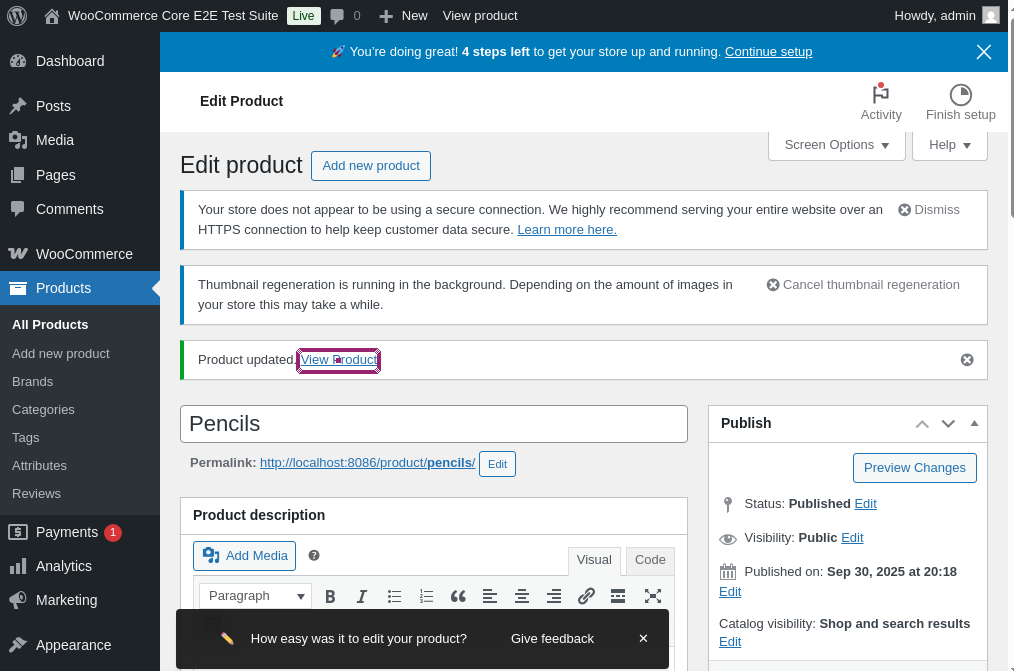
click "Pencils"
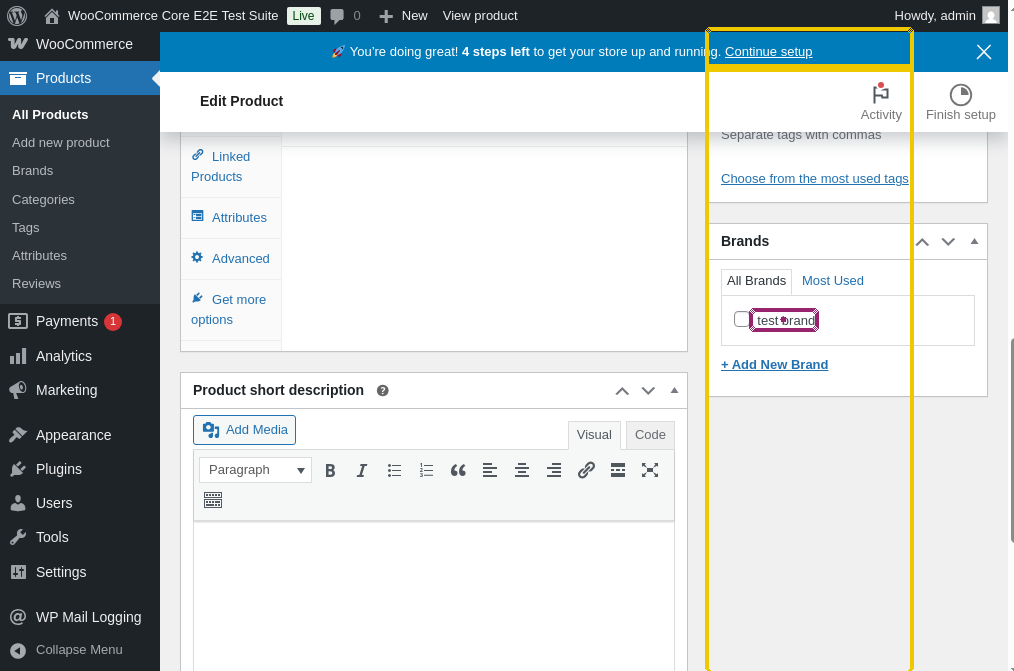
click "test brand" below "Product tags"
click button "Update"
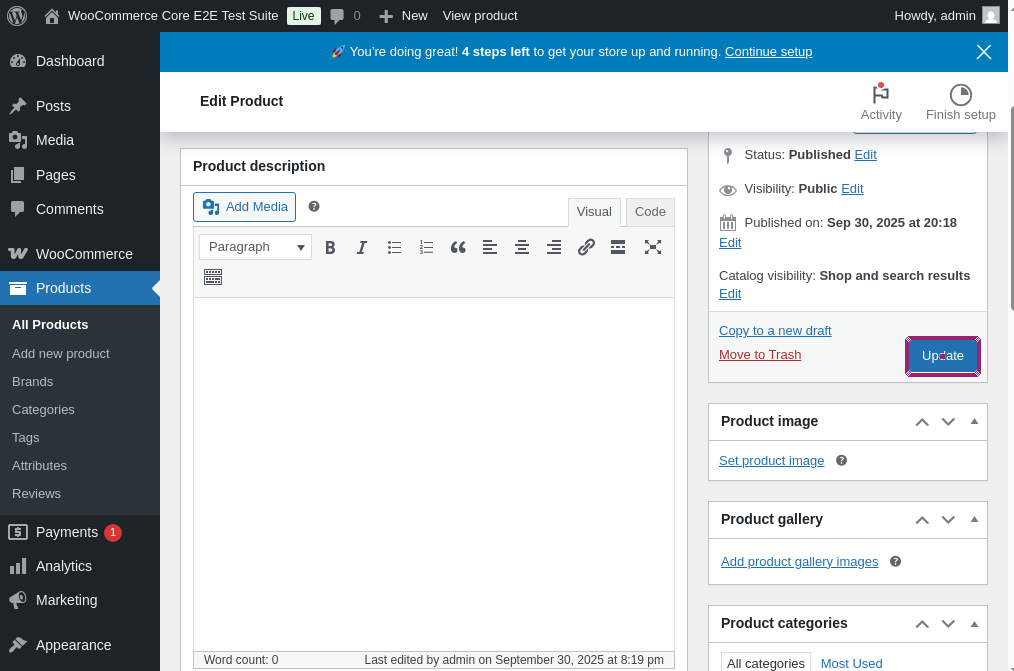
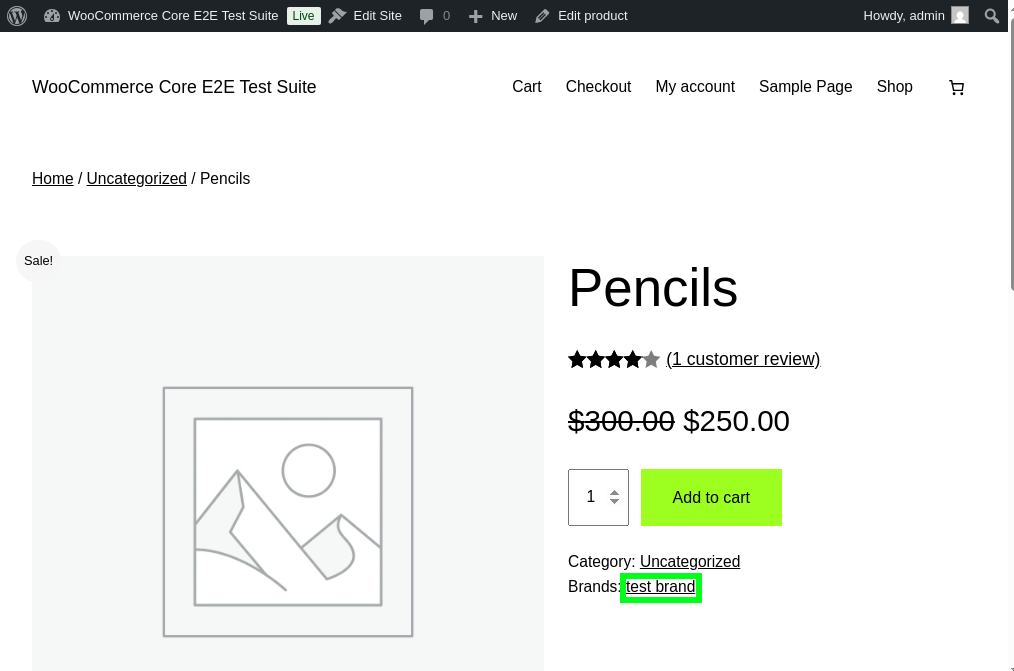
click "View Product"
check that page contains "test brand"
Complete test case
click "My account"
log in
click "Live"
click "Products"
click "Brands"
enter "test brand" into "Name"
click button "Add New Brand"
click "Products"
click "Pencils"
click "test brand" below "Product tags"
click button "Update"
click "View Product"
check that page contains "test brand"
Setting up the testing environment
open url "http://localhost:8086/wp-admin/"
login
skip wc setup
add a new product "Pencils"
add coupon "Pencil free"
click "Coming soon"
click exactly "Live"
click "Save changes"
check that page contains "Live" on the left of "Howdy"
One thing to note; this script is making use of custom-made reusable rules, you can find them here
Test cases to get you started with end-to-end testing
We’ve created a set of prebuilt test cases that you can run immediately. These tests cover a wide range of functionalities. Below there’s a brief description of what feature each test case is testing and a link to its execution:
-
Make a review as customer, check that other users can see it: in here we log in as a customer to the store then write a review for a product, after that we check with other user that the review was successfully submitted. Test case execution.
log in as customer
click "Shop"
click "Pencils"
click "star-4"
click button "Submit"
type "Test review"
click button "Submit"
check that page contains "Your review is awaiting approval"
log out from site
log in
click "Live"
click "Products"
click "Reviews"
hover over "Jane Smith"
click "Approve"
click "View product"
check that page contains "Test review"
-
Log in as customer then add products to the cart and its contents persist after logging out: on this instance we test out if the cart contents are saved after logging out from the online store.Test case execution.
log in as customer
click exactly "Cart"
check that page contains "Cart"
check that page contains "Pencils"
click "Add to cart" below "Pencils"
log out from site
log in as customer
click "mini-cart" on the right of "My account"
check that page contains "Pencils"
click "Remove item"
-
Create a product without stock, verify that users cannot purchase it. For this test, we want to validate that it’s not possible to place orders for items that aren’t in stock. Test case execution.
click "My account"
log in
click "Live"
click "Products"
click button "Add new product" on the left of "Import"
enter "Sold out" into "Product name"
enter "0" into "Regular price"
click "Inventory"
click radiobutton "Out of stock"
click "Publish"
go to site
log out from site
log in as customer
click "Shop"
click "Sold out"
check that page contains "Sold out"
log out from site
log in
click "Live"
click "Products"
hover over "Sold out"
click "Trash"
click "Trash" on the right of "Published"
enter "1" into checkbox on the left of "Name"
select "Delete permanently" from "Bulk actions"
click button "Apply"
-
Create a new user, request password change and validate if email gets sent: we seek to test if the password reset emails are being sent when requested. To do so, we log into the website, ask for password change then validate that the mail was sent. Test case execution.
click "My Account"
log in
click "Live"
click "Users"
click "Add User"
enter "test user" into "Username"
enter "[email protected]" into "email"
click "Add User" roughly below "Send user notification"
go to site
log out from site
click "Lost your password?"
enter "[email protected]" into "Username or email"
click "Reset password"
check that page contains "Password reset email has been sent"
click "My Account"
log in
click "Live"
click "Users"
hover over "test user"
click "Delete"
click "Confirm Deletion"
-
Create a new brand, add it to a product then validate it is visible: in this instance we check that product brands can be created and applied to products then we validate that users can see the brand of the item on the product page. Test case execution.
click "My account"
log in
click "Live"
click "Products"
click "Brands"
enter "test brand" into "Name"
click button "Add New Brand"
click "Products"
click "Pencils"
click "test brand" below "Product tags"
click button "Update"
click "View Product"
check that page contains "test brand"
click "Live"
click "Products"
click "Brands"
enter "1" into checkbox on the left of "Image"
select "Delete" from "Bulk actions"
click "Apply"
check that page contains "Items deleted."
-
Create a new attribute, add it to an existing item, validate it displays on the website: in this case we want to check if the attributes being added to shop items are being shown on the product page. Test case execution.
click "My account"
log in
click "Live"
click "Products"
click "Pencils"
click "Attributes" below "Linked Products"
enter "Pieces" into "e.g. length or weight"
enter "333" into "Enter some descriptive text"
click "Save attributes"
go to site
click "Shop"
click "Pencils"
check that page contains "Pieces"
check that page contains "333"
click "Live"
click "Products"
click "Pencils"
hover over "Pieces"
click "Attributes" below "Linked Products"
click "Remove" on the right of "Pieces"
click "Save attributes"
-
Change site title check that other users can see it: in this section we’re trying to verify that the online store name is being correctly updated when edited. Test case execution.
click "My account"
log in
click "Live"
click "Settings" below "Tools"
enter "Awesome store" into "Site title"
click button "Save changes"
go to site
log out from site
log in as customer
check that page contains "Awesome store"
log out from site
log in
click "Live"
click "Settings" below "Tools"
enter "WooCommerce Core E2E Test Suite" into "Site title"
click button "Save changes"
-
Add item to cart apply a coupon then set an order: for this test case, we apply a coupon to a purchase we’re making and validate that the item price drops to “$0.00”. After that we place an order then verify it was successful. Test case execution.
click exactly "Cart"
check that page contains "Cart"
check that page contains "Pencils"
click "Add to cart" below "Pencils"
click "Add coupons"
enter "Pencil free" into "Enter code"
click button "Apply"
check that page contains "$0.00" on the right of "Estimated total"
click "Proceed to Checkout"
enter "[email protected]" into "Email address"
enter "Test" into "First name"
enter "Testing" into "Last name"
enter "test123" into "Address"
enter "testown" into "City"
enter "22201" into "Postcode"
click "Place Order"
check that page contains "Order received"
-
Add a downloadable product to the store, validate that other users can download it: we validate that virtual products can be added to the online shop then normal users can purchase and proceed to download it. Test case execution.
click "My account"
login
click "Live"
click "Products"
click "Add new product"
enter "Free royalty image" into "Product name"
enter "0" into "Regular price"
enter "1" into checkbox "Virtual"
enter "1" into checkbox "Downloadable"
click "Add file"
click "Choose file"
click "Media Library"
click 1st "thumbnail"
click "Insert file URL"
click "Publish"
check that page contains "Product published"
click "View"
log out from site
log in as customer
click "Shop"
check that page contains "Free royalty image"
click "Add to cart" below "Free royalty image"
checkout and place order
click "My account"
click "Downloads"
click on table at 1st row and 4th column
check that file was downloaded
-
Add a shop manager, verify they have access to the dashboard: we want to make sure other users can be given access to the admin dashboard, in this test case we create a new user, give them store manager permissions then verify they are able to interact with the admin dashboard. Test case execution.
click "My account"
log in
click "Live"
click "Users"
click "Add user"
select "Shop manager" from "Role"
enter "password" into "password"
click "Confirm use of weak password"
enter "Shop" into "Username"
enter "[email protected]" into "Email"
click button "Add User" roughly below "Role"
check that page contains "New user created. Edit user"
go to site
log out from site
enter "Shop" into "Username"
enter "password" into input "password-input"
click exactly "Log in"
check that page contains button "Live"
click button "Live"
click "Products"
check that page contains "Add new product"
go to site
log out from site
log in
click "Live"
click "Users"
hover over "Shop"
click "Delete"
click button "Confirm Deletion"
check that page contains "User deleted"
Reusable rules
The test cases above are using custom reusable rules, below you’ll find the code for every single one of them. For more info about reusable rules and how to use them, check this link.
-
go to site: this reusable rule is used for accesing the e-commerce store from the admin dashboard.
click "WooCommerce"
click "View store"
-
checkout and place order: performs the checkout process (assuming the cart has items in it).
click "Checkout"
enter "[email protected]" into "Email address"
enter "Test" into "First name"
enter "Testing" into "Last name"
enter "test123" into "Address"
enter "testown" into "City"
enter "22201" into "Postcode"
click "Place Order"
-
delete product “productName”: navigates through the admin dashboard and deletes a product specified by the parameter “productName”. Requires to be logged as an admin
click "WooCommerce"
click "Products"
click checkbox on the left of saved value "productName"
select "Move to trash" from "Bulk actions"
click "Apply"
click "Trash"
click checkbox on the left of "Name"
select "Delete permanently" from "Bulk actions"
-
delete all orders: requires to be logged as an admin. Navigates the admin dashboard and deletes all the orders that have been placed by customers.
click "WooCommerce"
click "Orders"
click checkbox on the left of "Order"
select "Move to trash" from "Bulk actions"
click "Apply"
click "Trash"
click checkbox on the left of "Order"
select "Delete permanently" from "Bulk actions"
-
log in as customer: performs the login process with the customer credentials.
click "My account"
enter "customer" into "Username or email address"
enter "password" into "Password"
click exactly "Log in"
check that page contains "Jane Smith"
-
log out from site: logs out from the online store.
click "My account"
click "Log out"
check that page contains "Login"
-
add coupon “couponCode”: adds a new coupon by the given parameter “couponCode”. Requires to be logged as admin.
hover over "WooCommerce"
click "Coupons"
click "Add new coupon"
enter saved value "couponCode" into "Coupon code"
select "Percentage discount" from "Fixed cart discount"
enter "100" into "Coupon amount"
enter "9999-12-12" into "YYYY-MM-DD"
click button "Publish"
check that page contains "Coupon updated"
-
add a new product “productName”: creates a new product with “productName” as its name. Requires to be logged as admin.
click "Products"
click "Physical product"
enter saved value "productName" into "Product Name"
enter "300" into "Regular price"
enter "250" into "Sale price"
enter enter
click button "Publish"
check that page contains "Product published. View Product"
-
skip wc setup: skips the WooCommerce setup guide that pops up the website is launched for the first time.
click "WooCommerce"
check that page contains "Welcome to Woo!"
click "Skip guided setup"
click "Go to my store"
check that page contains "Follow these steps"
Setting up GitHub CI/CD integration
For automated testing in your GitHub repository, you’ll need to configure your testRigor credentials as GitHub secrets. This approach differs from local testing by using GitHub’s secure environment variables.
Step 1: Add GitHub Secrets
- Go to your GitHub repository
- Click on “Settings” → “Secrets and variables” → “Actions”
- Add the following:
- As a secret:
WOOCOMMERCE_AUTH_TOKEN: Your testRigor auth token (keep this private)
- As variables:
WOOCOMMERCE_TEST_SUITE_ID: Your testRigor Test Suite IDWOOCOMMERCE_BASE_URL: Your woocommerce website URL
- As a secret:
For further information on creating secrets and variables in GitHub Actions, you can check the official GitHub documentation on secrets and variables.
Step 2: Use in GitHub Actions
- name: Run testRigor Tests
run: testrigor test-suite run WOOCOMMERCE_TEST_SUITE_ID --token WOOCOMMERCE_AUTH_TOKEN --localhost --url WOOCOMMERCE_BASE_URL env: WOOCOMMERCE_AUTH_TOKEN: ${{ secrets.WOOCOMMERCE_AUTH_TOKEN }} WOOCOMMERCE_TEST_SUITE_ID: ${{ vars.WOOCOMMERCE_TEST_SUITE_ID }} WOOCOMMERCE_BASE_URL: ${{ vars.WOOCOMMERCE_BASE_URL }}
Conclusion
Using WooCommerce, you can make your website function as an online store with ease. As it is an open-source plugin, you can modify the existing functions to match what you need.
But for businesses using WooCommerce, you need a test automation tool that makes very little trouble and provides precise testing outcomes quickly. Before you decide on testing tools, make sure to do careful research and choose one that meets your requirements.
| Achieve More Than 90% Test Automation | |
| Step by Step Walkthroughs and Help | |
| 14 Day Free Trial, Cancel Anytime |


