FlutterFlow Testing
|
|
Technological advancements continuously transform the way mobile applications are developed. During the initial times, developers used to write separate code for each platform. For Android and iOS, two separate applications need to be developed for the same functionality. Later, with the change in technology, cross-platform development languages were developed. These allowed one single code base for both Android and iOS. However, the developers still need to create code, and the quality of the code is dependent on their programming expertise.
Today, technology has advanced further, reducing the need for coding by programmers or humans. With no-code tools, developers can create apps more quickly. In this article, we will explore one such no-code tool: FlutterFlow.
What is FlutterFlow?
FlutterFlow is a no-code development platform developed to simplify the creation of mobile and web apps using no-code features like drag-and-drop interfaces. FlutterFlow was developed by former Google engineers Abel Mengistu and Alex Greaves in 2021. The base of FlutterFlow is Google’s Flutter framework.
Using FlutterFlow, developers can design, build, and deploy fully functional applications without writing extensive code. FlutterFlow is an ideal tool for rapid prototyping, minimum viable product (MVP) development, and full-fledged app creation, empowering both developers and non-developers to bring their app ideas to life efficiently and cost-effectively.
Features of FlutterFlow
FlutterFlow is packed with features that help simplify the app development process. Let’s review a few key features.
- Drag-and-Drop Interface: This interface allows users to build apps by dragging and dropping pre-built components, eliminating the need for manual coding. Users can also visually design their app’s user interface, making it accessible to those without coding skills.
- Customizable Components: Includes a wide range of pre-built widgets such as buttons, text fields, images, lists, and more, all of which can be customized to fit the app’s design requirements. This simplifies the creation of complex and interactive user interfaces.
- Multi-Device Support: Ensures that apps look good and function well on various devices and screen sizes, providing a consistent user experience across mobile, tablet, and web platforms.
- Backend Services: Built-in support for Firebase services like authentication, Firestore, and storage, which simplifies backend development and data management without writing backend code.
- Flutter Code: Users can export their projects to Flutter code, allowing for further customization and integration with existing codebases if needed. Exporting code also allows for better version control and easier collaboration with developers who prefer to work directly with the code.
- Real-Time Testing: Allows users to see how their app will look and behave in real-time, enabling quick testing and iteration on designs.
Creating an app using FlutterFlow
In FlutterFlow, you can sign up with an email ID or Google, GitHub or Outlook credentials. FlutterFlow offers three plans: Free, Standard and Pro. For this tutorial purpose, we will create a new sample app.
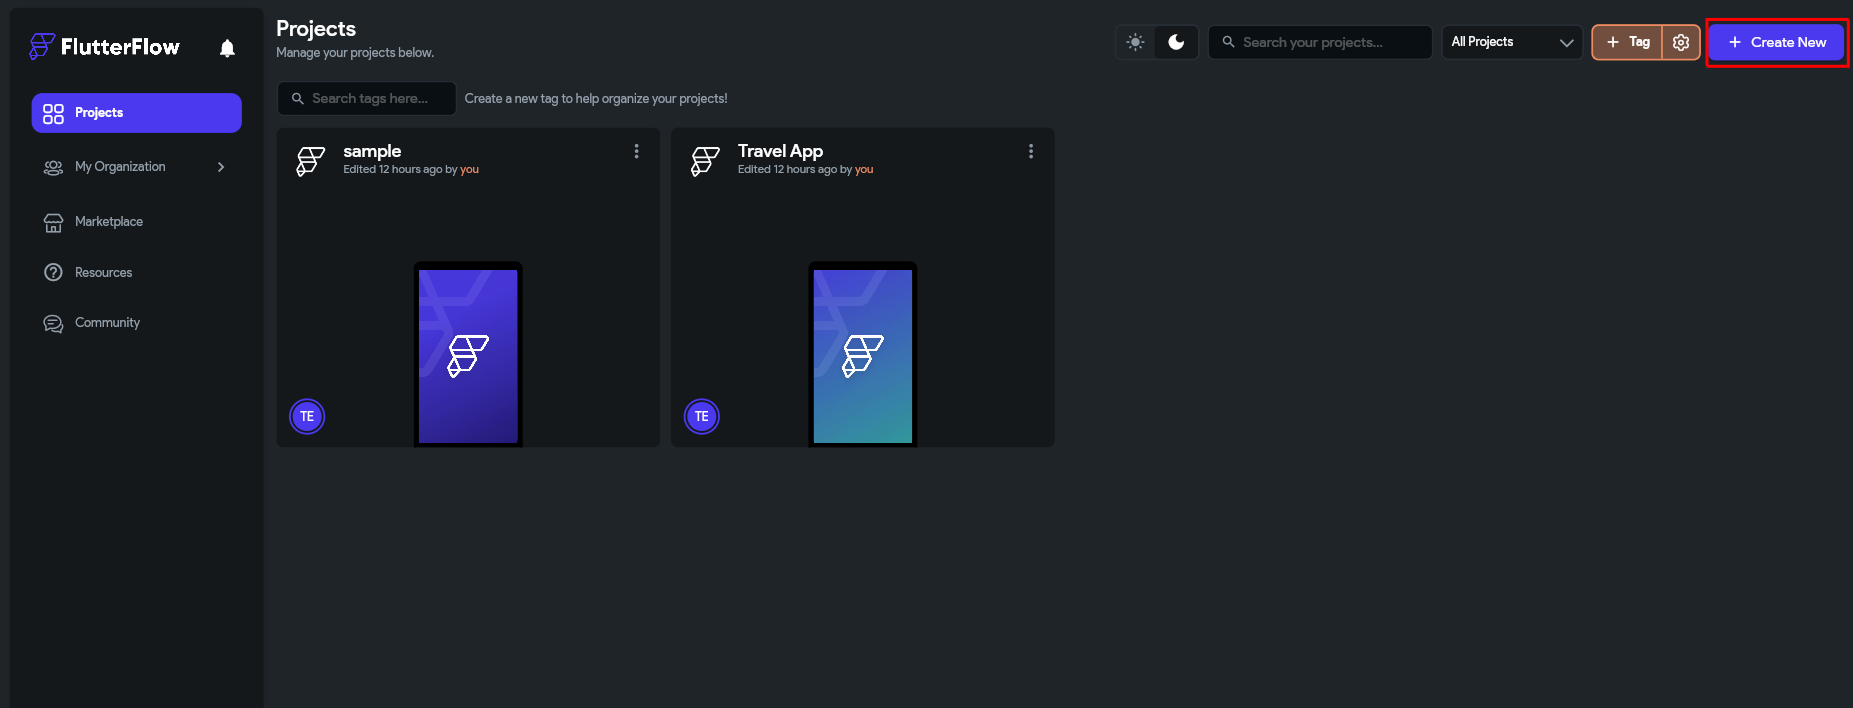
Step 1: Click Create New once you log in to FlutterFlow.
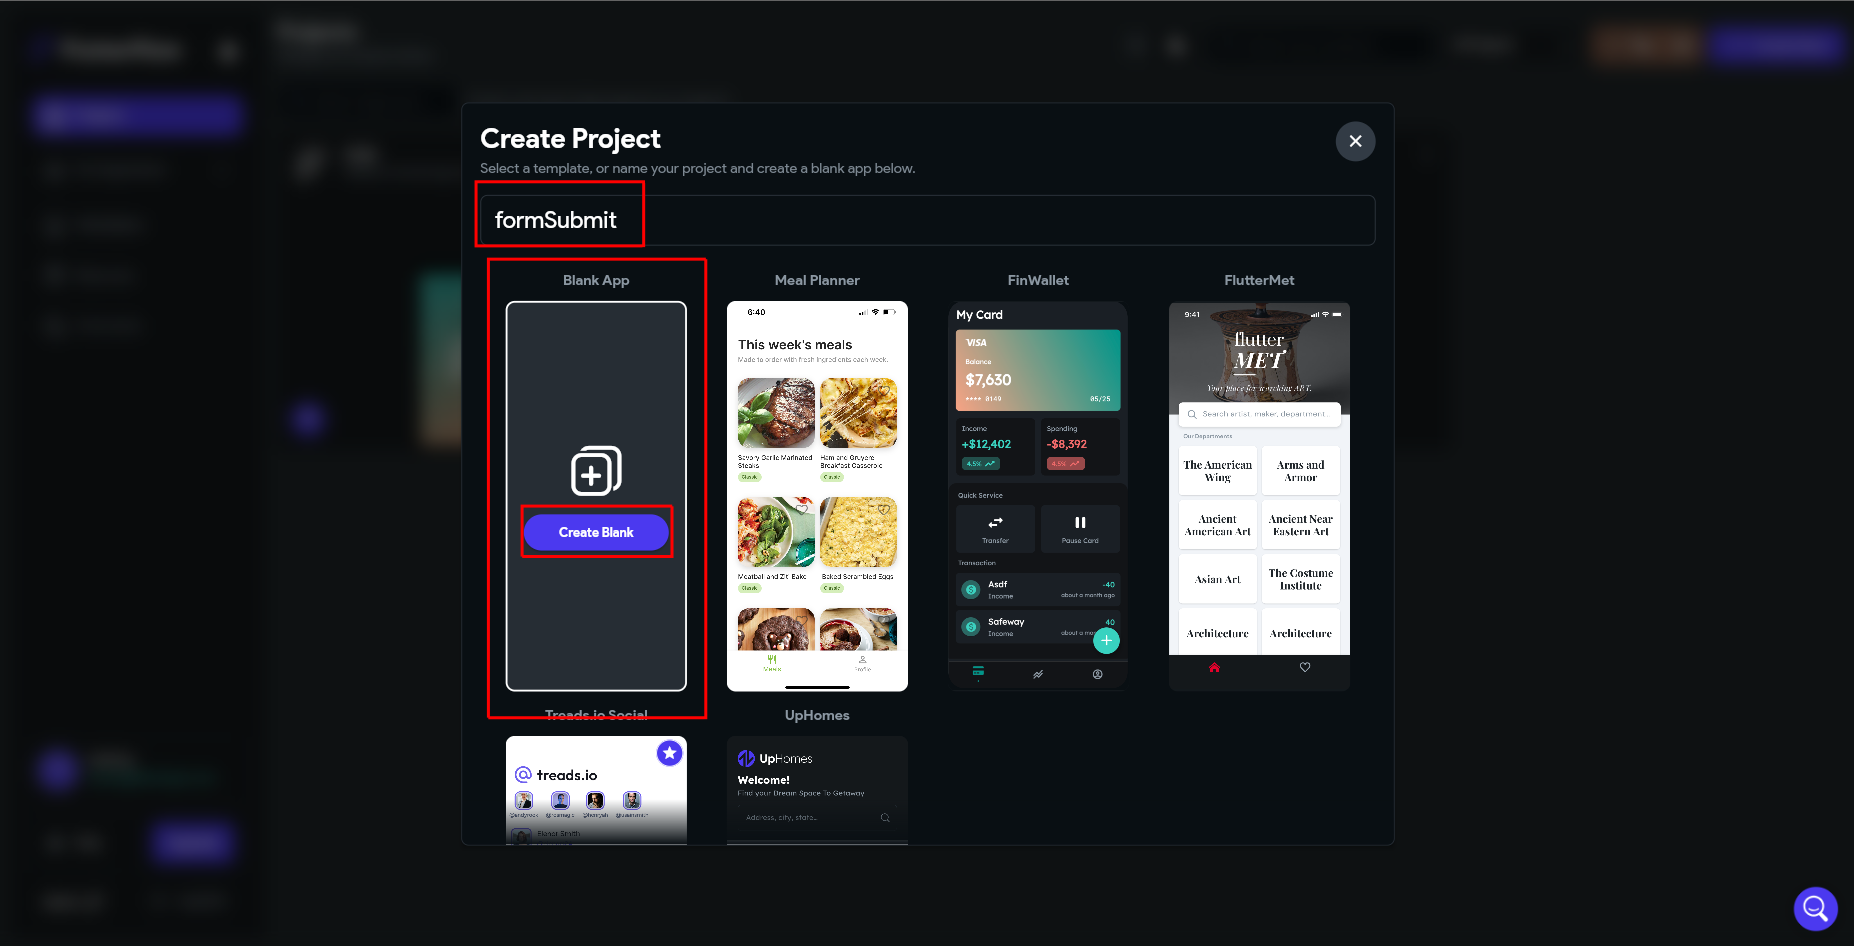
Step 2: You can either select to Create Blank app or select from the default templates provided. For the tutorial purpose, let us select a blank app and provide the project name.
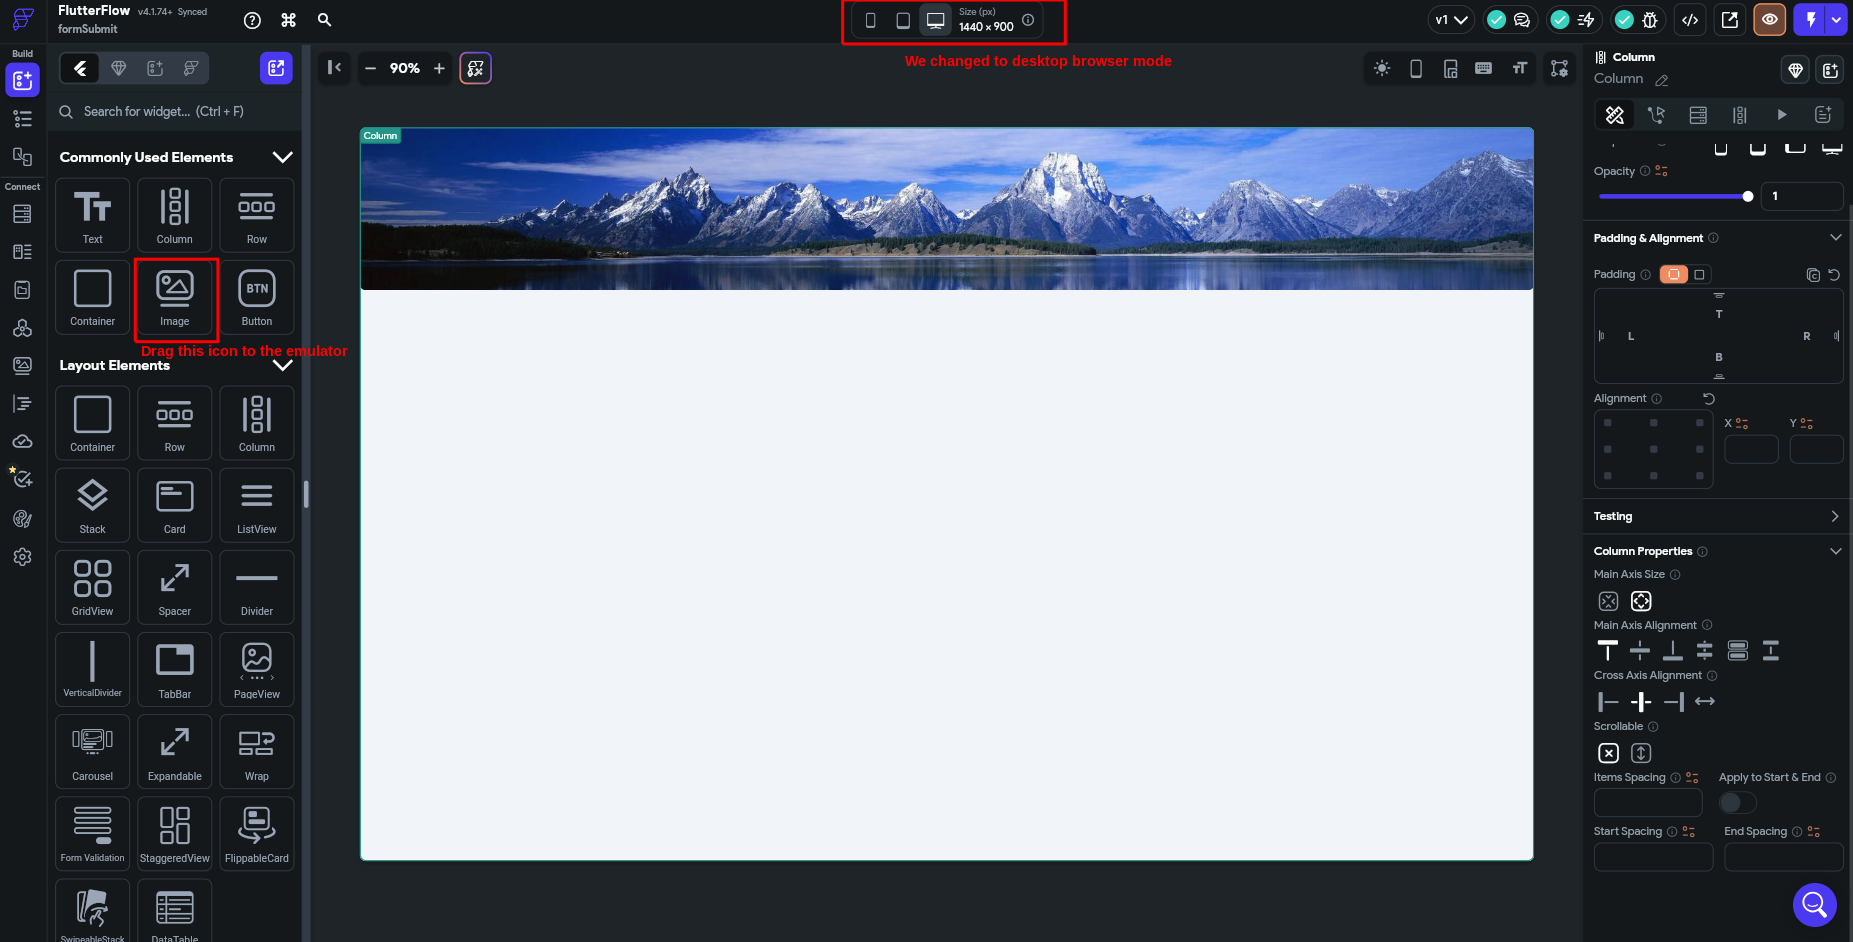
Step 3: Now you are on the home page, or what we can call the kitchen page, where the app gets built. On the left side of the page, you can see many components to create the app. You just need to drag them to the screen. The center portion is the device emulator, where you place all the components.
On the top of the screen, there is an option to switch between different device modes like mobile device, tablet screen, desktop browser screen or any custom resolution that you can set. On the right side, you will get the properties of the components that you drag to the emulator. You can set parameters, actions, etc., for the components.

Step 4: Let us create a sample app. We plan to add an image as a banner, then two input text fields and a submit button. Since we are creating a responsive design, we can change to the desktop browser view. Now, let us drag and drop an image component.
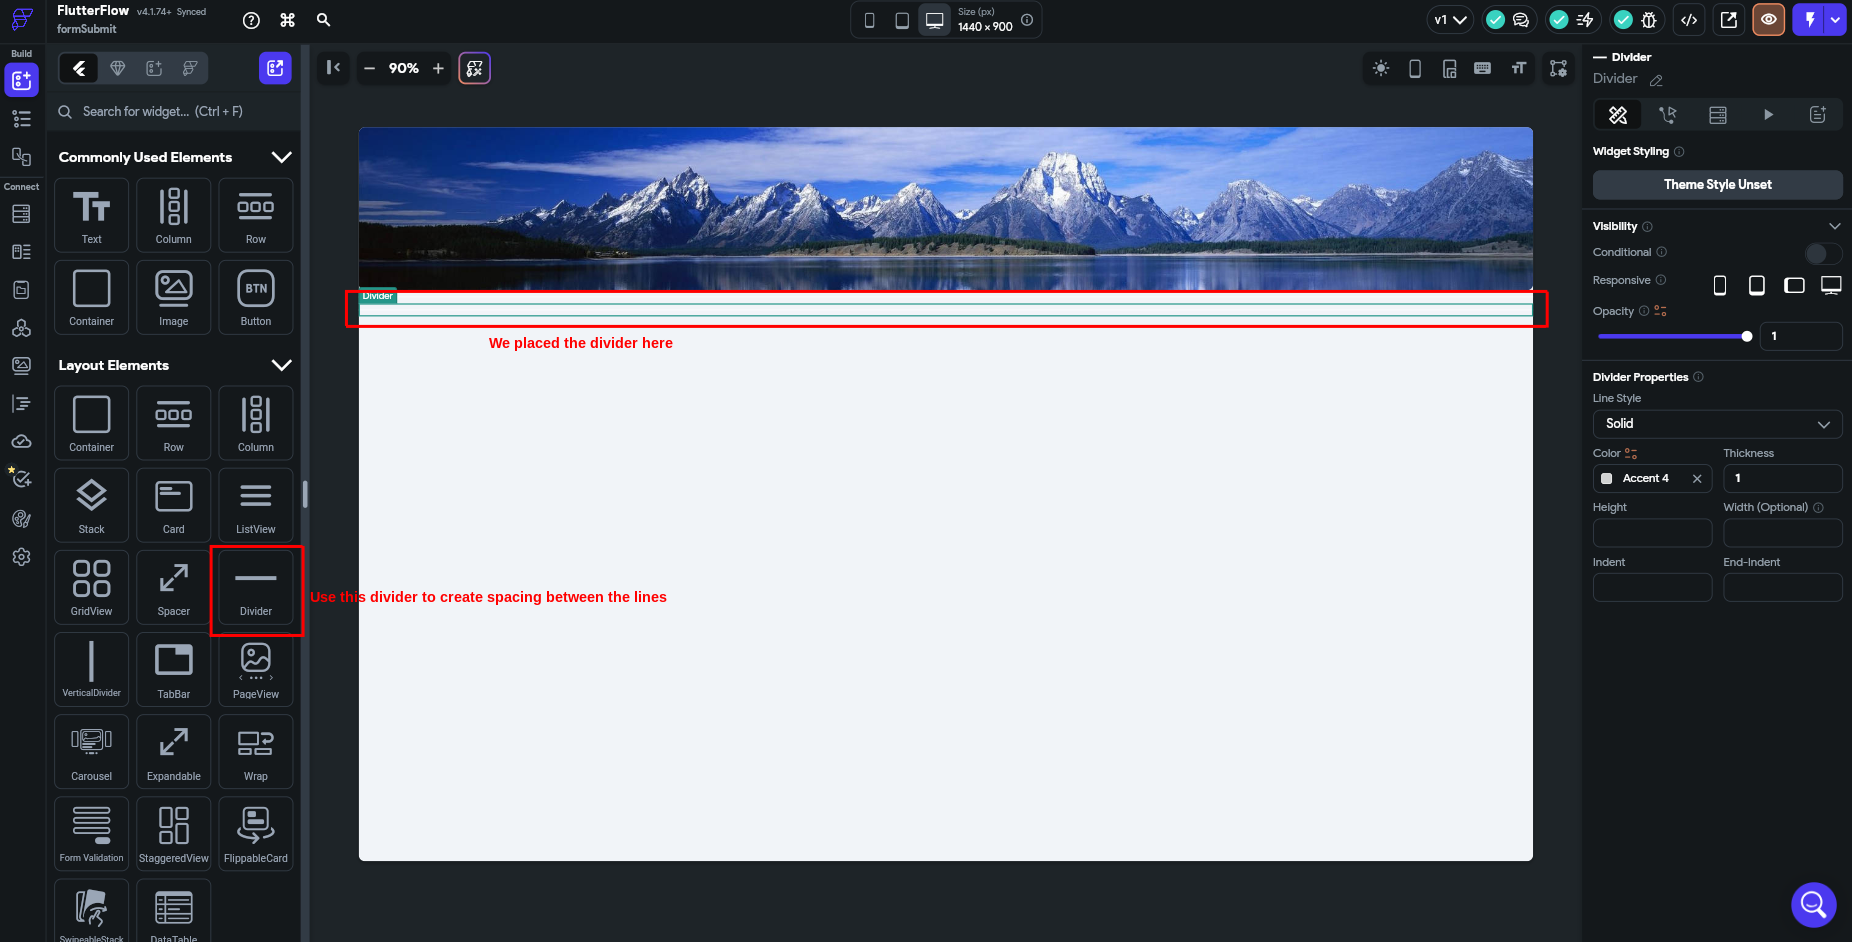
Step 5: Now, we need to add a text field; before that, if we add the text field right under the image banner, the application looks cluttered. So, let’s add a divider so that there is some gap between the banner and the text field. Drag the vertical divider and place it under the banner.
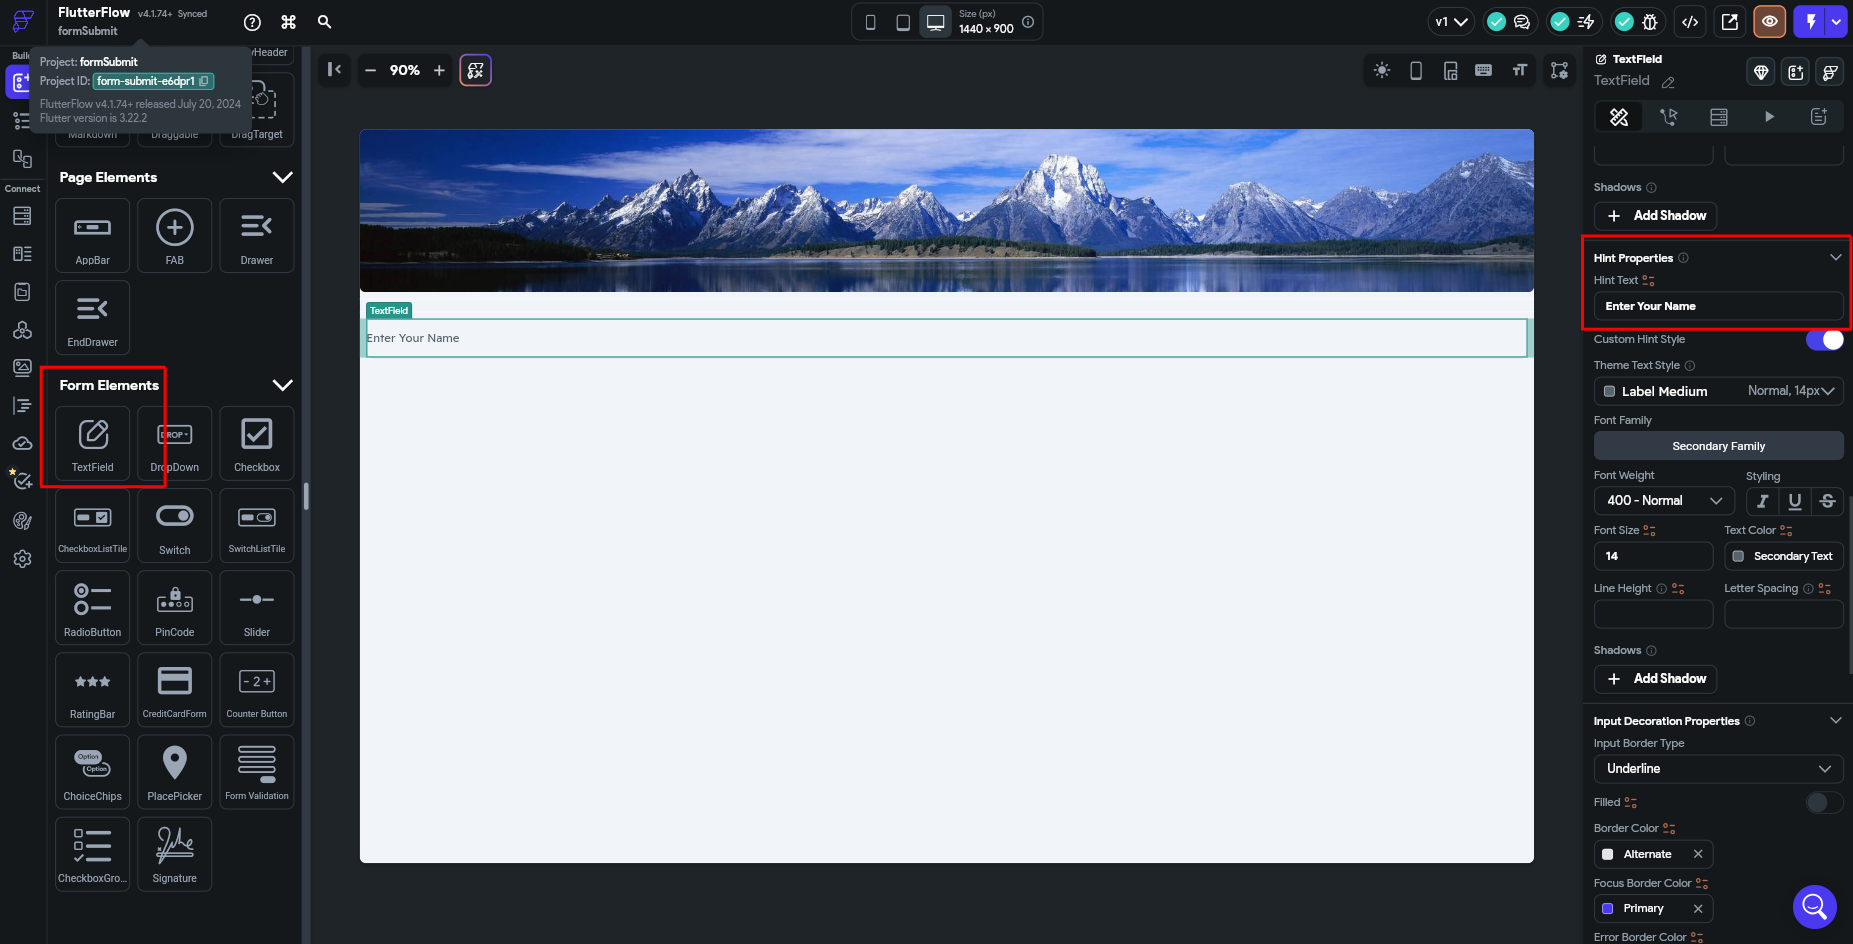
Step 6: The next step is to add the text field. Under the component section, scroll down to Form Elements. You can see the TextField component. Drag and drop this component to the screen.
Now, we need to mention what to fill in this text field, so on the right side, scroll down to Hint Properties. Fill the Hint Text with the value you want to provide. For this app, let us add Enter Your Name as the value.
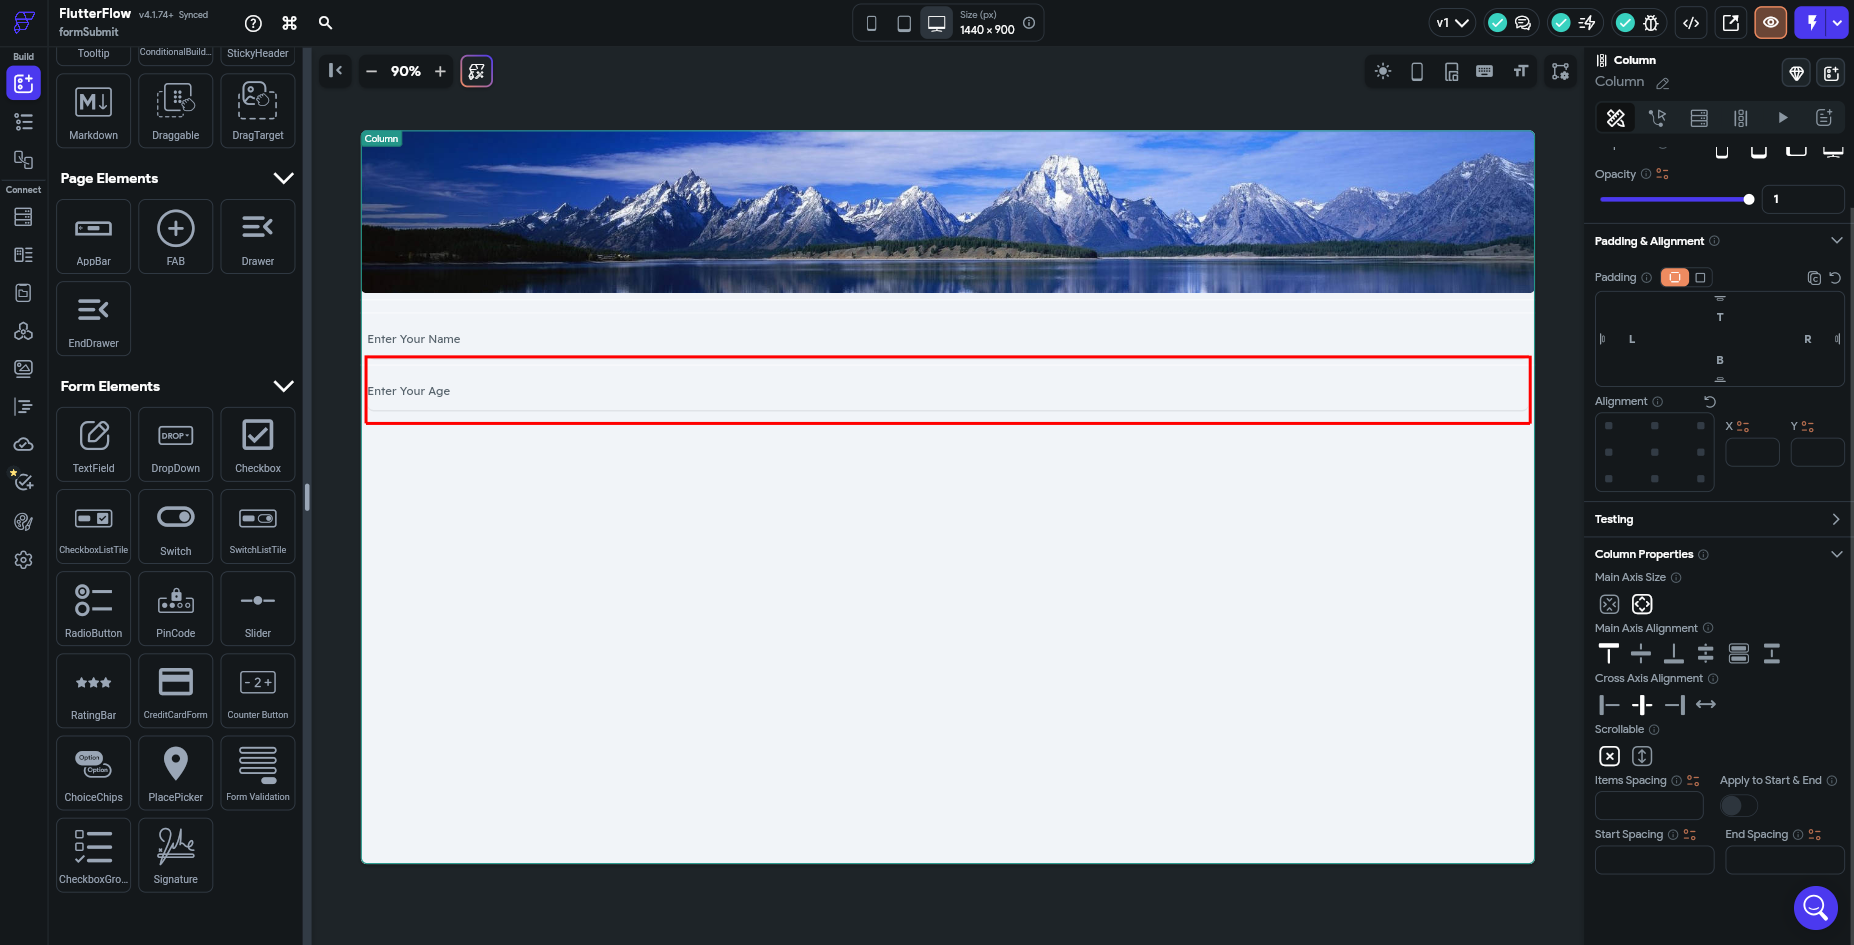
Step 7: Similarly, let us add one more text field for age. Follow the above steps to add another text field.
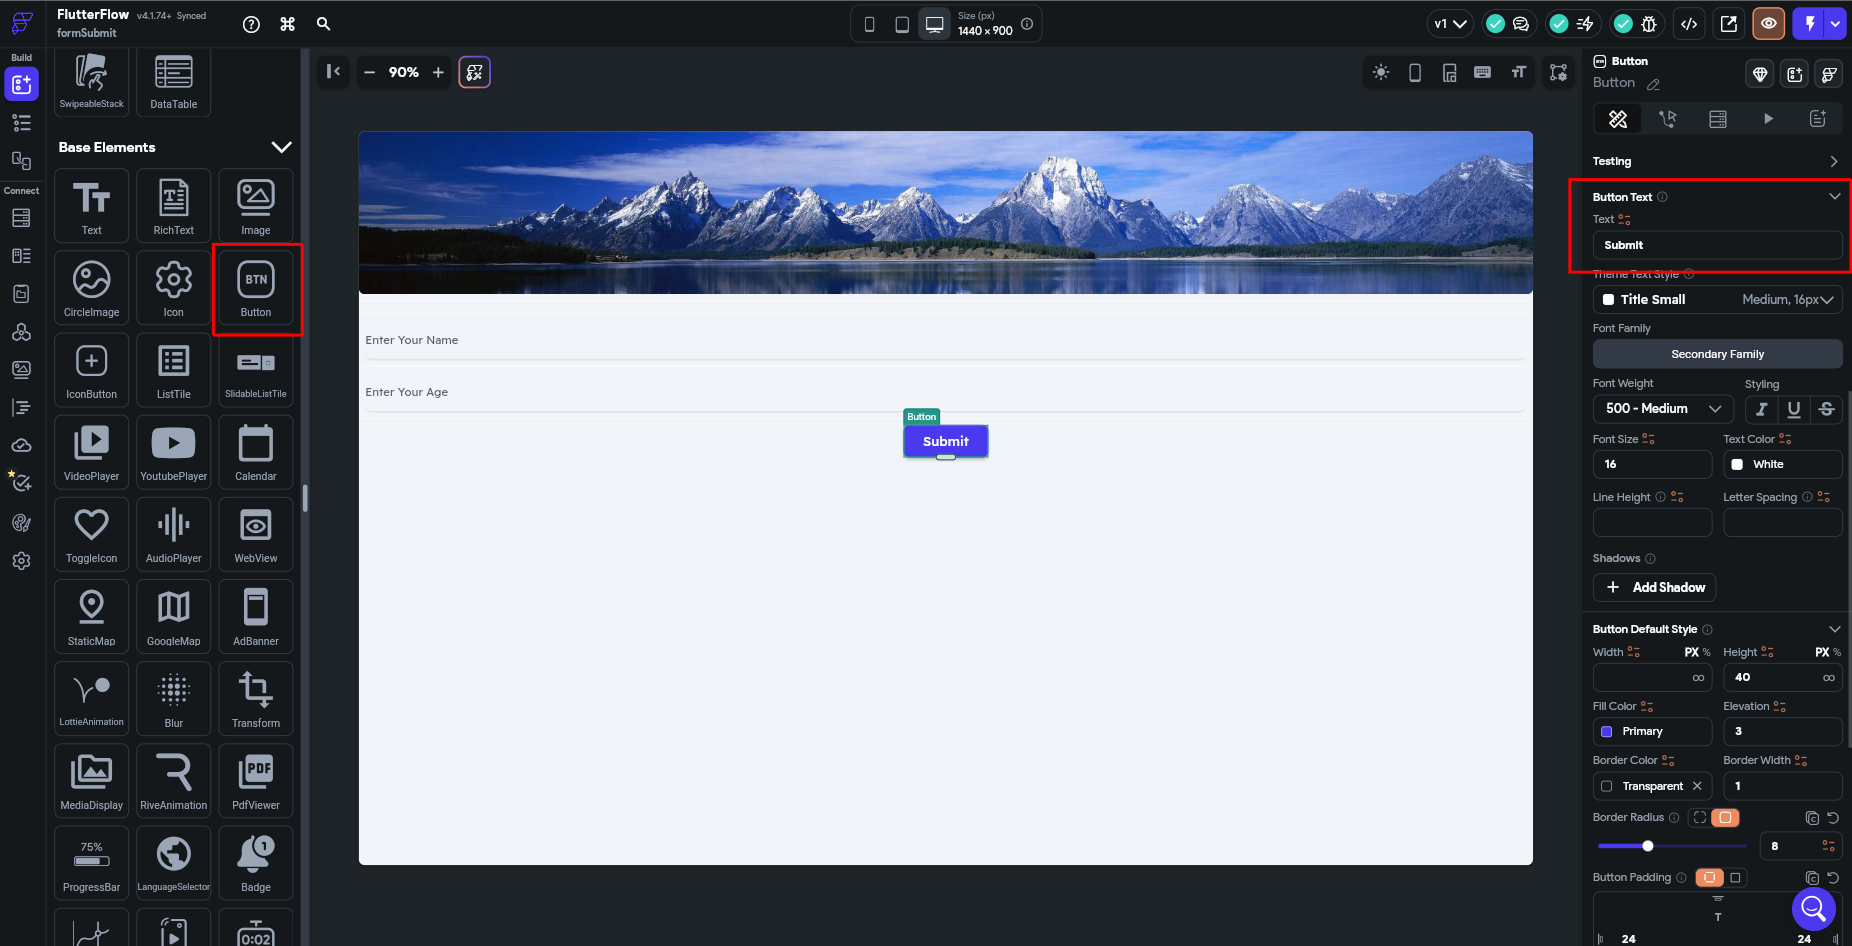
Step 8: Our next step is to add a Submit button. So add one divider, and then in the components section, go to Base Elements and drag and drop the Button to the screen. Now, we need to change the button name it ‘Submit’. On the right side panel, go to the Button Text property and update the Text to Submit.
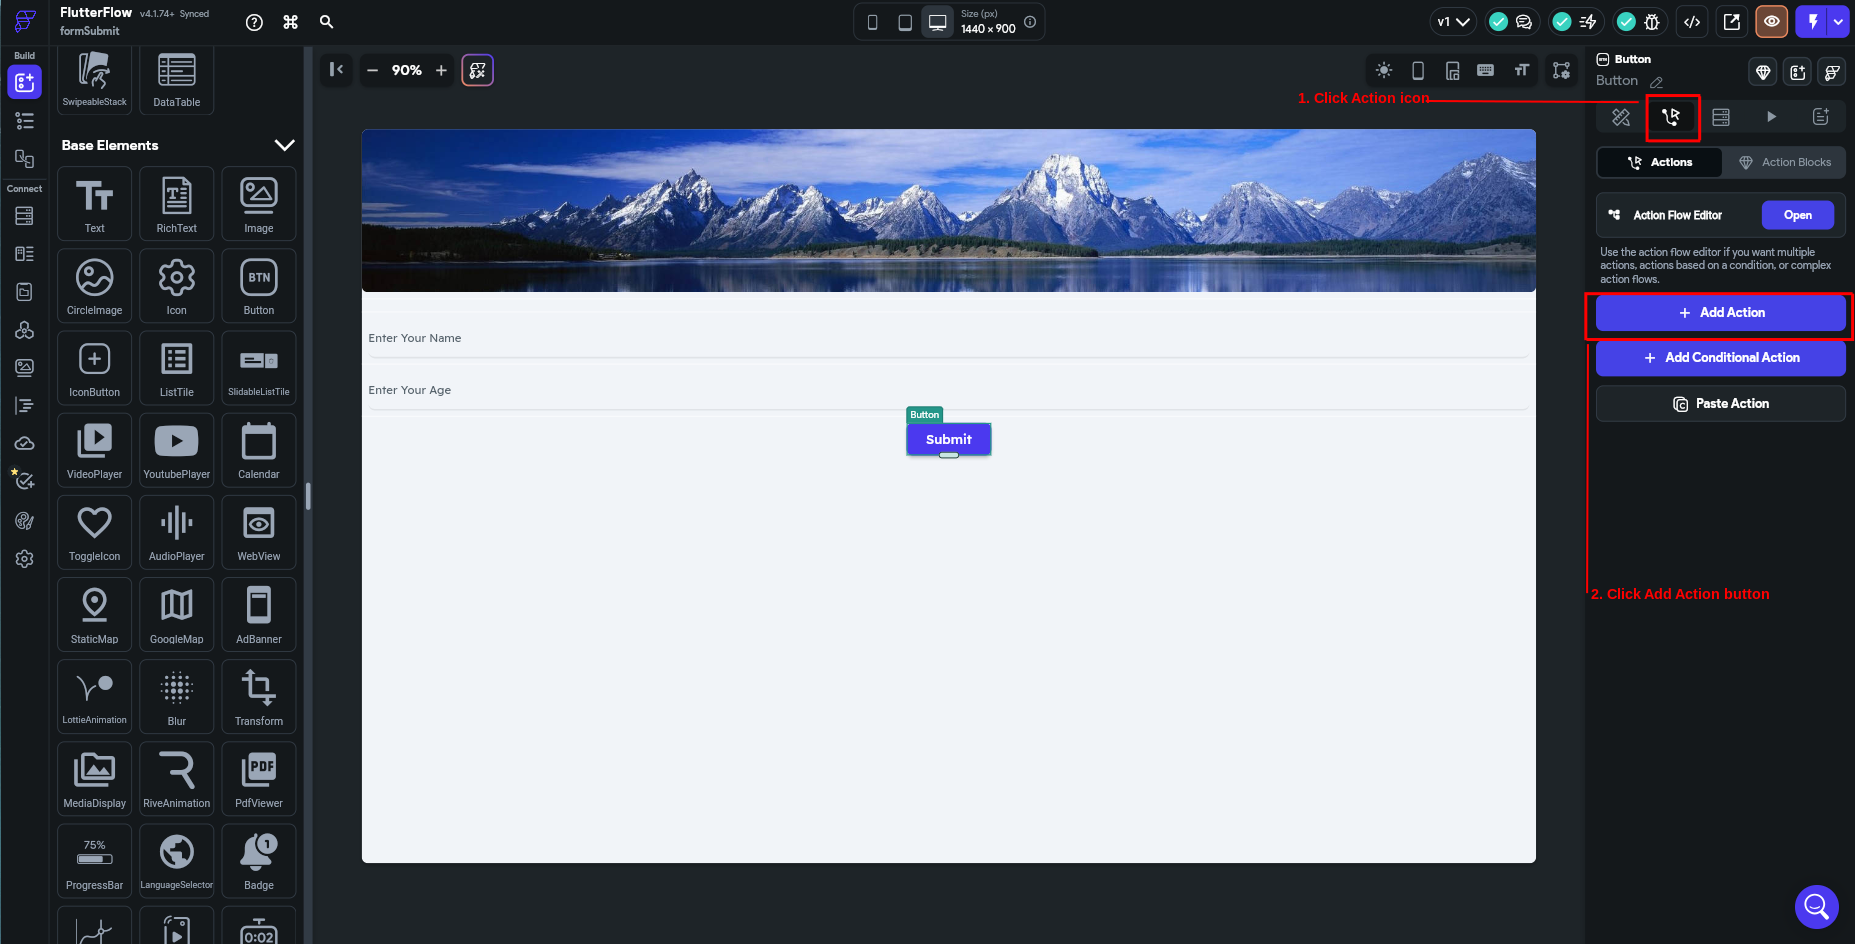
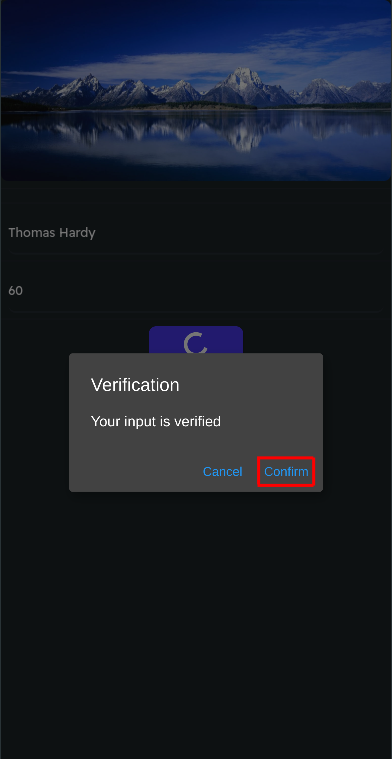
Step 9: Now, we need to add few actions to the button. Our plan is that when we click on the Submit button, an alert will be displayed, saying, “Your data is verified.” Let us see how we can do that.
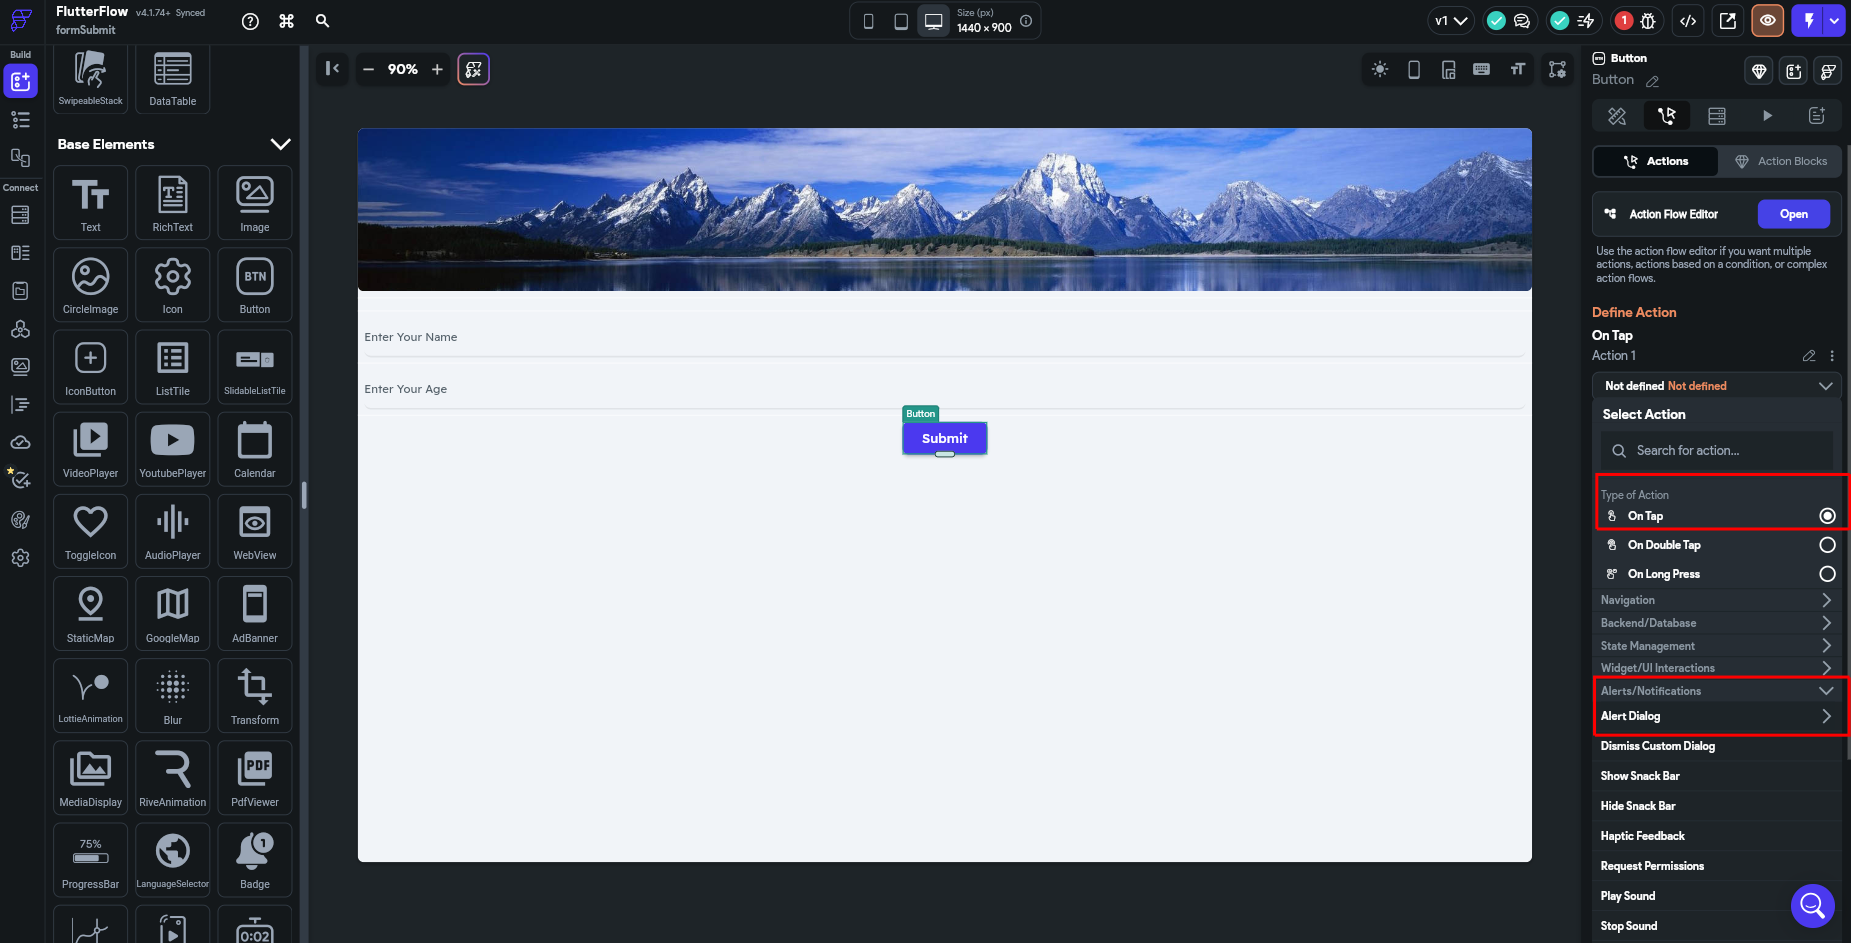
To add actions, click the Action icon on the right side properties and then click the Add Action button.
Step 10: Select the Type of Action as On Tap. Next, expand Alerts/Notifications and select Alert Dialog.
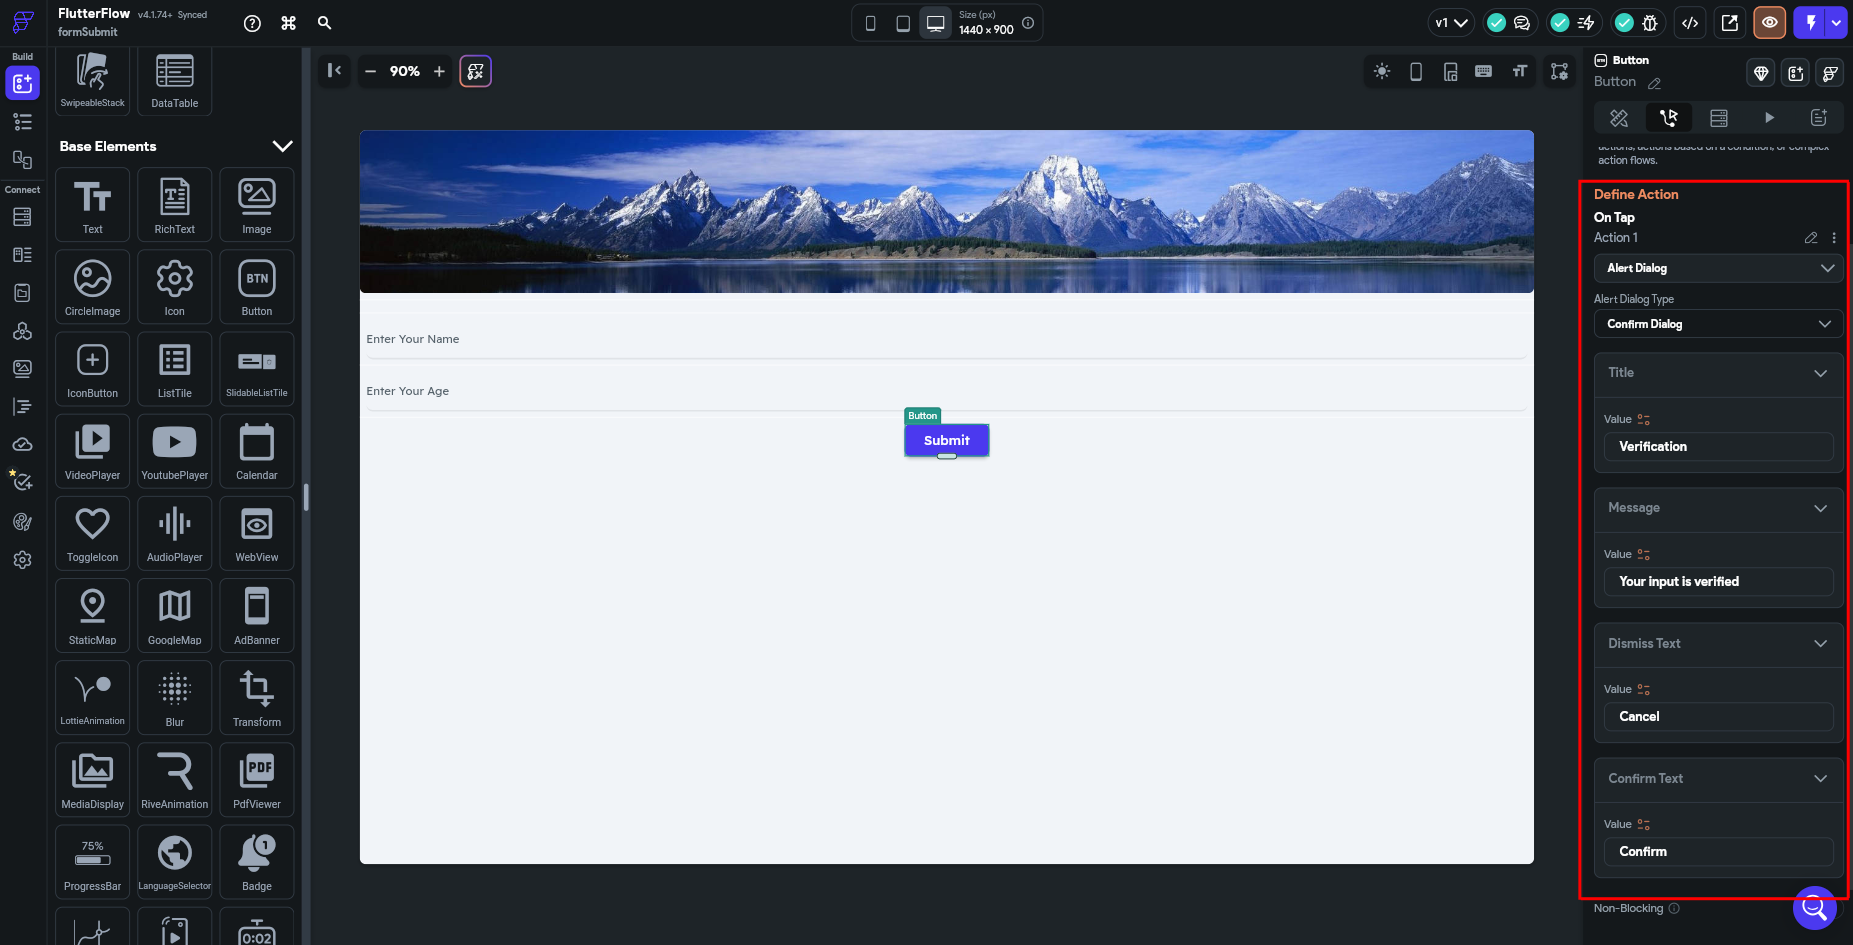
Next step is to select Alert Dialog Type as Confirm Dialog. Now add the below data:
- Title value as: Verification
- Message value as: Your input is verified
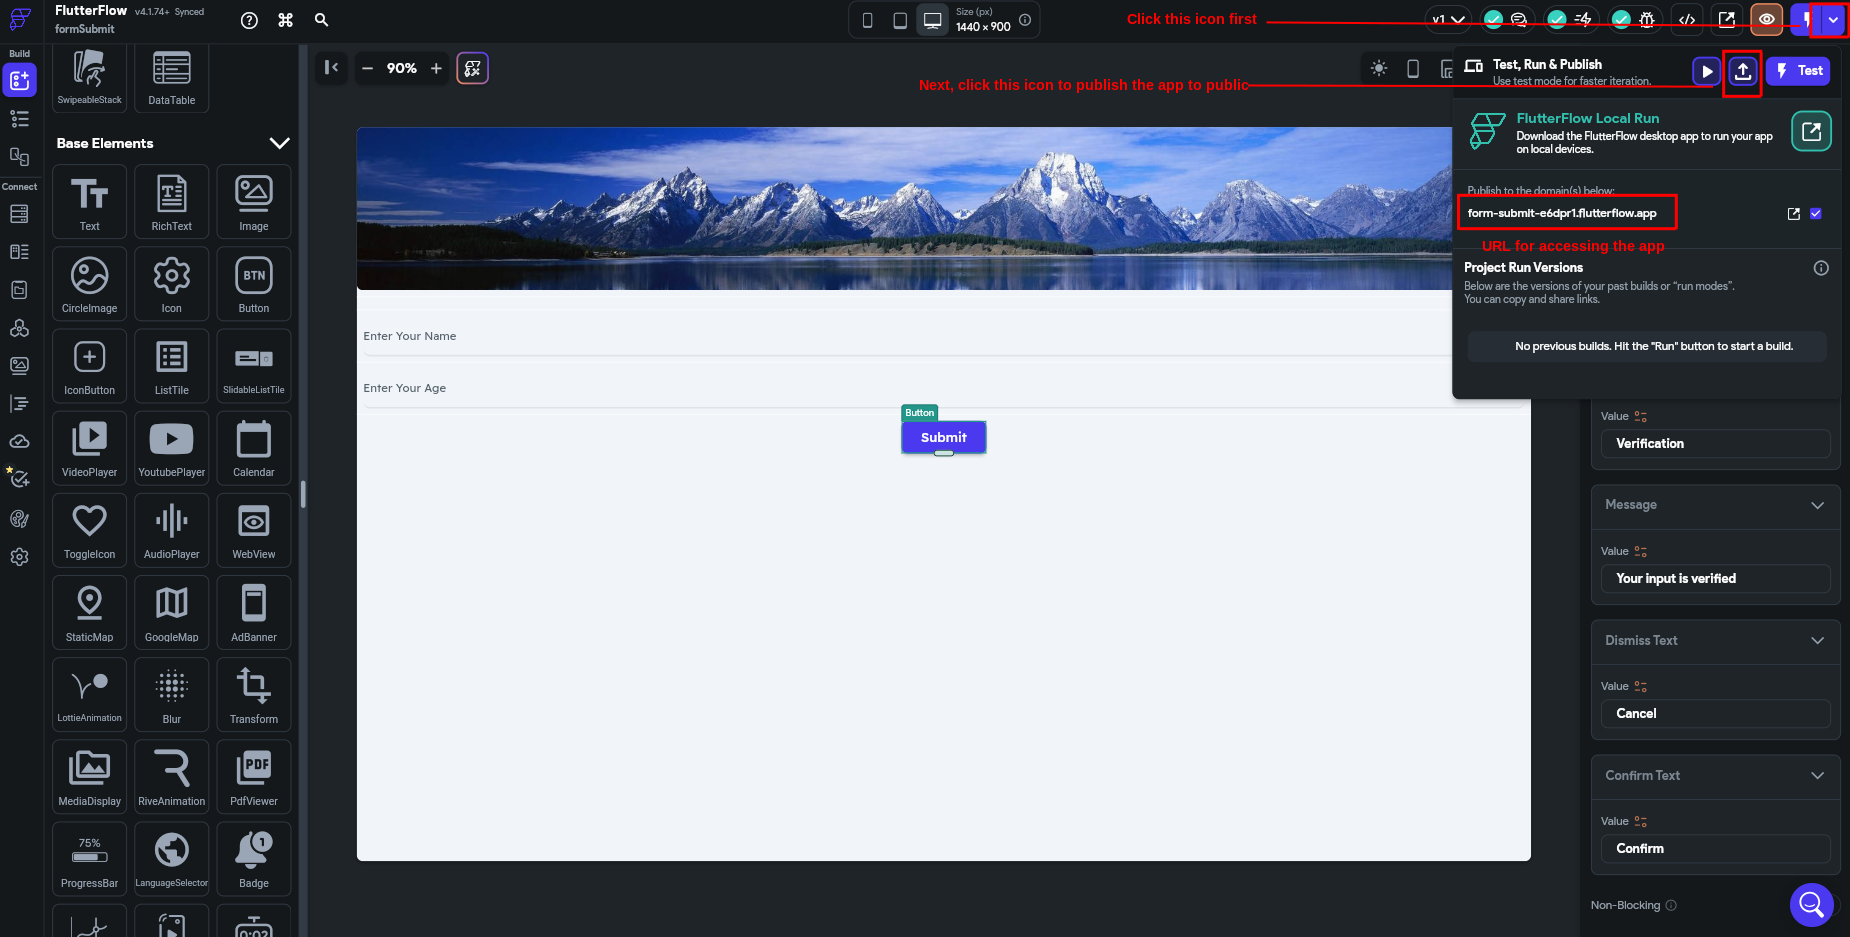
That’s it! We have developed our sample app. Now it’s time to publish it. Click on the dropdown near the top right lightning icon. Then click the upload button to publish the app. Below, you can see the URL for accessing the app.
Testing FlutterFlow Apps
Developing an app using FlutterFlow is very quick and less time-consuming. By using FlutterFlow, we can have frequent updates to the app and release new features in less time. However, testing Flutter apps might not be as easy as developing them. This is because for every release, there will be a vast suite of test cases to be executed to confirm that the existing features are working fine with the introduction of newer ones. And, this process is time time-consuming one, with traditional test automation frameworks. Also, we may not be able to depend on manual testing entirely. That means we must rely on automation testing to validate these existing features.
Though we mentioned automation testing can speed up testing Flutter, there are challenges in selecting the automation tools, too. Let’s understand the challenges in Flutter app testing.
- Limited Native Feature Testing: It is difficult to test native device features like GPS, camera, or sensors. So, for testing these features, we need to export the code and perform testing on real devices or emulators, which adds an extra step and complexity to the process. Read more about Real Devices vs. Emulators.
- Time Constraints and Scalability Issues: Manually testing every single feature is time-consuming as the app grows in complexity. This can significantly slow development cycles, especially when frequent updates are necessary. Read more about Test Scalability.
For example, manually testing a complex login flow across various devices and network conditions is extremely difficult. Automated testing can help relieve this by executing repetitive tests quickly and consistently.
- Shadow DOM Issues: FlutterFlow apps often use Shadow DOM to enhance performance, which complicates the use of traditional automation tools like Selenium. Shadow DOM creates a hidden layer within the DOM, making it difficult for automation tools to find and interact with elements. This requires devising workarounds or exploring alternative automation solutions.
- Limited Test Coverage: Achieving comprehensive test coverage manually is challenging, potentially leaving some areas untested. Testing complex user interactions and edge cases manually can be difficult and time-consuming. Read: Test Design Techniques & Test Coverage Techniques.
- Documentation and Reporting: Manual testing requires meticulous documentation of test cases, steps, and results, which can be time-consuming. Variability in how testers document their findings can lead to inconsistent reporting and difficulty in tracking issues. Know more about Test Reports.
The testRigor Approach
As previously mentioned, managing test devices and dealing with Selenium’s complexities can be quite challenging. However, testRigor addresses these issues in a unique way. Let’s explore how testRigor mitigates these challenges and offers additional features to enhance the testing process.
- Like how we build apps using FlutterFlow, testRigor, a codeless automation tool, helps create test scripts in plain English. So, even manual testers or stakeholders without technical background can create test scripts more easily. Read about how testRigor is a Test Automation Tool For Manual Testers.
- Element identification is one area where Selenium fails miserably. testRigor has a unique way of identifying elements. You don’t have to depend on XPath or CSS; just mention the element text or its relative position, and testRigor, with its AI capabilities, will identify the element.
- testRigor supports web testing on desktop and mobile across 3,000+ combinations of browsers and devices on multiple operating systems. Also, testRigor supports mobile testing on physical devices through cloud partners.
- With Generative AI, testRigor helps create unique test data and test cases based on the description we provide.
- As we know, FlutterFlow apps may have frequent releases; there will be changes in UI elements. testRigor, with its self-healing capability, can easily update these changes to the test scripts, thereby keeping the test cases up to date based on the functionality changes.
- FlutterFlow is a UI-based tool, so it’s important to ensure that the UI elements stay correct on every release. testRigor, with its visual testing features, ensures that the application doesn’t have any UI-related issues compared to previous versions. This testing is impossible to perform manually.
- With testRigor, we can execute test cases in parallel on different devices and browser combinations. Thus, we can increase the test execution coverage with less time.
- testRigor also supports reading images from text using OCR features, and it supports 2FA login, including login via email, text messages, and Google Authenticator
- testRigor has inbuilt integrations with most industry-leading test management tools, CI/CD tools, infrastructure tools, etc. It very easy to integrate any of the tools per the project needs. You can import your existing manual test cases from popular test management tools such as TestRail, PractiTest, Qase, ALM, etc., and convert them to automated test directly with small tweaks.
Testing a FlutterFlow app with testRigor
Now, let’s see how we can test our sample FlutterFlow app using testRigor.
Setting up testRigor test case
Step 1: Log in to your testRigor app with your credentials.
Step 2: Set up the test suite for the website testing by providing the information below:
- Test Suite Name: Provide a relevant and self-explanatory name.
- Type of testing: Select from the following options: Desktop Web Testing, Mobile Web Testing, Native and Hybrid Mobile, based on your test requirements.
- URL to run test on: Provide the application URL that you want to test, in this case, the Flowable app’s URL.
- Testing credentials for your web/mobile app to test functionality which requires user to login: You can provide the app’s user login credentials here and need not write them separately in the test steps then. The login functionality will be taken care of automatically using the keyword login.
- OS and Browser: Choose the OS Browser combination on which you want to run the test cases.
- Number of test cases to generate using AI: If you wish, you can choose to generate test cases based on the App Description text, which works on generative AI.

Step 3: Click ‘Create Test Suite‘.
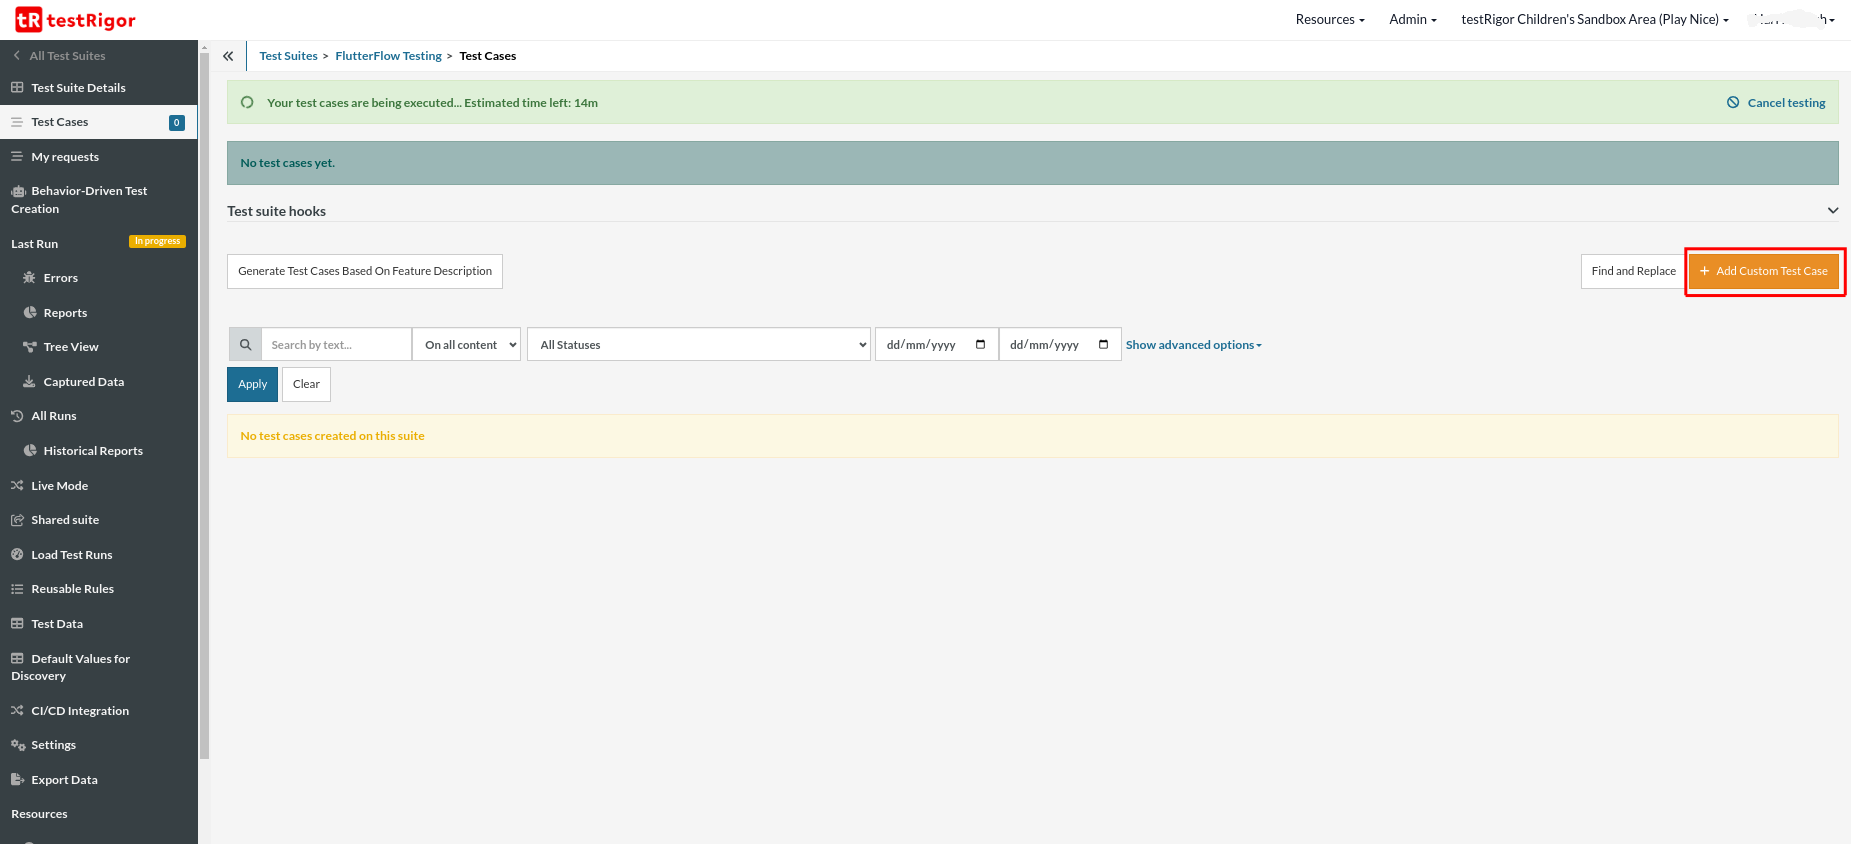
On the next screen, you can let AI generate the test case based on the App Description you provided during the Test Suite creation. However, for now, select do not generate any test, since we will write the test steps ourselves.
Step 4: To create a new custom test case yourself, click ‘Add Custom Test Case‘.
Step 5: Provide the test case description and start adding the test steps.
FlutterFlow Test Case
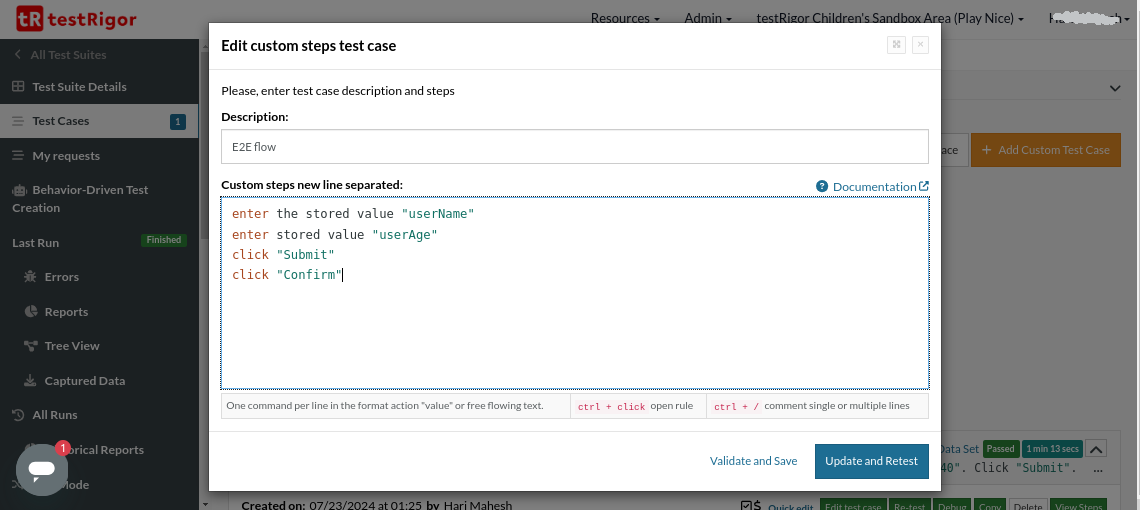
Let us create a test case where we add the Name and Age, Click the Submit button and then click the Confirm button.
When we publish the app in FlutterFlow, it provides us with the URL to access it. We can add in field ‘URL to run test on’ while creating the test suite in testRigor. We can directly add the test steps in plain English; there is no need to set up the app.
Step 1: Our first step will be to enter the Name. testRigor provides a unique feature to store the test data as a variable. Usually, when multiple test cases use the same test data, updating the data value in each test case individually can become unmanageable. With testRigor, you only need to update the stored value once, and it will automatically reflect across all related test cases. Know how to set up these variables in testRigor.
enter the stored value "userName"

enter stored value "userAge"

click “Submit”

click “Confirm”
enter the stored value "userName"
enter stored value "userAge"
click "Submit"
click "Confirm"
As you can see clearly, how easy it is to create test scripts using testRigor, you can have a look at the testRigor’s documentation. Know more about testRigor’s top features and its benefits.
Conclusion
Testing the apps built with FlutterFlow can be tricky because of the platform’s unique setup. To make sure these apps work well, we need to use smart testing strategies. Automated testing tools like testRigor can make this process much easier and more accurate. If you want to have a faster development, testing, and release cycle, testRigor helps with its plain English commands.
With testRigor, testers can quickly create, manage, and run their tests, covering all the important parts of the app. This enhances your testing process, helps create stronger, more reliable apps, allowing developers more time to focus and provide greater user experiences.
| Achieve More Than 90% Test Automation | |
| Step by Step Walkthroughs and Help | |
| 14 Day Free Trial, Cancel Anytime |


