How to execute test cases in parallel in testRigor?
|
|
Parallel execution plays a significant role in End-to-End (E2E) testing for several reasons, mainly time constraints and thorough coverage.
- Faster Testing: E2E testing involves simulating real user journeys across various systems. Running these tests one after another can be slow. Parallel execution lets you run multiple tests simultaneously, drastically speeding up the entire process.
- Improved Coverage: By running tests in parallel, you can efficiently test your application on different browsers, devices, and configurations simultaneously. This expands your test coverage and ensures a consistent user experience across various platforms. With faster turnaround, you can add more test cases, leading to more robust E2E testing.
testRigor, designed explicitly for End-to-End testing, has enabled parallel execution by default.
The parallelization is limited to one for free public plans, but we can purchase more parallelizations for other plans. Refer here for more details on plans.
Once you sign up, testRigor allows you to turn parallel testing on and off. Let’s see how to do that.
Step 1: Set up the test suite for the website testing by providing the information below:
- Test Suite Name: Provide a relevant and self-explanatory name.
- Type of testing: Select from the following options: Desktop Web Testing, Mobile Web Testing, Native, and Hybrid Mobile, based on your test requirements.
- URL to run test on: Provide the application URL you want to test.
- Testing credentials for your web/mobile app to test functionality which requires user to login: You can provide the app’s user login credentials here and need not write them separately in the test steps then. The login functionality will be taken care of automatically using the keyword login. However, this is an optional field and can be skipped if not relevant.
- OS and Browser: Choose the OS Browser combination on which you want to run the test cases.
- Number of test cases to generate using AI: You can simplify your test creation further by opting to generate test cases based on the App Description text. This feature works on generative AI.

Step 2: Click on Create Test Suite.
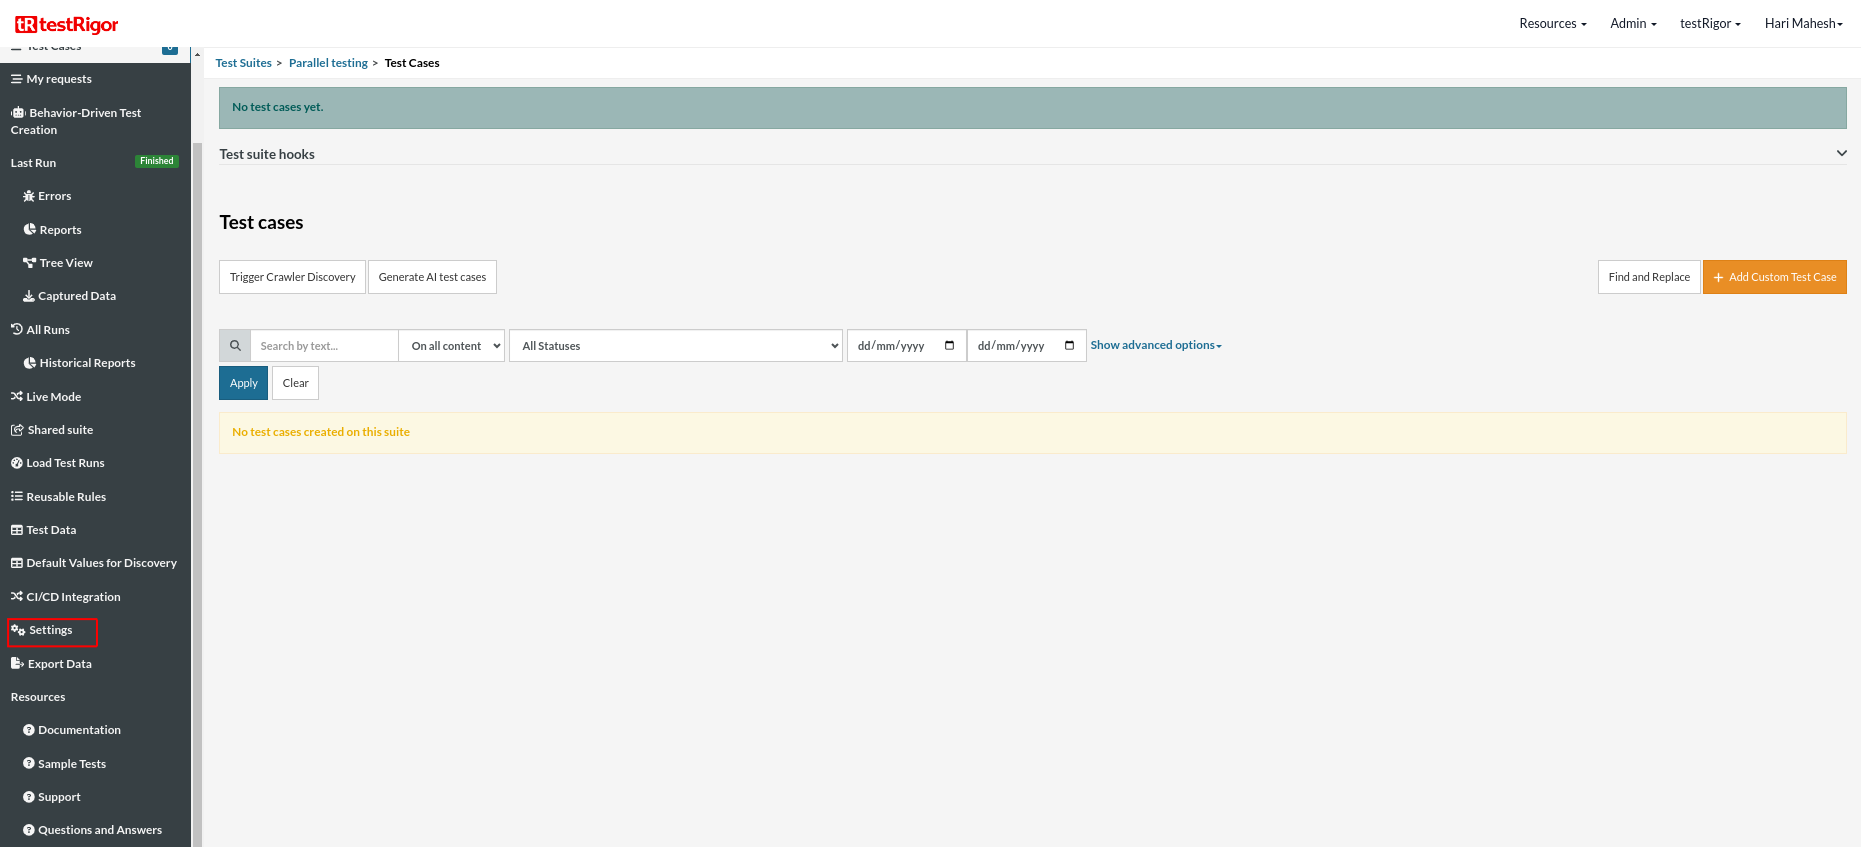
On the next screen, you can let AI generate the test case based on the app description you provided while creating the Test Suite. However, for now, select do not generate any test, since we will write the test steps ourselves.
Step 3: Click Settings on the left side menu.
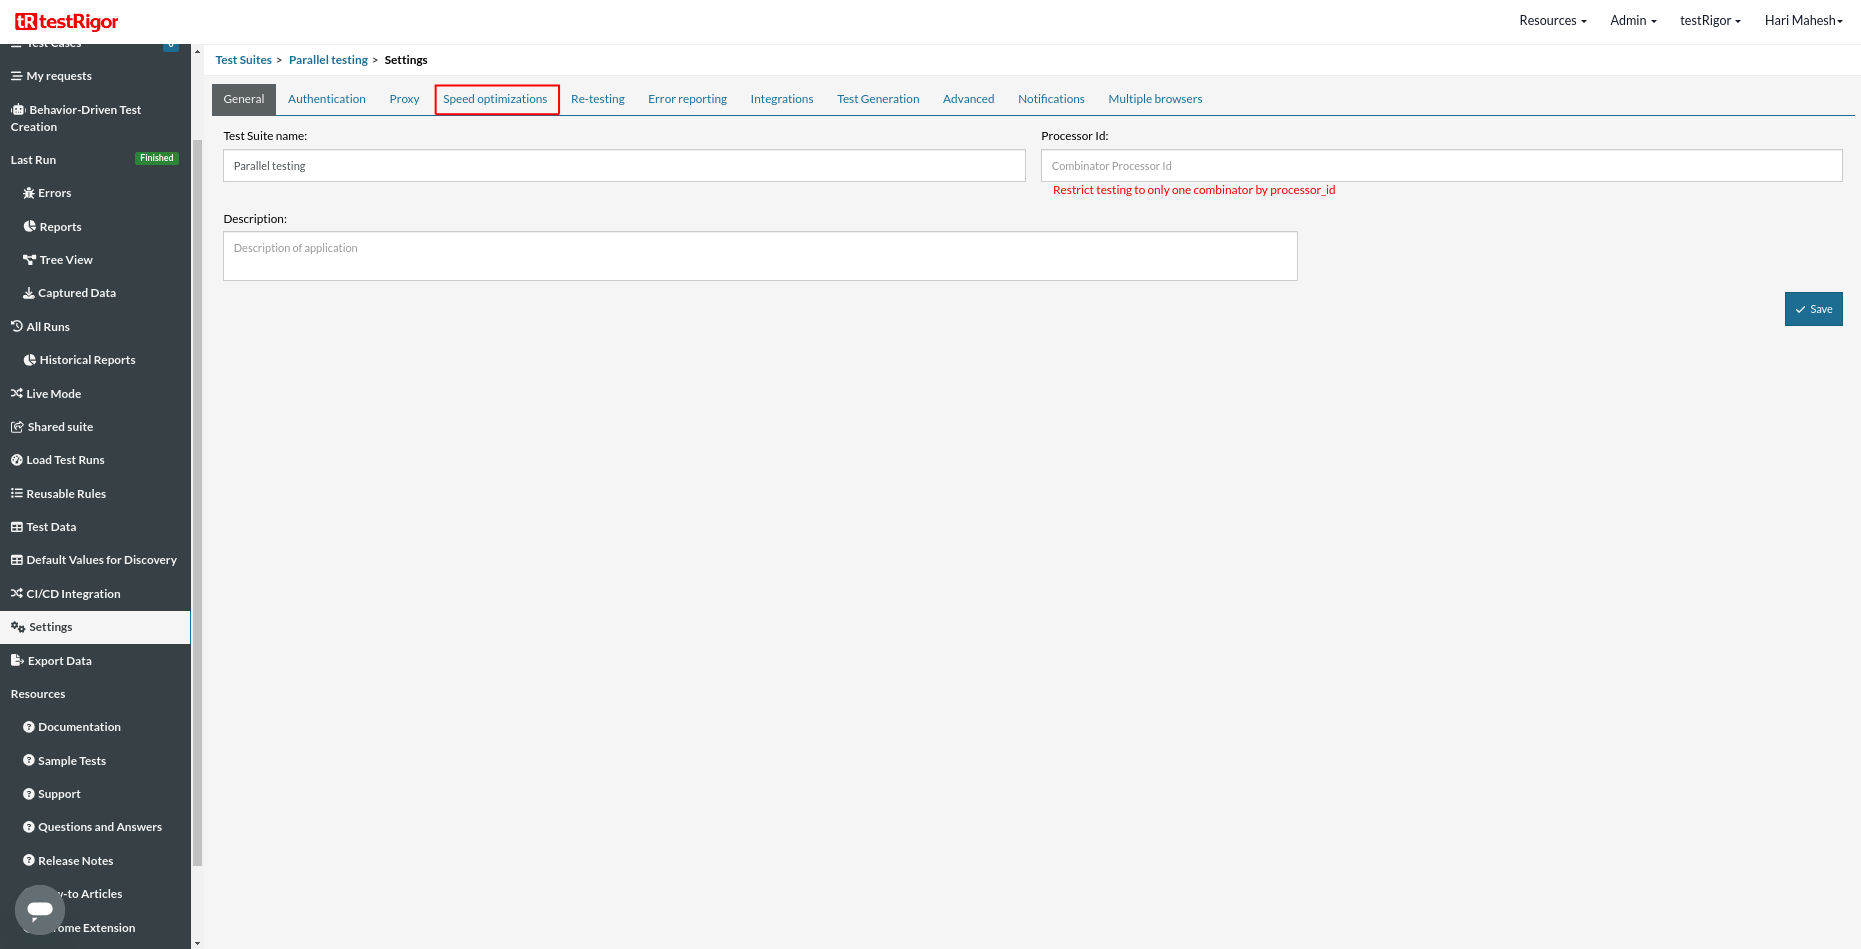
Step 4: Click Speed optimizations on the main screen header.
Step 5: Under the Performance title, you can see a checkbox mentioning the need to allow parallel testing. So, if we enable that checkbox, test cases will run in parallel. Otherwise, the test cases will be executed in sequential order.
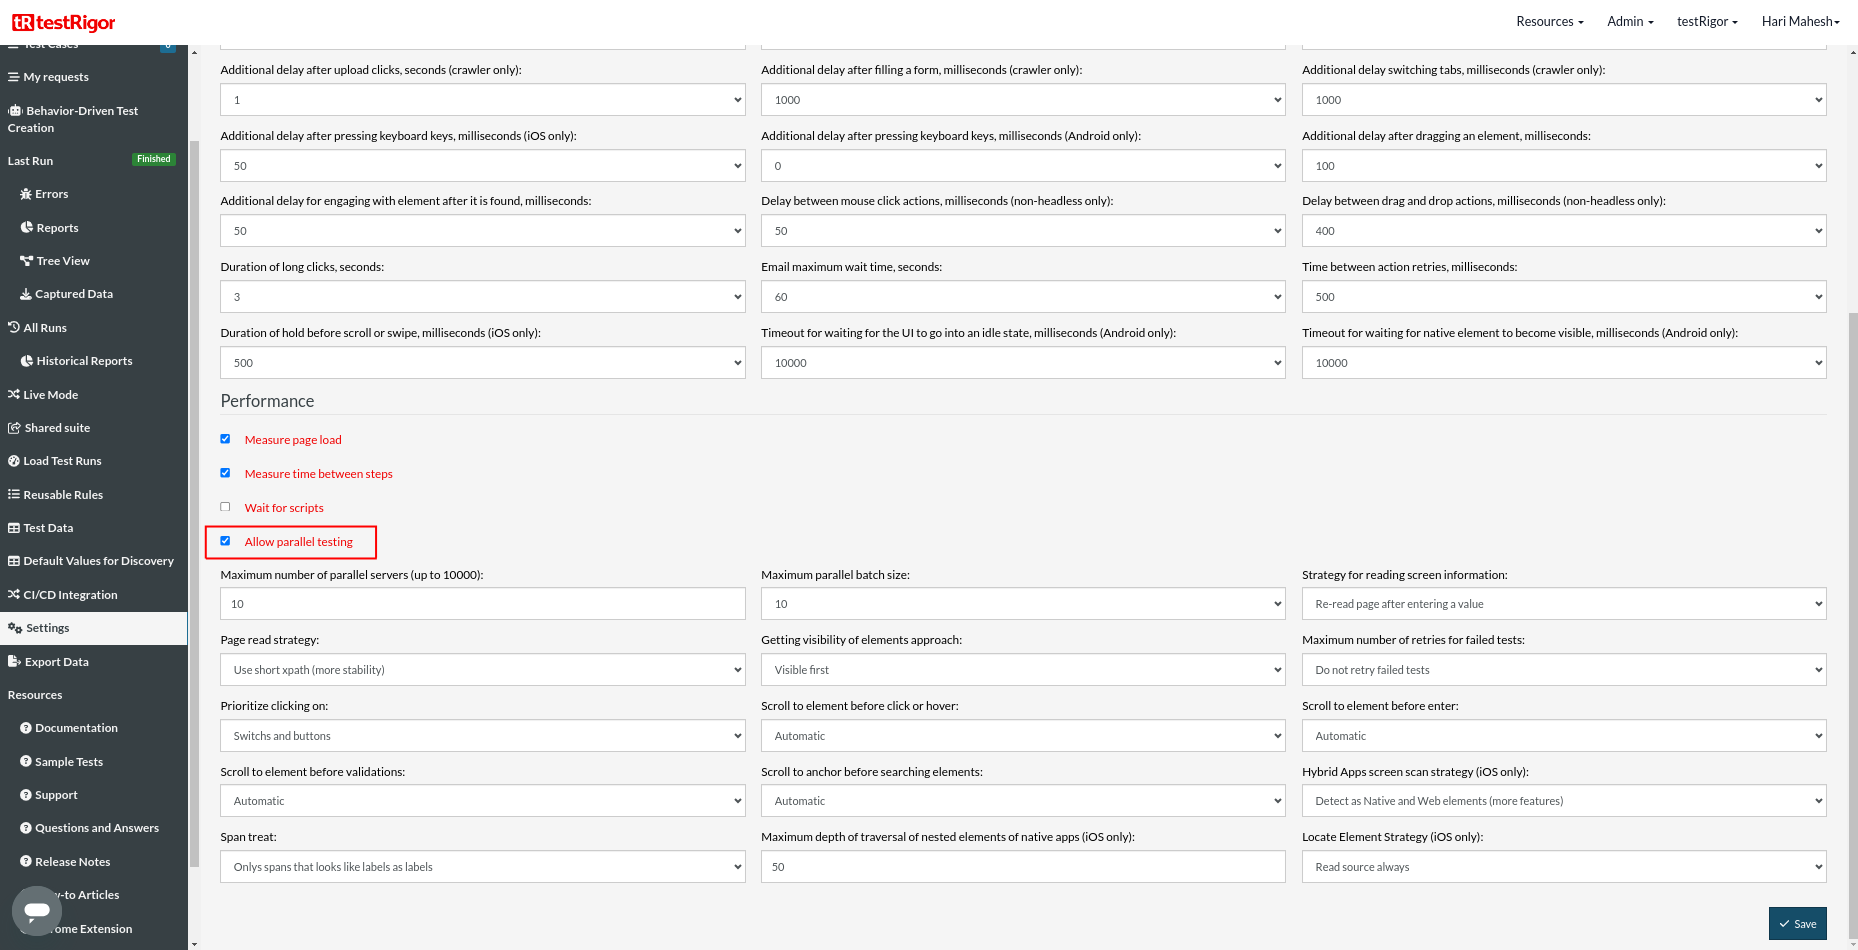
There are two terminologies associated with parallel testing. Below the parallel testing checkbox, we have two options:
- Maximum number of parallel servers (up to 10000)
- Maximum parallel batch size
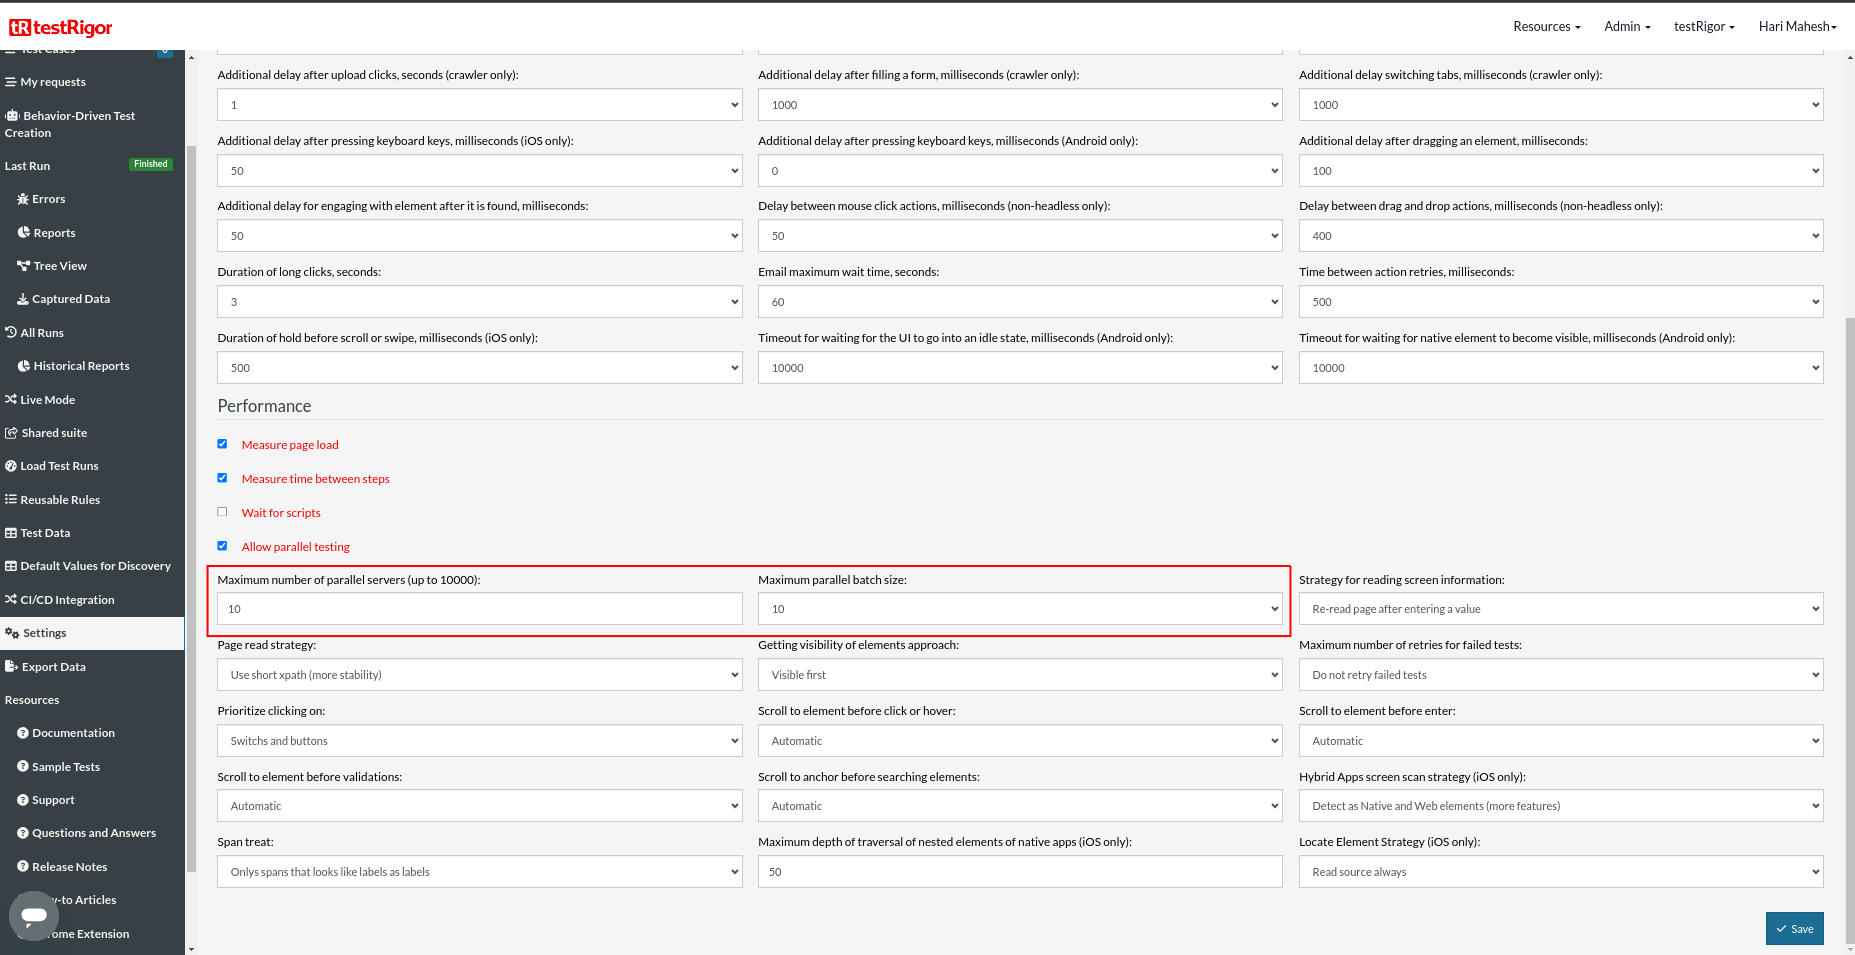
Let’s check in detail what these options are for.
Maximum number of parallel servers
This option is for selecting how many servers you need to run the test cases in parallel. For example, inputting the value as ’10’ means 10 test cases will be executed in parallel. The accepted range is between 1 to 10000. But again, this value depends on how many parallelization servers you have purchased with your subscription plan. If you have purchased five parallelization servers, but the value you input is 10, then only five test cases will be run in parallel.
Maximum parallel batch size
When the test cases are running in your test suite, testRigor groups the test case into batches, and each batch will be given to each parallel server. This process happens automatically.
It is calculated by this formula:
Batch Size = Number of test cases/ Parallel servers
Let’s explain with an example: you have 20 test cases and five parallel servers. So, as per the formula, the batch size will be 20/5 = 4. So, each parallel server will get one batch with 4 test cases. But testRigor provides an option to override the batch size. You may consider overriding the batch size to 1, and testRigor creates batches with a new batch size, i.e., 1. Hence, there will be 20 batches, each with 1 test case with a parallelization on five servers.
So, except for very edge cases, there is no need to turn off parallel execution; that’s why testRigor has enabled parallel execution by default.
testRigor’s Capabilities
Apart from the simplistic test case design and execution, some advanced features help you test your application using simple English commands.
- Reusable Rules (Subroutines): You can easily create functions for the test steps you use repeatedly. You can use the Reusable Rules to create such functions and call them in test cases by simply writing their names. See how to create Reusable Rules.
- Global Variables and Data Sets: You can import data from external files or create your own global variables and data sets in testRigor for data-driven testing.
- 2FA, QR Code, and Captcha Resolution: testRigor efficiently manages the 2FA, QR Code, and Captcha resolution through simple English commands.
- Email, Phone Call, and SMS Testing: Use simple English commands to test the email, phone calls, and SMS. These commands help validate 2FA scenarios with OTPs and authentication codes sent via email, phone calls, or text.
- File Upload/ Download Testing: Execute the test steps involving file download or file upload without the requirement of any third-party software. You can also validate the contents of the files using testRigor’s simple English commands.
- Database Testing: Execute database queries and validate the results fetched.
testRigor enables you to test web, mobile (hybrid, native), API, and desktop apps with minimum effort and maintenance.
Additional Resources
- Access testRigor documentation to learn about more valuable capabilities
- Top testRigor’s features
- How to perform end-to-end testing using testRigor
- How to do data-driven testing in testRigor
- How to do file testing using testRigor
- How to do email testing using testRigor
| Achieve More Than 90% Test Automation | |
| Step by Step Walkthroughs and Help | |
| 14 Day Free Trial, Cancel Anytime |


