TestLink – Overview
|
|
With test management tools integrated into software development projects, you can streamline and organize the testing process. They make it easier for teams to create, manage, and track test cases. Perform test execution to identify defects while providing real-time visibility into your project’s progress and quality levels. These improve collaboration among QA teams, developers, and stakeholders by centralizing all the testing activities. Moreover, they ensure traceability between requirements and tests.
Let’s discuss more about one such test management tool – TestLink.
What is TestLink?
TestLink is an open-source test management tool that helps teams manage their software testing processes. This includes creating, executing, and monitoring the cases of tests.
It provides a centralized platform where QA teams can organize test plans, document test cases, manage requirements, and log test execution results.TestLink supports manual and automated testing while integrating with popular defect-tracking tools like Jira, making reporting and tracking bugs easier.
TestLink – Features
TestLink offers many features that may help you achieve efficient test management.
- Test Case Management: TestLink makes it easy for users to create, organize, and manage their tests with structured steps, expected results, and priorities for each test case.
- Test Plan Creation: Teams can create comprehensive test plans that define test strategies, include multiple test cases, and arrange them according to different test cycles or milestones.
- Test Execution Management: TestLink makes it easy for users to assign test cases to testers, monitor the progress of test execution, and record results along the way, giving users a real-time idea of where their tests stand.
- Reporting and Metrics: TestLink provides detailed reports on test case execution, pass/fail rates, test coverage, and project progress, helping teams analyze test performance and overall product quality.
- User Management: TestLink allows administrators to set up role-based access control. Depending on the role within a particular project (eg. tester, developer, manager), different permissions are assigned to each user.
- Custom Fields: TestLink supports custom fields for test cases and test plans, among other items, plus enables teams to adapt the tool to their specific needs.
- Automation Integration: TestLink integrates with various test automation frameworks, allowing users to run automated tests and track the results within this same system.
Benefits of TestLink
TestLink offers numerous benefits that enhance the efficiency and effectiveness of the software testing process. Key benefits include:
- Open-source and Cost-effective: TestLink is free to use as an open-source tool. This makes it an economical solution for teams, especially those with limited budgets and smaller organizations.
- Centralized Test Management: TestLink provides a centralized platform that lets teams create and organize all testing-related activities in one place. This includes test cases, test plans, test execution, etc.
- Improved Test Coverage: TestLink links test cases to requirements, meaning that all aspects of the software are tested. Thus, it helps teams to maintain comprehensive test coverage and clear traceability.
- Customization and Flexibility: TestLink, adds in handy features such as custom fields and flexible workflows. It enables teams to tailor the tools according to the needs of each project and to adjust tests as necessary.
TestLink – Overview
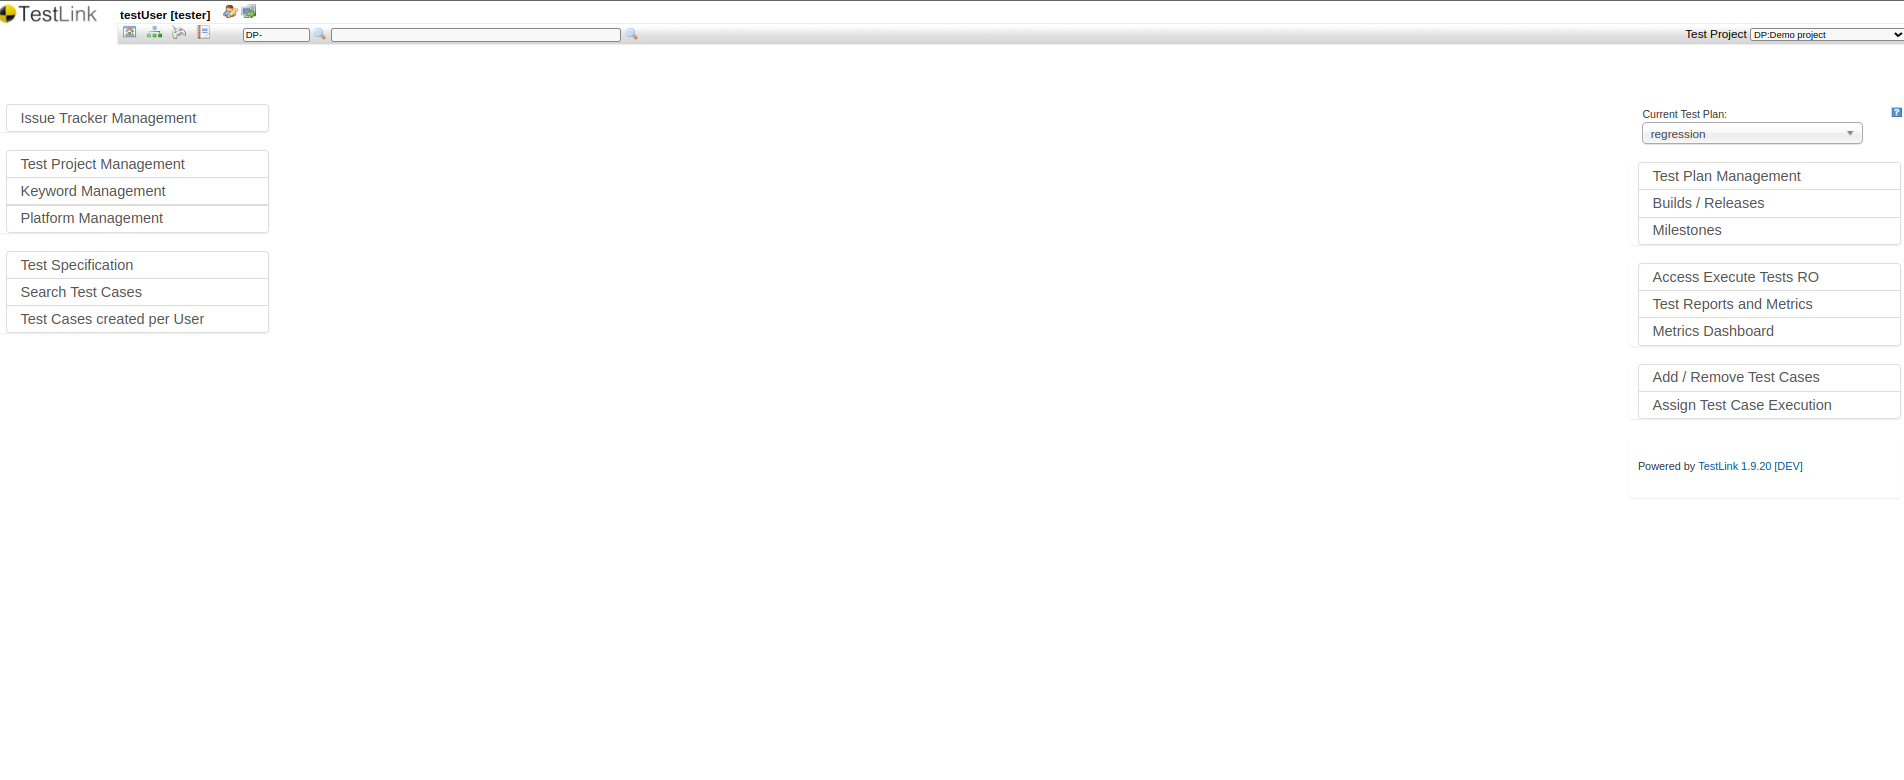
Once you log in to TestLink, the home page will display different options. On the left side, you can see project-related options. On the right side, you can see options for adding test cases, plans, milestones, etc. All these options vary depending on the role set by the lead or project administrator.
Creating Test Suite in TestLink
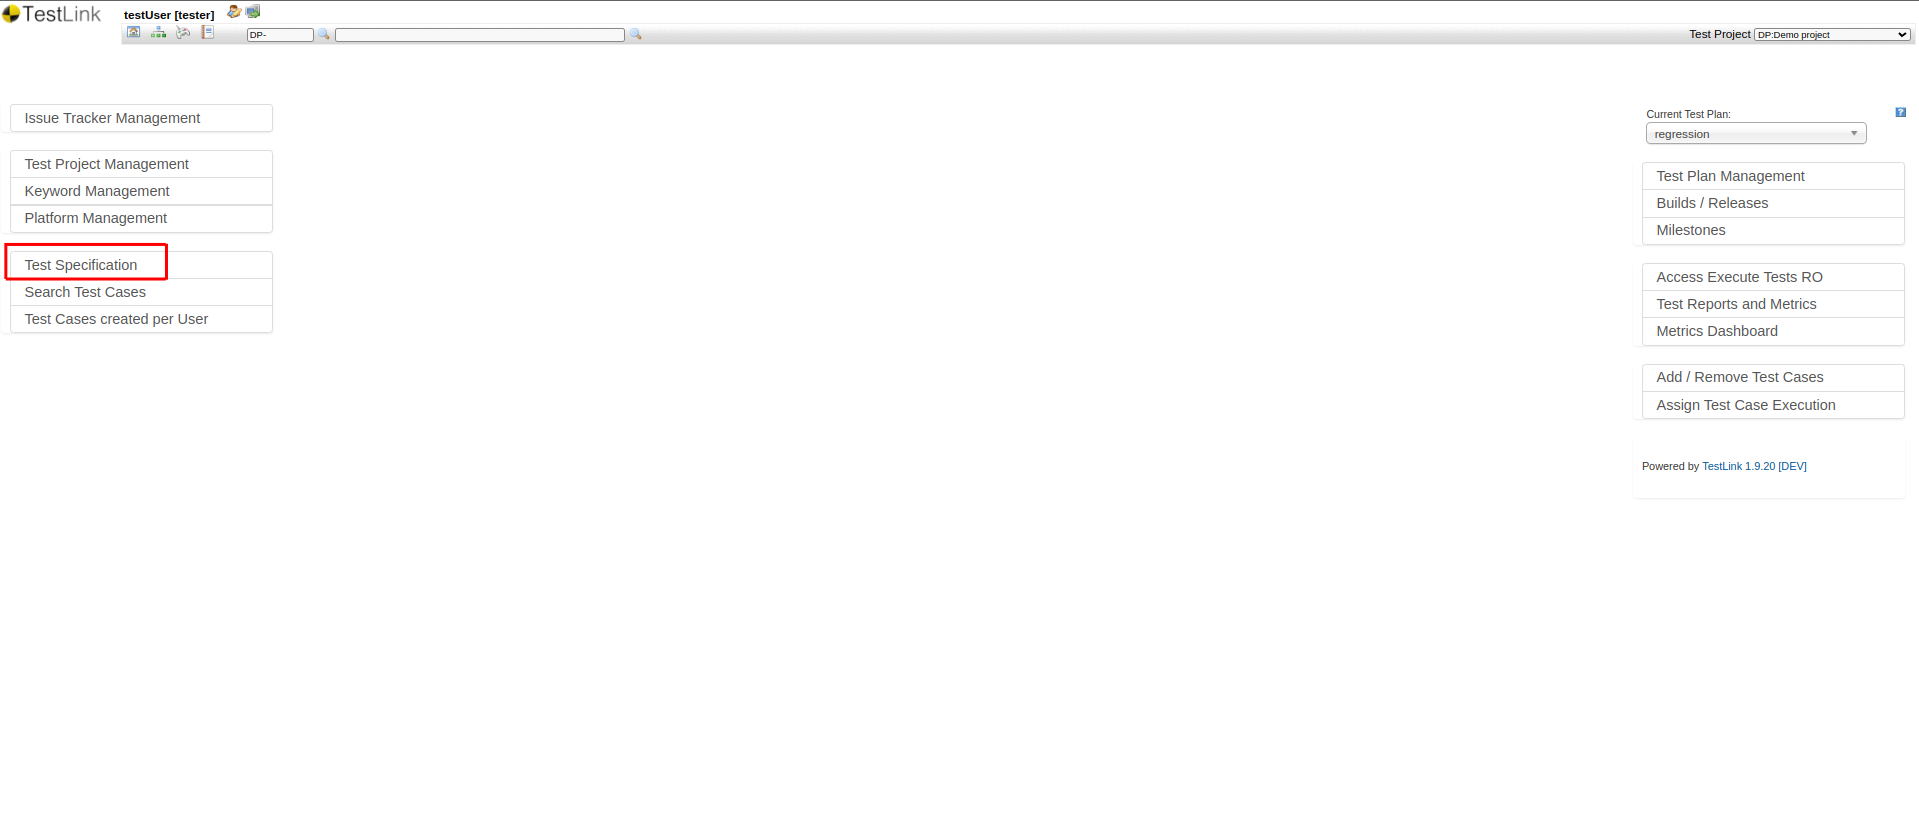
Step 1: Click the Test Specification menu on the left-hand side of the home page to create a test suite.
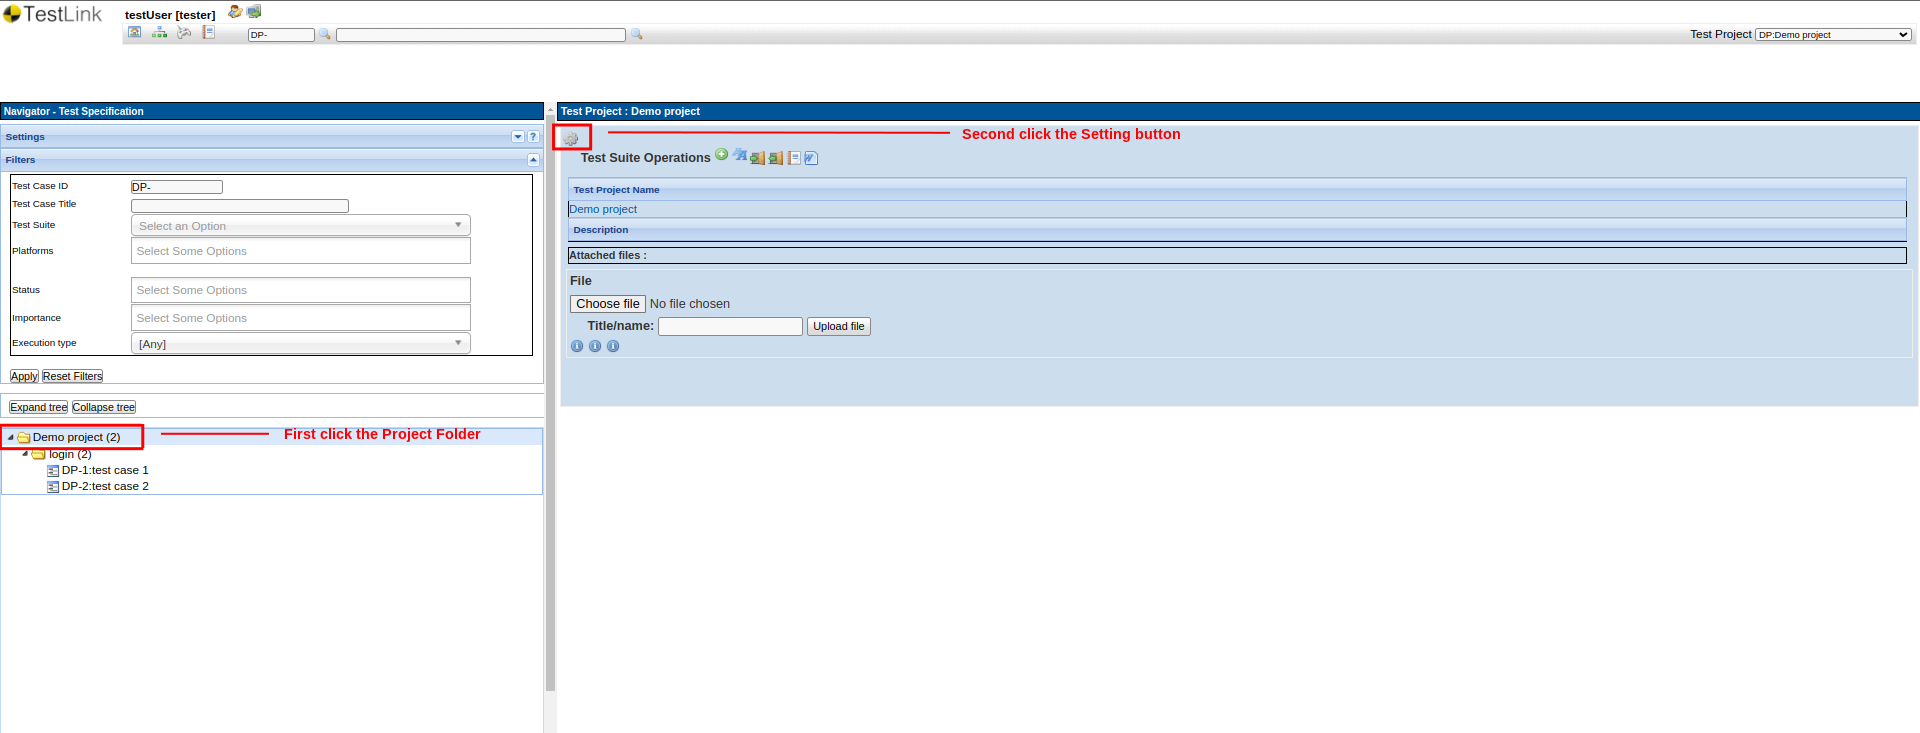
Step 2: On the Test Specification page, you can see the project folder structure. Click on the root folder, which will have the Test Project Name. The project details will be displayed on the page. Click on the Setting button at the top.
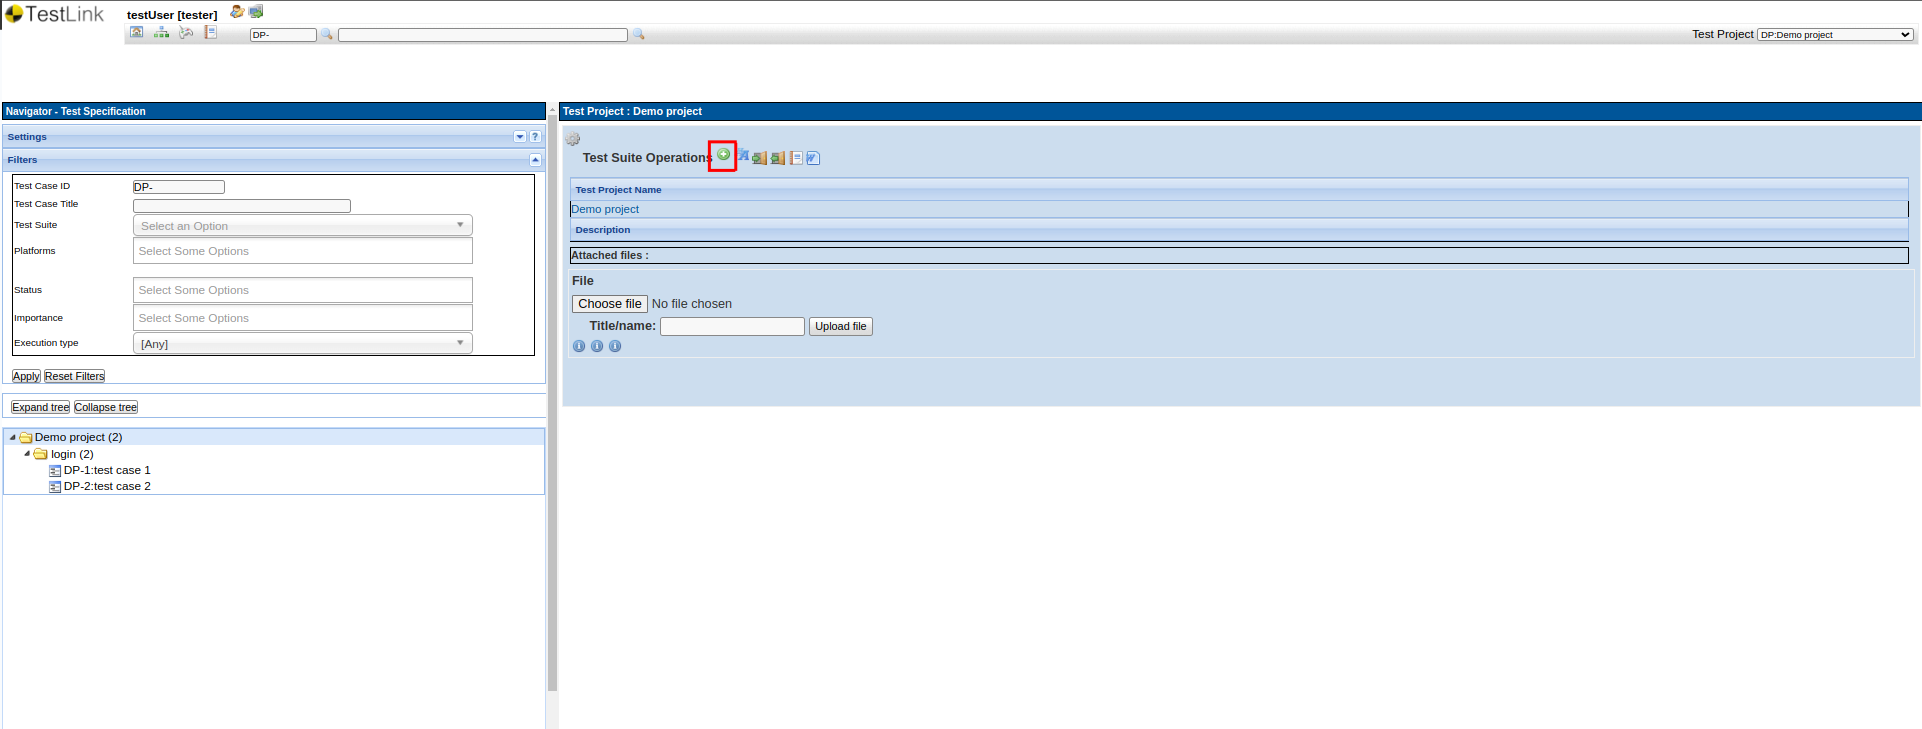
Step 3: Once you click the Setting, a few options will be displayed as below. Click the green plus (+) button to create a test suite.
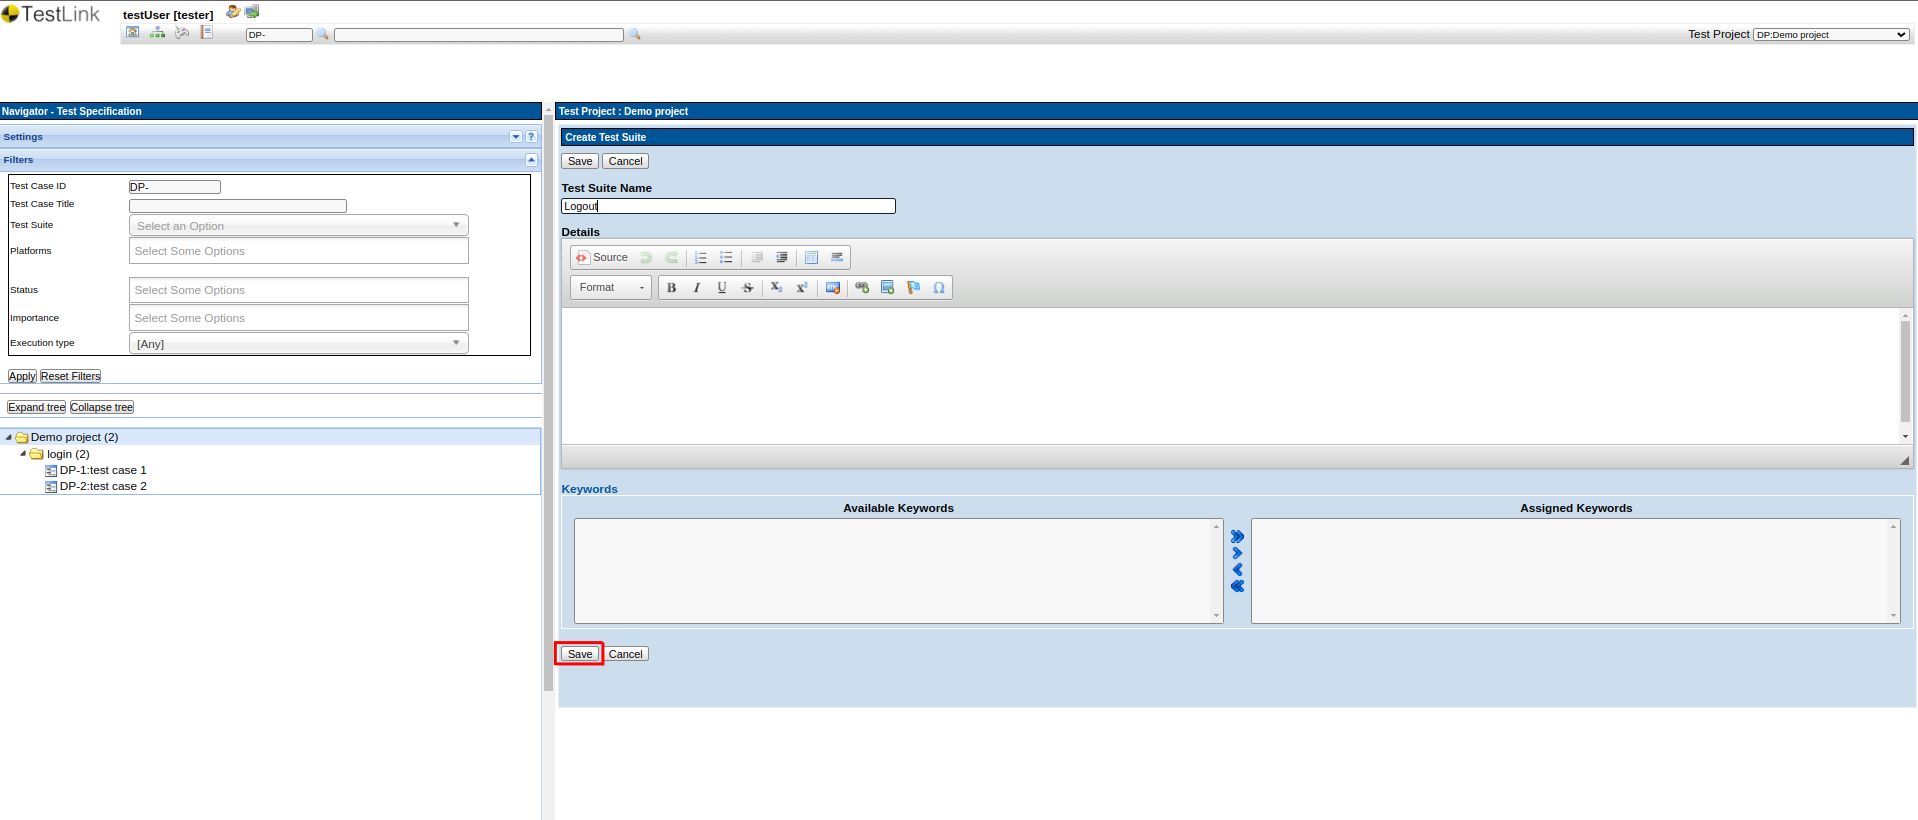
Step 4: Enter the Test Suite Name and click Save. A New Test Suite will be created.
Creating a Test Case in TestLink
Step 5: Once the test suite is created, click on the newly created test suite name. Similarly, as we learned during test suite creation, the Setting button will be displayed. Click it, there will be two options, one is for the Test Suite Operations and the other one is for Test Case Operations.
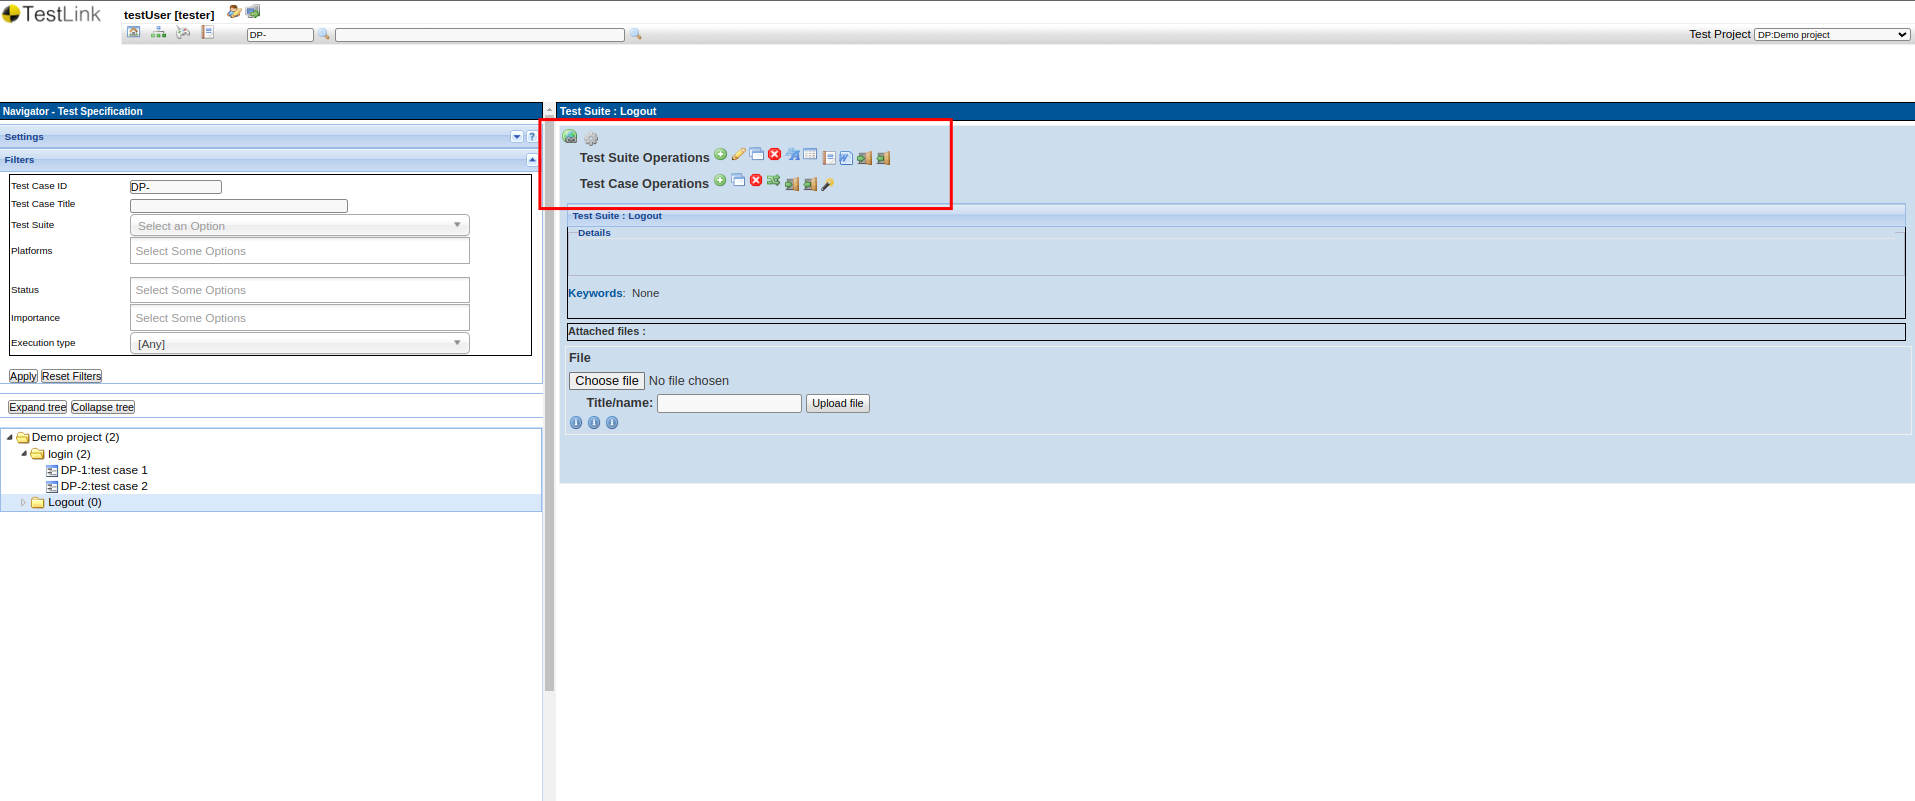
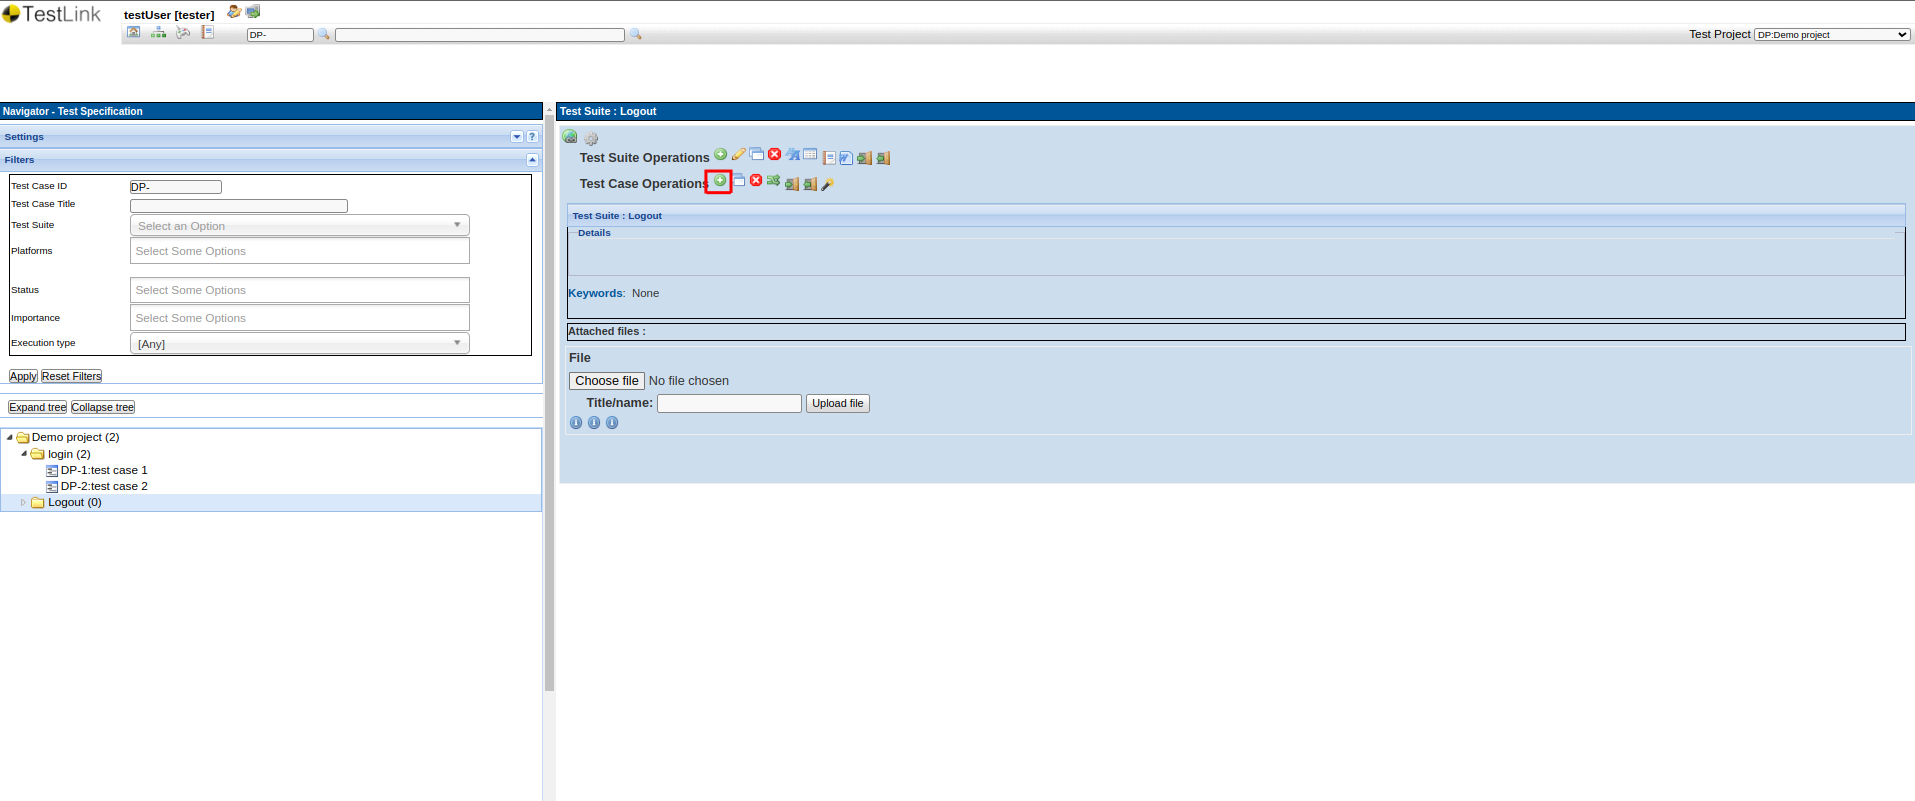
Step 7: For Test Suite Operations, you can create another sub-test suite or delete the current test suite. Now, we will create a new test case. For that, perform the steps similar to creating the test suite and click the green plus button (+) on the Test Case Operations menu.
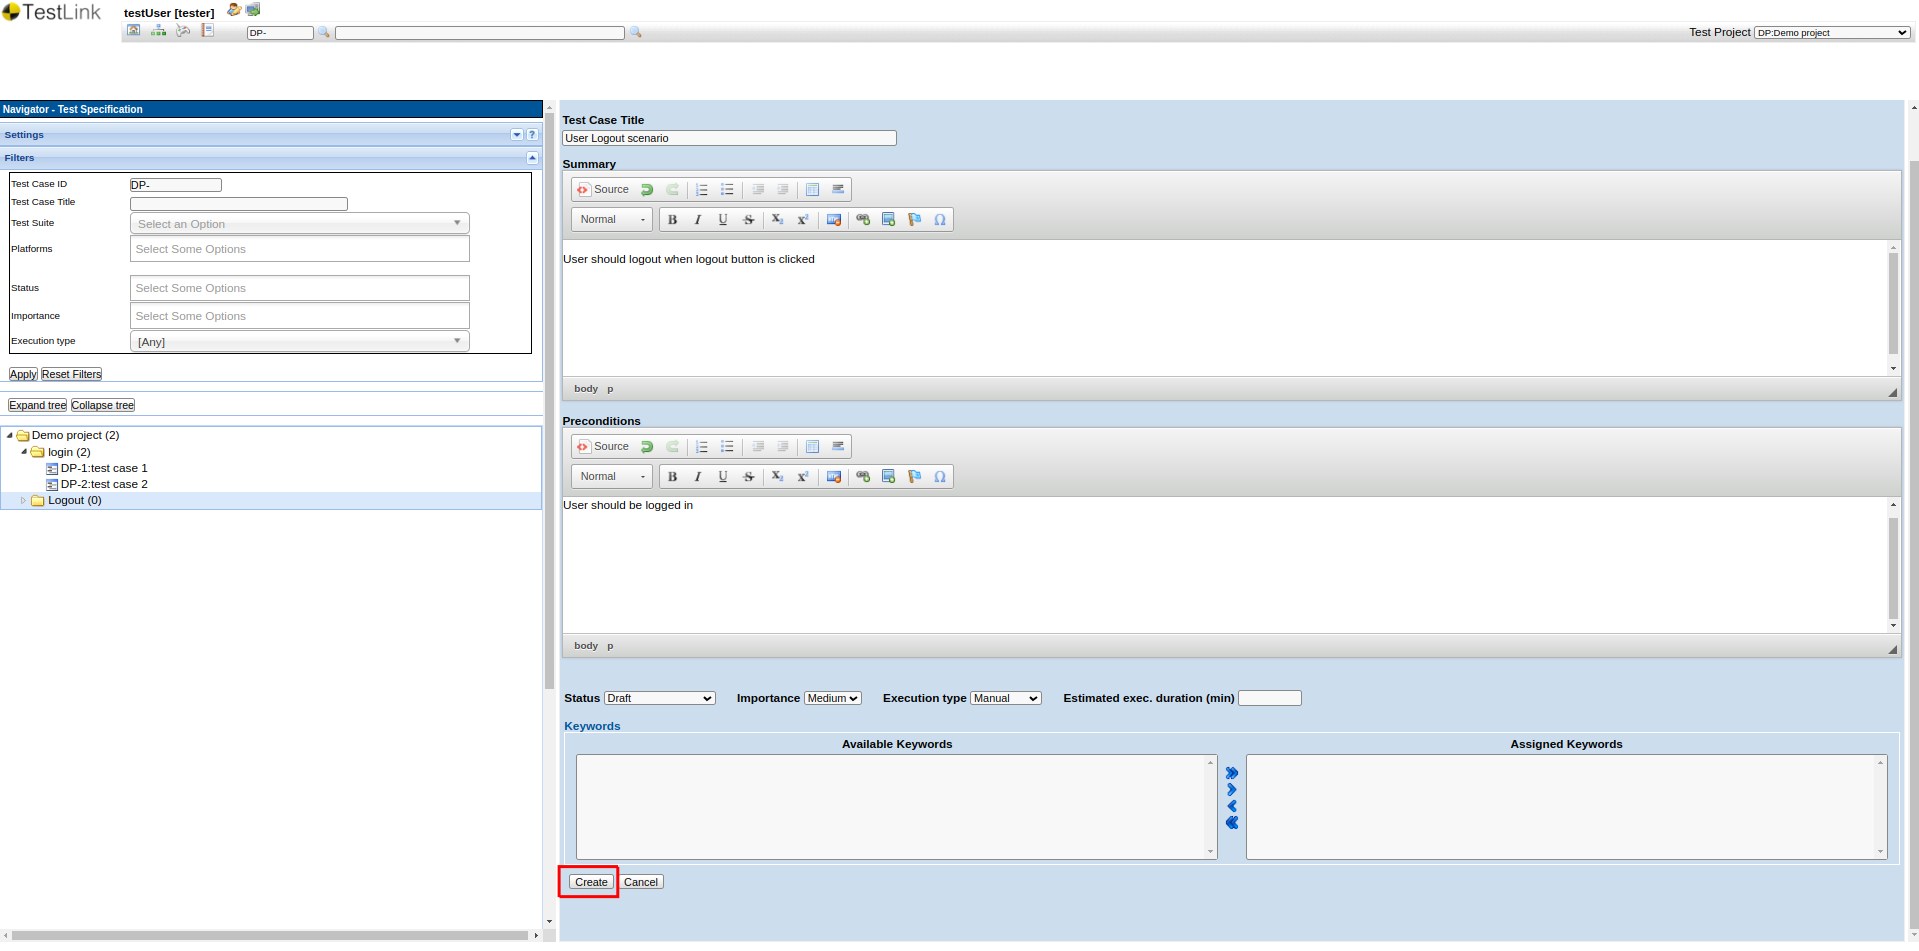
Step 8: The test case creation page is displayed. You can add the Test Case Title, Description, Preconditions, etc. Once all data is added, click the Save button.
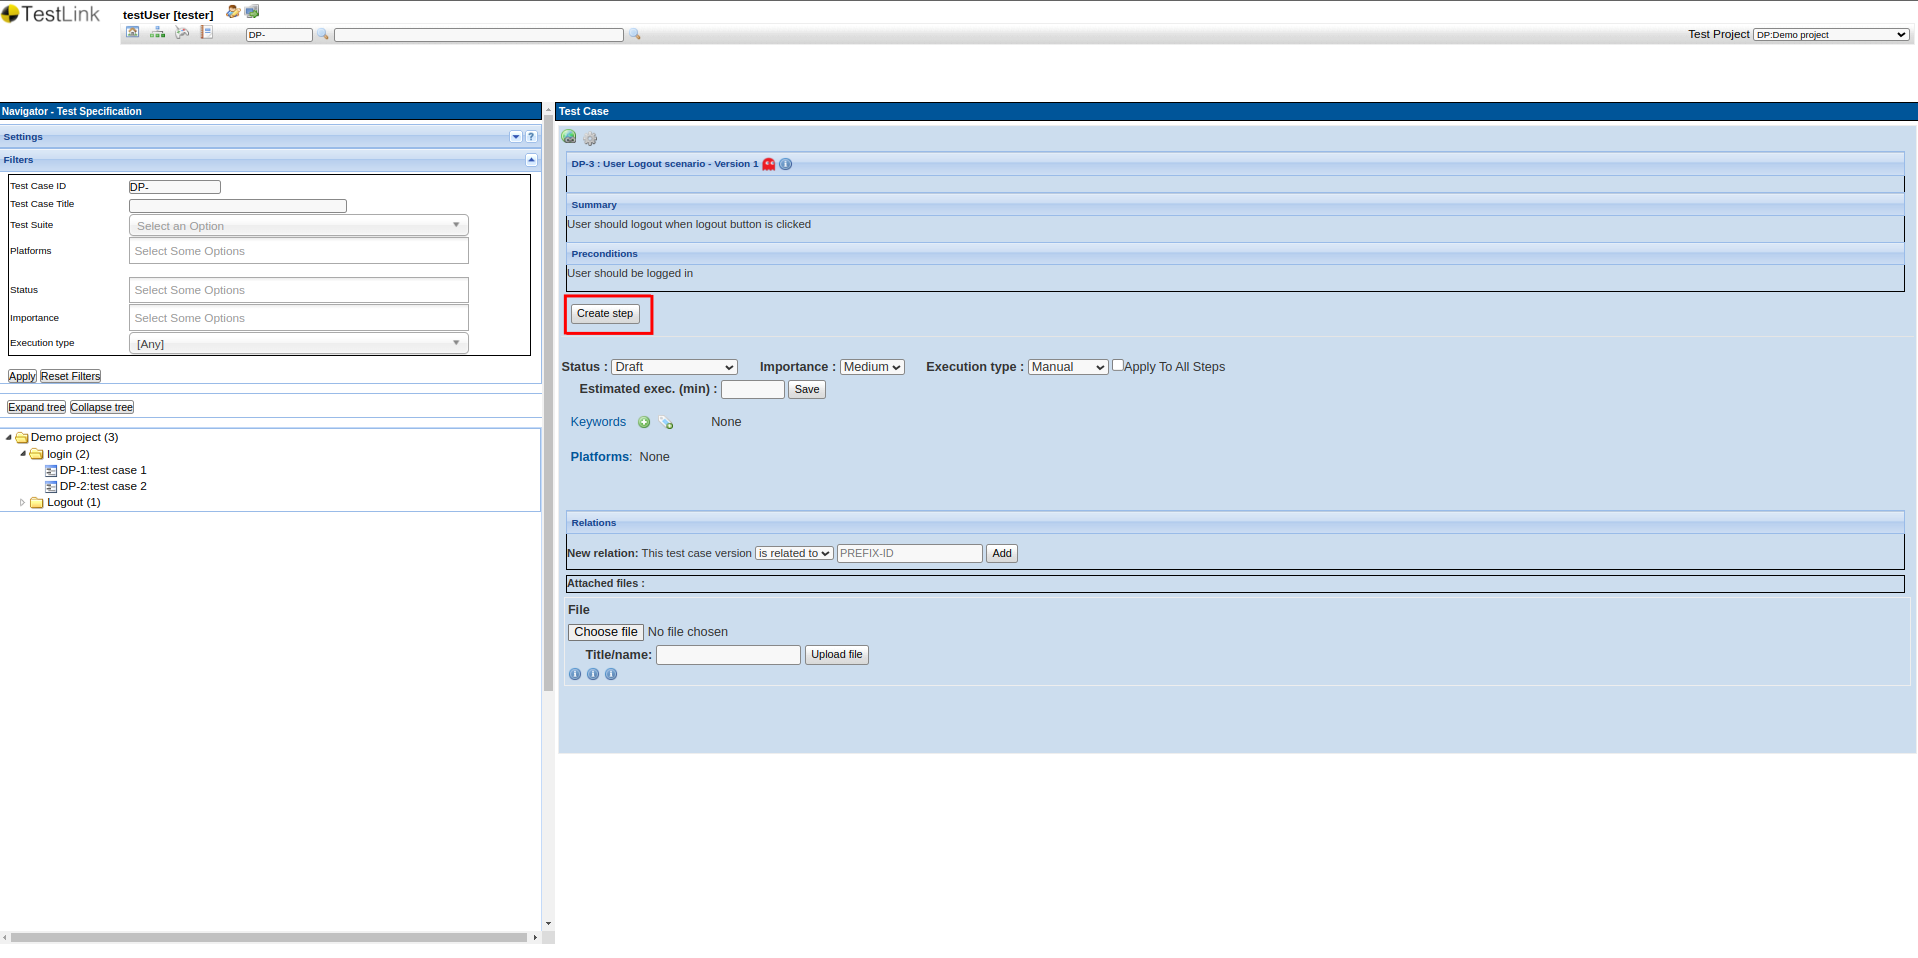
Step 9: Once you Save, you can see the overview of the test case, and also you can see the option to create steps. So to add test steps, click the Create Step button.
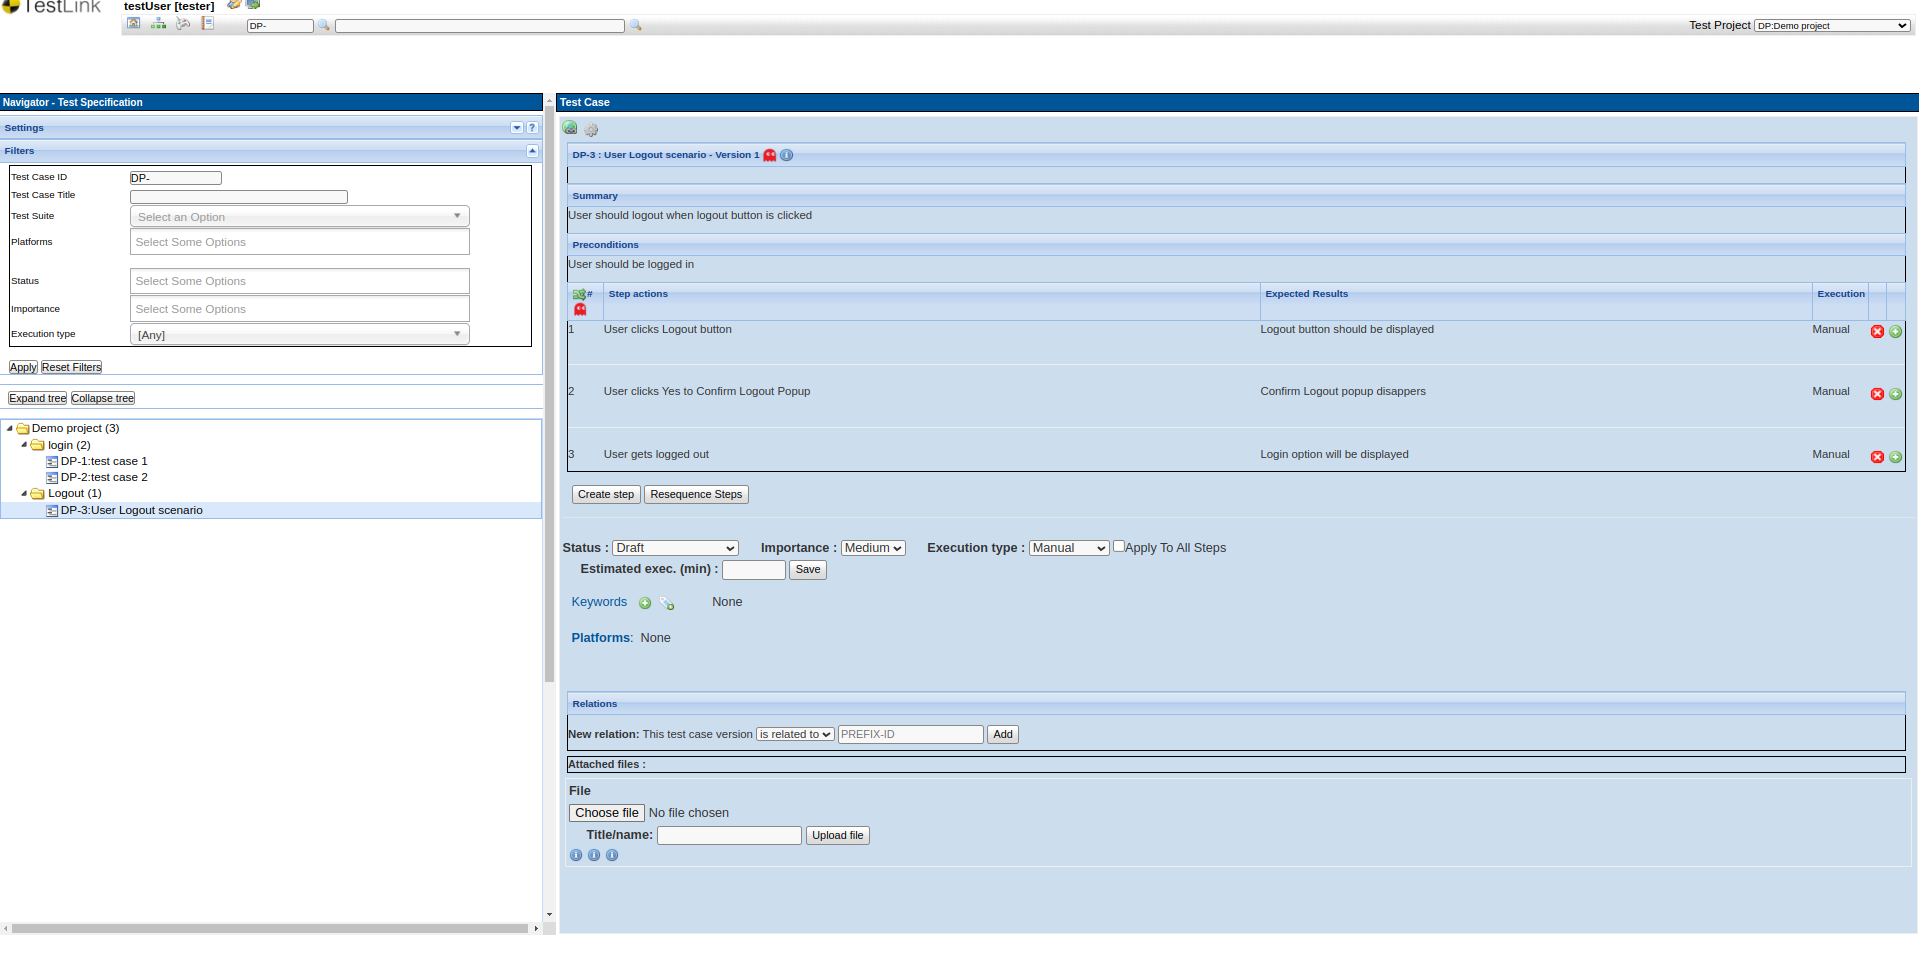
Step 10: Add necessary test steps and click Save button. Now, you can see the test case with all steps and other details.
TestLink Dashboard
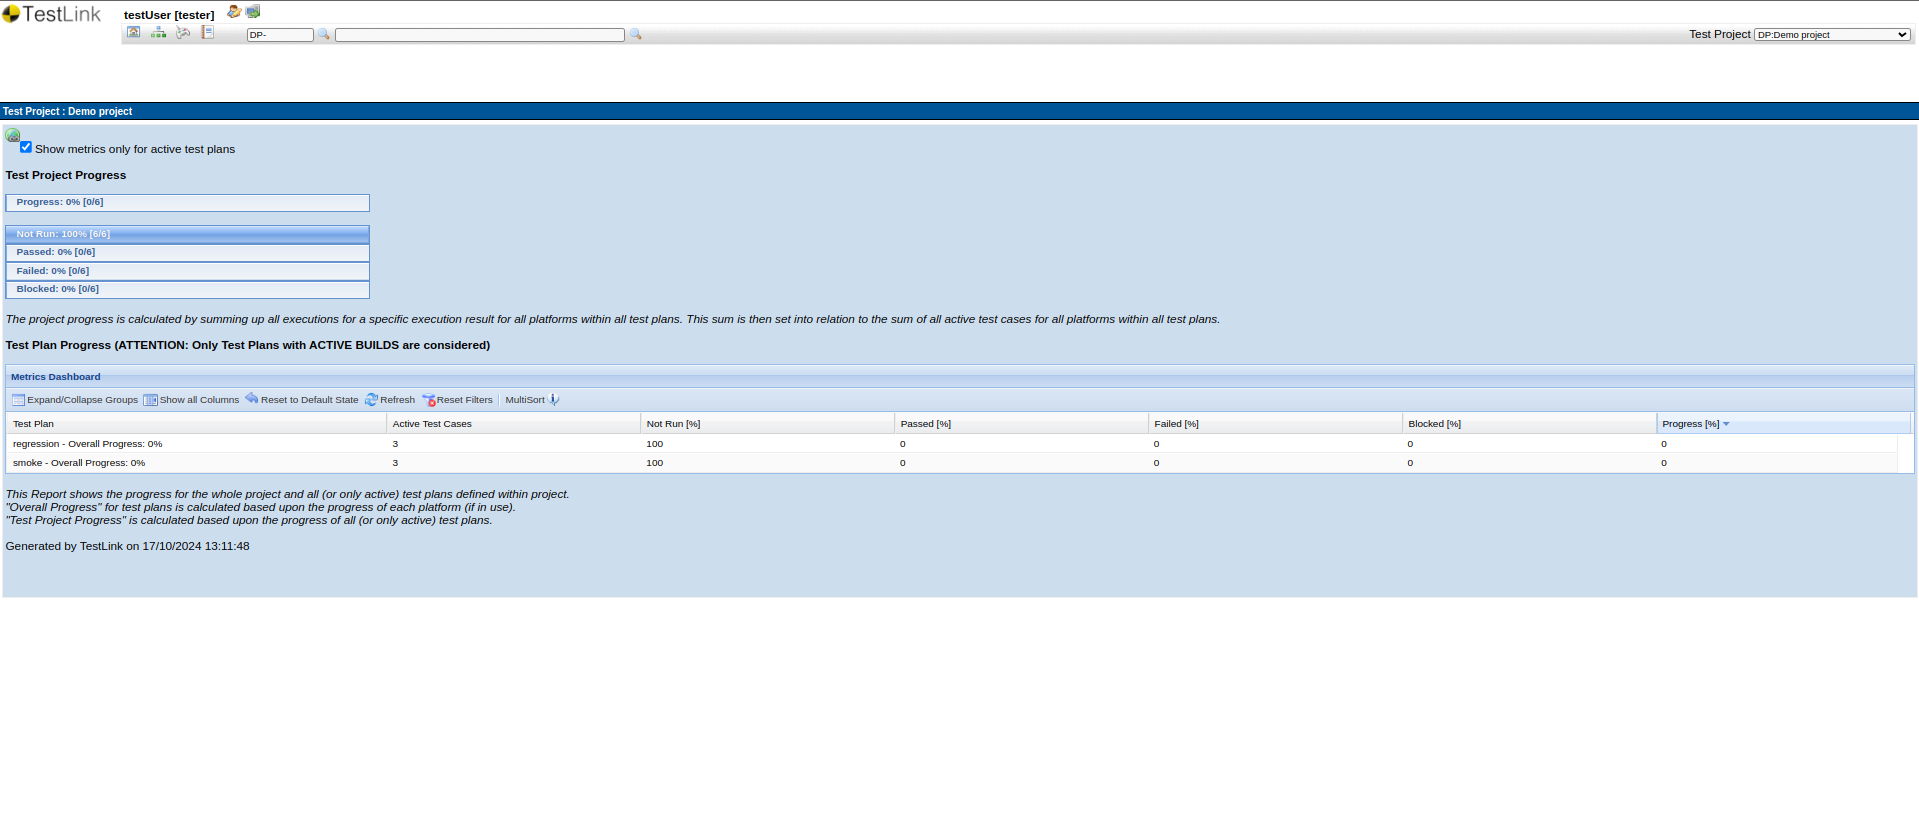
TestLink dashboard provides a detailed information about the test execution. You can see the test cases for each Test Plan and their execution status.
TestLink – Pros & Cons
Let’s understand the advantages and limitations of using TestLink.
| Pros | Cons |
|
|
Test Automation with AI-based tools
While test management tools like TestLink are helpful, more is needed. If you truly want to automate your testing, you need to use tools that can also execute your test cases. Of the many test automation tools available in the market, the one that can help you the most is testRigor.
testRigor with Generative AI
testRigor is a one-of-a-kind test automation tool that makes test case writing, executing, and maintaining easy. With this tool, you can easily create test cases in plain English language statements. This is because testRigor uses generative AI to take it upon itself to decipher what the user intends, making it like a human emulator or AI agent. Read about AI Agents in Software Testing.
You can write various types of functional, end-to-end, regression, sanity, API, UI, and system tests with this intelligent tool. These tests can verify different types of apps/platforms/scenarios, including the web, mobile (hybrid, native), desktop, API, database, file handling, QR code, Captcha resolution, email, phone, SMS, 2FA, and many more in just plain English.
That’s not all; testRigor uses advanced AI to reduce test maintenance overhead, thus allowing you to focus on creating test cases. Read more about Self-healing Tests.
Migrating TestLink Test Cases into testRigor
If your test suites are in TestLink and you decide to automate these test cases, then you can simply copy them into testRigor’s test editor and convert them to automation tests directly. As testRigor leverages generative AI, it will convert statements that it cannot comprehend into reusable rules, similar to shared steps in TestLink. These rules are in plain English and are a group of simple steps that lead to a more extensive action. You can further let testRigor build the rule for you. All this happens in plain English language. Here’s an example.
Let’s say that your TestLink test case has a statement like Checkout from cart. When testRigor’s engine tries to comprehend this, it will classify it as a reusable rule. Now, you can choose to either define this rule by yourself in plain English or let testRigor do it for you using generative AI.
Checkout from cart, testRigor might create steps like:click on “cart” scroll down until page contains "Checkout" click on “Checkout” click on “Continue”
Now, wherever you have the statement Checkout from cart, testRigor will execute this set of steps. At any point, you can modify these steps and the change will be reflected in all test cases.
You can do a lot more with testRigor. Here’s a full list of testRigor’s powerful capabilities.
| Achieve More Than 90% Test Automation | |
| Step by Step Walkthroughs and Help | |
| 14 Day Free Trial, Cancel Anytime |


