Dokku Testing: How to Test Your App’s Nginx Routing with testRigor
 |
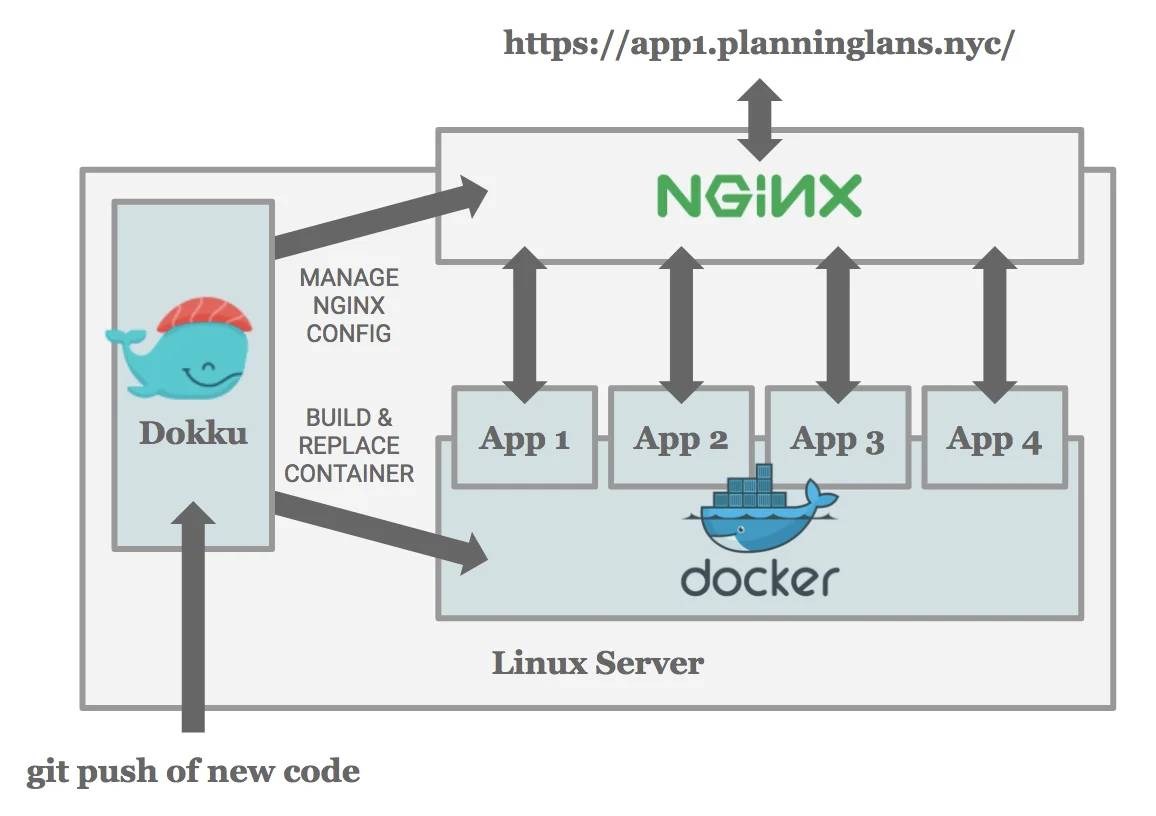
Dokku testing helps verify that an application still works through its public URLs after deployment or configuration changes. Dokku is an open-source platform for deploying and managing applications on your own server. It handles builds, containers, processes, and application routing, but a successful deployment does not guarantee that every request reaches the correct service.
Imagine a dashboard that loads normally while its API requests reach the wrong process. Or a chat interface that opens but cannot establish a WebSocket connection. An application redirect might also send users to a path that the proxy does not recognize. These are the kinds of problems browser-based regression tests should catch before they affect users.
This guide focuses on testing nginx path-based routing to non-web processes with testRigor. It uses a real eight-case browser suite as a practical example, while explaining how to adapt the approach to an application you deploy with Dokku.
Version note: Dokku documents the
proxy:route:*commands for version 0.39.0. The example in this article was tested against a development source revision and may not work with older Dokku releases. Check your installed version and the routing documentation before using these commands.
What Should Dokku Testing Cover for Nginx Routing?
A Dokku application can have a web process for the main website, an api process for HTTP endpoints, and another process for WebSocket traffic. The important question is not simply whether those processes are running. It is whether a user request reaches the intended process and produces the expected result.
A useful regression suite should check the following journeys:
- A browser request reaches the correct backend, rather than accidentally falling through to
web. - Routing survives a process restart and applies configuration changes.
- Removing and restoring a route produces the expected behavior.
- A real WebSocket message travels through the proxy and returns to the browser.
- A missing upstream produces an identifiable error.
- A prefix-aware application redirects the browser to the correct public URL.
These checks protect more than a configuration file. They help establish that browsers can use the application after deployments, routing changes, and process lifecycle events.
How Dokku Routes Requests to Your Application
By default, the nginx proxy sends application traffic to the web process. Dokku’s path-based routing feature lets you direct a selected URL prefix to a different process within the same application. Other requests still use the web catch-all.
The example testing fixture defines three processes:
Procfile contains:web: python server.py web api: python server.py api ws: python ws.py
The fixture serves the main page on port 5000, an API on port 5001, and a WebSocket server on port 5002. Once those processes are deployed, Dokku can route /api/v0 and /ws to their respective upstreams.
browser-probe test application, the setup uses these commands:dokku ps:scale browser-probe web=1 api=1 ws=1 dokku proxy:route:set browser-probe api /api/v0 --port 5001 dokku proxy:route:set browser-probe ws /ws --port 5002 dokku proxy:route:report browser-probe
For your own app, replace the application name, process names, prefixes, and ports with those you actually deploy. Dokku can also strip a matching prefix before forwarding the request with --strip-prefix. That behavior matters when a backend expects /login but the public URL is /api/v0/login.
See the official proxy route reference for matching rules, port options, and backend-specific behavior.
What Dokku Already Tests, and Why Browser Tests Still Matter
Dokku has native tests for routing. For example, tests/unit/proxy-route-nginx.bats checks route selection, prefix stripping, route removal, and WebSocket upgrade directives in generated nginx configuration.
Those tests are valuable. They exercise the behavior of Dokku’s routing implementation and catch regressions without requiring a cloud browser service. However, finding an upgrade header in generated nginx configuration does not, by itself, prove that a browser can open a WebSocket and exchange a message with the deployed service.
Similarly, a correctly rendered route does not establish that a page’s JavaScript fetch reaches the correct backend, or that a browser follows an application redirect to the intended destination. A practical Dokku testing strategy adds browser evidence at that boundary without replacing the native tests.
Unit Testing in Dokku
Unit tests target individual pieces of behavior, such as parsing and validating route definitions. They give maintainers fast feedback about a particular rule or function. For application developers, the equivalent layer covers their own routing helpers, URL generation, and application logic.
Integration Testing in Dokku
Integration tests examine whether components cooperate. In this scenario, important boundaries include Dokku’s route commands, nginx configuration generation, process containers, and upstream responses. A command can succeed while the browser still reaches an unexpected endpoint, so integration checks and end-to-end checks answer different questions.
End-to-End Dokku Testing
End-to-end testing starts from the user-facing URL and follows an entire interaction through the proxy and the application. For the WebSocket case, that journey is:
Open the application → enter a message → send it over WebSocket → receive the echo → verify the expected backend and Host header.
The browser has to execute JavaScript, establish the connection, receive the server’s response, and show the result. That is a different level of evidence from checking nginx configuration alone.
Tools for End-to-End Dokku Testing
testRigor
testRigor lets teams describe browser interactions and assertions in plain English. For Dokku routing, that means a test can click a button, verify text rendered after an API call, or check the result of a WebSocket exchange without expressing each action as a CSS selector or custom browser script.
The eight-case example also uses the testRigor CLI to run Chrome tests against a local Dokku instance through a localhost tunnel. This is useful for temporary development environments that are not publicly reachable.
Selenium
Selenium is an open-source browser automation ecosystem with bindings for several programming languages. It offers flexibility for engineering teams that want to write and maintain their tests in code. Checking JavaScript-rendered output is straightforward, while more specialized network behavior may require application-side instrumentation or additional tooling.
Playwright
Playwright provides code-driven browser automation, locators, tracing, and request inspection. It is a good fit for teams already maintaining JavaScript or TypeScript test suites. testRigor offers an alternative when the team prefers readable, browser-level test steps and cloud execution. None of these tools replaces Dokku’s own command and integration tests.
Dokku Testing with testRigor: A Practical Browser Walkthrough
We will use the application from the Dokku routing browser-test contribution. Its small test page is deliberately simple: one button fetches the API’s identity, and another sends a message through a WebSocket. The response appears in the browser, where testRigor can validate it.
Use an isolated environment. The broader example changes process scale, application configuration, and routes. Do not run those destructive lifecycle checks against a production application serving users. A regular staging deployment is enough to start; the example repository harness uses a more elaborate isolated Docker setup for reproducible testing.
Step 1: Prepare the Application and Test Environment
In your own Dokku deployment, verify that the application is reachable through a staging hostname and that the test routes point to the intended processes. The example fixture instead publishes http://localhost:19080 on loopback and uses the CLI tunnel to give the remote browser access.
dokku proxy:route:report browser-probe
dokku nginx:validate-config browser-probe
These commands are useful setup checks, but they do not replace the browser assertions below. If you are using the example harness, let its installer create and verify the fixture instead of pointing the tests at an unrelated Dokku app.
Step 2: Create a Dokku Testing Suite in testRigor
To test a publicly reachable staging app through the testRigor web interface:
- Sign in to testRigor and create a new test suite.
- Choose a desktop Chrome testing profile and give the suite a descriptive name, such as Dokku Routing Regression.
- Enter the URL of your staging application and configure any required authentication.
- Create the suite, then choose Add Test Case to enter the steps manually.
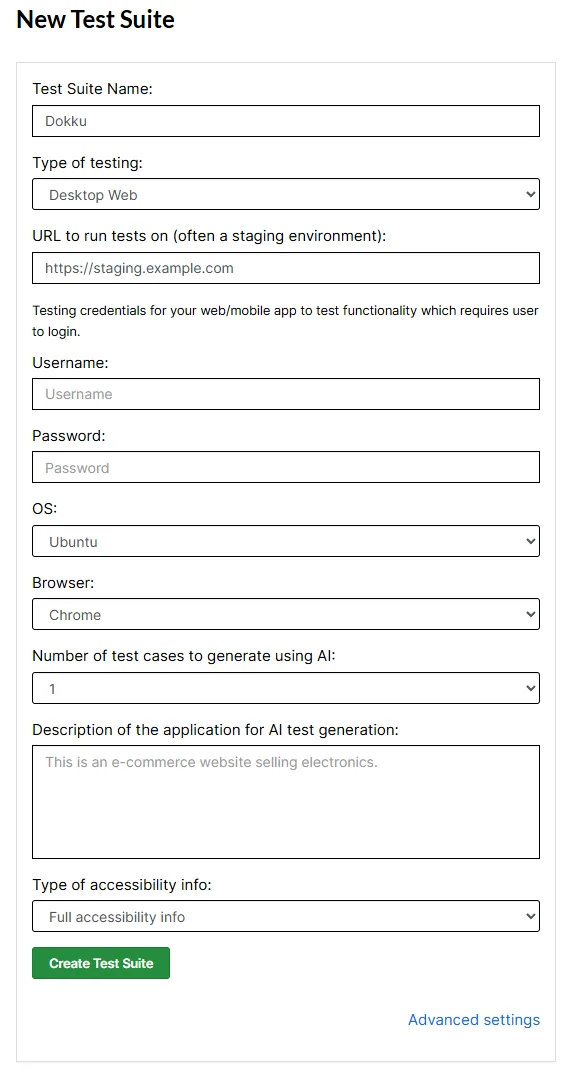
For the source-controlled local example, create a dedicated private Desktop Web Chrome suite and use its ID with the CLI. The harness uploads one selected case per execution, supplies its test data, and opens the local app through the tunnel. Do not use the public example suite as a shared writable test environment.
Step 3: Configure Test Data
Good routing assertions need evidence that the correct upstream responded. The example API returns an identity marker and container hostname. The controller obtains the expected values from the fixture state, then supplies them to testRigor automatically.
| Test Data key | What it verifies |
|---|---|
expectedBackendMarker |
The API response came from the expected configured backend. |
previousHostname |
A restarted route no longer displays the previous container hostname. |
previousBackendMarker |
A configuration update replaced the old marker. |
expectedErrorHeading and expectedErrorDetail |
The correct Dokku error-page content appears when the API has no running upstream. |
For your own app, use a stable, test-specific response value such as an environment marker or build revision. Do not rely only on the presence of a page heading: the heading might render even if an API call fails. The provided harness requires no manual Test Data entries because its controller writes them for each run.
Step 4: Check That the Browser Reaches the Correct Backend
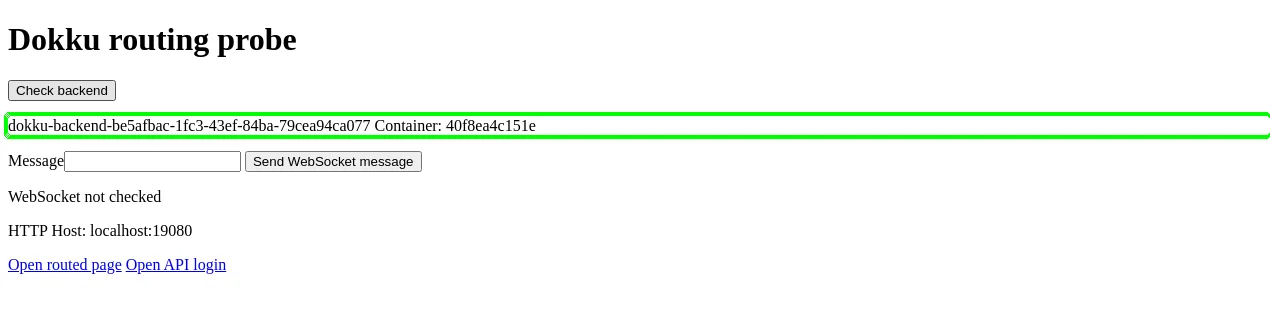
On the fixture’s main page, Check backend runs browser JavaScript that fetches /api/v0/identity. The API returns its role, marker, and hostname. The page then displays the marker and container identity.
click "Check backend"
check that page contains stored value from "expectedBackendMarker"
This part of Dokku testing checks the result rendered by the browser, not merely the HTTP status of the original page. The fixture additionally rejects responses whose role is not api. A separate HTTP check in the controller confirms the expected role and marker after the browser verdict.
Step 5: Test a Real WebSocket Exchange
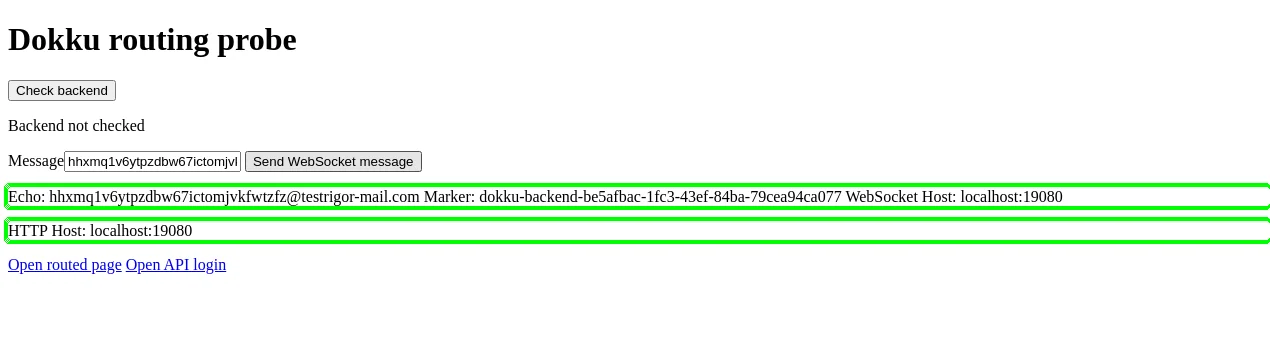
WebSocket routing deserves its own test. A page can load and an nginx config can include upgrade headers while a live connection still fails. In the fixture, clicking Send WebSocket message opens a connection to /ws. The server responds with the message, configured backend marker, and request Host header.
The test generates a unique value, sends it, and checks that the browser shows the exact value returned. In this particular example, generate unique email simply creates a unique message payload; the scenario is not testing email delivery.
Complete WebSocket Test Case
generate unique email, then enter into "Message" and save as "sentMessage"
click "Send WebSocket message"
check that page contains string with parameters "Echo: ${sentMessage} Marker: ${expectedBackendMarker}"
check that page contains "HTTP Host: localhost:19080"
check that page contains "WebSocket Host: localhost:19080"
The final two checks are specific to the loopback fixture. When adapting the case to a staging domain, replace them with the Host value your environment should preserve. The controller also performs an independent WebSocket exchange to cross-check the browser result.
Step 6: Validate Routing After Changes
Routing problems can appear only after a change. That is why Dokku testing should include process and route lifecycle cases, not just initial connectivity. The example prepares different fixture states before each browser case. This preparation occurs outside the plain-English test, so the browser case can stay focused on the user-visible result.
click "Check backend"
check that page contains stored value from "expectedBackendMarker"
check that page does not contain stored value from "previousHostname"
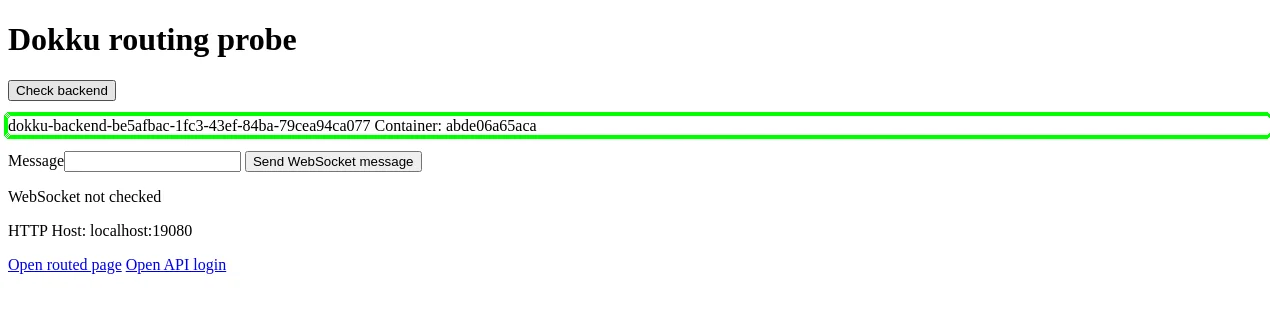
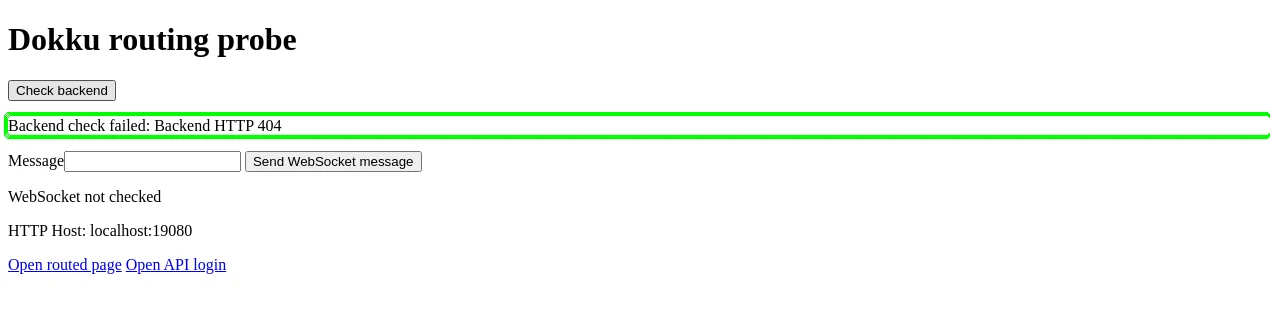
TC-03 checks that a changed application marker replaces the old value. TC-04 removes the route and expects the web process’s 404 response, while TC-05 re-adds it and checks that the API marker returns. A general page-load test would miss these differences.
A pass after restart does not prove continuous availability during the restart. To establish an uninterrupted service-level objective, add monitoring or time-series probes that observe the entire transition.
Step 7: Check Missing Upstreams and Redirects
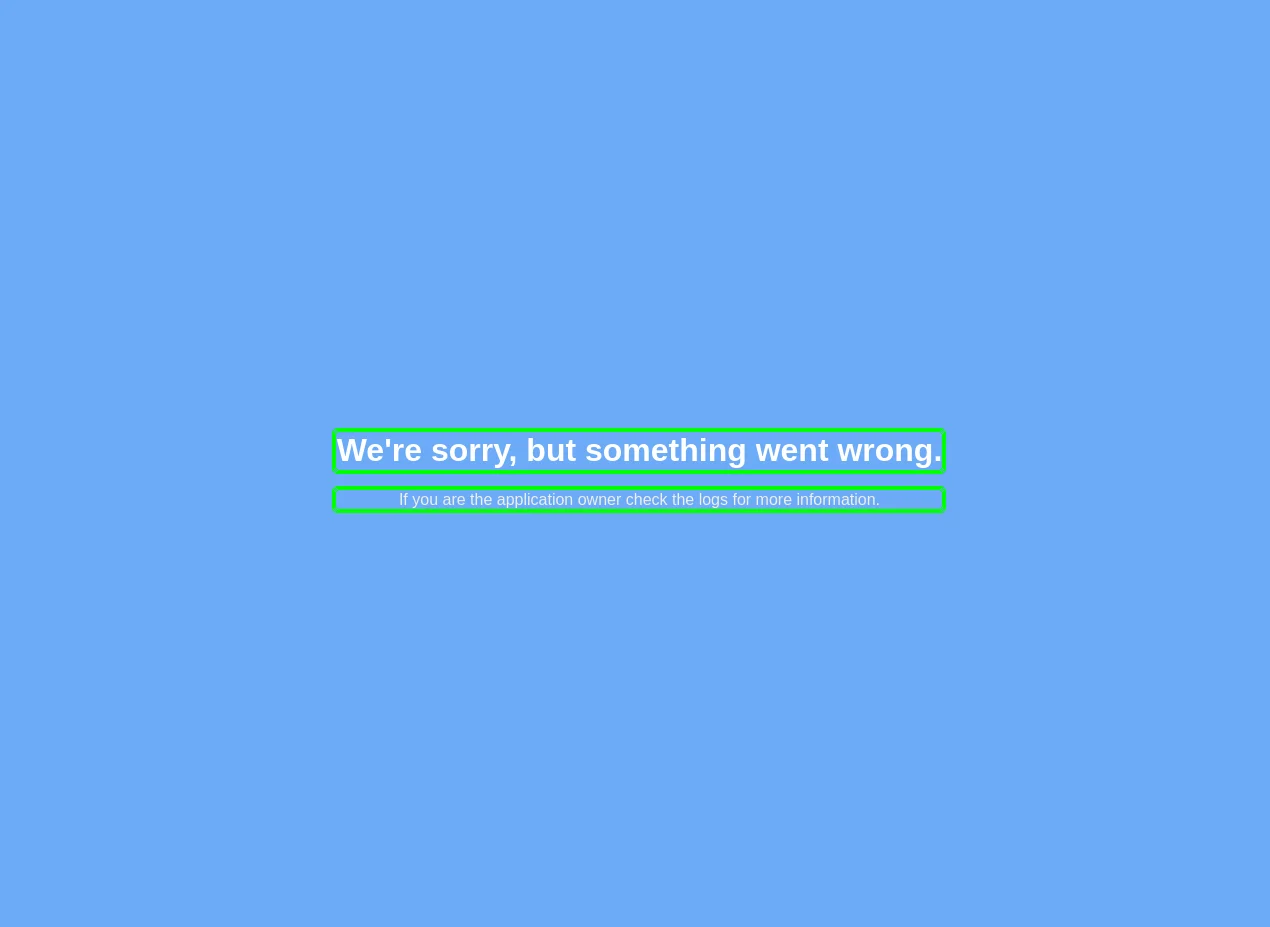
TC-07 scales the API process to zero. The browser follows Open routed page and checks the expected Dokku error heading and detail. The independent HTTP probe confirms a 502 response. This distinguishes a missing upstream from the intentional 404 expected when a route has been removed.
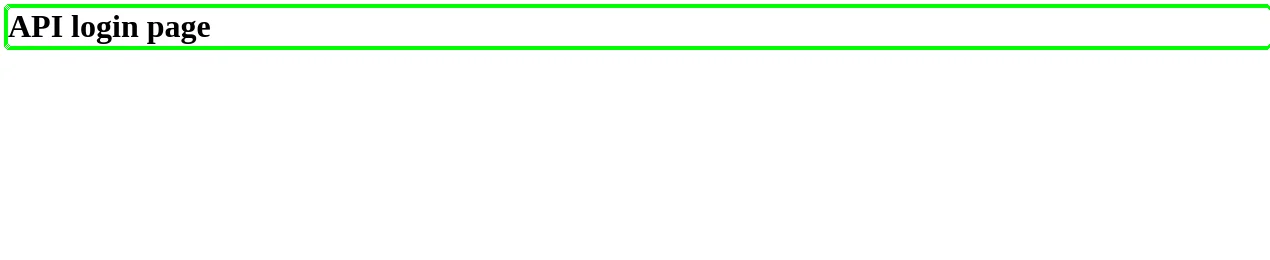
click "Open API login"
check that page contains "API login page"
Here, nginx removes /api/v0 before forwarding the request, but the API knows its external prefix and redirects to /api/v0/login. The browser then reaches the login page. This does not demonstrate that Dokku automatically rewrites an application’s Location header. If your app runs under a prefix, configure its public base path accordingly, or implement an appropriate proxy response rewrite where supported and intentionally configured.
Eight Verified Dokku Testing Scenarios for Nginx Routing
The following cases come from the source-controlled suite. Each link opens an execution published by the example GitHub Actions workflow on November 18, 2026.
| Case | Browser-visible behavior | Example execution |
|---|---|---|
| TC-01 | API identity is rendered after a browser fetch. | View execution |
| TC-02 | Route works after restart; previous hostname is absent. | View execution |
| TC-03 | New configuration marker appears instead of the old one. | View execution |
| TC-04 | Removed route falls back to the web process and shows a 404. | View execution |
| TC-05 | Restored route reaches the API again. | View execution |
| TC-06 | Live WebSocket echo, backend marker, and Host are displayed. | View execution |
| TC-07 | Scaled-zero API displays Dokku’s error page. | View execution |
| TC-08 | Prefix-aware redirect reaches the API login page. | View execution |
The workflow completed successfully at source revision 4b6d58af3. Its reports identify all eight browser cases as passed, with matching independent HTTP or WebSocket checks and verified cleanup.
You can also open the public example suite. The contribution was proposed in PR #9299, which was closed without being merged into the upstream Dokku repository. These results show a successful example run, not part of Dokku’s official CI.
Dokku Testing Tips for Reliable Automation
The real test fixture illustrates several useful practices:
- Assert the backend, not only the page. A response marker and process identity help distinguish a correct upstream from a fallback page that also returned HTTP 200.
- Use independent expected values. Obtain the expected marker from controlled configuration and a prior hostname from the running container, rather than trusting the response under test to tell you what was expected.
- Distinguish route removal from process unavailability. In this fixture, removal results in a web-process 404; scaling the routed API to zero results in a Dokku error page with HTTP 502.
- Test application-aware prefixes. Stripping a request prefix does not automatically fix redirects generated by an application that assumes it lives at the root URL.
- Keep destructive state changes outside browser test steps. Prepare routes and scale through a controlled harness, then restore the original state even if the browser assertion fails.
- Do not let an HTTP probe replace the browser result. The example runs both. A mismatch fails its controller rather than silently accepting whichever result is more convenient.
- Adapt Host expectations to the environment.
localhost:19080is meaningful for the provided fixture, not for a public staging hostname.
When to Run Your Dokku Testing Suite
Run a small browser smoke test after an application deployment or reverse-proxy change. Expand the checks when you update API behavior, redirect paths, WebSocket endpoints, process scaling, or environment configuration. For critical paths, a scheduled regression run can catch changes outside your release process.
Not every check needs to run on every commit. Browser identity and API access checks are relatively small. Tests that restart a process, remove a route, or scale an upstream to zero should use an isolated environment and may belong in a separate regression job.
For Developers: Reproducing the Source-Controlled Test Suite
You do not need to build Dokku from source to test an existing staging application with testRigor. The following instructions are for developers who want to reproduce the exact demonstration behind the eight published executions.
The upstream PR was not merged, but its tested commit remains available from the Dokku repository through the pull request reference. The harness requires x86-64 Linux, Bash, Docker Engine with Compose, privileged Docker support, Python 3, Git, Node.js matching tests/E2E/.node-version, and testRigor credentials. It builds Dokku from committed source and creates the browser-probe app inside a separate Docker daemon.
git clone https://github.com/dokku/dokku.git
cd dokku
git fetch origin pull/9299/head
git switch -c dokku-routing-e2e-demo 4b6d58af3c65cefe955a01146535fdd453227179
npm ci --prefix tests/E2E
export TESTRIGOR_SUITE_ID="YOUR_PRIVATE_SUITE_ID"
read -rsp "testRigor API token: " TESTRIGOR_API_KEY; echo
export TESTRIGOR_API_KEY
export DOKKU_SOURCE_REVISION=$(git rev-parse HEAD)
export DOKKU_E2E_IMAGE=dokku-e2e/source:${DOKKU_SOURCE_REVISION:0:9}
export DOKKU_HARNESS_BRANCH=$(git branch --show-current)
export E2E_ARTIFACTS=$(mktemp -d)
bash tests/E2E/scripts/build-dokku.sh "$E2E_ARTIFACTS"
bash tests/E2E/scripts/install-dokku.sh install
python3 tests/E2E/scripts/run-ci.py "$E2E_ARTIFACTS/positive"
python3 tests/E2E/scripts/report-results.py "$E2E_ARTIFACTS/positive"
docker compose -f tests/E2E/compose.yml down --remove-orphans
unset TESTRIGOR_API_KEY
For a focused run, the controller accepts --cases 6 to select the WebSocket case. It also has separate negative controls that deliberately produce incorrect fixture states to verify that the browser assertions fail for the intended reason. Those controls are development checks, not normal successful routing scenarios.
The example README documents the full setup, and COVERAGE.md explains the eight assertions and their overlap with the native tests. Its optional GitHub Actions workflow uses a repository variable named TESTRIGOR_SUITE_ID and a secret named TESTRIGOR_CI_TOKEN, skips unconfigured or fork-PR runs, and publishes reports for completed executions.
Additional Resources
- Dokku: Path-Based Routing to Non-Web Processes
- Dokku: Nginx Proxy Documentation
- testRigor Plain-English Test Commands
- testRigor Command-Line Integration
- The Example Contribution and Its Implementation Notes
Conclusion
A Dokku deployment can be healthy while an important user journey is not. Routes can target the wrong process, restart or configuration changes can expose stale behavior, WebSocket upgrades can fail, and redirects can send users outside the intended prefix.
The most useful Dokku testing strategy therefore combines native routing tests with a few checks that exercise the application through its real browser entry point. Start by checking the rendered API identity, add a live WebSocket interaction if your app uses one, and then cover the lifecycle or failure cases that matter to your deployment. Keep disruptive tests in an isolated environment and use the execution reports to investigate what users would actually experience.
| Achieve More Than 90% Test Automation | |
| Step by Step Walkthroughs and Help | |
| 14 Day Free Trial, Cancel Anytime |